manuals.online logo
Brands
  1. Home
  2. •
  3. Brands
  4. •
  5. Modsel
  6. •
  7. Medical Equipment
  8. •
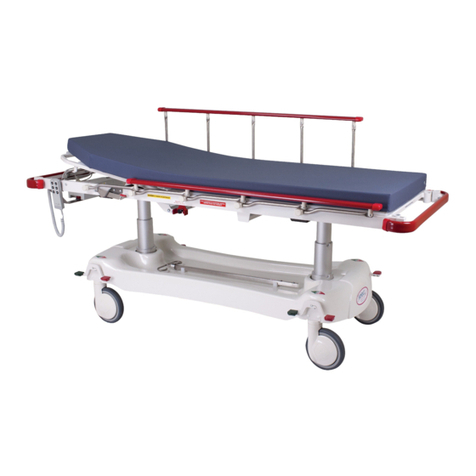
  9. Modsel Contour Portare-X Servicing User manual

Modsel Contour Portare-X Servicing User manual

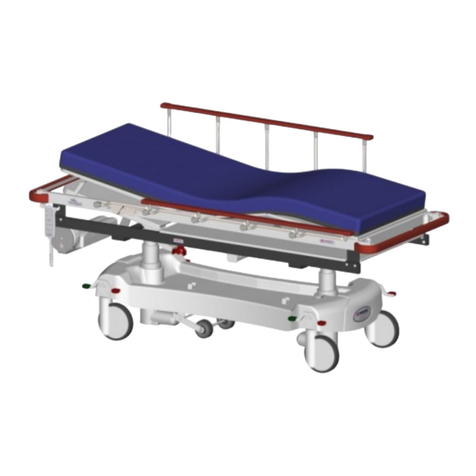
Contour Portare-X Servicing
Thank you for placing your confidence in our Stretchers. They have been engineered from
quality materials and hand-made with care to fulfil the requirements of the healthcare
industry. Your stretcher will give years of trouble-free service if used and cared for in
accordance with our directions.
As an Australian manufacturer with the longest warranty, we’re committed to delivering the best value in
the healthcare industry. If you have a maintenance issue with any of our products, we can help to get you
back up and running again very quickly.
All of our parts are usually in stock ready for a 24 hour dispatch. Identify anyContourPortare-X Stretcher
parts that you may need for an emergency repair or future maintenance, and contact us today for a fast,
fairly priced response.
To facilitate quick and accurate identification, pleasesupply theSERIAL NUMBERfound on the
MODSELmanufacturers label of the product.
Routine inspection of castors and other frame components can usually preventcommon problems. After
each (12) twelve months of use, the trolley must be checked in accordance with our recommended
Service Checklist.
An approvedMODSEL Service Checklistcan be downloaded online from this link
TO ENSURE WARRANTY, PERIODIC MAINTENANCE RECORDS MUST BE RETAINED.
Disposal
Contact Modsel or your institution expert for advice on disposal of this device.
DO NOT repurpose this device. Modsel as the legal manufacturer of this medical device can advise if it
can be reconditioned.
v-12112022 - Page 2
"Trusted products made for trusted professionals"
How To Service The Dropsides
Refer to the separateDropside Servicingguide.
How To Remove The Plastic Base Cover
1. Fully raise the height of the stretcher top.
2. Lift the plastic base cover up and then twist/roll it sideways.
3. Slidethe entire cover out of the base frame through the lifting legs.
4. To replace, follow reverse procedure.
How To Replace The Lifters
1. Firstly ensure the base cover is free and then lay the stretcher on its side on the ground. This can
be done by the following steps;
2. Stand facing the side of the stretcher – the side to stand on must be the side that you want to
have lain down on the ground.
3. Pull stretcher towards you until all castors are at 90° to the length of the stretcher (facing away
from you) and apply the brakes.
4. With the help of another person, firmly hold end rails at either end of the stretcher and carefully
tilt it over until top makes contact with the ground.
5. Remove theretaining pins from the ends of the lifter.
6. Replace with new lifter ensuring that the new one is positioned correctly.
7. Reassemble in the reverse order to the steps above.
v-12112022 - Page 3
"Trusted products made for trusted professionals"
How To Adjust The Brake/Steer System
Wear from continuous use may cause the trolley brake or steer action to not lock in properly over time.
This may need to be corrected by adjusting the length of the Brake Linkage Rod.
1. Lock the right hand brake/steer pedal (from the foot end of the trolley) into the brake position.
Check that the head end pedal on the same side is locking fully into the brake position at the same
time. If not, the Brake Linkage Rod may need to be shortened or lengthened accordingly, to
equalise the operation.
2. To adjust the Brake Linkage Rod, lift or remove the plastic base cover as per instructions above.
3. Loosen the rod end lock nut.
4. Remove the rod end retaining bolt and nut and then wind the rod end a half turn in (clockwise) to
shorten or out to lengthen the Brake Linkage Rod.
5. Assemble the rod end retaining bolt loosely and test the brake/steer action. Continue to adjust the
rod end until the system operates correctly.
6. Re-assemble, locking all bolts and nuts tight.
How To Replace a Castor
1. Check the replacement castor is the correct type (ie. brake or brake/steer, Catis or Tente brand).
2. Remove or lift up the plastic base cover as per the instructions above.
3. Set the brake pedal the neutral position. Loosen the pedal lock screws at castor to be removed.
Using a suitable marker pen, mark the position of the hex lug on the hex rod. Loosen the lock
screw on the hex lug to allow the hex rod to slide through. Use a pin punch on the end of the hex
rod, to drive clear of the castor.
4. Release the lock tab and remove the castor retaining bolts. Remove old castor. Remove any plastic
bolt-hole plugs if in the castor spigot and insert the replacement castor. DO NOT ROTATE THE
CASTOR SPIGGOT, AS THIS MAY ALTER THE CASTOR SETTINGS.
5. Align the hex rod with the hole in the castor spigot. If the hex rod will not slide through the spigot,
remove and rotate entire castor 180° and re-ft. Tap the hex lug back into the original position
using a soft hammer and tighten lock screw using medium strength thread locker. Replace the
castor retaining bolts together with the existing or new lock tab. Tighten the castor lock screws.
Bend bolt locking tabs into position against bolt heads.
6. Replace brake pedal ensuring adequate clearance both sides of the base for the cover.
v-12112022 - Page 4
"Trusted products made for trusted professionals"
Spare Part Identification
Overall Size:2135 x 815mm overall size (965mm wide top option)
v-12112022 - Page 5
"Trusted products made for trusted professionals"
Spare Part Identification Table
Item Code Description
1 MPT-J2837-Standard Contour Electric Premia Mattress-Standard
1.1 MPT-J2837-Wide Contour Electric Premia Mattress-Wide
2 MPT-C2718 Corner Casting
3 MPT-E1745 PVC End Cap
4 MPT-E2696-Standard End Rail PVC Extrusion - Standard
4.1 MPT-E2696-Wide End Rail PVC Extrusion - Wide
5 MPT-E2695-Standard End Rail Aluminium Extrusion-Standard
5.1 MPT-E2695-Wide End Rail Aluminium Extrusion-Wide
6 BIC-3037 Knee Bend Actuator
7 BIC-1792-3 Dewert Battery
8 BIC-1792-2 Battery Interface
9 BIC-2435 Backrest Actuator
10 BIC-2339 Twin Wheel Castor
11 BIC-2438 Portare Hi-Lo Actuator
12 BIC-1001721 5th Wheel Strut-600N
13 BIC-2153 Silva ID Castor
14 BIC-2340 Ezi Track Actuator
15 MPT-SA-2482-LH Steer/Brake Pedal Assembly-LH
16 MPT-SA-2482-RH Steer/Brake Pedal Assembly-RH
17 BIC-2442-Knee Break Handset
18 BIC-2318 Control Box
19 MPT-SA-2545-Standard CPR Release Lever Assembly-Standard
19.1 MPT-SA-2545-Wide CPR Release Lever Assembly-Standard
20 BIC-1790 Cable Retractor
21 MPT-WS2663-Standard Portare-X Lower Backrest Frame-Standard
v-12112022 - Page 6
"Trusted products made for trusted professionals"
21.1 MPT-WS2663-Wide Portare-X Lower Backrest Frame-Wide
22 MPT-SA-2698-Standard End Rail Assembly-Standard
22.1 MPT-SA-2698-Wide End Rail Assembly-Wide
23 MPT-WS2678-Standard Portare-X Upper Backrest Frame-Standard
23.1 MPT-WS2678-Wide Portare-X Upper Backrest Frame-Wide
v-12112022 - Page 7
"Trusted products made for trusted professionals"

Other Modsel Medical Equipment manuals

Modsel Contour Portare User manual

Modsel

Modsel Contour Portare User manual

Modsel Contour Multi-X User manual

Modsel

Modsel Contour Multi-X User manual

Modsel I-Move Slim User manual

Modsel

Modsel I-Move Slim User manual

Modsel I-Move Chart Servicing User manual

Modsel

Modsel I-Move Chart Servicing User manual

Modsel I-Move Slim Servicing User manual

Modsel

Modsel I-Move Slim Servicing User manual

Popular Medical Equipment manuals by other brands

Bedfont Micro+ Smokerlyzer Series user manual

Bedfont

Bedfont Micro+ Smokerlyzer Series user manual

ZELTIQ CoolSculpting System user manual

ZELTIQ

ZELTIQ CoolSculpting System user manual

OxyGo OXYHOME 1400-5100 user manual

OxyGo

OxyGo OXYHOME 1400-5100 user manual

SystemRoMedic ReTurn7600 manual

SystemRoMedic

SystemRoMedic ReTurn7600 manual

CellAir Gecko operating manual

CellAir

CellAir Gecko operating manual

Nasco CPARLENE 3000 Series instruction manual

Nasco

Nasco CPARLENE 3000 Series instruction manual

GCE MediVital Instructions for use

GCE

GCE MediVital Instructions for use

Drive Medical AGF-3X instruction manual

Drive Medical

Drive Medical AGF-3X instruction manual

GE LOGIQ e R4 Series Basic service manual

GE

GE LOGIQ e R4 Series Basic service manual

Protocol Propaq 242 Directions for use

Protocol

Protocol Propaq 242 Directions for use

HealthCo Selina Bariatric user manual

HealthCo

HealthCo Selina Bariatric user manual

BIONIME Rightest GD500 Getting started guide

BIONIME

BIONIME Rightest GD500 Getting started guide

AKRUS AK 2004 user manual

AKRUS

AKRUS AK 2004 user manual

KLS Martin NON-STICK red Instructions for use

KLS Martin

KLS Martin NON-STICK red Instructions for use

EDAN iM8 user manual

EDAN

EDAN iM8 user manual

BioStable HAART 200 Instructions for use

BioStable

BioStable HAART 200 Instructions for use

Invacare Matrx Vi user manual

Invacare

Invacare Matrx Vi user manual

Getinge Volista Instructions for use

Getinge

Getinge Volista Instructions for use

manuals.online logo
manuals.online logoBrands
  • About & Mission
  • Contact us
  • Privacy Policy
  • Terms and Conditions

Copyright 2025 Manuals.Online. All Rights Reserved.