manuals.online logo
Brands
  1. Home
  2. •
  3. Brands
  4. •
  5. modway
  6. •
  7. Indoor Furnishing
  8. •
  9. modway MOD-6180 User manual

modway MOD-6180 User manual

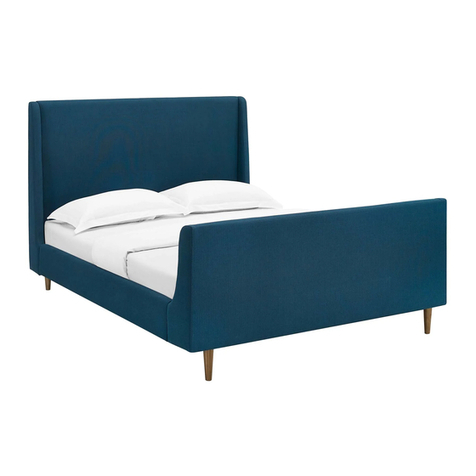
MOD-6180 QUEEN BED
Customer Service 609-256-9000︱www.modway.com
Page 1of 4
Thank you for purchasing the MODWAY QUEEN BED!
Before you start, here are some helpful advice:
1. We suggest you spend a short time reading through this leaflet and then follow the simple step-by-step
instructions.
2.Owing to the size and weight of the bed, we recommend that it is assembled by two adults, on a carpeted or
padded area, in the room that it is intended for. Approximate assembly time: 30 minutes.
3.Please do not use any tools other than those provided or recommended in these instructions.
4.Please do not throw away any of the packaging or the instruction until you have checked all the components
and hardware and the furniture is fully assembled. Please ensure that the packaging is disposed of in a safe
and environmentally friendly way.
5.Assemble all components loosely until advised to tighten. Depending on use, it may be necessary to tighten
the components from time to time, so please save the tools that have been provided.
6.Please keep all the fitting out of reach of children.
Hardware:
Components:
1. Headboard x1 2. Left Ear x1 3. Right Ear x1 4. Footboard x1 5. Side Rail x2
6. Side Rail x2 7. Side Support Leg x2 8. Center Cross -back x1 9. Center Cross -front x1
10. Center Support Leg x3 11. Cross Bar x1 12. Leg x4 13. Slats x2
Bolt M8x25mm x12
Bolt M8x45mm x9
Bolt M8x60mm x1
Nut M8 x6
Connection plate x4
Flat Washer x4
B.
Bolt M8x20mm x18
C.
D.
E.
I.
J.
A.
L.
M.
Allen Wrench x1
Spanner Wrench x1
MOD-6180 QUEEN BED
Customer Service 609-256-9000︱www.modway.com
Page 2of 4
STEP 1:
1. Attach Left Ear (2) to the left of the Headboard (1) by using 2 pieces of Bolts (C) from back as shown.
2. Repeat the same step to assemble Right Ear (3) to the Headboard (1) as shown.
3. Use Allen Wrench (L) to tighten all Bolts (C) clockwise as shown.
4. Tighten 2 pieces of Legs (12) to the bottom of Headboard (1) with 2 pieces of Flat washers (J) clockwise
until secure by hand as shown.
5. Repeat the same step to assemble 2 pieces of Legs (12) to the Footboard (4).
STEP 2:
1. Attach the 2 pieces of Side Rails (5) to the 2 pieces of Side Rails (6) by using 2 pieces of Side Support Legs
(7) with 8 pieces of Bolts (A) as shown
2. Attach 2 pieces of Connection plates (I) to 2 pieces of Side Rails (5) by using 4 pieces of Bolts (A) as shown.
3. Attach 2 pieces of Connection plates (I) to 2 pieces of Side Rails (6) by using 4 pieces of Bolts (A) as shown.
4. Use Allen Wrench (L) to tighten all Bolts (A) clockwise as shown.
MOD-6180 QUEEN BED
Customer Service 609-256-9000︱www.modway.com
Page 3of 4
STEP 3:
1.Attached the 2 pieces of assembled Side Rails (5&6) to the Headboard (1) and Footboard (4) by using 4
pieces of Bolts (B) as shown.
2.Use Allen Wrench (L) to tighten all Bolts (B) clockwise as shown.
STEP 4:
1.Attach one of the leg of the Center Support Leg (10) to the Center Cross-Front (9) and the Cross Bar (11)
by using 1 piece of Bolt (D) and Bolt (C) then affix 2 pieces of Nuts (E) on each bolt as shown.
2.Attach the other legs on each end of the Center Cross-Front (9) and Center Cross–Back (8) by using 2
pieces of Bolt (C) then affix 2 pieces of Nuts (E) on each bolt as shown."
3.Use Allen Wrench (L) and Spanner Wrench (M) to tighten all Bolts (C&D) and Nuts (E) clockwise
as shown.
MOD-6180 QUEEN BED
Customer Service 609-256-9000︱www.modway.com
Page 4of 4
STEP 5:
1. Put the assembled Cross Center & Cross Bar from step 4 to the assembled Side Rails from step 3.
2. Attach Center cross-back (8) to the Headboard (1) by using 2 pieces of Bolts (B) as shown.
3. Attach Center cross-front (9) to the Footboard (4) by using 2 pieces of Bolts (B) as shown.
4. Attach Cross bar (11) to the 2 pieces of Side Rails (5 & 6) by using 2 pieces of Bolts (A) as shown.
5. Use Allen Wrench (L) to tighten all Bolts (A) and Bolts (B) clockwise as shown.
STEP 6:
Put 2 pieces of Slats (13) on the assembled bed in Step 5 as shown.
Assembly is complete, your queen bed is ready to be used now!

Other modway Indoor Furnishing manuals
modway EEI–2323 Manual

modway

modway EEI–2323 Manual

modway EEI-4407 User manual

modway

modway EEI-4407 User manual

modway MOD-6199 User manual

modway

modway MOD-6199 User manual

modway MOD-6253 User manual

modway

modway MOD-6253 User manual

modway EEI-6168 User manual

modway

modway EEI-6168 User manual

modway EEI-3416 User manual

modway

modway EEI-3416 User manual

modway EEI-3889 User manual

modway

modway EEI-3889 User manual

modway Birdie EEI-5086 User manual

modway

modway Birdie EEI-5086 User manual

modway Transmit EEI-2528 User manual

modway

modway Transmit EEI-2528 User manual

modway EEI-4343 User manual

modway

modway EEI-4343 User manual

modway EEI-2533 User manual

modway

modway EEI-2533 User manual

modway EEI-3403 User manual

modway

modway EEI-3403 User manual

modway EEI-1381 User manual

modway

modway EEI-1381 User manual

modway Rendezvous EEI-2548 User manual

modway

modway Rendezvous EEI-2548 User manual

modway EEI-3344 User manual

modway

modway EEI-3344 User manual

modway MOD-6220 User manual

modway

modway MOD-6220 User manual

modway EEI-6160 User manual

modway

modway EEI-6160 User manual

modway EEI-2784 User manual

modway

modway EEI-2784 User manual

modway EEI-2134 User manual

modway

modway EEI-2134 User manual

modway EEI-3907 User manual

modway

modway EEI-3907 User manual

modway EEI-5027 User manual

modway

modway EEI-5027 User manual

modway MOD-6271 User manual

modway

modway MOD-6271 User manual

modway EEI-3303 User manual

modway

modway EEI-3303 User manual

modway MOD-5436 User manual

modway

modway MOD-5436 User manual

Popular Indoor Furnishing manuals by other brands

Summer 07600A instruction manual

Summer

Summer 07600A instruction manual

Crate&Barrel Warren manual

Crate&Barrel

Crate&Barrel Warren manual

HABYS Sigma User guide and assembly instructions

HABYS

HABYS Sigma User guide and assembly instructions

Costway JV10906 manual

Costway

Costway JV10906 manual

Stengel Minikitchen operating instructions

Stengel

Stengel Minikitchen operating instructions

BLACK RED WHITE re set asto 8/18 Assembly manual

BLACK RED WHITE

BLACK RED WHITE re set asto 8/18 Assembly manual

Eaton Linear Tech Bench 1 installation manual

Eaton

Eaton Linear Tech Bench 1 installation manual

burmeier FORTUNA II 15.0524.11 instruction manual

burmeier

burmeier FORTUNA II 15.0524.11 instruction manual

Living Earth Crafts ZG Dream Lounger user manual

Living Earth Crafts

Living Earth Crafts ZG Dream Lounger user manual

EDN reale manual

EDN

EDN reale manual

Geuther Bambino 2620 manual

Geuther

Geuther Bambino 2620 manual

Global Contract Compile installation manual

Global Contract

Global Contract Compile installation manual

IMMAX FACE 08970L user manual

IMMAX

IMMAX FACE 08970L user manual

Evocare LM5203T owner's manual

Evocare

Evocare LM5203T owner's manual

Extremis Marina bistro manual

Extremis

Extremis Marina bistro manual

CorLiving LFF-300-D manual

CorLiving

CorLiving LFF-300-D manual

Alice's Garden VABO 8 manual

Alice's Garden

Alice's Garden VABO 8 manual

hawa HAWA-Frontslide 60/matic-Telescopic 4 Planning and installation instructions

hawa

hawa HAWA-Frontslide 60/matic-Telescopic 4 Planning and installation instructions

manuals.online logo
manuals.online logoBrands
  • About & Mission
  • Contact us
  • Privacy Policy
  • Terms and Conditions

Copyright 2025 Manuals.Online. All Rights Reserved.