Momax Smart Zense User manual

Zense
IoT Ambient Light With Wireless Charging
QC3S
INSTRUCTION MANUAL
IoT 智能氣氛燈連無線充電座
使用說明 / 使用說明
IoT 智能無線幻彩鬧鐘音箱

Introduction p.2 - 19
產品資料 p.20 - 37
產品資料 p.38 - 55
1

2. Register
Register an account and log in using your mobile number or email
address.
The Home page of all connected devices.
To set scenarios or conditions and respective actions of the
new smart device.
Profile management, FAQ, setting, etc.
1. Download ‘MOMAX Smart’ APP
Search ‘MOMAX Smart’ app on iOS or Android or any platform.
Quick Start Guide
2 3

3. Wi-Fi pairing
Make sure your home Wi-Fi network is ON. 2.4GHz Wi-Fi network is
required.
• Method A (Auto Searching)
1. Turn ON Wi-Fi & Bluetooth on your smartphone.
2. Once Zense is power ON, press & hold the “ ” button for 2
secs until you see the “ ” icon flickers quickly, indicating that it is
ready to pair your device.
3. Tap “+” in the app, a pop-up will appear requiring you to select
“Device to be added: MOMAX Zense”.
4. Tap “Go to add”.
5. Tap “+” in the tab of Bluetooth device.
6. Select the Wi-Fi network and enter the password.
• Method B (Add Manually)
1. Once Zense is power ON
2. Open ‘MOMAX smart app’, tap ‘+’ at the right top corner.
3. Then, select “Add manually”, select MOMAX Zense.
4. Select the Wi-Fi network and enter the password.
5. If Zense is not power ON, please follow the steps as indicated to
power ON. Press & hold the “ ” button for 2 secs until you see
the “ ” icon flickers quickly, indicating that it is ready to pair your
device.
6. Tap “Next” to add the device.
• Method C (Hot Spot Mode)
1. Once Zense is power ON, press & hold the “ ” button for 5 secs
until it blinks slowly.
2. Open ‘MOMAX smart app’, tap ‘+’ at the right top corner.
3. Then, select “Add manually”, select the respective product icon.
4. Select the Wi-Fi network and enter the password. Then, select
“AP mode” at the top right corner.
5. A pop-up will appear requiring you to connect your device to
Zense’s Wi-Fi hotspot. Select “SmartLife - ####”
6. It will start adding the device.
4 5

Remote Control Page
You can set the time, alarm clock, special light modes, etc. Moreover, this
device can execute automatically according to conditions such as specific
time, weather, etc. (allow access of your location is required.)
Device App Control panel.
4. Successfully connected
Once the connection is completed. You will see “ ” symbol appear
on the LED screen.
You can edit the name of the device.
Tips: *The device name should be identifable and easy to pronounce (voice control).
5. Connect to a new 2.4GHz Wi-Fi network
Press & hold the “ ” button for 2 secs until the Wi-Fi icon flickers
rapidly. Then, follow steps 1-4.
Device setting
•Setthetime
Alarm
Sleep Mode Setting
Night Light Switch
•Brightness
Light Switch
•Changethecolor
Special Effect Light Switch
•9therapylightsettings
6 7

Smart Home Ecology System
Adding Multiple Devices in interactive smart mode.
Light Therapy
Thereare9therapylightmodestosuityourdierentneeds.
89

Voice Control
This smart device supports voice control with Amazon Alexa, Google
Assistant and other China platform, etc.) To connect with these platforms,
please refer to the App>More Services>Voice Service. Voice commands
of each platform may vary, please refer to the relevant user manual.
Turn on/off the light .
Set the light to 50 percent.
Set the light to warm white.
Wireless Charging Base
USB-C Output Port
Power Input Port
LED Display
Speaker
Snooze &
RGB Button
Product Overview
10 11

Icon Description
Weather Status
Once it is connected to a Wi-Fi network, it will show
the real time weather status in your selected location.
Time Display
Once it is connected to a Wi-Fi network, you can
switch between 12/24H formats.
Wireless Charging
When it is ON, charging is in progress.
When it blinks quickly, foreign object is detected.
Please remove the foreign object.
Bluetooth
When it blinks rapidly, it is ready to pair.
When it is ON, pairing is completed.
When it is OFF, pairing is disconnected.
Wi-Fi Pairing
When it blinks rapidly, it means that it is in Wi-Fi mode.
When it blinks slowly, it means that it is in hot-spot
mode.
When it is ON, pairing is completed.
When it is OFF, pairing is disconnected.
Alarm clock 1 & Alarm clock 2
When it is ON, alarm clock is set.
When it is OFF, alarm clock is OFF.
Buttons Description
Bluetooth Press to connect to Bluetooth.
Ambient
Light Press to turn ON or OFF the ambient light.
Alarm Clock 1 Press to toggle between ON, OFF and stop
the alarm.
Alarm Clock 2 Press to toggle between ON, OFF and stop
the alarm.
Night Light Press to turn ON or OFF the night light.
Wi-Fi pairing Press & hold to reset Wi-Fi pairing.
Snooze &
Ambient
Light
When alarm is ON, press to enter snooze
mode.
When the alarm is OFF, press to turn ON or
OFF the ambient light.
LED Display
Snooze & Ambient Light Button
Speaker
12 13

Problem Possible cause and solution
Couldn’t connect
to Momax Smart
app
•Makesuretochoosea2.4GHzstableWi-Fi
network.
•RestarttheWi-Finetworkifneeded.
•CheckifWi-Fipasswordiscorrect.
•MakesureBluetoothisONinyourdevice.
•ConnectZensetotheWi-Finetworkagainby
method A, B or C.
Couldn’t connect
to Bluetooth
•MakesureBluetoothinONinyourdevice.
•Makesureyourdeviceisnotconnectedto
other Bluetooth device.
Momax smart
app is not working.
•MakesuretheWi-Finetworkisnormal
•MakesureZenseisconnectedtopower.
•TrytoconnectZenseandyourdeviceusingthe
same Wi-Fi.
•Restartyourapp
Trouble Shooting
If you want to submit your problem to us, in Zense’s homepage →
Tap “ ”→FAQ & feedback →Tap “Send feedback” at the bottom.
Snooze & Ambient Light Button
Bluetooth Connection
1. Connect Zense to the power adapter
2. Press the “ “ button, you will see the Bluetooth icon flickers on the
LED display
3. Make sure to turn ON Bluetooth on your smartphone, select “Momax
QC3S” on your device.
4. Once it is connected, you will hear an indicator sound.
Wireless Charging
Simply place your Qi-enabled device on top of the wireless charging base.
Charging in progress: “ “ icon is ON.
Charging is completed: “ “ ico flickers.
14 15

Points for attention
Before using, please read this user manual carefully and keep it for future
reference.
1. Do not dismantle or modify the product;
2. Do not store the product in wet conditions;
3. Do not keep or use the product near heat sources;
4. Do not let water or any other liquid flows into the inside part of the
product’s interface. This would cause damages to the product.
5. Before connecting the power supply, please check whether the
voltage of the product is consistent with the local power supply
voltage.
6. Make sure to remove metallic or magnetic protective case of your
device when charging;
7. While charging, the Zense may heat up. This is normal and should
not affect Zense’s performance. If the battery feels hot to the touch
during this charging process, remove the Zense from the charger
and allow it to cool down before restarting the charging process;
8. Remove the dust from the power plug and insert it all the way. If the
power cord or plug is damaged or found defective, to avoid danger,
it must be replaced by a professional from the manufacturer or
maintenance department.
9. When an abnormality occurs (such as a burning smell, overheat,
etc.), turn off the machine and unplug the power cord.
10. Hold the plug when pulling out the power plug.
11. This product is only for domestic use.
Warnings
Model : QC3S
Input : DC 12V 2A
Output 1 (Wireless Charging) : 5W, 7.5W, 10W, 15W (max.)
Output 2 (USB-C) : 5V 1A
Adapter Power : Rated 24W, 28W (max.)
Speaker power : 4Ω, 5W
Impedance : 4 Ohms
Lamp Power : 15W (max.)
Wireless WiFi Frequency : 2.402GHz - 2.480GHz
Wireless WiFi Distance : 10m
Size : 226mm x 231mm x 103.6mm
Weight : 733g±30g (Adapter not included)
Contains
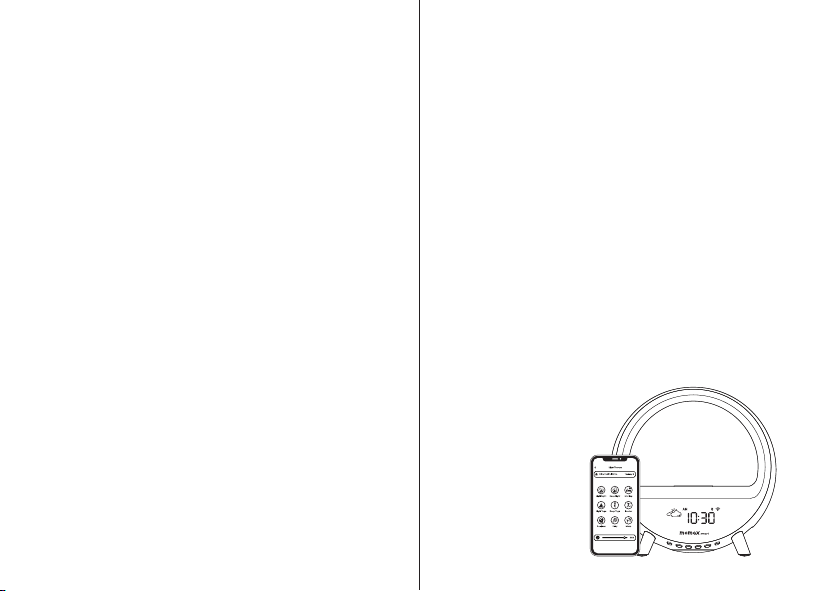
1.Zense IoT Ambient light with Wireless Charging
2.Power Adapter (Cable Length : 1.5m)
3.Instruction Manual And Warranty Card
Specification
16 17

1. For any defect, in the judgment of our technician, caused under
normal use, we are responsible for repairing free of charge 12 months
commencing from the date of purchase at the discretion of our
company;
2. A valid warranty card and original purchase invoice must be presented
upon request of warranty service;
3. This warranty card shall not apply to the product if:
(a) It is consumable part(s), such as Filter, or;
(b) it has explicitly modified or repaired in any way by persons other
than technicians of this company, or;
(c) it has been damaged through misuse, malicious acts, negligence,
the inflow of any liquid, or;
(d) losses or damages are caused by force majeure or natural
disasters.
4. No alteration to this warranty card will be allowed;
5. The warranty terms and conditions are subject to change without prior
notice;
6. Please retain your proof of purchase for warranty service;
7. Please consult the dealer about the product compatibility with your
cell phone/ PDA before purchase. Product specifications are subject
to change without prior notice;
8. Please visit www.momax.net for the latest product information.
Warranty Conditions
Please reference Mobile Apps content: Before accepting the Agreement,
you are supposed to thoroughly read all the contents of the Agreement,
and fully understand its terms, especially restrictive clauses or exceptions
and Privacy Notice. Restrictive clauses or exceptions are bold or
highlighted in other forms to catch your attention. In case of any doubt
about the terms of the Agreement, please contact the relevant business
department of Tuya. You are not allowed to use the service before
you have read and accepted all the terms of the Agreement, relevant
agreements, and rules, etc. Once you select “agree and submit the
Agreement” (see registration page for detailed wordings) and complete
the registration procedure, or you use the service in any form, it will be
deemed that you have read and agreed with the restriction of the
Agreement and rules above. In case of any breach of the Agreement,
Tuya has the right to unilaterally restrict, suspend or terminate the service
for you, and has the right to investigate your relevant responsibilities.
1.Do not place the product as household waste;
2.Please dispose of discarded electronic products properly according to
local regulations;
3.MOMAX encourages you to participate in the electronic recycling
program.
Service Agreement of
Smart Mobile Application Platform
Disposal of Electronic Products
18 19

2. 註冊
註冊一個帳戶,然後使用您的手機號碼或電子郵件地址登錄。
主頁將會連接所有設備。
可設定智能設備特定條件下、執行指定操作。
個人資料管理,常見問題解答,設置等。
1. 下載“MOMAX Smart”應用程式
在iOS或Android或任何平台上搜索“MOMAXSmart”應用程式。
快速入門指南
20 21

3. Wi-Fi 配網
確保您的家居Wi-Fi網絡已開啟。需要2.4GHzWi-Fi網絡。
•方法一(自動搜索)
1. 開啟智能手機上的Wi-Fi和藍牙。
2. 開啟Zense電源後,按住“ ”按鈕2秒,直到您看到“ ”標
示快閃,代表已準備好與您的設備配對。
3. 在應用程式按“ +”,您將看到一個彈出訊息要求你選取“將會添
加的裝置:MOMAXZense”。
4. 按“開始添加”。
5. 按藍牙裝置格內的“+”符號。
6. 選擇Wi-Fi網絡及輸入密碼。
•方法二(手動添加)
1. 開啟Zense電源。
2. 開啟“MOMAXSmart”應用程式,按右上角的“+”。
3. 然後,選擇“手動添加”,選擇MOMAXZense。
4. 選擇Wi-Fi網絡並輸入密碼。
5. 如Zense未啟動電源,請按指示啟動。按住“ ”按鈕2秒,直到
您看到“ ”圖示快閃,代表已準備好與您的設備配對。
6. 選擇Wi-Fi網絡及輸入密碼。
•方法三(熱點模式)
1. 開啟Zense電源後,按住Wi-Fi按鈕5秒鐘,直到您看到“ ”標
示慢閃。
2. 開啟“MOMAXSmart”應用程式,按右上角的“+”。
3. 然後,選擇“手動添加”,選擇對應的產品圖示。
4. 選擇Wi-Fi網絡並輸入密碼。然後選擇右上角的“AP模式”。
5.彈出訊息將提示您將手機連接到Zense的Wi-Fi熱點。選擇
“SmartLife-####”。
6. 程式將開始添加設備。
22 23

控制設備版面
您可以設定時間,鬧鐘,特別燈光模式等。此外,本產品可根據特定時間,天
氣等條件自動執行特定模式(需要允許位置存取權。)
控制面板
4. 成功連接
連接完成後。您可以在LED顯示屏上看到“”符號。
您可以編輯設備的名稱。
提示:*設備名稱應易於識別且易於發音(語音控制)。
5. 連接新的Wi-Fi網絡
按住“”按鈕2秒鐘,直到Wi-Fi圖示快閃。然後,執行步驟1-5。
裝置設定
•設定時間
鬧鐘
伴睡模式
夜燈開關
•亮度調節
燈開關
•轉換顏色
特別燈效開關
•9種治療燈效
24 25

智能家居生態系統
添加多個設備的互動智能模式
治療燈效
有9種治療燈效,可配合不同場景使用:
輕度助眠、深度助眠、愉悅起床、瑜伽調息、深度瑜伽、提神醒腦、
舒緩減壓、派對模式和音樂模式。
26 27

產品總覽
LED屏幕
喇叭
貪睡及氣氛燈
模式切換按鈕
無線充電底座
USB-C輸出插口
電源輸入插口
語音控制
此智能設備支持使用AmazonAlexa、GoogleAssistant及中國內地等平台進
行語音控制。要連接這些平台,請參閱App>更多服務>語音服務。
每個平台的語音指令可能略有所差異,請參閱相關的用戶手冊。
打開/關閉燈光
將燈光設置為50%
將燈光設置為暖白色
28 29

按鈕 描述
藍牙 短按:藍牙配對模式
氣氛燈 開啟或關閉氣氛燈模式
鬧鐘1
短按:開啟、關閉或停止響鬧
鬧鐘2
小夜燈 短按:開啟或關閉小夜燈功能
Wi-Fi配網 長按:重設配網
貪睡/氣氛燈 響鬧期間:用手輕壓啟動貪睡模式。
非響鬧期間:用手輕按可開啟/關閉氣氛燈。
LED 顯示屏
圖標 描述
天氣狀況
連接到Wi-Fi網絡後,它將實時顯示您選擇位置的天
氣狀態。
時間顯示
連接到Wi-Fi網絡後,您可以在12/24小時之間切換。
無線充電
長亮時,表示正在充電。
快速閃爍時,表示檢測到異物。請移除異物。
藍牙
當圖示快速閃爍,代表可以配對。
長亮時,代表配對完成。
熄滅時,代表配對斷開。
配網
當它快速閃爍時,表示它處於Wi-Fi模式。
當它緩慢閃爍時,表示它處於熱點模式。
長亮,代表配對完成。
熄滅,代表配對斷開。
鬧鐘1 及 鬧鐘2
長亮時,鬧鐘設定。
關閉時,鬧鐘關閉。
喇叭
貪睡及氣氛燈模式切換按鈕
30 31

疑難排解
問題 可能原因及解決辦法
無法連接到Momax
Smart應用程式
•確保選擇穩定的2.4GHzWi-Fi網絡。
•如果需要,請重新啟動Wi-Fi網絡。
•檢查Wi-Fi密碼是否正確。
•確保手機開啟藍牙模式。
•重新嘗試方法A,B或C配網方式。
無法連接到藍牙 •確保手機開啟藍牙模式。
•確保您的手機沒有連接到其他藍牙設備。
應用程式沒法運作
•確保Wi-Fi網絡正常
•確保Zense已連接電源。
•嘗試使用同一Wi-Fi網絡連接Zense和您的手機。
•重新啟動Momaxsmartapp。
如果您想將問題提交給我們,在Zense的主頁中->點擊“ ”->常見問題
和反饋->點擊底部的“繼續反饋”。
貪睡及氣氛燈模式切換按鈕
藍牙連接
1.將Zense連接到電源適配器
2.按下“”按鈕,您將在LED顯示屏上看到藍牙圖標閃爍
3.確保打開智能手機上的藍牙,然後在設備上選擇“MOMAXQC3S”。
4.連接後,您將聽到指示燈的聲音。
無線充電
只需將支持Qi的設備放在無線充電基座上即可。
正在充電時:“ ”長亮。
充電完成時:“ ”閃爍。
32 33

使用前,請仔細閱讀本用戶手冊,並妥善保存以備將來參考。
1. 請勿自行拆開或改裝本產品;
2. 請勿將本產品存放在潮濕環境中;
3. 請勿將產品靠近熱源或於熱源附近充電;
4. 請勿將水或其它液體流入本產品介面內部,導致本產品損壞。
5. 連接電源之前,請檢查產品電壓是否與當地電源電壓一致。
6. 如您有額外使用金屬或包含磁片的保護殼,請確保充電前須移除;
7. 充電時,Zense有可能產生熱力,此乃正常現象,並不會影響產品表
現。但如果感到手機電池或Zense過熱,請斷開Zense電源供應,待冷
卻後,再嘗試充電;
8. 清除電源插頭上的灰塵,並確保完全插入電源插座。如果電源線或插頭
損壞或不能正常使用,為避免危險,必須由製造商或保修部的專業人員
進行更換。
9. 發生異常情況時(例如,有燒溶的氣味、過熱等),請關閉機器並移除
電源。
10. 拔出電源插頭時,請握住插頭。
11. 此產品僅供一般家居使用。
注意事項
型號 :QC3S
輸入 :DC12V 2A
輸出1(無線充) :5W,7.5W,10W,最大15W
輸出2(USB-C):5V 2A(最大10W)
適配器功率 :額定24W,最大28W
音箱輸出功率 :4Ω,5W
阻抗 :4Ohms
燈輸出功率 :最大15W
無線頻率 :2.402GHz-2.480GHz
無線距離 :10米
尺寸 :226毫米x231毫米x103.6毫米
重量 :733克±30克(不含適配器)
包裝內容
1. ZenseIoT智能氣氛燈連無線充電座
2. 電源適配器(1.5米)
3. 使用說明書及保用證
產品規格
34 35

保養條款
1. 由購買日期起12個月內,如產品有損壞或故障,經本公司技術人員證實
為在正常使用之情況下發生,本公司將提供免費維修服務;
2. 維修時必須出示本保用證及購買商號之發票正本,如果用戶不能提供,
本公司有權不提供維修服務。用戶可能需要支付相關維修費用;
3. 保用期內,出現以下條款產品保用證自動失效;
(a)是可消耗的部件,例如過濾網;
(b)非本公司人員恣意拆解或維修產品之任何部分;
(c)錯誤的操作如:非法接駁電源,以及水、污穢物滲入產品內導致產品
損;
(d)不可抗拒意外事件或天然災害導致產品損壞;
4. 此保用證如經塗改,保用證自動失效;
5. 本公司有權增刪任何維修及保用條款而不作通知;
6. 如因錯誤使用本公司產品而導致手提電話或其他電子產品有任何損壞,
本公司不會承擔任何責任;
7. 有關 MOMAX 原裝產品和您的手機或電子產品的相容性,請在購買時向
經銷商確認。此產品規格隨時可能變更,恕不另行通告;
8. 請瀏覽www.momax.net瞭解最新產品資訊。
智能移動應用平台服務協議
請參考移動應用程式內容:在接受本協議之前請您務必仔細閱讀本協議的
移動應用程式全部內容,充分理解條款內容,特別是限制及免責條款。限
製或免除責任條款,私隱聲明,將以加粗或其他醒目形式提示您注意。如
果您對本協議的條款有疑問的,請聯繫相關業務部門進行詢問。除非您已
閱讀並接受本協議及相關協議、規則等所有條款,否則,您無權使用本服
務。一旦您選“同意協議並提交”(具體措辭詳見註冊頁面)並完成註冊
流程,或您以任何方式使用本服務,即視為您已閱讀並同意上述協議、規
則等的約束。如您有違反本協議的任何行為時,智能生活有權根據您違反
的情況隨時單方採取限制、中止或終止向您提供服務等措施,並有權追究
您相關責任。
如何處理廢棄電子產品
1. 請勿將電子產品當成家庭廢棄物丟棄;
2. 請依當地的法例規定處理廢棄的電子產品;
3. MOMAX鼓勵您積極參與電子產品回收計劃。
36 37
This manual suits for next models
1
Table of contents
Other Momax Batteries Charger manuals