manuals.online logo
Brands
  1. Home
  2. •
  3. Brands
  4. •
  5. Monacor
  6. •
  7. Security Camera
  8. •
  9. Monacor Security TVCCD-125COL User manual

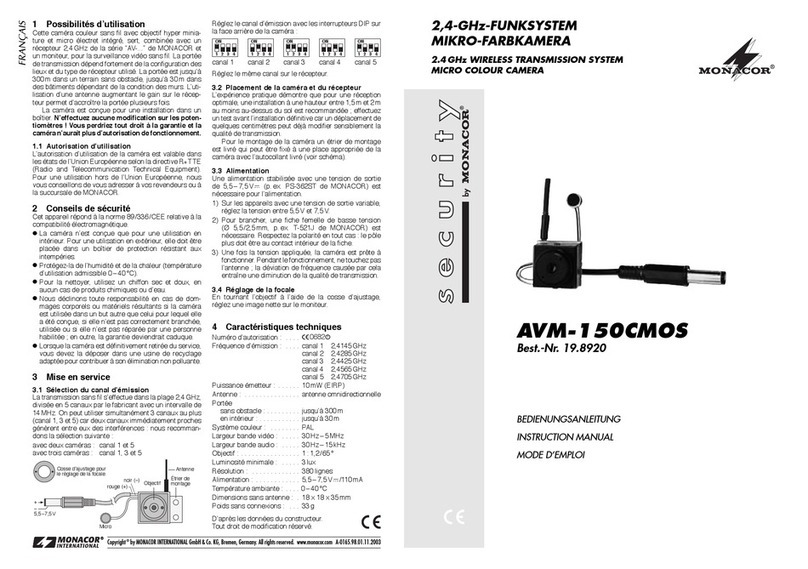
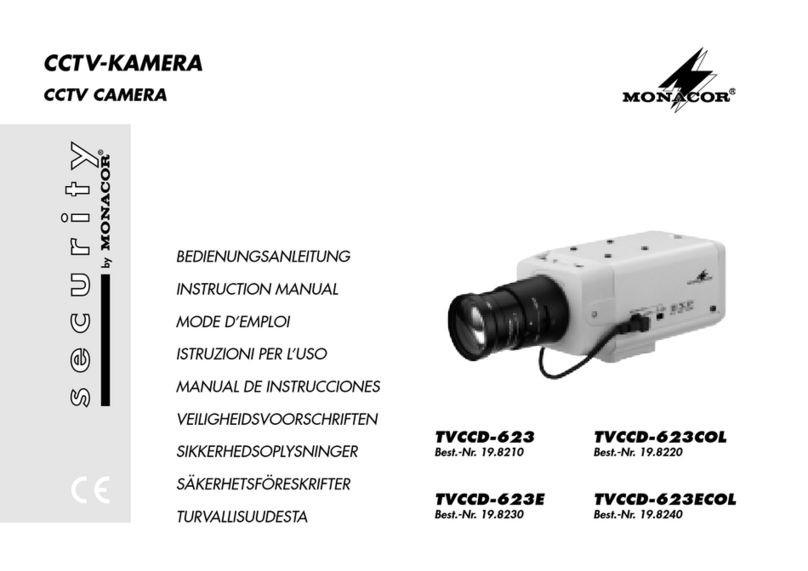
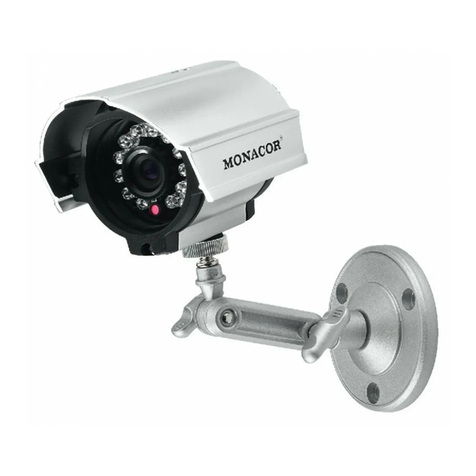
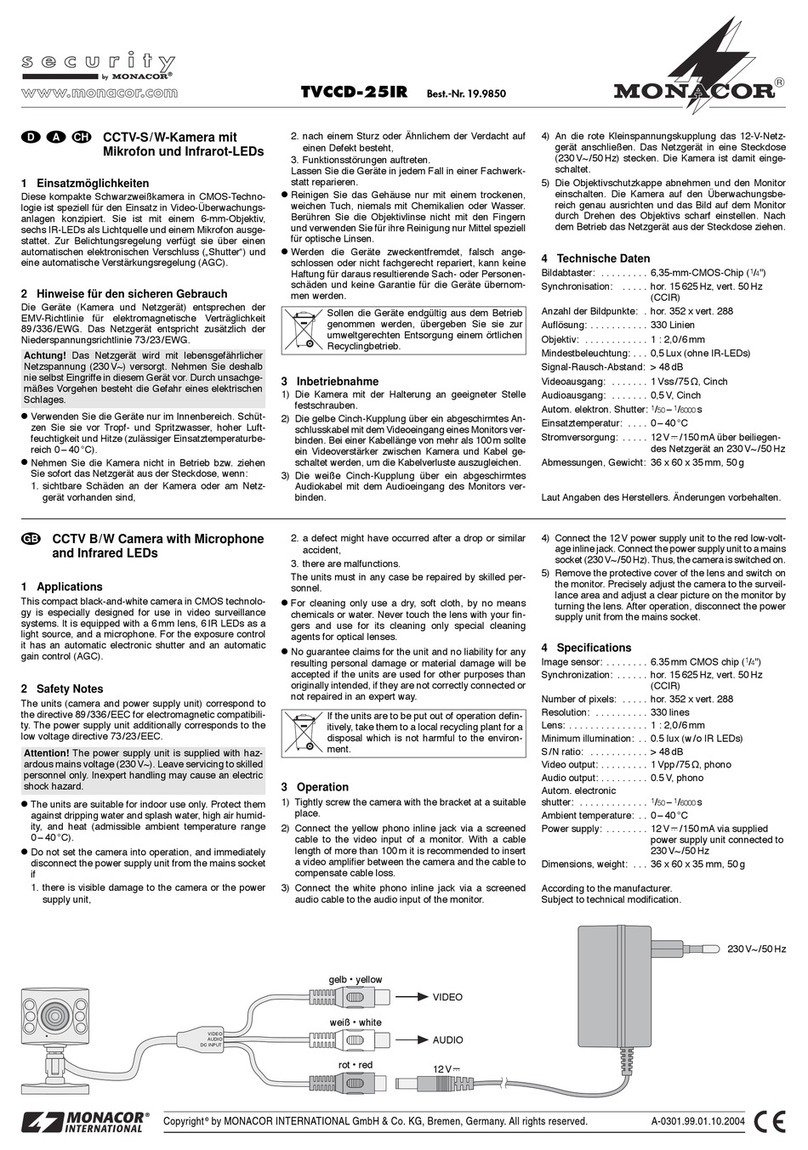
Monacor Security TVCCD-125COL User manual

12V
Video
29,4 43
22
Farbkamera
1Einsatzmöglichkeiten
Die Farbkamera mit 3,6-mm-Objektiv (TVCCD-125COL)
bzw. 3,7-mm-Nadelöhr-Objektiv (TVCCD-125PCOL) eig-
net sich durch ihre geringen Abmessungen besonders für
den unauffälligen Einsatz in Videoüberwachungsanlagen
(CCTV). Sie verfügt über einen automatischen elektroni-
schen Shutter, eine automatische Verstärkungsregelung
(AGC), eine Gegenlichtkompensation (BLC) und einen
automatischen Weißabgleich.
2Hinweise für den sicheren Gebrauch
Die Kamera entspricht allen erforderlichen Richtlinien der
EU und ist deshalb mit gekennzeichnet.
●Die Kamera ist nur zur Verwendung im Innenbereich
geeignet. Schützen Sie sie vor Tropf- und Spritzwasser,
hoher Luftfeuchtigkeit und Hitze (zulässiger Einsatz-
temperaturbereich 0–40°C).
●Berühren Sie die Objektivlinsen nicht mit den Fingern,
schützen Sie sie vor Staub und sonstiger Verschmut-
zung und verwenden Sie für ihre Reinigung nur Mittel
speziell für optische Linsen.
●Reinigen Sie das Gehäuse nur mit einem weichen, tro-
ckenen Tuch, niemals mit Chemikalien oder Wasser.
●Wird die Kamera zweckentfremdet, falsch angeschlos-
sen oder nicht fachgerecht repariert, kann keine Haftung
für daraus resultierende Sach- oder Personenschäden
und keine Garantie für die Kamera übernommen werden.
3Inbetriebnahme
1) Das Videosignal am BNC-Stecker (3) über ein ab-
geschirmtes Kabel auf den Videoeingang eines Moni-
tors geben. Bei einer Kabellänge über 100m sollte ein
Videoverstärker zwischen Kamera und Kabel ge-
schaltet werden, um die Signaldämpfung des Kabels
auszugleichen.
2) An die Kleinspannungskupplung (2) ein stabilisiertes
12-V-Netzgerät mit einer Belastbarkeit von mindes-
tens 200mA anschließen (z.B. PS-500ST von
MONACOR). Es wird ein Kleinspannungsstecker
5,5/2,1mm (Außen-/Innendurchmesser) benötigt.
Unbedingt auf die richtige Polung achten: Den Pluspol
an den Mittelkontakt des Steckers anlegen.
3) Nach dem Anlegen der Betriebsspannung den Monitor
einschalten und durch Ausrichten der Kamera auf den
Überwachungsbereich die optimale Montagestelle für
sie feststellen. An dieser Stelle die Kamera über ihren
Montagebügel festschrauben. Nach der Montage die
zwei Schrauben am Montagebügel lösen, die Kamera
in die gewünschte Stellung neigen und die Schrauben
wieder festziehen.
Soll die Kamera endgültig aus dem Betrieb
genommen werden, übergeben Sie sie zur
umweltfreundlichen Entsorgung einem örtlichen
Recyclingbetrieb.
Soll die Kamera eingebaut werden, die kleine
Schraube am Haltering des Montagebügels lösen, die
Kamera aus dem Ring nehmen und in die beiliegende
Einbauplatte einsetzen (Abb. 2). Mit den beiden kurzen
Schrauben die Kamera an der Platte befestigen.
4) Wird das zu überwachende Objekt nicht scharf abge-
bildet, die Fokuseinstellung korrigieren: Dazu das
Objektiv (1) vorsichtig so weit drehen, bis das Bild
scharf ist.
4Technische Daten
Bildaufnehmer: . . . . . . . CCD-Chip, 6,35mm (1/4")
Video-System: . . . . . . . PAL, hor. 15625Hz, vert. 50Hz
Anzahl der Bildpunkte: . hor. 512 ×vert. 582
Auflösung: . . . . . . . . . . 420 Linien
Gamma-Korrekturfaktor: 1
Objektiv
TVCCD-125COL: . . . 1 : 2,0/3,6mm
TVCCD-125PCOL: . . 1 : 2,0/3,7mm, Nadelöhr
Shutter: . . . . . . . . . . . . 1/50 s bis 1/100000 s
Mindestbeleuchtung: . . 0,05Lux
Autom. Weißabgleich: . . 2400–11000K
Signal/Rausch-Abstand: > 50dB (AGC aus)
Videoausgang: . . . . . . . 1Vss/75Ω
Einsatztemperatur: . . . . 0–40°C
Stromversorgung: . . . . . 12V /200mA
Änderungen vorbehalten.
®
TVCCD-125COL
TVCCD-125PCOL
Best.-Nr. 18.0980
Best.-Nr. 18.0990
®
Colour Camera
1Applications
The colour camera with 3.6mm lens (TVCCD-125COL) or
3.7 mm pinhole lens (TVCCD-125PCOL) is especially
suitable for inconspicuous use in video surveillance
systems (CCTV) due to its small dimensions. It has an
automatic electronic shutter, an automatic gain control
(AGC), a backlight compensation (BLC), and an auto-
matic white balance.
2Safety Notes
The camera corresponds to all required directives of the
EU and is therefore marked with .
●The camera is only suitable for indoor use. Protect it
against dripping water and splash water, high air hu-
midity, and heat (admissible ambient temperature
range 0–40°C).
●Do not touch the lenses of the lens assembly with your
fingers, protect them against dust and other impurities,
and only use specific cleaning agents for optical lenses
for cleaning.
●For cleaning the housing only use a dry, soft cloth,
never chemicals or water.
●No guarantee claims for the camera and no liability for
any resulting personal damage or material damage will
be accepted if the camera is used for other purposes
than originally intended, if it is not correctly connected,
or not repaired in an expert way.
3Operation
1) Feed the video signal at the BNC plug (3) via a
screened cable to the video input of a monitor. With a
cable length of more than 100m a video amplifier
should be inserted between camera and cable to com-
pensate the signal attenuation by the cable.
2) Connect a regulated 12V power supply unit with a
rating of at least 200mA (e.g. PS-500ST from
MONACOR) to the low voltage inline jack (2). A low
voltage plug 5.5/2.1mm (outside/inside diameter) is
required. Observe in any case the correct polarity:
Connect the positive pole to the centre contact of the
plug.
3) After applying the operating voltage, switch on the
monitor, and by adjusting the camera to the surveil-
lance area, determine the optimum place of mounting
for it. Tightly screw the camera via its mounting
bracket to this place. After mounting, release the two
screws at the mounting bracket, incline the camera to
the desired position, and retighten the screws.
For installing the camera release the small screw at
the supporting ring of the mounting bracket, remove
the camera from the ring, and insert it into the supplied
mounting plate (fig. 2). Fasten the camera with the two
short screws at the plate.
If the camera is to be put out of operation de-
finitively, take it to a local recycling plant for a
disposal which is not harmful to the environ-
ment.
4) If the object to be monitored is not clearly reproduced,
readjust the focus setting: For this purpose carefully
turn the lens (1) until the image is clear.
4Specifications
Image sensor: . . . . . . . 6.35mm (1/4") CCD chip
Video system: . . . . . . . PAL, hor. 15625Hz,
vert. 50Hz
Number of pixels: . . . . . hor. 512 ×vert. 582
Resolution: . . . . . . . . . . 420 lines
Gamma correction factor: 1
Lens
TVCCD-125COL: . . . 1:2.0/3.6mm
TVCCD-125PCOL: . . 1:2.0/3.7mm, pinhole
Shutter: . . . . . . . . . . . . 1/50 s to 1/100000 s
Minimum illumination: . . 0.05lux
Automatic white balance: 2400–11000K
S/N ratio: . . . . . . . . . . . > 50dB (AGC off)
Video output: . . . . . . . . 1Vpp/75Ω
Ambient temperature: . . 0–40°C
Power supply: . . . . . . . 12V /200 mA
Subject to technical modifications.
D A CH
GB
Copyright©by MONACOR INTERNATIONAL GmbH & Co. KG, Bremen, Germany. All rights reserved. A-0738.99.01.05.2007
®
TVCCD-125PCOL TVCCD-125COL
2
3
1
➀➁

12V
Video
29,4 43
22
Caméra couleur
1Possibilités d’utilisation
La caméra couleur avec objectif 3,6mm (TVCCD-125COL)
ou objectif hyperminiature 3,7mm (TVCCD-125PCOL),
est idéale, grâce à ses petites dimensions, pour une utili-
sation discrète dans des installations de vidéo surveil-
lance (CCTV). Elle dispose d’une obturation électronique
automatique, d’un réglage automatique d’amplification
(AGC), d’une compensation du contre jour (BLC) et d’une
compensation automatique du blanc.
2Conseils d’utilisation
La caméra répond à toutes les directives nécessaires de
l’Union Européenne et porte donc le symbole .
●La caméra n’est conçue que pour une utilisation en
intérieur. Protégez-la des éclaboussures et projections
d’eau, d’une humidité de l’air élevée et de la chaleur
(température d’utilisation admissible 0–40°C).
●Ne touchez pas les lentilles des objectifs avec les
doigts, protégez-les contre la poussière et autres impu-
retés et pour le nettoyage, utilisez uniquement des pro-
duits pour lentilles optiques.
●Pour nettoyer le boîtier, utilisez uniquement un chiffon
doux et sec, n’utilisez jamais de produits chimiques ou
d’eau.
●Nous déclinons toute responsabilité en cas de dom-
mages corporels ou matériels résultants si la caméra
est utilisée dans un but autre que celui pour lequel elle
a été conçue, si elle n’est pas correctement branchée
ou n’est pas réparée par une personne habilitée, de
même, la garantie deviendrait caduque.
3Fonctionnement
1) Appliquez le signal vidéo présent à la prise BNC (3),
via un câble blindé, à l’entrée vidéo d’un moniteur.
Pour un câble d’une longueur supérieure à 100 m, il
convient d’insérer, entre la caméra et le câble, un
amplificateur vidéo pour compenser les pertes de si-
gnal du câble.
2) Reliez à la prise basse tension (2), une alimentation
stabilisée 12V avec une puissance de 200 mA mini-
mum (p.ex. PS-500ST de MONACOR). Un adaptateur
5,5/2,1mm (diamètre extérieur/diamètre intérieur) est
nécessaire. Veillez à respecter la polarité : mettez le
pôle plus au contact médian de la fiche.
3) Une fois la tension de fonctionnement appliquée, allu-
mez le moniteur et déterminez le meilleur emplace-
ment de montage pour la caméra en l’orientant sur la
zone de surveillance. A l’endroit voulu, vissez la
caméra via son étrier de montage. Une fois le monta-
ge effectué, desserrez les deux vis sur l’étrier de mon-
tage, inclinez la caméra dans la position souhaitée et
revissez.
Pour installer la caméra, desserrez la petite vis sur
l’anneau de maintien de l’étrier de montage, retirez la
Lorsque la caméra est définitivement retirée du
service, vous devez la déposer dans une usine
de recyclage de proximité pour contribuer à son
élimination non polluante.
caméra de l’anneau et mettez-la dans la plaque de
montage livrée (schéma 2). Fixez la caméra sur la pla-
que avec les deux vis courtes.
4) Si l’objet à surveiller n’est pas assez précis, corrigez le
réglage du focus : tournez l’objectif (1) avec précaution
jusqu’à ce que l’image soit nette.
4Caractéristiques techniques
Capteur : . . . . . . . . . . . puce CCD, 6,35mm (1/4")
Système vidéo : . . . . . . PAL, hor. 15625Hz,
vert. 50Hz
Nombre de points : . . . . hor. 512 ×vert. 582
Résolution : . . . . . . . . . 420 lignes
Facteur de
correction gamma : . . . 1
Objectif
TVCCD-125COL : . . 1 : 2,0/3,6mm
TVCCD-125PCOL : . 1 : 2,0/3,7mm, hyperminiature
Obturation : . . . . . . . . . 1/50 s à 1/100 000 s
Luminosité minimale : . . 0,05 lux
Compensation
automatique du blanc : . 2400–11000K
Rapport signal/bruit : . . > 50dB (AGC désactivé)
Sortie vidéo : . . . . . . . . 1Vcc/75Ω
Température fonc. : . . . 0–40°C
Alimentation : . . . . . . . . 12V /200mA
Tout droit de modification réservé.
®
TVCCD-125COL
TVCCD-125PCOL
Best.-Nr. 18.0980
Best.-Nr. 18.0990
®
Telecamera a colori
1Possibilità d’impiego
La telecamera a colori con obiettivo di 3,6mm (TVCCD-
125COL) oppure con obiettivo pin hole di 3,7mm
(TVCCD-125PCOL), grazie alle dimensioni ridotte, è
adatta in particolar modo per l’impiego discreto in impian-
ti di sorveglianza video (CCTV). Dispone di un otturatore
elettronico automatico, di regolazione automatica del gua-
dagno (AGC), di compensazione della controluce (BLC) e
di bilanciamento automatico del bianco.
2Avvisi di sicurezza
La telecamera è conforme a tutte le direttive richieste
dell’UE e pertanto porta la sigla .
●La telecamera è prevista solo per l’uso all’interno di
locali. Proteggerla dall’acqua gocciolante e dagli spruz-
zi d’acqua, da alta umidità dell’aria e dal calore (tem-
peratura d’impiego ammessa fra 0 e 40°C).
●Non toccare le lenti degli obiettivi con le dita, proteg-
gerle dalla polvere e da altro sporco, e per pulirle usare
solo mezzi per lenti ottiche.
●Per la pulizia del contenitore usare solo un panno mor-
bido, asciutto; non impiegare in nessun caso prodotti
chimici o acqua.
●Nel caso d’uso improprio, di collegamenti sbagliati o di
riparazione non a regola d’arte della telecamera, non si
assume nessuna responsabilità per eventuali danni
consequenziali a persone o a cose e non si assume
nessuna garanzia per la telecamera.
3Messa in funzione
1) Portare il segnale video presente al connettore BNC
(3) sull’ingresso video di un monitor servendosi di un
cavo schermato. Se il cavo supera i 100m di lunghez-
za conviene inserire un amplificatore del segnale
video fra telecamera e cavo per compensare l’at-
tenuazione del segnale dovuta al cavo.
2) Alla presa per alimentazione DC (2) si collega un ali-
mentatore 12V stabilizzato con potenza minima di
200mA (p.es. PS-500ST della MONACOR). È richie-
sta una spina per alimentazione DC 5,5/2,1mm (dia-
metro esterno/interno). Fare assolutamente attenzio-
ne alla corretta polarità: collegare il polo positivo con il
contatto centrale della spina.
3) Dopo aver applicato la tensione d’esercizio, accende-
re il monitor e individuare il posto ottimale per il mon-
taggio della telecamera orientandola in direzione della
zona da sorvegliare. Avvitare la telecamera in quel
punto per mezzo della sua staffa di montaggio. Dopo il
montaggio, allentare le due viti sulla staffa di montag-
gio, orientare la telecamere nella direzione desiderata
e stringere di nuovo le viti.
Se la telecamera deve essere montata, allentare la
piccola vite sull’anello di supporto della staffa di mon-
taggio, sfilare la telecamera dall’anello e inserirla nella
Se si desidera eliminare la telecamera definiti-
vamente, consegnarla per lo smaltimento ad
un’istituzione locale per il riciclaggio.
piastra di montaggio in dotazione (fig. 2). Fissare la
telecamera alla piastra servendosi delle due viti corte.
4) Se l’oggetto da sorvegliare non è a fuoco, correggere
l’impostazione del fuoco: per fare ciò girare l’obiettivo
(1) delicatamente finché l’immagine non è a fuoco.
4Dati tecnici
Sensore ottico: . . . . . . . chip CCD, 6,35mm (1/4")
Sistema video: . . . . . . . PAL, orizz. 15625Hz,
vert. 50Hz
Numero pixel: . . . . . . . . orizz 512 ×vert. 581
Risoluzione: . . . . . . . . . 420 linee
Fattore di correzione
del gamma: . . . . . . . . . 1
Obiettivo
TVCCD-125COL: . . . 1 : 2,0/3,6mm
TVCCD-125PCOL: . . 1 : 2,0/3,7mm, pin hole
Otturatore : . . . . . . . . . . 1/50 s a 1/100000 s
Illuminazione minima: . . 0,05 Lux
Bilanciamento autom.
del bianco: . . . . . . . . . . 2400–11000K
Rapporto S/R: . . . . . . . > 50dB (AGC disattivato)
Uscita video: . . . . . . . . 1Vpp/75Ω
Temperatura d’esercizio: 0–40°C
Alimentazione: . . . . . . . 12V /200mA
Con riserva di modifiche tecniche.
F B CH
I
Copyright©by MONACOR INTERNATIONAL GmbH & Co. KG, Bremen, Germany. All rights reserved. A-0738.99.01.05.2007
®
TVCCD-125PCOL TVCCD-125COL
2
3
1
➀➁

This manual suits for next models

3

Other Monacor Security Camera manuals

Monacor TVCCD-130S User manual

Monacor

Monacor TVCCD-130S User manual

Monacor TVCCD-30 User manual

Monacor

Monacor TVCCD-30 User manual

Monacor HDCAM-620 User manual

Monacor

Monacor HDCAM-620 User manual

Monacor TVCCD-800ECOL User manual

Monacor

Monacor TVCCD-800ECOL User manual

Monacor TVCCD-320/SW User manual

Monacor

Monacor TVCCD-320/SW User manual

Monacor TVCCD-360 User manual

Monacor

Monacor TVCCD-360 User manual

Monacor TVCCD-1622COL User manual

Monacor

Monacor TVCCD-1622COL User manual

Monacor AXOC-4312BV User manual

Monacor

Monacor AXOC-4312BV User manual

Monacor TVCCD-130A User manual

Monacor

Monacor TVCCD-130A User manual

Monacor TVCCD-152SET User manual

Monacor

Monacor TVCCD-152SET User manual

Monacor Security AV-430SET User manual

Monacor

Monacor Security AV-430SET User manual

Monacor TVCCD-160S User manual

Monacor

Monacor TVCCD-160S User manual

Monacor AV-3033CCD User manual

Monacor

Monacor AV-3033CCD User manual

Monacor TVCCD-34COL User manual

Monacor

Monacor TVCCD-34COL User manual

Monacor TVCCD-24M User manual

Monacor

Monacor TVCCD-24M User manual

Monacor TVCAM-110BF User manual

Monacor

Monacor TVCAM-110BF User manual

Monacor TVCCD-450 User manual

Monacor

Monacor TVCCD-450 User manual

Monacor TVCCD-400 User manual

Monacor

Monacor TVCCD-400 User manual

Monacor TVCCD-97COL User manual

Monacor

Monacor TVCCD-97COL User manual

Monacor TVCCD-120 User manual

Monacor

Monacor TVCCD-120 User manual

Monacor ELIP-2036BF User manual

Monacor

Monacor ELIP-2036BF User manual

Monacor TVCCD-318HCOL User manual

Monacor

Monacor TVCCD-318HCOL User manual

Monacor TVCCD-115 COL User manual

Monacor

Monacor TVCCD-115 COL User manual

Monacor INC-2000BX User manual

Monacor

Monacor INC-2000BX User manual

Popular Security Camera manuals by other brands

Panasonic WV-S4550L Important information

Panasonic

Panasonic WV-S4550L Important information

Cymbol G3 Series user guide

Cymbol

Cymbol G3 Series user guide

ALFAtron U2 IP-CAM Series manual

ALFAtron

ALFAtron U2 IP-CAM Series manual

Key Digital KD-CAMUSB Quick setup guide

Key Digital

Key Digital KD-CAMUSB Quick setup guide

Samsung SCP-3120 user manual

Samsung

Samsung SCP-3120 user manual

Bushnell 119446C instruction manual

Bushnell

Bushnell 119446C instruction manual

Lilin PIH-2422 instruction manual

Lilin

Lilin PIH-2422 instruction manual

Novus NVIP-4DN2001V/IR-1P user manual

Novus

Novus NVIP-4DN2001V/IR-1P user manual

Motorola SCOUT73 user guide

Motorola

Motorola SCOUT73 user guide

Eneo VK-1322 instruction manual

Eneo

Eneo VK-1322 instruction manual

Feit Electric SEC3000/CAM/RP installation guide

Feit Electric

Feit Electric SEC3000/CAM/RP installation guide

Digital Watchdog Snapit DWC-V4382D manual

Digital Watchdog

Digital Watchdog Snapit DWC-V4382D manual

DeView CCD instruction manual

DeView

DeView CCD instruction manual

EverFocus EHA1280 eZ.HD Series user manual

EverFocus

EverFocus EHA1280 eZ.HD Series user manual

Crest Electronics CC-2707WF-20 manual

Crest Electronics

Crest Electronics CC-2707WF-20 manual

Digital Watchdog DWC-MVH2I4WV user manual

Digital Watchdog

Digital Watchdog DWC-MVH2I4WV user manual

Vitek VTC-PIR4CN-4 Operation manual

Vitek

Vitek VTC-PIR4CN-4 Operation manual

DAGE-MTI Excel Series user manual

DAGE-MTI

DAGE-MTI Excel Series user manual

manuals.online logo
manuals.online logoBrands
  • About & Mission
  • Contact us
  • Privacy Policy
  • Terms and Conditions

Copyright 2025 Manuals.Online. All Rights Reserved.