manuals.online logo
Brands
  1. Home
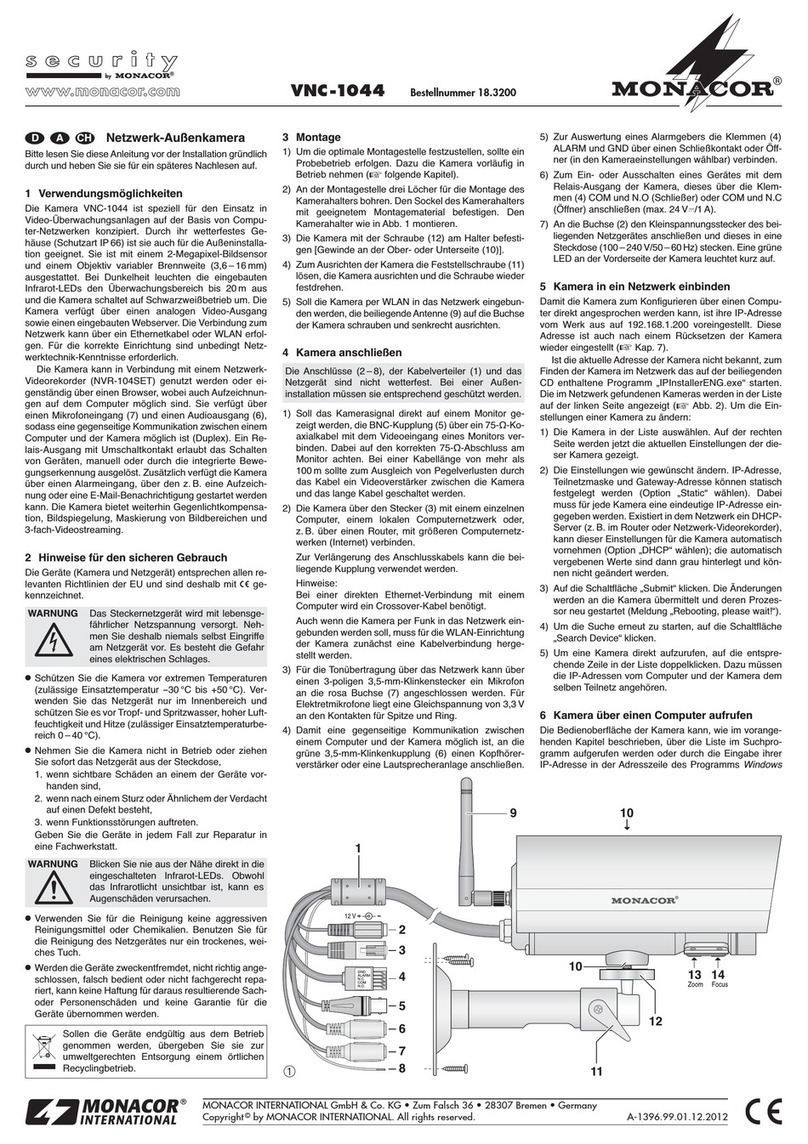
  2. •
  3. Brands
  4. •
  5. Monacor
  6. •
  7. Security Camera
  8. •
  9. Monacor TVCCD-25IR User manual

Monacor TVCCD-25IR User manual

CCTV-S/W-Kamera mit
Mikrofon und Infrarot-LEDs
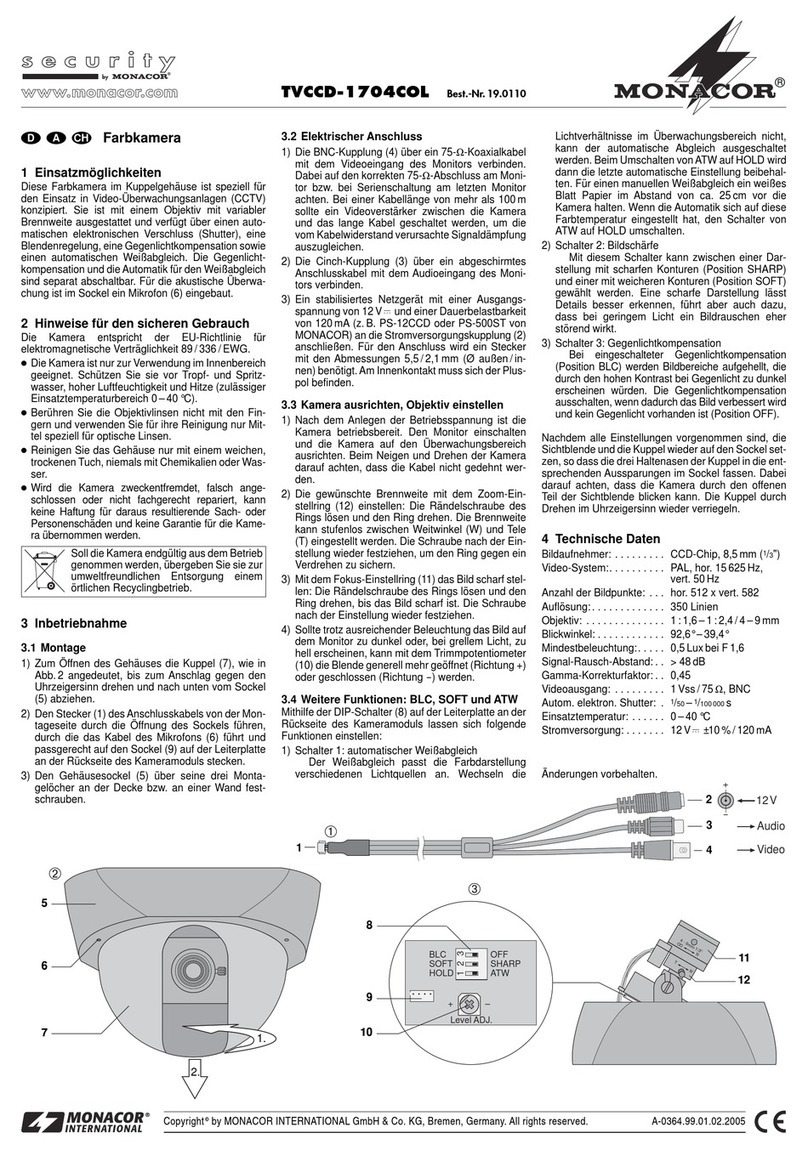
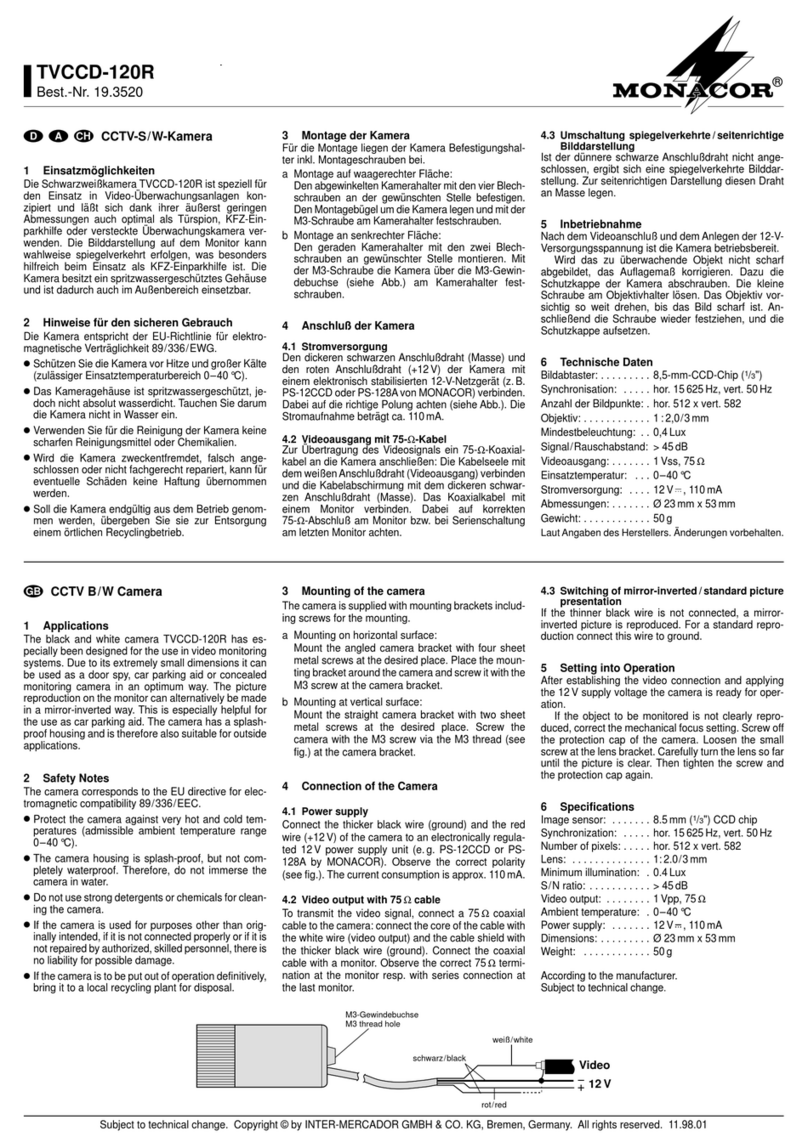
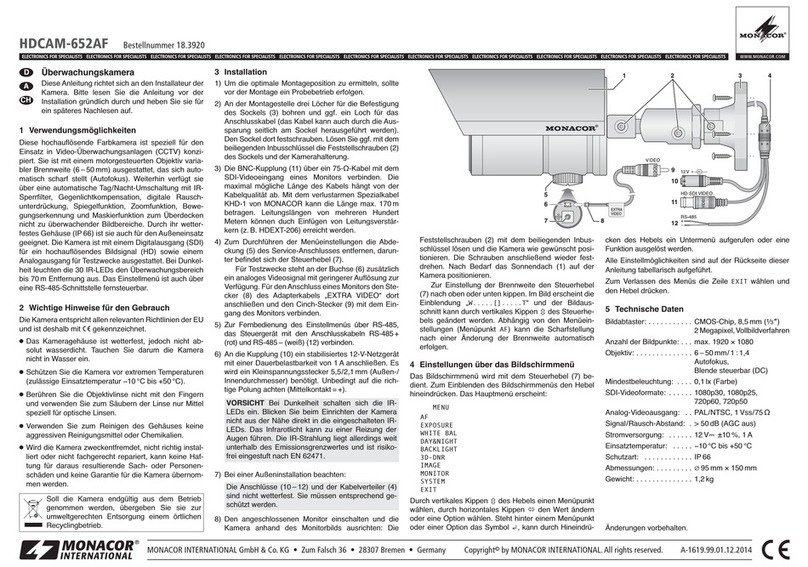
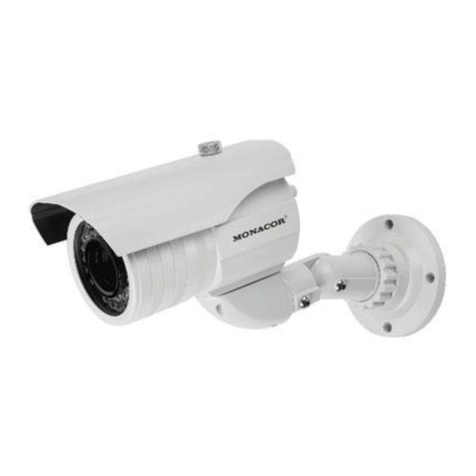
1Einsatzmöglichkeiten
Diese kompakte Schwarzweißkamera in CMOS-Techno-
logie ist speziell für den Einsatz in Video-Überwachungs-
anlagen konzipiert. Sie ist mit einem 6-mm-Objektiv,
sechs IR-LEDs als Lichtquelle und einem Mikrofon ausge-
stattet. Zur Belichtungsregelung verfügt sie über einen
automatischen elektronischen Verschluss („Shutter“) und
eine automatische Verstärkungsregelung (AGC).
2Hinweise für den sicheren Gebrauch
Die Geräte (Kamera und Netzgerät) entsprechen der
EMV-Richtlinie für elektromagnetische Verträglichkeit
89/336/EWG. Das Netzgerät entspricht zusätzlich der
Niederspannungsrichtlinie 73/23/EWG.
●Verwenden Sie die Geräte nur im Innenbereich. Schüt-
zen Sie sie vor Tropf- und Spritzwasser, hoher Luft-
feuchtigkeit und Hitze (zulässiger Einsatztemperaturbe-
reich 0 – 40 °C).
●Nehmen Sie die Kamera nicht in Betrieb bzw. ziehen
Sie sofort das Netzgerät aus der Steckdose, wenn:
1. sichtbare Schäden an der Kamera oder am Netz-
gerät vorhanden sind,
Achtung! Das Netzgerät wird mit lebensgefährlicher
Netzspannung (230 V~) versorgt. Nehmen Sie deshalb
nie selbst Eingriffe in diesem Gerät vor. Durch unsachge-
mäßes Vorgehen besteht die Gefahr eines elektrischen
Schlages.
2. nach einem Sturz oder Ähnlichem der Verdacht auf
einen Defekt besteht,
3. Funktionsstörungen auftreten.
Lassen Sie die Geräte in jedem Fall in einer Fachwerk-
statt reparieren.
●Reinigen Sie das Gehäuse nur mit einem trockenen,
weichen Tuch, niemals mit Chemikalien oder Wasser.
Berühren Sie die Objektivlinse nicht mit den Fingern
und verwenden Sie für ihre Reinigung nur Mittel speziell
für optische Linsen.
●Werden die Geräte zweckentfremdet, falsch ange-
schlossen oder nicht fachgerecht repariert, kann keine
Haftung für daraus resultierende Sach- oder Personen-
schäden und keine Garantie für die Geräte übernom-
men werden.
3Inbetriebnahme
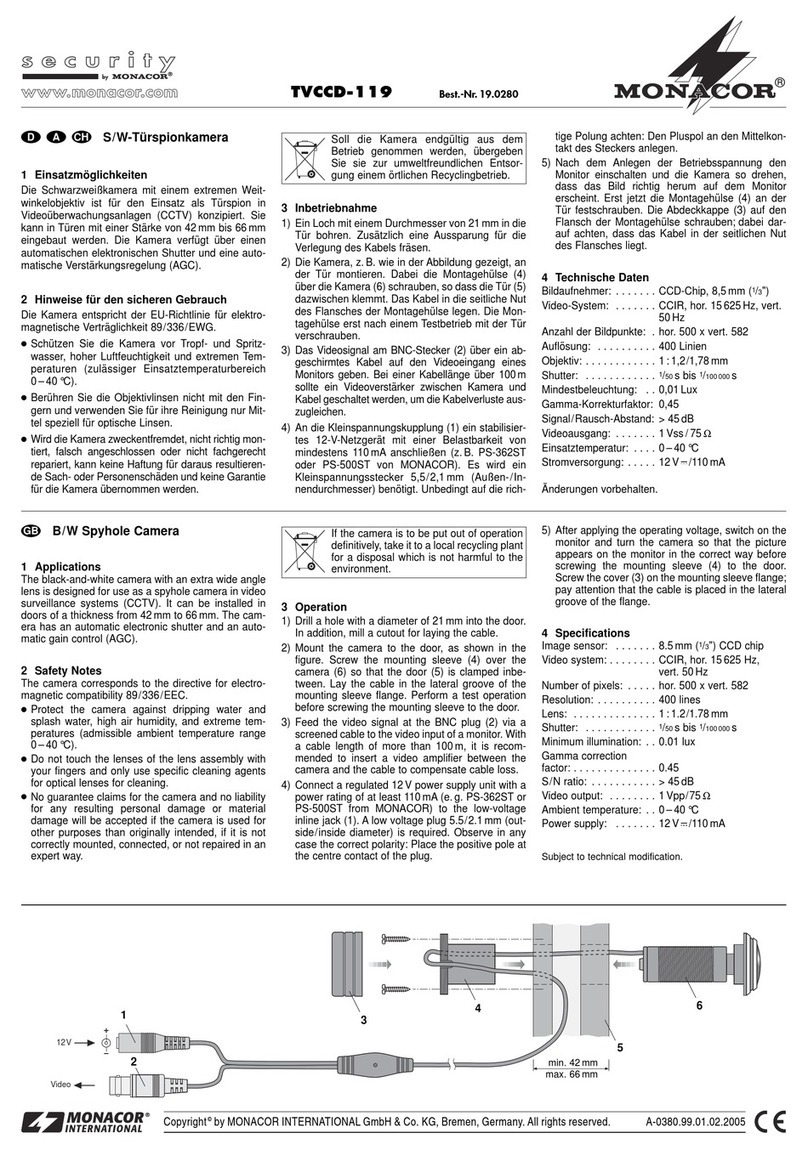
1) Die Kamera mit der Halterung an geeigneter Stelle
festschrauben.
2) Die gelbe Cinch-Kupplung über ein abgeschirmtes An-
schlusskabel mit dem Videoeingang eines Monitors ver-
binden. Bei einer Kabellänge von mehr als 100 m sollte
ein Videoverstärker zwischen Kamera und Kabel ge-
schaltet werden, um die Kabelverluste auszugleichen.
3) Die weiße Cinch-Kupplung über ein abgeschirmtes
Audiokabel mit dem Audioeingang des Monitors ver-
binden.
Sollen die Geräte endgültig aus dem Betrieb
genommen werden, übergeben Sie sie zur
umweltgerechten Entsorgung einem örtlichen
Recyclingbetrieb.
4) An die rote Kleinspannungskupplung das 12-V-Netz-
gerät anschließen. Das Netzgerät in eine Steckdose
(230 V~/50 Hz) stecken. Die Kamera ist damit einge-
schaltet.
5) Die Objektivschutzkappe abnehmen und den Monitor
einschalten. Die Kamera auf den Überwachungsbe-
reich genau ausrichten und das Bild auf dem Monitor
durch Drehen des Objektivs scharf einstellen. Nach
dem Betrieb das Netzgerät aus der Steckdose ziehen.
4Technische Daten
Bildabtaster: . . . . . . . . . 6,35-mm-CMOS-Chip (1/4")
Synchronisation: . . . . . hor. 15 625 Hz, vert. 50 Hz
(CCIR)
Anzahl der Bildpunkte: . hor. 352 x vert. 288
Auflösung: . . . . . . . . . . . 330 Linien
Objektiv: . . . . . . . . . . . . 1 : 2,0/6 mm
Mindestbeleuchtung: . . . 0,5 Lux (ohne IR-LEDs)
Signal-Rausch-Abstand: > 48 dB
Videoausgang: . . . . . . . 1 Vss/75 Ω, Cinch
Audioausgang: . . . . . . . 0,5 V, Cinch
Autom. elektron. Shutter: 1/50 –1/6000 s
Einsatztemperatur: . . . . 0 – 40 °C
Stromversorgung: . . . . . 12 V /150 mA über beiliegen-
des Netzgerät an 230 V~/50 Hz
Abmessungen, Gewicht: 36 x 60 x 35 mm, 50 g
Laut Angaben des Herstellers. Änderungen vorbehalten.
CCTV B/W Camera with Microphone
and Infrared LEDs
1Applications
This compact black-and-white camera in CMOS technolo-
gy is especially designed for use in video surveillance
systems. It is equipped with a 6 mm lens, 6 IR LEDs as a
light source, and a microphone. For the exposure control
it has an automatic electronic shutter and an automatic
gain control (AGC).
2Safety Notes
The units (camera and power supply unit) correspond to
the directive 89/336/EEC for electromagnetic compatibili-
ty. The power supply unit additionally corresponds to the
low voltage directive 73/23/EEC.
●The units are suitable for indoor use only. Protect them
against dripping water and splash water, high air humid-
ity, and heat (admissible ambient temperature range
0–40°C).
●Do not set the camera into operation, and immediately
disconnect the power supply unit from the mains socket
if
1. there is visible damage to the camera or the power
supply unit,
Attention! The power supply unit is supplied with haz-
ardous mains voltage (230 V~). Leave servicing to skilled
personnel only. Inexpert handling may cause an electric
shock hazard.
2. a defect might have occurred after a drop or similar
accident,
3. there are malfunctions.
The units must in any case be repaired by skilled per-
sonnel.
●For cleaning only use a dry, soft cloth, by no means
chemicals or water. Never touch the lens with your fin-
gers and use for its cleaning only special cleaning
agents for optical lenses.
●No guarantee claims for the unit and no liability for any
resulting personal damage or material damage will be
accepted if the units are used for other purposes than
originally intended, if they are not correctly connected or
not repaired in an expert way.
3Operation
1) Tightly screw the camera with the bracket at a suitable
place.
2) Connect the yellow phono inline jack via a screened
cable to the video input of a monitor. With a cable
length of more than 100 m it is recommended to insert
a video amplifier between the camera and the cable to
compensate cable loss.
3) Connect the white phono inline jack via a screened
audio cable to the audio input of the monitor.
If the units are to be put out of operation defin-
itively, take them to a local recycling plant for a
disposal which is not harmful to the environ-
ment.
4) Connect the 12 V power supply unit to the red low-volt-
age inline jack. Connect the power supply unit to a mains
socket (230 V~/50 Hz). Thus, the camera is switched on.
5) Remove the protective cover of the lens and switch on
the monitor. Precisely adjust the camera to the surveil-
lance area and adjust a clear picture on the monitor by
turning the lens. After operation, disconnect the power
supply unit from the mains socket.
4Specifications
Image sensor: . . . . . . . . 6.35 mm CMOS chip (1/4")
Synchronization: . . . . . . hor. 15 625 Hz, vert. 50 Hz
(CCIR)
Number of pixels: . . . . . hor. 352 x vert. 288
Resolution: . . . . . . . . . . 330 lines
Lens: . . . . . . . . . . . . . . . 1 : 2,0/6 mm
Minimum illumination: . . 0.5 lux (w/o IR LEDs)
S/N ratio: . . . . . . . . . . . > 48 dB
Video output: . . . . . . . . . 1 Vpp/75 Ω, phono
Audio output: . . . . . . . . . 0.5 V, phono
Autom. electronic
shutter: . . . . . . . . . . . . . 1/50 –1/6000 s
Ambient temperature: . . 0 – 40 °C
Power supply: . . . . . . . . 12 V /150 mA via supplied
power supply unit connected to
230 V~/50 Hz
Dimensions, weight: . . . 36 x 60 x 35 mm, 50 g
According to the manufacturer.
Subject to technical modification.
®
TVCCD-25IR Best.-Nr. 19.9850
®
VIDEO
AUDIO
DC INPUT
Copyright©by MONACOR INTERNATIONAL GmbH & Co. KG, Bremen, Germany. All rights reserved. A-0301.99.01.10.2004
®
gelb • yellow
weiß • white
VIDEO
AUDIO
12 V
230 V~/50 Hz
rot • red
D A CH
GB
Caméra CCTV noir et blanc
avec microphone et LEDs
infrarouges
1Possibilités d’utilisation
Cette caméra compacte noir et blanc relevant de la tech-
nologie CMOS est spécialement conçue pour une utilisa-
tion dans des installations de vidéosurveillance. Elle est
dotée d’un objectif 6 mm, de six LEDs infrarouges comme
source lumineuse et d’un microphone. Elle dispose d’une
obturation électronique automatique (“shutter”) et d’un
réglage d’amplification automatique (AGC) pour les régla-
ges d’exposition.
2Conseils d’utilisation et de sécurité
Les appareils (caméra et bloc secteur) répondent à la
norme européenne 89/336/CEE relative à la compatibilité
électromagnétique ; le bloc secteur répond également à la
norme 73/23/CEE portant sur les appareils à basse ten-
sion.
●N’utilisez les appareils que pour une utilisation en inté-
rieur. Protégez-les de tout type de projections d’eau,
des éclaboussures, d’une humidité élevée et la chaleur
(plage de température de fonctionnement autorisée :
0–40°C).
Attention ! Le bloc secteur est alimenté par une tension
dangereuse (230 V~). Ne touchez jamais l’intérieur de
l’appareil car en cas de mauvaise manipulation vous
pourriez subir une décharge électrique.
●Ne faites pas fonctionner la caméra et débranchez im-
médiatement le bloc secteur de la prise secteur lorsque :
1. des dommages sur la caméra ou le bloc secteur
apparaissent.
2. après une chute ou accident similaire..., l’appareil
peut présenter un défaut.
3. des dysfonctionnements apparaissent.
Dans tous les cas, les dommages doivent être réparés
par un technicien spécialisé.
●Nettoyez le boîtier uniquement avec un chiffon sec et
doux, en aucun cas de produits chimiques ou d’eau. Ne
touchez pas la lentille avec les doigts et pour son net-
toyage, utilisez uniquement des produits spécifiques
pour les lentilles optiques.
●Nous déclinons toute responsabilité en cas de domma-
ges corporels ou matériels résultants si les appareils
sont utilisés dans un but autre que celui pour lequel ils
ont été conçus, s’ils ne sont pas correctement branchés
ou réparés par une personne habilitée ; de même, la
garantie deviendrait caduque.
3Fonctionnement
1) Vissez la caméra avec le support à un emplacement
adéquat.
2) Reliez la fiche RCA jaune via un cordon blindé à l’en-
trée vidéo d’un moniteur. Pour une longueur de câble
supérieure à 100 m, il est recommandé d’installer un
Lorsque les appareils sont définitivement
retirés du service, vous devez les déposer
dans une usine de recyclage de proximité pour
contribuer à leur élimination non polluante.
amplificateur vidéo entre la caméra et le câble pour
compenser les pertes en ligne.
3) Reliez la fiche RCA blanche via un cordon audio blindé
à l’entrée audio du moniteur.
4) Connectez le bloc secteur 12 V à la fiche d’alimentation
rouge. Reliez ensuite le bloc secteur à une prise sec-
teur 230 V~/50 Hz. La caméra est alors allumée.
5) Retirez le cache de l’objectif et allumez le moniteur.
Dirigez avec précision la caméra vers la zone de sur-
veillance et réglez avec netteté l’image sur le moniteur
en tournant l’objectif. Après le fonctionnement, débran-
chez le bloc secteur de la prise secteur.
4Caractéristiques techniques
Système : . . . . . . . . . . . puce CMOS 6,35 mm (1/4")
Synchronisation : . . . . . hor. 15 625 Hz, vert. 50 Hz
(CCIR)
Nombre de points : . . . . hor. 352 x vert. 288
Résolution : . . . . . . . . . . 330 lignes
Objectif : . . . . . . . . . . . . 1 :2,0/6 mm
Luminosité minimale : . . 0,5 lux (sans LEDs IR)
Rapport signal/bruit : . . > 48 dB
Sortie vidéo : . . . . . . . . . 1 Vcc/75 Ω, RCA
Sortie audio : . . . . . . . . . 0,5 V, RCA
Obturation électro. auto. : 1/50 –1/6000 s
Température fonc. : . . . . 0 – 40 °C
Alimentation : . . . . . . . . 12 V /150 mA par bloc secteur
livré relié à 230 V~/50 Hz
Dimensions, poids . . . . 36 x 60 x 35 mm, 50 g
D’après les données du constructeur.
Tout droit de modification réservé.
Telecamera CCTV b/n con microfo-
no e LED infrarossi
1Possibilità d’impiego
Questa telecamera b/n compatta in tecnologia CMOS è
stata realizzata specialmente per l’impiego in impianti di
sorveglianza video. È equipaggiata con un obiettivo di
6mm, con sei LED infrarossi come fonti di luce e con un
microfono. Per la regolazione dell’esposizione dispone di
un otturatore elettronico automatico (“shutter”) e di una
regolazione automatica del guadagno (AGC).
2Avvertenze di sicurezza
Gli apparecchi (telecamera e alimentatore) sono conformi
alla direttive UE 89/336/CEE sulla compatibilità elettro-
magnetica. L’alimentatore è in più conforme alla direttiva
73/23/CEE per apparecchi a bassa tensione.
●Far funzionare gli apparecchi solo all’interno di locali.
Proteggerli dall’acqua gocciolante e dagli spruzzi d’ac-
qua, da alta umidità dell’aria e dal calore (temperatura
d’impiego ammessa fra 0 °C e 40 °C).
●Non mettere in funzione la telecamera oppure staccare
subito l’alimentatore dalla spina di rete se:
1. la telecamera o l’alimentatore presentano dei danni
visibili;
Attenzione! L’alimentatore funziona con pericolosa ten-
sione di rete (230 V~). Non intervenire mai al suo interno;
la manipolazione scorretta può provocare delle scariche
pericolose.
2. dopo una caduta o dopo eventi simili sussiste il so-
spetto di un difetto;
3. gli apparecchi non funzionano correttamente.
Per la riparazione rivolgersi sempre ad un’officina com-
petente.
●Per la pulizia usare solo un panno morbido, asciutto;
non impiegare in nessun caso prodotti chimici o acqua.
Non toccare la lente dell’obiettivo con le dita e per pulir-
la usare solo prodotti speciali per lenti ottiche.
●Nel caso d’uso improprio, di collegamenti sbagliati o di
riparazione non a regola d’arte degli apparecchi, non si
assume nessuna responsabilità per eventuali danni
consequenziali a persone o a cose e non si assume
nessuna garanzia per gli apparecchi.
3Messa in funzione
1) Avvitare la telecamera in un punto adatto per mezzo
del suo supporto.
2) Collegare la presa RCA gialla con l’ingresso video di un
monitor servendosi di un cavo schermato di collega-
mento. Se il cavo è più lungo di 100 m è opportuno
inserire un amplificatore video fra telecamera e cavo
per compensare le perdite dovute al cavo.
3) Collegare la presa RCA bianca con l’ingresso audio del
monitor servendosi di un cavo schermato di collega-
mento.
Se si desidera eliminare gli apparecchi defini-
tivamente, consegnarli per lo smaltimento ad
un’istituzione locale per il riciclaggio.
4) Collegare l’alimentatore 12 V con la presa rossa di ali-
mentazione DC. Inserire l’alimentatore in una presa di
rete (230 V~/50 Hz). In questo modo, la telecamera è
accesa.
5) Staccare il cappuccio dall’obiettivo e accendere il mo-
nitor. Orientare la telecamera sulla zona da sorvegliare
con precisione e mettere a fuoco l’immagine girando
l’obiettivo. Dopo l’uso, staccare l’alimentatore dalla
presa.
4Dati tecnici
Sensore ottico: . . . . . . . chip CMOS 6,35 mm (1/4")
Sincronizzazione: . . . . . orizz. 15 625 Hz, vert. 50 Hz
(CCIR)
Numero pixel: . . . . . . . . orizz. 352 x vert. 288
Risoluzione: . . . . . . . . . 330 linee
Obiettivo: . . . . . . . . . . . . 1 : 2,0/6 mm
Illuminazione minima: . . 0,5 lux (senza LED IR)
Rapporto S/R: . . . . . . . > 48 dB
Uscita video: . . . . . . . . . 1 Vpp/75 Ω, RCA
Uscita audio: . . . . . . . . . 0,5 V, RCA
Otturatore elettronico
automatico: . . . . . . . . . . 1/50 –1/6000 s
Temperatura d’esercizio: 0 – 40 °C
Alimentazione: . . . . . . . 12 V /150 mA tramite
alimentatore in dotazione con
230 V~/50 Hz
Dimensioni, peso: . . . . . 36 x 60 x 35 mm, 50 g
Dati forniti dal costruttore.
Con riserva di modifiche tecniche.
®
TVCCD-25IR Best.-Nr. 19.9850
®
VIDEO
AUDIO
DC INPUT
Copyright©by MONACOR INTERNATIONAL GmbH & Co. KG, Bremen, Germany. All rights reserved. A-0301.99.01.10.2004
®
jaune • giallo
blanc • bianco
VIDEO
AUDIO
12 V
230 V~/50 Hz
rouge • rosso
I
F B CH
Cámara CCTV blanco y negro con
micrófono y LEDs infrarrojos
1Posibilidades de utilización
Esta cámara compacta blanco y negro procedente de la
tecnología CMOS está especialmente diseñada para una
utilización en las instalaciones de vigilancia vídeo. Está
dotada de un objetivo 6 mm, de seis LEDs infrarrojos
como fuente luminosa y de un micrófono. Dispone de
obturación electrónica automática (“shutter”) y de regula-
ción de la amplificación automática (AGC) para los regla-
jes de exposición.
2Consejos de utilización y de seguridad
Los aparatos (cámara y alimentador) cumplen la normati-
va europea 89/336/CEE relativa a la compatibilidad elec-
tromagnética. El alimentador cumple adicionalmente la
normativa 73/23/CEE relativa a los aparatos de baja ten-
sión.
●Los aparatos están concebidos para una utilización en
interior. Protegerlos de todo tipo de proyecciones de
aguas, de salpicaduras, del calor y de la humedad ele-
vada temperatura de funcionamiento 0 – 40 °C).
●No poner en funcionamiento la cámara y de inmediato
desconectar el alimentador ya que:
1. aparecen daños en el aparato o el alimentador,
¡Atención! El alimentador está alimentado por una ten-
sión peligrosa de 230 V~. No tocar jamás el interior del
aparato, en caso de una mala manipulación, podría
sufrir una descarga eléctrica mortal.
2. después de una caída o accidente similar, el aparato
puede presentar un defecto,
3. aparece mal funcionamiento.
En todos los casos, los daños deben ser reparados por
un técnico especialista.
●Limpiar la caja solamente con un paño seco y suave, en
ningún caso, utlilizar productos químicos o agua. Nunca
tocar la lente con los dedos y utilizar para su limpieza
solamente detergentes especialmente para lentes ópti-
cas.
●Declinamos cualquier responsabilidad en caso de des-
perfectos materiales o corporales resultandos si los
aparatos se utilizan para otro fin que no sea el que ha
sido concebido, si no se conectan correctamente o no
son reparados por una persona cualificada.
3Funcionamiento
1) Atornillar la cámara con el soporte de emplazamiento
adecuado.
2) Conectar la toma amarilla RCA vía un cable blindado a
la entrada vídeo de un monitor. Para una longitud de
cable superior a 100 m, un amplificador vídeo debería
instalarse entre la cámara y el cable para compensar
las pérdidas de línea.
3) Conectar la toma blanca RCA vía un cable audio blin-
dado a la entrada audio del monitor.
Cuando se retiran definitivamente los apara-
tos del servicio, debe depositarse en una fábri-
ca de reciclaje adaptada para su eliminación
no contaminante.
4) Conectar el alimentador 12 V a la toma de alimentación
roja. Conectar el alimentador a una toma de 230 V~/
50 Hz. La cámara está entonces conectada
5) Sacar la tapa del objetivo y conectar el monitor. Dirigir
con precisión la cámara hacia la zona de vigilancia y
regular con nitidez la imagen del monitor moviendo el
objetivo. Después de su funcionamiento, sacar el ali-
mentador de la toma de red.
4Características técnicas
Sistema . . . . . . . . . . . . . pulga CMOS 6,35 mm (1/4")
Sincronización . . . . . . . hor. 15 625 Hz, vert. 50 Hz
(CCIR)
Número de puntos . . . . hor. 352 x vert. 288
Resolución . . . . . . . . . . 330 lineas
Objectivo . . . . . . . . . . . . 1 : 2,0/6 mm
Luminosidad mínima . . . 0,5 lux (sin LEDs IR)
Relación señal/ruido . . . > 48 dB
Salida vídeo . . . . . . . . . 1 Vcc/75 Ω, RCA
Salida audio . . . . . . . . . 0,5 V, RCA
Obturación
electrónica autom. . . . . 1/50 –1/6000 s
Temperatura func. . . . . . 0 – 40 °C
Alimentación . . . . . . . . . 12 V /150 mA con alimentador
entregado a 230 V~/50 Hz
Dimensiones, peso . . . . 36 x 60 x 35 mm, 50 g
Datos según fabricante.
Sujeto a modificaciones técnicas.
Czarno-biała kamera CCTV z
mikrofonem i nadajnikiem IR
1Zastosowanie
TVCCD-25IR jest kompaktową czarno-białą kamerą
wykonaną w technologii CMOS. Przeznaczona jest do
użytku w systemach monitoringu. Wyposażona jest w
obiektyw 6 mm o stałej ogniskowej, 6 diod IR jako źródło
światła podczerwonego oraz mikrofon. Do sterowania
oświetleniem służy automatyczna elektroniczna migaw-
ka oraz automatyczna regulacja wzmocnienia (AGC).
2Środki bezpieczeństwa
Urządzenia (kamera oraz zasilacz) są zgodne z wymaga-
niami normy o zgodności elektromagnetycznej 89/336/
EEC oraz normy dotyczącej urządzeń niskonapięcio-
wych 73/23/EEC.
●Urządzenia są przeznaczone tylko do użytku wewnątrz
pomieszczeń. Należy je chronić przed wilgocią i wyso-
ką temperaturą (dopuszczalny zakres temperatury to
0–40°C).
●Nie wolno używać kamery i natychmiast odłączyć wty-
czkę zasilającą zasilacza z gniazda:
1. Jeśli występują widoczne uszkodzenia urządzeń lub
kabla zasilającego.
Uwaga! Zasilacz jest zasilany niebezpiecznym dla życia
napięciem zmiennym 230 V~. Aby uniknąć porażenia
elektrycznego nie wolno otwierać urządzenia. Jego
naprawą powinien zajmować się tylko przeszkolony
personel.
2. Uszkodzenie urządzenia może wystąpić w wyniku
upadku lub innego podobnego zdarzenia.
3. Jeśli urządzenie działa nieprawidłowo.
W takim przypadku naprawą urządzenia powinien zaj-
mować się tylko przeszkolony personel.
●Do czyszczenia używać suchej, miękkiej ściereczki.
Nie stosować wody ani środków czyszczących. Nie
dotykać soczewek palcami. Do czyszczenia soczewek
stosować tylko odpowiednie detergenty do szkieł
optycznych.
●Producent ani dostawca nie ponosi odpowiedzialności
za wynikłe szkody materialne, jeśli urządzenie było
używane niezgodnie z przeznaczeniem, zostało zain-
stalowane lub obsługiwane niepoprawnie lub podda-
wane nieautoryzowanym naprawom.
3Obsługa
1) Przykręcić mocno i pewnie kamerę w wymaganym
miejscu.
2) Połączyć żółte gniazdo nakablowe wykorzystując
ekranowany kabel z monitorem. Jeśli długość połą-
czenia będzie przekraczać 100m należy zastosować
wzmacniacz wideo i wpiąć go pomiędzy monitorem a
kamerą, aby zminimalizować straty sygnału.
3) Połączyć białe gniazdo nakablowe wykorzystując
ekranowany kabel z wejściem audio monitora.
Jeśli urządzenie nie będzie już nigdy więcej
używane, wskazane jest przekazanie go do
miejsca utylizacji odpadów, aby zostało utyli-
zowane bez szkody dla środowiska.
4) Podłączyć wtyk zasilacza 12 V do czerwonego gniazda
nakablowego. Podłączyć zasilacz do gniazda siecio-
wego (230V ~/50Hz). Kamera jest gotowa do pracy.
5) Zdjąć pokrywę ochronną z obiektywu kamery,
włączyć monitor. Poprzez regulację położenia kamery
ustawić monitorowany obszar, a następnie parametry
wyświetlanego regulując obiektywem. Po zakończe-
niu użytkowania kamery odłączyć zasilacz z sieci.
4 Dane techniczne
Przetwornik obrazu: . . . 6,35 chip CMOS (1/4")
Synchronizacja: . . . . . . pozioma 15 625 Hz,
pionowa 50 Hz (CCIR)
Liczba pikseli: . . . . . . . . 352 x 288 (poziom x pion)
Rozdzielczość: . . . . . . . 330 linii
Obiektyw: . . . . . . . . . . . 1 : 2,0/6 mm
Minimalna jasność: . . . . 0,5 lux (bez LED IR)
Stosunek S/N: . . . . . . . > 48 dB
Wyjście video: . . . . . . . . 1 Vpp/75 Ω, chinch
Wyjście audio: . . . . . . . . 0,5 V, chinch
Aut. elektro. migawka: . 1/50 –1/6000 s
Temperatura pracy: . . . 0 –40 °C
Zasilanie: . . . . . . . . . . . . 12 V /150 mA przez
dołączony zasilacz podłączony
do sieci 230 V~/50Hz
Wymiary, waga: . . . . . . . 36 x 60 x 35 mm, 50 g
Zgodnie z danymi producenta.
Z zastrzeżeniem do możliwych zmian.
®
TVCCD-25IR Best.-Nr. 19.9850
®
VIDEO
AUDIO
DC INPUT
Copyright©by MONACOR INTERNATIONAL GmbH & Co. KG, Bremen, Germany. All rights reserved. A-0301.99.01.10.2004
®
amarillo • żółty
blanco • biały
VIDEO
AUDIO
12 V
230 V~/50 Hz
rojo • czerwony
E
PL

This manual suits for next models

1

Other Monacor Security Camera manuals

Monacor TVCCD-123COL User manual

Monacor

Monacor TVCCD-123COL User manual

Monacor security TVCCD-33COL User manual

Monacor

Monacor security TVCCD-33COL User manual

Monacor INC-3557PTZ User manual

Monacor

Monacor INC-3557PTZ User manual

Monacor TVCCD-400 User manual

Monacor

Monacor TVCCD-400 User manual

Monacor TVCCD-140SET User manual

Monacor

Monacor TVCCD-140SET User manual

Monacor TVCCD-162S User manual

Monacor

Monacor TVCCD-162S User manual

Monacor TVCCD-257SET User manual

Monacor

Monacor TVCCD-257SET User manual

Monacor VC-400COL User manual

Monacor

Monacor VC-400COL User manual

Monacor security TVCCD-250SET User manual

Monacor

Monacor security TVCCD-250SET User manual

Monacor TVCCD-1622COL User manual

Monacor

Monacor TVCCD-1622COL User manual

Monacor TVCCD-340COL User manual

Monacor

Monacor TVCCD-340COL User manual

Monacor TVCCD-152SET User manual

Monacor

Monacor TVCCD-152SET User manual

Monacor INC-5360DF User manual

Monacor

Monacor INC-5360DF User manual

Monacor TVCCD-1706COL User manual

Monacor

Monacor TVCCD-1706COL User manual

Monacor TVCCD-35 COL User manual

Monacor

Monacor TVCCD-35 COL User manual

Monacor TVCCD-118 User manual

Monacor

Monacor TVCCD-118 User manual

Monacor TVCCD-182HCOL User manual

Monacor

Monacor TVCCD-182HCOL User manual

Monacor TVCCD-255 User manual

Monacor

Monacor TVCCD-255 User manual

Monacor Security TVCCD-119 User manual

Monacor

Monacor Security TVCCD-119 User manual

Monacor TVCCD-600COL User manual

Monacor

Monacor TVCCD-600COL User manual

Monacor HDCAM-620 User manual

Monacor

Monacor HDCAM-620 User manual

Monacor INC-2812BV User manual

Monacor

Monacor INC-2812BV User manual

Monacor TVCCD-60MACOL User manual

Monacor

Monacor TVCCD-60MACOL User manual

Monacor TVCCD-400COL User manual

Monacor

Monacor TVCCD-400COL User manual

Popular Security Camera manuals by other brands

ETS IP CAMERA SERIES Operation guide

ETS

ETS IP CAMERA SERIES Operation guide

Ganz ZN-PTZ12VP-XT installation manual

Ganz

Ganz ZN-PTZ12VP-XT installation manual

Wisenet SNV-6084 quick guide

Wisenet

Wisenet SNV-6084 quick guide

Siqura FD2005M1-EI quick start guide

Siqura

Siqura FD2005M1-EI quick start guide

Intellinet 550857 Quick install guide

Intellinet

Intellinet 550857 Quick install guide

BABY DELIGHT SNUGGLE NEST instruction manual

BABY DELIGHT

BABY DELIGHT SNUGGLE NEST instruction manual

Panasonic WV-NW484S - i-Pro Network Camera Specifications

Panasonic

Panasonic WV-NW484S - i-Pro Network Camera Specifications

Vezco VZ-TVI-B3020 user manual

Vezco

Vezco VZ-TVI-B3020 user manual

MTX MTX1000DIR user guide

MTX

MTX MTX1000DIR user guide

SECO-LARM ENFORCER MVE-PB020Q manual

SECO-LARM

SECO-LARM ENFORCER MVE-PB020Q manual

MOBOTIX MOVE VandalBullet VB-4-IR Quick install

MOBOTIX MOVE

MOBOTIX MOVE VandalBullet VB-4-IR Quick install

Tyco Illustra Standard V Series quick start guide

Tyco

Tyco Illustra Standard V Series quick start guide

Velleman CAMCOLBUL11 user manual

Velleman

Velleman CAMCOLBUL11 user manual

Axis P39 Series installation guide

Axis

Axis P39 Series installation guide

ZKTeco ZKSD4 Series user manual

ZKTeco

ZKTeco ZKSD4 Series user manual

Vivotek FD8162 user manual

Vivotek

Vivotek FD8162 user manual

Avico AVDIR-HDT70VAHD user manual

Avico

Avico AVDIR-HDT70VAHD user manual

Sanyo VCC-5995P instruction manual

Sanyo

Sanyo VCC-5995P instruction manual

manuals.online logo
manuals.online logoBrands
  • About & Mission
  • Contact us
  • Privacy Policy
  • Terms and Conditions

Copyright 2025 Manuals.Online. All Rights Reserved.