Money Controls SR3 User manual

SR3 Type 2 MechTool Manual TSP022.doc Issue 5.2 – Aug 2003
This Manual is NOT for use on SR3 Type 2 Modes 3, 8, 14 & 15
This document is the private unpublished property of Money Controls Ltd and may not be reproduced in part or in
total by any means, electronic or otherwise, without the written permission of Money Controls Ltd. Money Controls
Ltd does not accept liability for any errors or omissions contained within this document. Money Controls Ltd shall
not incur any penalties arising out of the adherence to, interpretation of, or reliance on, this standard. Money
Controls Ltd will provide full support for this product when used as described within this document. Use in
applications not covered or outside the scope of this document may not be supported. Money Controls Ltd.
reserves the right to amend, improve or change the product referred to within this document or the document itself
at any time.

SR3 Type 2 MechTool Manual TSP022.doc Issue 5.2 – Aug 2003
This Manual is NOT for use on SR3 Type 2 Modes 3, 8, 14 & 15
CONFIDENTIAL
Not to be disclosed without prior written permission from Money Controls
Page 2 of 19
Contents
1. Diary of Changes ........................................................................................................................................... 3
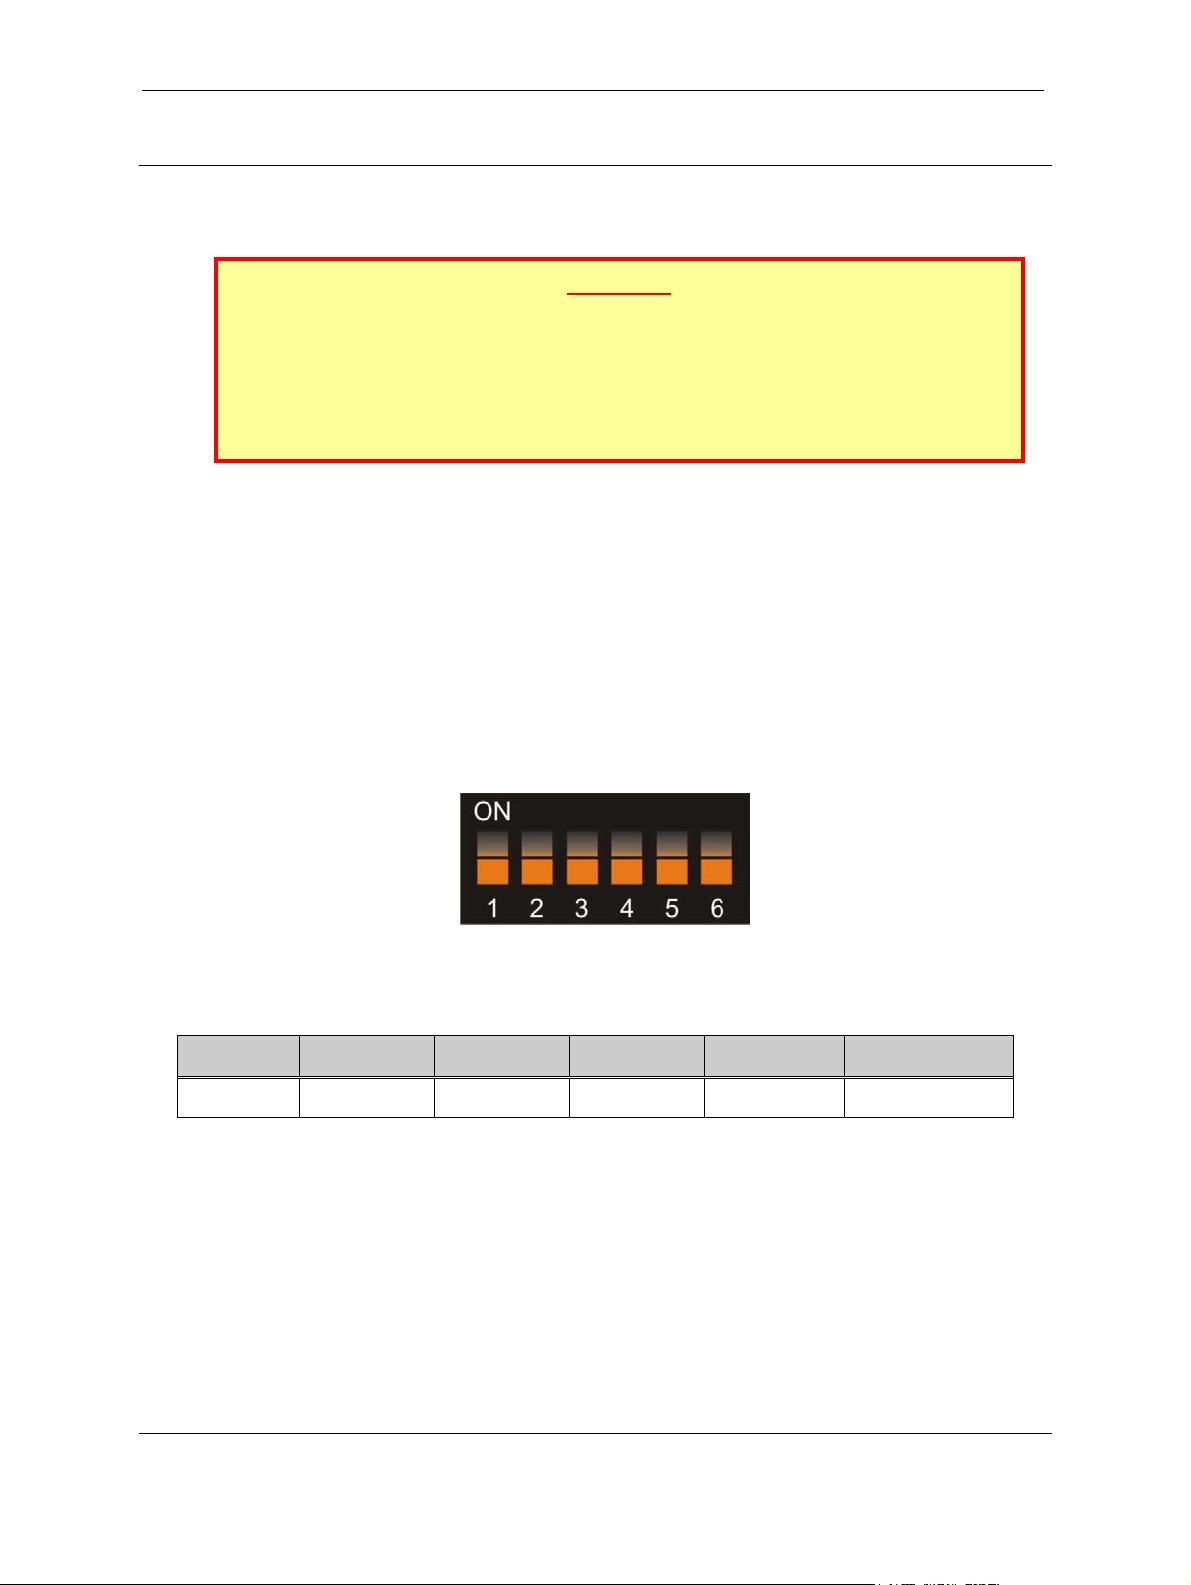
2. MechToolTM DIL Switch Options.................................................................................................................. 4
3. Accept and Inhibit Configuration................................................................................................................. 6
3.1 Inhibit Specific Coins – Method 1 ............................................................................................................ 6
3.2 Enable Specific Coins – Method 1........................................................................................................... 6
3.3 Inhibit Specific Coins – Method 2 ............................................................................................................ 7
3.4 Enable Specific Coins – Method 2........................................................................................................... 8
4. Teach and Run™ ........................................................................................................................................... 9
4.1 Programming Steps................................................................................................................................. 9
4.2 BANK 1.................................................................................................................................................. 10
4.3 BANK 2.................................................................................................................................................. 10
4.4 Teach and Run Example ....................................................................................................................... 11
5. Erase All Windows ...................................................................................................................................... 12
6. Adjust Coin Security ................................................................................................................................... 13
6.1 Method 1 – coin required ....................................................................................................................... 13
6.2 Method 2 – no coins required. ............................................................................................................... 14
6.3 Decrease Security ................................................................................................................................. 15
6.4 Increase Security................................................................................................................................... 15
6.5 Reset Security ....................................................................................................................................... 15
7. Alarms .......................................................................................................................................................... 16
7.1 Alarm Enable ......................................................................................................................................... 16
7.2 Alarm Disable ........................................................................................................................................ 16
8. Price Setting................................................................................................................................................. 17
8.1 Set Price 1 ............................................................................................................................................. 17
8.2 Set Price 2 ............................................................................................................................................. 17
9. Bank Select .................................................................................................................................................. 18
9.1 Enable Banks 1 and 2............................................................................................................................ 18
9.2 Enable Bank 1 / Disable Bank 2 ............................................................................................................ 18
9.3 Disable Bank 1 / Enable Bank 2 ............................................................................................................ 18
Tables
Table 1: DIL Switch Functions................................................................................................................................. 4
Table 2: 6 way DIL Switch Functions....................................................................................................................... 5
Table 3: Switch Position v Coin Window ................................................................................................................. 7
Table 4: Switch Position v Coin Window ................................................................................................................. 8
Table 5: Teach and Run™ Programming - Bank 1............................................................................................... 10
Table 6: Teach and Run™ Programming (Mode 6 ONLY)................................................................................... 10
Table 7: Teach and Run™ Programming - Bank 2............................................................................................... 10
Table 8: DIL Switches - Decrease Security ........................................................................................................... 15
Table 9: DIL Switches - Increase Security............................................................................................................. 15

SR3 Type 2 MechTool Manual TSP022.doc Issue 5.2 – Aug 2003
This Manual is NOT for use on SR3 Type 2 Modes 3, 8, 14 & 15
CONFIDENTIAL
Not to be disclosed without prior written permission from Money Controls
Page 3 of 19
1. Diary of Changes
Issue 1.0……………………………………………………………………………………October 2001
Issue 2.0…………………………………………………………………………………..February 2002
¾Applied TMWP v3.0.
Issue 3.0…………………………………………………………………………………..27th April 2002
¾Added DIL switch pictures.
Issue 3.1……………………………………………………………………………………6th Sept 2002
¾Modification to disclaimer.
Issue 4.0………………………………………………………………………………..2nd January 2003
¾Added reference to Mode 6 in heading.
Issue 5.0…………………………………………………………………………………….3rd April 2003
¾Added Mode 7 Price setting.
¾Amended Table 2 to include modes.
¾Added the limited Mode 6 functions.
¾Changed page header from Mode 6 to Mode 8.
¾Added Section 9 Bank Select.
¾Added references to Mode 10.
¾Amended Section 4 Teach and Run™
Issue 5.1…………………………………………………………………………………..24th June 2003
¾Changed the description of “Enable Bank 1 / Disable Bank 2”
¾Removed Typo’s in Section 9.
Issue 5.2………………………………………………………………………………..18th August 2003
¾Applied TMWP V3.2
¾Changed page header to include Modes 14 and 15.

SR3 Type 2 MechTool Manual TSP022.doc Issue 5.2 – Aug 2003
This Manual is NOT for use on SR3 Type 2 Modes 3, 8, 14 & 15
CONFIDENTIAL
Not to be disclosed without prior written permission from Money Controls
Page 4 of 19
2. MechToolTM DIL Switch Options.
There are a number of options which can be selected via the 6 way DIL switch.
The 6 way DIL switch or Program Switch Bank can be used for field programming the following:
¾Enable / disable a specific coin (2 methods available)
¾Adjust coin security settings (2 methods available)
¾Enable / disable alarm
¾Teach and RunTM
¾Erase all windows
¾Set Prices (Mode 7 only)
¾Enable / Disable Banks
Table 1: DIL Switch Functions
1 2 3 4 5 6
Program 1 Program 2 Program 3 Program 4 Teach on/off Security on/off
Warning:
Pressing the reject lever within 20 seconds of power up, with the 6 DIL switches
set to OFF, will set the SR3 into standby mode, the LED will flash RED and no
coins will be accepted for approx. 3 mins.
This does NOT apply to SR3 Type 2 Mode 10.

SR3 Type 2 MechTool Manual TSP022.doc Issue 5.2 – Aug 2003
This Manual is NOT for use on SR3 Type 2 Modes 3, 8, 14 & 15
CONFIDENTIAL
Not to be disclosed without prior written permission from Money Controls
Page 5 of 19
Table 2: 6 way DIL Switch Functions
SW1 SW2 SW3 SW4 SW5 SW6 FUNCTION Available in
‘Modes’
off ON off off off off Enable Banks 1 and 2 1, 2, 4, 5, 7 & 10
off off ON ON off off Enable Bank 1 / Disable Bank 2 1, 2, 4, 5, 7 & 10
ON off ON ON off off Disable Bank 1 / Enable Bank 2 1, 2, 4, 5, 7 & 10
ON ON off off off off Enable Specific Coins – Method 1 1, 2, 4, 5, 7 & 10
off off ON off off off Enable Specific Coins – Method 2 1, 2, 4, 5, 7 & 10
ON ON off ON off off Inhibit Specific Coins – Method 1 1, 2, 4, 5, 7 & 10
off ON ON off off off Inhibit Specific Coins – Method 2 1, 2, 4, 5, 7 & 10
off off off ON off off Alarm Disable 1, 2, 4, 5, 7 & 10
ON off off ON off off Alarm Enable 1, 2, 4, 5, 7 & 10
off ON off ON off off Erase All Windows (Step 1) 1, 2, 4, 5, 7 & 10
ON off off off off off Erase All Windows (Step 2) 1, 2, 4, 5, 7 & 10
WWWW
ON off Teach and Run™
W = window, SW1 = MSB 1, 2, 4, 5, 7 & 10
SNNNoff
ON
Adjust Coin Security – Method 1
S = ON to widen, OFF to narrow.
SW2 = MSB
1, 2, 4, 5, 7 & 10
SNNN
ON ON
Adjust Coin Security – Method 2
S = ON to widen, OFF to narrow.
SW2 = MSB
1, 2, 4, 5, 6, 7 & 10
off off off ON ON off Teach and Run™
Window 1 6
off off ON ON ON off Teach and Run™
Window 3 6
ON ON ON off off off Set Price 1 7
ON off ON off off off Set Price 2 7
Note: SR3 Type 2 modes 3 and 8 can not use any MechTool functions.

SR3 Type 2 MechTool Manual TSP022.doc Issue 5.2 – Aug 2003
This Manual is NOT for use on SR3 Type 2 Modes 3, 8, 14 & 15
CONFIDENTIAL
Not to be disclosed without prior written permission from Money Controls
Page 6 of 19
3. Accept and Inhibit Configuration
It is possible on the SR3 to inhibit a single coin or any combination of the 12 possible
programmed coins by following one of the procedures below.
Note: If the SR3 contains the same coin twice (i.e. standard security and high security) usually
in the same bank then method 1 will disable both coins. Therefore you must use method 2.
3.1 Inhibit Specific Coins – Method 1
Example:- To Inhibit 50p and 20p.
Switch off the power to the SR3.
Set the Program DIL switches to:-
SW1 SW2 SW3 SW4 SW5 SW6
ON ON OFF ON OFF OFF
Switch on the power to the SR3.
Press the reject lever within 20 seconds. (Mode 10 can be accessed at any time).
The LED will turn RED.
Insert 50p and 20p and check that they are accepted.
Press the reject lever to return to normal operational mode.
The LED will turn GREEN.
Return ALL the DIL switches to the OFF position.
The inserted coin/s will now be rejected.
3.2 Enable Specific Coins – Method 1
Example:- To Enable 50p and 20p.
Switch off the power to the SR3.
Set the Program DIL switches to:-
SW1 SW2 SW3 SW4 SW5 SW6
ON ON OFF OFF OFF OFF
Switch on the power to the SR3.
Press the reject lever within 20 seconds. (Mode 10 can be accessed at any time).
The LED will turn RED.
Insert 50p and 20p and check that they are accepted.
Press the reject lever to return to normal operational mode.
The LED will turn GREEN.
Return ALL the DIL switches to the OFF position.
The inserted coin/s will now be accepted.
Note:- It is possible for a single coin to be enabled using the above procedure even though
that particular bank has been disabled.

SR3 Type 2 MechTool Manual TSP022.doc Issue 5.2 – Aug 2003
This Manual is NOT for use on SR3 Type 2 Modes 3, 8, 14 & 15
CONFIDENTIAL
Not to be disclosed without prior written permission from Money Controls
Page 7 of 19
3.3 Inhibit Specific Coins – Method 2
Example:- To Inhibit 50p Coin 2 and 20p Coin 3.
Switch off the power to the SR3.
Set the Program DIL switches to:-
SW1 SW2 SW3 SW4 SW5 SW6
OFF ON ON OFF OFF OFF
Switch on the power to the SR3.
Press the reject lever within 20 seconds. (Mode 10 can be accessed at any time).
The LED will turn RED.
Set the switches to the desired coin position (refer to Table 3) i.e. 2.
SW1 SW2 SW3 SW4 SW5 SW6 Coin No.
OFF OFF ON OFF OFF OFF 2
Press the reject lever – LED changes colour to GREEN then back to RED.
Set the switches to the next desired coin position (refer to Table 3) i.e. 3.
SW1 SW2 SW3 SW4 SW5 SW6 Coin No.
OFF OFF ON ON OFF OFF 3
Press the reject lever – LED changes colour to GREEN then back to RED.
Return ALL the DIL switches to the OFF position.
Press the reject lever to return to normal operational mode.
The LED will turn GREEN.
The selected coin/s will now be rejected.
Table 3: Switch Position v Coin Window
Coin No. SW1 MSB SW2 SW3 SW4 LSB
1off off off ON
2off off ON off
3off off ON ON
4off ON off off
5off ON off ON
6off ON ON off
7off ON ON ON
8ON off off off
9ON off off ON
10 ON off ON off
11 ON off ON ON
12 ON ON off off

SR3 Type 2 MechTool Manual TSP022.doc Issue 5.2 – Aug 2003
This Manual is NOT for use on SR3 Type 2 Modes 3, 8, 14 & 15
CONFIDENTIAL
Not to be disclosed without prior written permission from Money Controls
Page 8 of 19
3.4 Enable Specific Coins – Method 2
Example:- To Enable 50p Coin 2 and 20p Coin 3.
Switch off the power to the SR3.
Set the Program DIL switches to:-
SW1 SW2 SW3 SW4 SW5 SW6
OFF OFF ON OFF OFF OFF
Switch on the power to the SR3.
Press the reject lever within 20 seconds. (Mode 10 can be accessed at any time).
The LED will turn RED.
Set the switches to the desired coin position (refer to Table 4) i.e. 2.
SW1 SW2 SW3 SW4 SW5 SW6 Coin No.
OFF OFF ON OFF OFF OFF 2
Press the reject lever – LED changes colour to GREEN then back to RED.
Set the switches to the next desired coin position (refer to Table 4) i.e. 3.
SW1 SW2 SW3 SW4 SW5 SW6 Coin No.
OFF OFF ON ON OFF OFF 3
Press the reject lever – LED changes colour to GREEN then back to RED.
Return ALL the DIL switches to the OFF position.
Press the reject lever to return to normal operational mode.
The LED will turn GREEN.
The selected coin/s will now be accepted.
Table 4: Switch Position v Coin Window
Coin
No.
SW1
MSB SW2 SW3 SW4
LSB
1off off off ON
2off off ON off
3off off ON ON
4off ON off off
5off ON off ON
6off ON ON off
7off ON ON ON
8ON off off off
9ON off off ON
10 ON off ON off
11 ON off ON ON
12 ON ON off off

SR3 Type 2 MechTool Manual TSP022.doc Issue 5.2 – Aug 2003
This Manual is NOT for use on SR3 Type 2 Modes 3, 8, 14 & 15
CONFIDENTIAL
Not to be disclosed without prior written permission from Money Controls
Page 9 of 19
4. Teach and Run™
The SR3 can have the option to enable Teach & Run™ on all 12 coins.
This option is selected at the time of order. The specific coin channel to be programmed is
selected using switch 1 (MSB) to switch 4 (LSB) on the 6 way DIL switch.
4.1 Programming Steps
To programme a coin/token please follow these 6 Steps:
1. Switch off the power to the SR3.
2. Set the 6 way DIL switch to the relevant coin to be programmed.
(see Table 5 and Table 7,Mode 6 see Table 6).
3. Switch on the power to the SR3.
4. Press the reject lever within 20 seconds. (Mode 10 can be accessed at any time).
The LED will turn RED.
5. Start entering the coins1or tokens1you wish to teach until the LED flashes GREEN,
typically after 8 to 10 insertions2.
If the LED turns GREEN after the 1st coin is inserted, then Teach & Run is DISABLED.
6. Press the reject lever and the LED will return to constant GREEN.
The coin channel is now programmed3.
To programme further coin channels, repeat from step 1.
Once you have finished programming return all switches to the OFF position.
The first coin inserted after Teach & Run™ may reject. Subsequent coins should accept.
Notes: 1 If a large sample of coins/tokens are used, then the coin channel sensor windows will
be more accurate and a higher acceptance of true coins/tokens should be seen. If only
a single coin/token is used, coin channel sensor windows will be programmed which
may not truly reflect the coin/token population.
2 If significantly more than 10 coins have been inserted and the LED is still not changing
to GREEN, this could be caused by three possible reasons.
a) The coins/tokens being used are actually 2 different types although they look
the same e.g. 1p old and 1p new.
b) The coins/tokens being used are poorly manufactured/minted to such an extent
that the Teach & Run™ is unable to correlate the readings taken.
c) The SR3 has a fault.
3 Even though a coin/token has been programmed make sure that the coin channel has
actually been enabled (see section 3).
Teach & Run™ does NOT automatically enable the taught coin/token.

SR3 Type 2 MechTool Manual TSP022.doc Issue 5.2 – Aug 2003
This Manual is NOT for use on SR3 Type 2 Modes 3, 8, 14 & 15
CONFIDENTIAL
Not to be disclosed without prior written permission from Money Controls
Page 10 of 19
4.2 BANK 1
Table 5: Teach and Run™ Programming - Bank 1
Coin Number Switch 1 Switch 2 Switch 3 Switch 4 Switch 5 Switch 6
1off off off ON ON off
2off off ON off ON off
3off off ON ON ON off
4off ON off off ON off
5off ON off ON ON off
6off ON ON off ON off
Table 6: Teach and Run™ Programming (Mode 6 ONLY)
Coin Number Switch 1 Switch 2 Switch 3 Switch 4 Switch 5 Switch 6
1off off off ON ON off
3off off ON ON ON off
4.3 BANK 2
Table 7: Teach and Run™ Programming - Bank 2
Coin Number Switch 1 Switch 2 Switch 3 Switch 4 Switch 5 Switch 6
7off ON ON ON ON off
8ON off off off ON off
9ON off off ON ON off
10 ON off ON off ON off
11 ON off ON ON ON off
12 ON ON off off ON off

SR3 Type 2 MechTool Manual TSP022.doc Issue 5.2 – Aug 2003
This Manual is NOT for use on SR3 Type 2 Modes 3, 8, 14 & 15
CONFIDENTIAL
Not to be disclosed without prior written permission from Money Controls
Page 11 of 19
4.4 Teach and Run Example
Example:- To teach coin channel 12 for £1
Switch off the power to the SR3.
Set the Program DIL switches to:-
MSB
SW1 SW2 SW3 LSB
SW4 Total SW5 SW6
ON ON OFF OFF 12 ON OFF
Switch on the power to the SR3.
Press the reject lever within 20 seconds. (Mode 10 can be accessed at any time).
The LED will turn RED.
Start entering £1 coins until the LED flashes GREEN, typically after 8 to 10 insertions.
If the LED turns GREEN after the 1st coin is inserted, then Teach & Run is DISABLED.
Press the reject lever and the LED will turn GREEN.
The coin channel has been programmed.
Set ALL switches to the OFF position.
Note: if a fault condition occurs (flashing RED), either power off, power on and restart teaching
or press the reject lever, this will exit Teach and RunTM, the LED will change colour from
flashing RED to GREEN.

SR3 Type 2 MechTool Manual TSP022.doc Issue 5.2 – Aug 2003
This Manual is NOT for use on SR3 Type 2 Modes 3, 8, 14 & 15
CONFIDENTIAL
Not to be disclosed without prior written permission from Money Controls
Page 12 of 19
5. Erase All Windows
This function allows you to erase all the windows previously programmed, whether they were
programmed by Teach and RunTM, programmed using a programming device or programmed
by Money Controls Ltd.
Because of the severity of this procedure, two steps are required, which reduces the risk of this
being done accidentally.
Switch off the power to the SR3.
Set the Program DIL switches to:-
SW1 SW2 SW3 SW4 SW5 SW6
OFF ON OFF ON OFF OFF
Switch on the power to the SR3.
Press the reject lever within 20 seconds. (Mode 10 can be accessed at any time).
The LED will flash RED / GREEN.
Set the Program DIL switches to:-
SW1 SW2 SW3 SW4 SW5 SW6
ON OFF OFF OFF OFF OFF
Press the reject lever again.
The LED will flash GREEN.
Set ALL the DIL switches to the OFF position.
Press the reject lever to return to operational mode.
LED will change to constant GREEN.

SR3 Type 2 MechTool Manual TSP022.doc Issue 5.2 – Aug 2003
This Manual is NOT for use on SR3 Type 2 Modes 3, 8, 14 & 15
CONFIDENTIAL
Not to be disclosed without prior written permission from Money Controls
Page 13 of 19
6. Adjust Coin Security
The security of an individual coin/token can be adjusted using the 6 way DIL switches.
Two methods are available on the SR3 Type 2.
Switch 1 Allows sensor windows to be increased or decreased. (ON =
increase windows / decrease security, OFF = decrease windows /
increase security)
Switches 2, 3, 4 Determines the number of counts to be added or removed from the
sensor windows (SW2 = MSB, SW4 = LSB). See Table 8 and Table
9below.
Switch 5 Not used for adjusting coin security settings = OFF.
Switch 6 Enables coin security mode = ON.
6.1 Method 1 – coin required
Example:- To increase the sensor windows / decrease the security on a £1 coin4by 2
counts5,6 the following procedure should be followed:
Switch off the power to the SR3.
Set the 6 way DIL switches to:- (widen, 2 counts, security)
SW1 SW2 SW3 SW4 SW5 SW6
ON OFF ON OFF OFF ON
Switch on the power to the SR3.
Press the reject lever within 20 seconds. (Mode 10 can be accessed at any time).
Check the LED turns RED.
Insert a £1 coin and check it accepts.
The LED should now turn GREEN.
Set ALL the switches to the OFF position.
Press the reject lever again to return to operational mode.
The security has now been saved to EEPROM.
Notes:
4 The coin channel must be ENABLED for changes to be programmed.
5 +n counts will add n counts to the upper limits of the sensor windows and subtract n
counts from the lower limits of the sensor windows for the coin channel selected. i.e.
+2 counts will actually make the sensor windows a total of 4 counts wider on the coin
channel selected.
-n counts will subtract n counts from the upper limits of the sensor windows and add
n counts to the bottom limits of the sensor windows for the coin channel selected.
i.e. +3 counts will actually make the sensor windows a total of 6 counts narrower on
the coin channel selected.
6 If 2 counts were not enough and 3 counts were actually required, the procedure has
to be repeated for +3 counts (NOT an extra +1 count).

SR3 Type 2 MechTool Manual TSP022.doc Issue 5.2 – Aug 2003
This Manual is NOT for use on SR3 Type 2 Modes 3, 8, 14 & 15
CONFIDENTIAL
Not to be disclosed without prior written permission from Money Controls
Page 14 of 19
6.2 Method 2 – no coins required.
Example:- To increase the sensor windows / decrease the security on a £1 coin7(window 1)
by 2 counts8,9 the following procedure should be followed:
Switch off the power to the SR3.
Set the 6 way DIL switches to:- (widen, 2 counts, Teach and RunTM, security)
SW1 SW2 SW3 SW4 SW5 SW6
ON OFF ON OFF ON ON
Switch on the power to the SR3.
Press the reject lever within 20 seconds. (Mode 10 can be accessed at any time).
Check the LED turns RED.
Set the 6 way DIL switches to:- (window 1)(see Table 4)
SW1 SW2 SW3 SW4 SW5 SW6
OFF OFF OFF ON ON ON
Press the reject lever again.
The LED will now turn RED then GREEN.
The security has now been saved to EEPROM.
Set ALL the switches to the OFF position.
Press the reject lever to return to operational mode.
LED will change to constant GREEN.
Notes:-
7 The coin channel must be ENABLED for changes to be programmed.
8 +n counts will add n counts to the upper limits of the sensor windows and subtract n
counts from the lower limits of the sensor windows for the coin channel selected. i.e.
+2 counts will actually make the sensor windows a total of 4 counts wider on the coin
channel selected.
-n counts will subtract n counts from the upper limits of the sensor windows and add
n counts to the bottom limits of the sensor windows for the coin channel selected.
i.e. +3 counts will actually make the sensor windows a total of 6 counts narrower on
the coin channel selected.
9 If 2 counts were not enough and 3 counts were actually required, the procedure has
to be repeated for +3 counts (NOT an extra +1 count).

SR3 Type 2 MechTool Manual TSP022.doc Issue 5.2 – Aug 2003
This Manual is NOT for use on SR3 Type 2 Modes 3, 8, 14 & 15
CONFIDENTIAL
Not to be disclosed without prior written permission from Money Controls
Page 15 of 19
6.3 Decrease Security
Table 8: DIL Switches - Decrease Security
Value SW1 SW2 SW3 SW4 SW5 SW6
0ON off off off off ON
+1 ON off off ON off ON
+2 ON off ON off off ON
+3 ON off ON ON off ON
+4 ON ON off off off ON
+5 ON ON off ON off ON
+6 ON ON ON off off ON
+7 ON ON ON ON off ON
6.4 Increase Security
Table 9: DIL Switches - Increase Security
Value SW1 SW2 SW3 SW4 SW5 SW6
0off off off off off ON
-1 off off off ON off ON
-2 off off ON off off ON
-3 off off ON ON off ON
-4 off ON off off off ON
-5 off ON off ON off ON
-6 off ON ON off off ON
-7 off ON ON ON off ON
6.5 Reset Security
Set the DIL switches to either Increase Security 0 or Decrease Security 0. This will set the
sensor windows tweak value to 0 for the coin channel selected, i.e. the original programmed
sensor windows.

SR3 Type 2 MechTool Manual TSP022.doc Issue 5.2 – Aug 2003
This Manual is NOT for use on SR3 Type 2 Modes 3, 8, 14 & 15
CONFIDENTIAL
Not to be disclosed without prior written permission from Money Controls
Page 16 of 19
7. Alarms
When enabled, an alarm condition will activate all the outputs (A1 to A6) for 100ms, except for
condition iii and iv.
Conditions which will indicate an alarm condition include:
i. An event which occurs out of sequence.
ii. A sequence of events occur which indicate a ‘Coin-on-string’ fraud is being attempted.
There are a number of events that might lead to this condition.
iii. If the credit / reject sensor is blocked for more than 1.5 seconds, the alarm signal will
remain active, for the duration of the blockage.
iv. During power-up diagnostics – if enabled – for the duration of the fault.
7.1 Alarm Enable
To enable an alarm the following steps should be followed:
Switch off the power to the SR3.
SW1 SW2 SW3 SW4 SW5 SW6
ON OFF OFF ON OFF OFF
Switch on the power to the SR3.
Press the reject lever within 20 seconds. (Mode 10 can be accessed at any time).
The LED will flash GREEN.
Switch off the power to the SR3.
Set ALL the DIL switches to the OFF position.
Switch on the power to the SR3.
The alarm is now ON.
7.2 Alarm Disable
To disable an alarm the following steps should be followed:
Switch off the power to the SR3.
SW1 SW2 SW3 SW4 SW5 SW6
OFF OFF OFF ON OFF OFF
Switch on the power to the SR3.
Press the reject lever within 20 seconds. (Mode 10 can be accessed at any time).
The LED will flash GREEN.
Switch off the power to the SR3.
Set ALL the DIL switches to the OFF position.
Switch on the power to the SR3.
The alarm is now OFF.

SR3 Type 2 MechTool Manual TSP022.doc Issue 5.2 – Aug 2003
This Manual is NOT for use on SR3 Type 2 Modes 3, 8, 14 & 15
CONFIDENTIAL
Not to be disclosed without prior written permission from Money Controls
Page 17 of 19
8. Price Setting
8.1 Set Price 1
Example:- To set Price 1 to € 0.70.
Switch off the power to the SR3.
Set the 6 way DIL switches to:- (Price 1)
SW1 SW2 SW3 SW4 SW5 SW6
ON ON ON OFF OFF OFF
Switch on the power to the SR3.
Press the reject lever within 20 seconds.
Check the LED turns RED.
Insert a € 0.50 and a € 0.20 coin (total € 0.70) and ensure they accept.
Set ALL the switches to the OFF position.
Press the reject lever again to return to operational mode, LED = GREEN.
Price 1 has now been saved to EEPROM.
8.2 Set Price 2
Example:- To set Price 2 to € 1.10.
Switch off the power to the SR3.
Set the 6 way DIL switches to:- (Price 2)
SW1 SW2 SW3 SW4 SW5 SW6
ON OFF ON OFF OFF OFF
Switch on the power to the SR3.
Press the reject lever within 20 seconds.
Check the LED turns RED.
Insert a € 1.00 and a € 0.10 coin (total € 1.10) and ensure they accept.
Set ALL the switches to the OFF position.
Press the reject lever again to return to operational mode, LED = GREEN.
Price 2 has now been saved to EEPROM.
Note:- To set Price 1 or Price 2 to 0 (Free Sales Mode), don’t enter any coins.

SR3 Type 2 MechTool Manual TSP022.doc Issue 5.2 – Aug 2003
This Manual is NOT for use on SR3 Type 2 Modes 3, 8, 14 & 15
CONFIDENTIAL
Not to be disclosed without prior written permission from Money Controls
Page 18 of 19
9. Bank Select
9.1 Enable Banks 1 and 2
Switch off the power to the SR3.
Set the switches as shown below.
SW1 SW2 SW3 SW4 SW5 SW6
OFF ON OFF OFF OFF OFF
Switch on the power to the SR3.
Press the reject lever within 20 seconds. (Mode 10 can be accessed at any time).
The LED will flash GREEN.
Switch off the power to the SR3.
Set ALL the DIL switches to the OFF position.
Switch on the power to the SR3.
Both banks are now Enabled.
9.2 Enable Bank 1 / Disable Bank 2
Firstly follow the steps as shown in 9.1 Enable Banks 1 and 2.
Switch off the power to the SR3.
Set the switches as shown below.
SW1 SW2 SW3 SW4 SW5 SW6
OFF OFF ON ON OFF OFF
Switch on the power to the SR3.
Press the reject lever within 20 seconds. (Mode 10 can be accessed at any time).
The LED will flash GREEN.
Switch off the power to the SR3.
Set ALL the DIL switches to the OFF position.
Switch on the power to the SR3.
The changes are now stored in Eeprom.
9.3 Disable Bank 1 / Enable Bank 2
Switch off the power to the SR3.
Set the switches as shown below.
SW1 SW2 SW3 SW4 SW5 SW6
ON OFF ON ON OFF OFF
Switch on the power to the SR3.
Press the reject lever within 20 seconds. (Mode 10 can be accessed at any time).
The LED will flash GREEN.
Switch off the power to the SR3.
Set ALL the DIL switches to the OFF position.
Switch on the power to the SR3.
The changes are now stored in Eeprom.

SR3 Type 2 MechTool Manual TSP022.doc Issue 5.2 – Aug 2003
This Manual is NOT for use on SR3 Type 2 Modes 3, 8, 14 & 15
CONFIDENTIAL
Not to be disclosed without prior written permission from Money Controls
Page 19 of 19
This manual is intended only to assist the reader in the use of this product and
therefore Money Controls shall not be liable for any loss or damage whatsoever
arising form the use of any information or particulars in, or any incorrect use of the
product. Money Controls reserve the right to change product specifications on any
item without prior notice
Other manuals for SR3
2
Table of contents
Other Money Controls Bank Note Validator manuals