manuals.online logo
Brands
  1. Home
  2. •
  3. Brands
  4. •
  5. montpellier
  6. •
  7. Cooker
  8. •
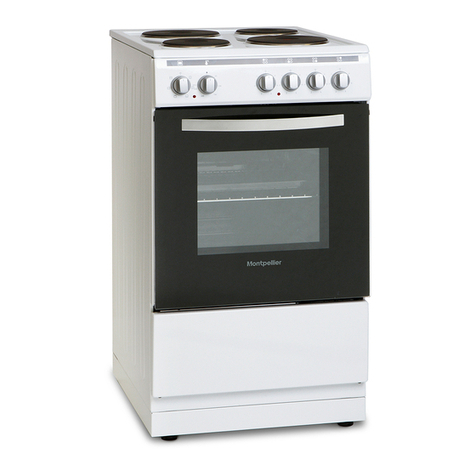
  9. montpellier SCG50W User manual

montpellier SCG50W User manual

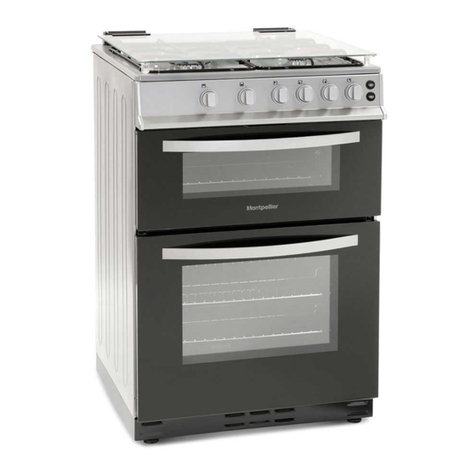
Freestanding Gas Cookers - 50 & 60cm
SCG50W/SCG60W/TCG50W/TCG60W
Please read these instructions carefully before attempting to install or use this appliance.
We recommend that you keep these instructions in a safe place for future reference.
Installation and Operating Instructions
Thank you for choosing this Montpellier Freestanding Gas Cooker.
Our Cookers has been designed to provide you with the best combination of style, reliability and performance to
give you years of trouble-free use.
You may be familiar with a similar product, but please take time to read these instructions carefully before installing
or using your Freestanding Cooker to ensure you get the most from your purchase.
We recommend that you keep this manual in a safe place for future reference.
Your Freestanding Cooker is covered by a comprehensive two year Parts & Labour
Guarantee. In the unlikely event that you experience a problem with your Cooker,
you can rest assured that you are fully protected against the cost of repairs for the
first 24 months . Please note that any claim must be accompanied by the model
reference number, serial number and proof of purchase.
To activate your guarantee, you will need your product serial number. This can be
found on the rear of the machine.
There are two ways to register your Guarantee:
•Online: Visit the Support page on our website and complete the online Product
Registration form. www.montpellier-appliances.com
•By Post: Simply detach and ll in the form provided, attach a stamp and send
it in the post. Don’t forget to include your e-mail address so that we can send
conrmation through to you.
Welcome
Note: We are unable to take registrations over the phone.
ACROSS ALL OUR MODELS
YEAR
GUARANTEE
PA R T S & L A B O U R
www.montpellier-appliances.com
Dear Customer,
Pieces of packaging (plastic bags, polystyrene etc.) must not be
left within reach of children, as they are potentially dangerous.
Please dispose of packaging thoughtfully by the appropriate
means.
To this effect, we recommend that you read the entire guide
carefully before operating the product and keep it as a
reference.
CONTENTS
1.
IMPORTANT WARNINGS
2.
TECHNICAL FEATURES OF YOUR OVEN
3.
INSTALLATION OF YOUR OVEN
4.
DESCRIPTION OF COOKER & CONTROL PANEL
5.
USING YOUR COOKER
6.
CHANGING THE GAS NOZZEL
7.
IF YOUR COOKER DOES NOT OPERATE
8.
USING HEAT SHIELD
IMPORTANT WARNINGS
•WARNING: This appliance must be earthed!
•Ensure that the electricity supply is turned OFF before installing
your
appliance.
•Ensure that the appliance is switched off before replacing the oven
lamp.
•
If the supply cord is damaged, it must be replaced by the
manufacturer,
its services agent or similar qualified persons.
•Keep the electrical cable of your cooker away from the hot areas; do
not
let it touch the appliance. Keep away from anything sharp and any
heated surfaces.
•Usage of your appliance creates moisture and heat in the room;
make
sure that your kitchen is well ventilated.
•Prolonged intensive use of the appliance may call for additional
ventilation.
•When the cooker is hot DO NOT touch the oven glass.
•This appliance is for cooking purposes only. It must not be used for
other purpose. This appliance is only for domestic use, not for
commercial use.
•Before using your appliance, keep curtains, paper or
inflammable
things away from your appliance. Do not keep combustible
or
inflammable things in or near the appliance.
This appliance can be used by children aged from 8 years and above and
persons with reduced physical, sensory or mental capabilities or lack of
experience and knowledge if they have been given supervision or
instruction concerning use of the appliance in a safe way and understand
the hazards involved. Children shall not play with the appliance. Cleaning
and user maintenance shall not be made by children unless they are older
than 8 years and supervised.
•Use oven gloves when using cooker. Do not touch on hot surfaces
•Do not carry the cooker by the handle.
•Do not use cooker in potentially explosive atmospheres.
•When the oven is being used, some parts may become hot; children
should be kept away and supervised at all times.
•Do not splash cool water in an oven tray or inside the oven when the
surface of the appliance is still hot. Arising Steam may cause burns and
a sudden temperature exchange may cause damage to the surface of
the appliance
•WARNING: Accessible parts may become hot during use. Young children
should be kept away.
•Do not use harsh abrasive cleaners or sharp metal scrapers to clean the
oven door glass since they can scratch the surface.
•If the current rate of the fuse in your installation is less than 32Ampere,
have a qualified electrician fit a 32A. fuse.
•This appliance is produced in accordance with the safety regulations.
Incorrect use may harm people and the appliance.
•Power must be supplied via a suitable double pole isolating switch,
having contact separation of at least 3 mm in all poles placed in a readily
accessible position adjacent to the unit.
•Children should be supervised to ensure that they do not play with the
appliance.
•The cooker may be located in a kitchen, a kitchen/diner or bed-sitting
room.
•If the product has a digital timer, you must reset after a loss of power.
Otherwise, your oven will not operate.
•Caution: Accessible parts may be hot when the grill is in use. Young
children should be kept away”
•Do not put flammable, combustible, explosive liquid or any material in
the oven, even if the appliance is not in use.
•Bread may catch fire if the toasting time is too long. Close supervision is
necessary during toasting
•For cleaning fan, the guard panel (optional) the cooker must be
switched off before removing the guard and after cleaning, the guard
must be
replaced in correct position into the cooker.
•WARNING: Before obtaining access to terminals, all supply circuits must
be disconnected.
•WARNING: Unattended cooking on a hob with fat or oil can be
dangerous and may result in fire. Never try to extinguish a fire with
water, switch off the appliance and then cover the flame e.g. with a lid
or a fire blanket.
•WARNING: Danger of fire: Do not store items on the cooking surfaces.
•WARNING: If the surface is cracked, switch off the appliance to avoid
the possibility of electric shock.
•The appliance is not intended to be operated by means of an
external timer or separate remote-control system
•WARNING: Danger of fire: Do not store items on the cooking
surfaces.
TECHNICAL FEATURES OF YOURCOOKER
SPECIFICATIONS
50 x 50
50 x 60
60 x 60
Outer width
500 mm
500 mm
600 mm
Outer depth
600 mm
660 mm
660 mm
Outer height
850 mm
850 mm
850 mm
Inner width
395 mm
395 mm
445 mm
Inner depth
405 mm
405 mm
445 mm
Inner height
330 mm
330 mm
330 mm
INSTALLATION OF YOUR COOKER
GAS CONNECTION
CAUTION: THIS APPLIANCE MUST ONLY BE INSTALLED IN A PERMANENTLY
VENTILATED ROOM IN COMPLIANCE WITH THE APPLICABLE REGULATIONS and
by a qualified engineer.
It shall be installed and connected in accordance with current
installation regulations. Particular attention should be given to the
relevant requirements regarding ventilation.
The use of a gas cooking appliance results in the production of heat and
moisture. Ensure that the kitchen is well ventilated: keep natural
ventilation means open or install a mechanical ventilation device
(extraction hood)
Prolonged and intensive use of the appliance may require additional
ventilation, for example opening a window or more effective
ventilation, by increasing the extraction level of the ventilation device if
present.
Your cooker is for use with 220-240V AC or 230VAC for mono phase 50-
60 Hz electric supply. If your supply is different from the specified value,
contact your authorized service agent.
Connection and Security:
1. Prior to installation, ensure that the gas supply (type of the gas
and gas pressure) and the adjustment of the
appliance are
compatible
2. The adjustment conditions for this appliance are stated on the label
(or rating plate and are specified in this booklet)
3. Fit the clamp to the hose. Push the hose until it goes to the
end of
the pipe.
4. Check for gas leak; ensure that the controls on the fascia panel are
off, but that the gas supply is turned on. Apply some soap bubbles to
the connection. If there is gas leak, there will be
foaming in the
soaped area.
5. The cooker should be installed in a well-ventilated area on an even
floor so that it’s level.
6. Re-inspect the gas connection.
7. When installing your cooker, ensure that the hob top is at work
top level. Bring to work top level by adjusting the feet if
necessary
8. Do not channel the gas hose through any heated areas,
especially
behind the cooker. Do not try to move the cooker
whilst it’s connected to the gas supply as this may loosen the
gas connections and a gas leak may occur .
9. Please use a flexible hose for gas connection.
10. Connect your cooker to the LPG supply by shortest route and
without any leak. Min. 40 cm Max. 125 cm.
11. When making gas leak test, never use any naked flame such as
lighters, matches, cigarettes etc.
Connection Scheme for LPG Connection Scheme for NG
Connector
Connector
Gasket
Gasket
Hose inlet Hose Connector
Clips Gas hose
Flexible hose
Correct
Wrong
Correct Correct
WALL FIXING
•Before using the appliance, and in order to ensure safe use, be sure to
fix the appliance to the wall using the chain and hooked screw
supplied. Ensure that the hook is screwed into the wall securely
WARNING!
In order to prevent tipping of the appliance, this stabilizing devise must
be used. Refer to the instructions for installation.
Any kitchen furniture next to the appliance must be heat -resistant(100°C)
DESCRIPTION OF COOKER
Symbols of functions on cooker:
Closed
Oven Burner
Small flame Big flame
Oven & grill burner Grill burner
Manual operation Timer
1- Top lid (if fitted) 9- Oven door
2-
Cooktop
10- Control knobs
3-
Fascia panel
11- Bottom shelf
4- Wire grid 12- Middle lower shelf
5-
Tray
13- Middle upper shelf
6-
Cavity
14- Top shelf
7-
Bottom cover
15- Oven lamp (Option)
8-
Door handle
USING YOUR COOKER
Before using your cooker please remove all flammable tapes,
sytrofoam and any other materials in or on the cooker.
Using the Gas Hob:
1. Selection of the burner to be used is identified by a symbol
on the knob or on the fascia panel.
The gas burner controlled by each knob is shown by a symbol. Push
in and turn the appropriate knob in a counter-clockwise direction to
the max. (+) symbol. To turn the burner off turn the appropriate
knob anticlockwise until it stops. Different symbols are shown on the
knob for off as , for maximum flame
as and minimum flame as .
2. If the burner does not ignite, wait for one minute before
trying
again. If the burner goes out for any reason, turn off the gas
control valve and wait for one
minute before trying again.
3. Your cooker is fitted with a Gas Security System, when the burner
goes out the control valve cuts off the gas supply automatically. To
re-light the burner, press the
knob and turn counter-clockwise.
After the ignition you must wait
5 to 10 second for the gas security
systems activation.
Before operating your hob please ensure that the burner caps are
positioned correctly. The correct placement is shown below.
BURNER
Burner cap
Electronic Lighting Device
USABLE SOUCEPAN DIAMETER
Wok Burner
Ø 24 - 28 cm
Rapid Burner
Ø 22 - 26 cm
Semi-rapid Burner
Ø 18 - 22 cm
Auxiliary Burner
Ø 12 - 18 cm
Using the Gas Oven:
Selection of the burner is indicated by symbol on the knob or on the
fascia panel.
Oven Burner Control: Push the knob in and turn in a counter-clockwise
direction to the max. (+) symbol. To turn off, turn the knob in a
clockwise direction until it stops.
Different symbols are shown on the knob. ; To turn off , for maximum
flame as and minimum flame as .
Grill Burner Control: Push the knob in a counter-clockwise direction to
the max. (+) symbol.
Note:
*When you operate the oven burners please do not close the oven
door wait 3 minutes before closing.
*If your cooker has a mechanical timer, the timer knob should be set to
the required time. At the end of the cooking time a ‘’bing’’
tone will be
heard. The timer is only a minute minder it does not control the cooker.
Cooking Time Table:
Meals
Temperature (°C)
Rack position
Cooking time (min.)
Creamed cake
150 - 170
2
30 - 35
Pastry
200 - 220
2
35 - 45
Biscuit
160 - 170
3
20 - 25
Cookie
160 – 170
3
20 - 35
Cake
160 - 180
2
25 - 35
Braided cookie
200 - 220
2
30 - 40
Filo pastry
180 - 220
2
35 - 45
Savory pastry
160 - 180
2
20 - 30
Lamb meat
200 - 230
1
90 - 120
Veal
200 - 230
1
90 - 120
Mutton
210 - 230
1
90 - 120
Chicken (in
210 - 230
1
75 – 100
Fish
190 - 210
2
40 – 50
Note: Cooking times and performance may vary depending on individual
use or preference.
Changing the nozzle:
1.
Firstly, shut off the gas supply. Use a screwdriver with a special
head for removal and re-installation.
Remove the nozzle from the burner with a special screwdriver
and install the new nozzle
2.
Close the nozzle with your finger, open the gas valve and check
for any gas leakage by soap foam.
Oven Burner Nozzle Change:
Remove the back panel of the cooker and remove the nozzle fixing body
from the
burner. Remove the nozzle from the injector body with a
special screwdriver. After changing, close the nozzle with your finger,
open the gas valve and check for any gas leak with soap foam around
the nozzle- body connection surface. Re-install the nozzle body to the
burner by.
Reduced Flame Adjustment:
In order to adjust your cooker to the correct gas type, make the
adjustment for a
reduced flame by use of a small screwdriver as shown
below, by turning the screw in the middle of the gas valve as well as
the nozzle.
From LPG to Natural gas
From Natural gas to LPG
Rapid Burner
3 turns anticlockwise
3 turns clockwise
Semi-rapid
Burner
2.5 turns anticlockwise
2.5 turns clockwise
Auxiliary Burner
2 turns anticlockwise
2 turns clockwise
Wok Burner
4 turns anticlockwise
4 turns clockwise
Oven Burner
4,5 turns anticlockwise
4,5 turns clockwise
Grill Burner
4 turns anticlockwise
4 turns clockwise
IF THE APPLIANCE DOES NOT OPERATE
No
spark
ignition.
There is no current
Check
the plug, socket and fuse box and
correct
if
there are any signs of tripping
Main gas valve is turned off
Turn on the main gas valve
Gas hose is bent.
Connect
the gas hose properly.
No Gas
supply
Burner injectors are clogged.
Clean
the injectors
Gas hose is bent.
Connect
the gas hose properly.
Uneven
flame / No
flame
Burner injectors are clogged.
Clean
the injectors
Burners might be wet.
Dry
the burner parts carefully.
Burner caps might not be fitted
correctly.
Make sure the caps and the burners are
fitted correctly.
Main gas valve is turned off
Turn on the main gas valve
Empty gas bottle (LPG)
Replace
with new bottle
If the problem is not solved:
Call the services agent on 01527 888 133
IMPORTANT
Do not try to repair the device yourself. Any repairs carried out must
be by an authorized/qualified person.

This manual suits for next models

3

Other montpellier Cooker manuals

montpellier MTCE50W User manual

montpellier

montpellier MTCE50W User manual

montpellier MR90GOX User manual

montpellier

montpellier MR90GOX User manual

montpellier MDC500FW User manual

montpellier

montpellier MDC500FW User manual

montpellier MTG50LW User guide

montpellier

montpellier MTG50LW User guide

montpellier RMC61CC User manual

montpellier

montpellier RMC61CC User manual

montpellier MR100DFK Assembly Instructions

montpellier

montpellier MR100DFK Assembly Instructions

montpellier MTG60LS User manual

montpellier

montpellier MTG60LS User manual

montpellier MTE50FW User manual

montpellier

montpellier MTE50FW User manual

montpellier MSCE600W User manual

montpellier

montpellier MSCE600W User manual

montpellier MR91DFMX User manual

montpellier

montpellier MR91DFMX User manual

montpellier MDG600LW User manual

montpellier

montpellier MDG600LW User manual

montpellier MMRDF60FC User manual

montpellier

montpellier MMRDF60FC User manual

montpellier MSE50 User manual

montpellier

montpellier MSE50 User manual

montpellier RMC100DFK User manual

montpellier

montpellier RMC100DFK User manual

montpellier ECO TCC60 User manual

montpellier

montpellier ECO TCC60 User manual

montpellier MR91DFMX/K User manual

montpellier

montpellier MR91DFMX/K User manual

montpellier MTE51W User manual

montpellier

montpellier MTE51W User manual

montpellier MR95DFCR User manual

montpellier

montpellier MR95DFCR User manual

montpellier MTCC60FW User manual

montpellier

montpellier MTCC60FW User manual

montpellier RMC61GOK User manual

montpellier

montpellier RMC61GOK User manual

montpellier MR90CEMX-K User manual

montpellier

montpellier MR90CEMX-K User manual

montpellier MTC60FW User manual

montpellier

montpellier MTC60FW User manual

montpellier MR90CEMK User manual

montpellier

montpellier MR90CEMK User manual

montpellier MDG500LW User manual

montpellier

montpellier MDG500LW User manual

Popular Cooker manuals by other brands

Pioneering RANGEMINDER installation guide

Pioneering

Pioneering RANGEMINDER installation guide

Fisher & Paykel CG302DLPGB1 manual

Fisher & Paykel

Fisher & Paykel CG302DLPGB1 manual

Creda HB49121 Instruction and recipe book

Creda

Creda HB49121 Instruction and recipe book

Baumatic BCG625-SS instruction manual

Baumatic

Baumatic BCG625-SS instruction manual

Electrolux EKM6700X Instruction booklet

Electrolux

Electrolux EKM6700X Instruction booklet

HURAKAN HKN-EKT40 manual

HURAKAN

HURAKAN HKN-EKT40 manual

Indesit KD6G35 operating instructions

Indesit

Indesit KD6G35 operating instructions

Indesit ID67V9KMB/UK Installation and Quick guide

Indesit

Indesit ID67V9KMB/UK Installation and Quick guide

BOMANN EH 3551 G Instruction manuals

BOMANN

BOMANN EH 3551 G Instruction manuals

Tricity Bendix SIE515 Operating and installation instructions

Tricity Bendix

Tricity Bendix SIE515 Operating and installation instructions

Jenn-Air S100 Use and care guide

Jenn-Air

Jenn-Air S100 Use and care guide

Belling Cookcenter 150 Installation & user's instructions

Belling

Belling Cookcenter 150 Installation & user's instructions

AEG Electrolux 41016VI user manual

AEG Electrolux

AEG Electrolux 41016VI user manual

Electrolux EKV 5605 X Instruction book

Electrolux

Electrolux EKV 5605 X Instruction book

Parkinson Cowan SG 405 R Operating and installation instructions

Parkinson Cowan

Parkinson Cowan SG 405 R Operating and installation instructions

ILVE PROFESSIONAL P09 user manual

ILVE

ILVE PROFESSIONAL P09 user manual

Sharp KF-56FVMT15WL-CH user manual

Sharp

Sharp KF-56FVMT15WL-CH user manual

ILVE Professional Series User instructions, installation, maintenance

ILVE

ILVE Professional Series User instructions, installation, maintenance

manuals.online logo
manuals.online logoBrands
  • About & Mission
  • Contact us
  • Privacy Policy
  • Terms and Conditions

Copyright 2025 Manuals.Online. All Rights Reserved.