manuals.online logo
Brands
  1. Home
  2. •
  3. Brands
  4. •
  5. montpellier
  6. •
  7. Cooker
  8. •
  9. montpellier MSE50 User manual

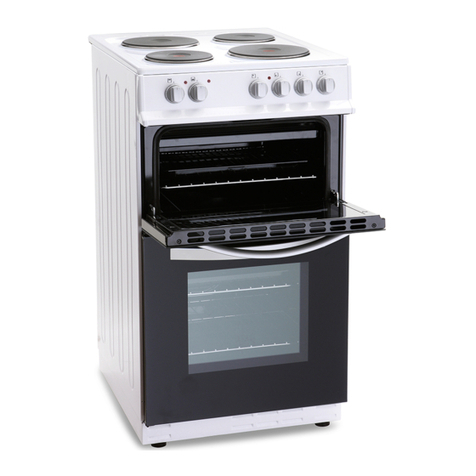
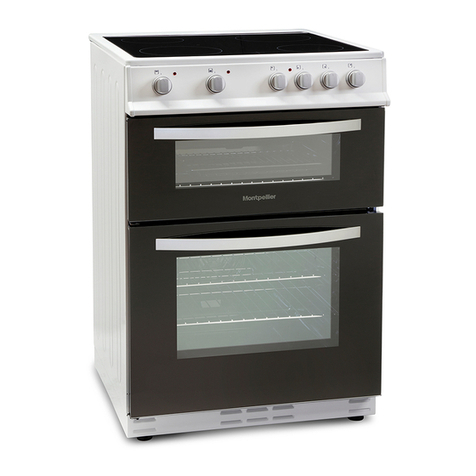
montpellier MSE50 User manual

Freestanding 50cm Cooker
MSE50 - All Colours
Please read these instructions carefully before attempting to install or use this appliance.
We recommend that you keep these instructions in a safe place for future reference.
Installation and Operating Instructions
THE PERFECT BALANCE OF FUNCTION AND STYLE
LAUNDRY - DISHWASHING - COOKING - COOLING
Thank you for choosing this Montpellier Freestanding Cooker.
Our Cookers has been designed to provide you with the best combination of style, reliability and performance to
give you years of trouble-free use.
You may be familiar with a similar product, but please take time to read these instructions carefully before installing
or using your Freestanding Cooker to ensure you get the most from your purchase.
We recommend that you keep this manual in a safe place for future reference.
Your Freestanding Cooker is covered by a comprehensive two year Parts & Labour
Guarantee. In the unlikely event that you experience a problem with your Cooker,
you can rest assured that you are fully protected against the cost of repairs for the
first 24 months . Please note that any claim must be accompanied by the model
reference number, serial number and proof of purchase.
To activate your guarantee, you will need your product serial number. This can be
found on the rear of the machine.
There are two ways to register your Guarantee:
•Online: Visit the Support page on our website and complete the online Product
Registration form. www.montpellier-appliances.com
•By Post: Simply detach and ll in the form provided, attach a stamp and send
it in the post. Don’t forget to include your e-mail address so that we can send
conrmation through to you.
Welcome
Note: We are unable to take registrations over the phone.
ACROSS ALL OUR MODELS
YEAR
GUARANTEE
PA R T S & L A B O U R
www.montpellier-appliances.com
Description
of
the
Appliance
CONTENTS:
Section 1. Installation
Section 2. Safety Advice
Section 3. Operating the Appliance
Section 4. Maintenance
Section 1: Installation
-Remove all packaging and protective film from the appliance.
-Position the appliance in a dry atmosphere.
-The following image is provided as a guide for installation – your
installer will carry out the installation in accordance with the current
regulations.
-Your installer will connect a power cable (not supplied) to your
appliance in accordance with the current regulations.
To install this appliance, please proceed as follows:
1.1. Choosing a location for your oven
When choosing a location for your oven, ensure that there are no
flammable or combustible materials in the close vicinity, such as
curtains. You may be required to make changes to the area
surrounding your oven.
You must ensure a minimum gap of 50mm between the edge of the
hotplate and an adjacent wall. You must ensure a minimum distance
of 750mm between the hotplate and overhanging cupboards or a
cooker hood (see below image).
Note: Do not site your oven next to a cooling appliance.
POWER OUTPUT:
Oven Bottom Element Oven
Top Element
Grill Element
2 x 145mm Hotplates
1 x 180mm Hotplate
1 x 180mm Rapid Hotplate
-1000W
-1000W
-1600W
-2 x 1000W
-1500W
- 2000W
This appliance has a power rating in excess or 3000W and
therefore must be ‘hard wired’ to a suitable fused point
adjacent to the appliance housing and protected with a 32
amp fuse. Please note that a switchable spur should be
accessible above the work surface to allow the power to
be turned off by the consumer.
Your installer will connect this appliance in accordance with
current regulations using a correct grade of electrical cable
(not supplied) and making a suitable connection between
the fused spur and the electrical connection block on the
rear of the appliance.
The line drawing on the left is for 3 phase and the line drawing
on the right is for single phase.
H05VV-F 5x1,5mm² 3N~ H05VV-F 3x2,5mm² ~ 6272Y 3x2,5mm² ~
L3
L2
L1
34
5
N
PE
2
1L
3
4
5
N
PE
2
1
LN
PE
Section 2. Safety Advice
-Please read this booklet thoroughly before installing and
switching on the appliance. The manufacturer accepts no
responsibility for incorrect installation and usage.
-This appliance is guaranteed for Domestic Use Only.
-The appliance is not intended for use by persons (including
children) with reduced physical, sensory or mental
capabilities, or lack of experience and knowledge, unless
they have been given supervision or instruction concerning
the use of the appliance by a person responsible for their
safety. Children should be supervised to ensure that they do
not play with the appliance.
-This appliance must only be used for cooking/heating foods
and liquids. Do not use it for any other purpose.
-If using an adaptor, this must be used in accordance with
the manufacturers instructions and ensure that the electrical
circuit is not overloaded as this could cause overheating.
-Do not twist or bend the cables, and keep them away from
hot surfaces.
-Following installation, please make sure that the power cable
is not trapped underneath the appliance.
-Keep the appliance surfaces clean. Failure to do this could
lead to the appliance malfunctioning.
-The surface of this appliance will get hot during use. The
surface of this appliance will remain hot after it has been
turned off.
Section 3. Operating the Appliance
3.1. Control Panel
3.2. Oven Functions
You are able to select various difference Oven Functions
(explained below) by adjusting the Oven Function knob on the
control panel (shown above).
Oven Lamp
Only the oven light will be turned on. This light will remain on until turned off.
Static Cooking Function
The oven's thermostat and warning lights will be turned on, the lower and upper
heating elements will start to heat.
Lower Heating Function
The oven's thermostat and warning lights will be turned on, the lower heating
element will start to heat.
Upper Heating Function
The oven's thermostat and warning lights will be turned on, the upper heating
element will start to heat.
3.2 Oven Functions continued.
3.3. Selecting a Temperature
Once you have selected an Oven Function, simply adjust the oven temperature knob
to the desired temperature.
Grilling Function
The oven's thermostat and warning lights will be turned on, the grill heating element will
start to heat.
This function is used for grilling and toasting foods, use the upper shelves of the oven.
Lightly brush the wire grid with oil to stop foods sticking and place food in the
center of the grid. Always place a tray beneath to catch any drips of oil or fat. It is
recommended to pre-heat the oven about 10 minutes.
Warning: When grilling, the oven door must be closed and the oven temperature
should be adjusted to 1900C.
Faster Grilling Function
The oven's thermostat and warning lights will be turned on, the grill and upper
heating elements will start to heat.
The function is used for faster grilling and for covering a larger surface area, such as
grilling meats, use the upper shelves of oven. Lightly brush the wire grid with oil to stop
foods sticking and place foods in the center of the grid. Always place a tray beneath to
catch any drips of oil or fat. It is recommended to pre-heat the oven about 10 minutes.
Warning: When grilling, the oven door must be closed and the oven temperature
should be adjusted to 1900C.
Gas Mark to °F & °C – Temperature Conversion
All timings given are purely as a guide. Timings may always vary due to personal methods, size of food being
prepared and the temperature of said food stuffs. We always recommend following the cooking guidelines on
your meat products and packets. For additional information, please call Montpellier on 03333 234 474.
Food Type Rack
Position Temperature Cooking Time
Small Cakes 1 to 3 180 - 200°c 15-20 mins
Biscuits 3 180 - 200°c 12-15 mins
Fruit Cakes 3 135-145°c 4hrs - 4hrs 45 mins
Sponge Cakes 2 180 - 200°c 50 mins
Bread 2 or 3 190°c 20-30 mins
Rolls 3 200°c (5) 180°c (15-20) 5 mins/15-20 mins
Beef Rib (Bone in/out) - 4 - 8
pounds (lb) 3 140-150°c
23-30/39-43 mins min per lb - Allow
to rest for 3-5 mins.
Beef - Eye round roast - 2 - 3
pounds (lb) 3 140-150°c 20-22 mins min per lb - Allow to rest
for 3-5 mins.
Beef Tenderloin Roast - 4 - 6
pounds (lb) 3 200°c 35 - 45 mins Total
Roast Lamb 3 140-145°c
20 - 26 mins per lb - Allow to rest for
at least 3 mins
Roast Chicken (Whole Chicken) 4
-8 pounds (lb) 3 170°c
20 - 30 mins per lb - Check the
internal temperature in the
innermost part of the thigh,
innermost part of the wing & thickest
part of the breast.
Roast Turkey 3 170°c
20 - 30 mins per lb - Check the
internal temperature in the
innermost part of the thigh,
innermost part of the wing & thickest
part of the breast.
Roast Pork: Loin, Shoulder, Leg -
Bone In 3 140°c 20-25 mins per lb - Allow to rest for
at least 3 mins
Roast Pork: Loin, Shoulder, Leg -
Boneless 3 140°c 22-33 mins per lb - Allow to rest for
at least 3 mins
Roast Potatoes 2 or 3 180°c 55 mins
Roasted Vegetables 2 or 3 160°c 25 - 35 mins
Casseroles/Bakes 2 or 3 140-150°c 2 - 3 hours
Fish (Whole) 3 180°c 20-30 mins
Pasta Bake 2 or 3 180°c 25-35 mins
We always recommend Pre-Heating. Firstly, set the required temperature and allow the oven to get to
temperature (up-to 15 minutes) before placing food in the cavity.
3.4. Hotplates Usage
The four hotplates are controlled by individual knobs on the ovens control panel.
Each hotplate offers 7 different levels of heat, which are as follows:
0
1
2/3
4/5/6
–Off
–Keeps hotplate warm
–Low cooking temperature
–High cooking temperature
To operate, turn the hotplate control knob clockwise to the required heat level.
When finished, turn the control knob to the off position.
Section 4. Maintenance
Before any maintenance or cleaning work is carried out, DISCONNECT the appliance
from the ELECTRICITY supply and ensure that the appliance is completely cool.
4.1. Cleaning the interior of the oven
Clean spillages from inside the oven as soon as possible after use.
Ensure the oven is turned off before cleaning. You will obtain the best cleaning results
if you clean the oven interior while it is slightly warm. To clean, wipe your oven with a
soft piece of cloth dampened with soapy water. After this wipe the oven with another
soft piece of cloth, dampened with water, once complete, dry the oven interior.
Do not use other abrasive cleaners and/or wire wool etc as this may damage the
interior of your oven.
4.2. Replacing the Oven Bulb
Warning!
Only ever remove/replace the oven bulb when the oven is cold and
turned off!
The oven bulb can be replaced and should be done so with a “like for like” 230V 25
watt bulb having the same fitment.
4.3. What to do if something goes wrong
There is no power to the appliance:
-Check there is not a power cut
-Check there is power to the electric socket/appliance
The oven does not heat:
-Check that the temperature of the oven thermostat has been correctly set.
The oven is not cooking food evenly:
-Adjust the shelf locations, cooking time and heat values accordingly.
MSE50W
MSE50S
MSE50K
Brand
Model
Type of Oven ELECTRIC
Mass kg 38(+/-2)
Energy Efficiency Index - conventional 93,5
Energy Efficiency Index - fan forced -
Energy Class A
Energy consumption (electricity) - conventional kWh/cycle 0,73
Energy consumption (electricity) - fan forced kWh/cycle -
Number of cavities 1
Heat Source ELECTRIC
Volume l 55
This oven complies with EN 60350-1
Energy Saving Tips
Oven
- Cook the meals together, if possible.
- Keep the pre-heating time short.
- Do not elongate cooking time.
- Do not forget to turn-off the oven at the end of cooking.
- Do not open oven door during cooking period.
Brand
Model
Type of Hob Electric
Number of Cooking Zones 4
Heating Technology-1 Hotplate
Size-1 cm Ø14,5
Energy Consumption-1 Wh/kg 193,0
Heating Technology-2 Hotplate
Size-2 cm Ø14,5
Energy Consumption-2 Wh/kg 193,0
Heating Technology-3 Hotplate
Size-3 cm Ø18,0
Energy Consumption-3 Wh/kg 193,0
Heating Technology-4 Hotplate
Size-4 cm Ø18,0
Energy Consumption-4 Wh/kg 194,0
Energy Consumption of Hob Wh/kg 193,3
This hob complies with EN 60350-2
Energy Saving Tips
Hob
- Use cookwares having flat base.
- Use cookwares with proper size .
- Use cookwares with lid.
- Minimize the amount of liquid or fat.
- When liquid starts boiling , reduce the setting.
MSE50W
MSE50S
MSE50K
Here For You
Here For You
After-sales assistance
If you continue to experience problems with your Electric Cooker, please call the Montpellier customer service
helpline on: 01759 487839
Please have all your product details available, including the model number, serial number, date of purchase,
and your retailer’s details before registering a fault.
The service call cannot progress without this information.
Your 2 year Manufacturer’s guarantee
THIS DOES NOT AFFECT YOUR STATUTORY RIGHTS.
Your new Montpellier appliance carries a free guarantee which protects you against the cost of repairs during the
rst 24 months from date of purchase provided that:
Any claim is accompanied by evidence of the model reference, model serial number and proof of purchase, such
as a Sales Receipt, showing that the appliance was purchased within the 24 months prior to the date
of claim.
What is not covered under the Guarantee
•Any appliance not correctly installed and operated in accordance with the manufacturer’s instructions.
•Any appliance that is used for anything other than domestic purposes.
• Any defect caused by accident, misuse, unauthorised modification or inexpert repair.
•Cost of Call-out where a fault cannot be found with the appliance.
• Cost of Call-out for work covering routine maintenance, such as, but not exclusively, cleaning of filters or
defrosting.
•Cost of Call-out for work required to correct the alignment of doors following door reversal procedures
carried out by you.
•Use of the appliance by anyone other than the Householder.
•Use in any commercial environment.
•Consumable items, such as, but not exclusively, fuses in plugs, bulbs and breakable items which require
routine replacement.
•Repair costs incurred that have not been authorised by Montpellier and/or carried out by a non-approved
Montpellier engineer.
•Montpellier Appliances do not accept claims for consequential loss, rusting, corroding, delivery damage
or scratches.
YOUR GUARANTEE IS VALID ONLY IN THE UK.
To register your appliance simply complete the card in your appliance pack and return it with a stamp axed or
alternatively you can register online at www.montpellier-appliances.com/support
SERVICE HELP-LINE
Should your appliance develop a fault, please call the Montpellier customer service helpline on: 01759 487839
Please remember to have all your product details available, including the model number, serial number, date of
purchase and your retailer’s details before registering a fault.
The symbol on the product or on its packaging indicates that this product may not be treated as household waste. Instead it shall
be handed over to the applicable collection point for the recycling of electrical and electronic equipment. By ensuring this product
is disposed of correctly, you will help prevent potential negative consequences for the environment and human health, which could
otherwise be caused by inappropriate waste handling of this product. For more detailed information about recycling of this product,
please contact your local city oce, your household waste disposal service or the shop where you purchased the product.
www.montpellier-appliances.com
Montpellier Domestic Appliances Ltd.
Unit 1, Tewkesbury Retail Park, Northway Lane,
Tewkesbury, Gloucestershire GL20 8JU
52270258

This manual suits for next models

3

Other montpellier Cooker manuals

montpellier MDC500FW User manual

montpellier

montpellier MDC500FW User manual

montpellier MTE50FW User manual

montpellier

montpellier MTE50FW User manual

montpellier MTCE50W User manual

montpellier

montpellier MTCE50W User manual

montpellier MTCC60FW User manual

montpellier

montpellier MTCC60FW User manual

montpellier MR90CEMK User manual

montpellier

montpellier MR90CEMK User manual

montpellier MSCE600W User manual

montpellier

montpellier MSCE600W User manual

montpellier MR100DFK Assembly Instructions

montpellier

montpellier MR100DFK Assembly Instructions

montpellier MMRC60FC User manual

montpellier

montpellier MMRC60FC User manual

montpellier ECO TCC60 User manual

montpellier

montpellier ECO TCC60 User manual

montpellier RMC100DFK User manual

montpellier

montpellier RMC100DFK User manual

montpellier MMRDF60FC User manual

montpellier

montpellier MMRDF60FC User manual

montpellier MTC60FW User manual

montpellier

montpellier MTC60FW User manual

montpellier MDG600LW User manual

montpellier

montpellier MDG600LW User manual

montpellier MMRG60K User manual

montpellier

montpellier MMRG60K User manual

montpellier MR91DFMX/K User manual

montpellier

montpellier MR91DFMX/K User manual

montpellier RMC61CC User manual

montpellier

montpellier RMC61CC User manual

montpellier MTG50LW User guide

montpellier

montpellier MTG50LW User guide

montpellier MTG60LS User manual

montpellier

montpellier MTG60LS User manual

montpellier MR95DFCR User manual

montpellier

montpellier MR95DFCR User manual

montpellier MDG500LW User manual

montpellier

montpellier MDG500LW User manual

montpellier MR90GOX User manual

montpellier

montpellier MR90GOX User manual

montpellier MTE51W User manual

montpellier

montpellier MTE51W User manual
montpellier MR91DFMX User manual

montpellier

montpellier MR91DFMX User manual

montpellier MR90CEMX-K User manual

montpellier

montpellier MR90CEMX-K User manual

Popular Cooker manuals by other brands

Beko DVG 695 Installation & operating instructions and cooking guidance

Beko

Beko DVG 695 Installation & operating instructions and cooking guidance

Tricity Bendix SE558 user manual

Tricity Bendix

Tricity Bendix SE558 user manual

inventum VFG5020GRVS instruction manual

inventum

inventum VFG5020GRVS instruction manual

Zanussi ZG952 Instructions for the use and care

Zanussi

Zanussi ZG952 Instructions for the use and care

AGA EC3-LM owner's manual

AGA

AGA EC3-LM owner's manual

Zanussi Z 8050 WOS Instructions for use and installation instructions

Zanussi

Zanussi Z 8050 WOS Instructions for use and installation instructions

Lofra MXV66MFR Service manual

Lofra

Lofra MXV66MFR Service manual

Stalgast KG-1 Series manual

Stalgast

Stalgast KG-1 Series manual

Indesit IS50D1S operating instructions

Indesit

Indesit IS50D1S operating instructions

Gorenje E52102AW0 manual

Gorenje

Gorenje E52102AW0 manual

AEG COMPETENCE 730 E-M operating instructions

AEG

AEG COMPETENCE 730 E-M operating instructions

Steba IK 70 Instructions for use

Steba

Steba IK 70 Instructions for use

Zanussi ZCV46250BA user manual

Zanussi

Zanussi ZCV46250BA user manual

Bush BGC50DB instruction manual

Bush

Bush BGC50DB instruction manual

Parkinson Cowan SIG 306 Operating and installation instructions

Parkinson Cowan

Parkinson Cowan SIG 306 Operating and installation instructions

Tricity Bendix SG 205WL Operating and installation instructions

Tricity Bendix

Tricity Bendix SG 205WL Operating and installation instructions

ILVE PD 906 Specifications

ILVE

ILVE PD 906 Specifications

Marta MT-4219 user manual

Marta

Marta MT-4219 user manual

manuals.online logo
manuals.online logoBrands
  • About & Mission
  • Contact us
  • Privacy Policy
  • Terms and Conditions

Copyright 2025 Manuals.Online. All Rights Reserved.