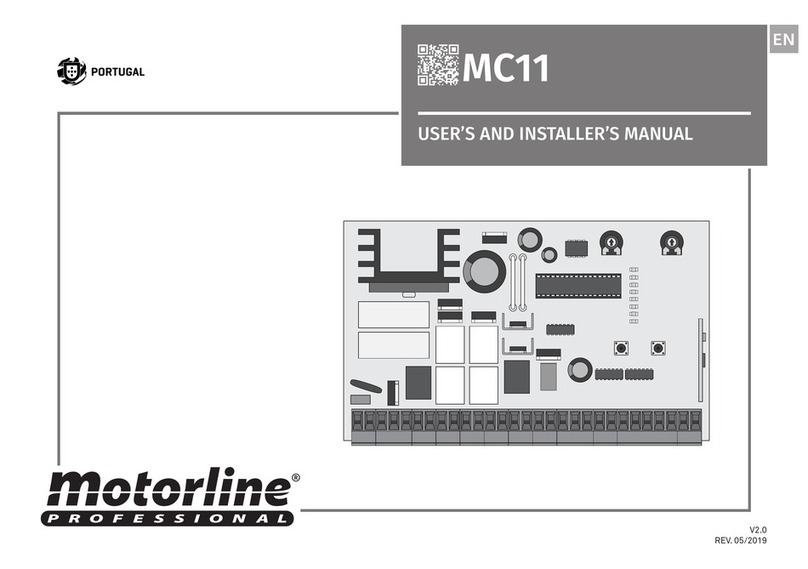
Motorline MC1 User manual

V1.0
REV. 02/2016
MC1
SEL SET
CODE
CODE PED
IN.CMD.AP.
LAMP/CORT
PGM.AUT
T.MOT
T.MOT.PED
T.PAUSA
EN
MC1
USER / INSTALLER MANUAL

1A 1B
ENEN
B
A
A
A
B
A
B
A
A
B
A
B
B
A
A
A
B
B
STANDARDS TO FOLLOW
TECHNICAL CHARACTERISTICS
CONNECTIONS SCHEME
SEL/SET BUTTONS
CONNECTORS DESCRIPTION
MOTOR'S STRENGH AND SPEED
PROGRAMMING PRE-RECOMENDATIONS
FUSES
LEDS
CONDITIONS AND PRE VERIFICATIONS
ESSENTIAL INSTALLATION STEPS
CONTROL BOARD INSTALLATION
PREINSTALLATION WARNINGS
PARAMETERS TO TAKE CARE
EXTENDED MENU 2
INSTRUCTIONS FOR FINAL CONSUMERS
OTHER INFORMATION
INSTRUCTIONS FOR SPECIALIZED INSTALLERS
MAIN MENU
COMPONENTS TEST
EXTENDED MENU 1
PHOTOCELLS AND TRANSMITTER TESTS
. SAFETY INSTRUCTIONS
. THE CONTROL BOARD
. INSTALLATION
. PROGRAMMING
. MAINTENANCE
. TROUBLESHOOTING
ATTENTION:
Importance of the Manual:
• It is important for your safety that these instructions are followed.
• Keep these instructions in a safe place for future reference.
Responsibility:
• The ELECTROCELOS S.A. is not responsible for the improper use of the product, or other
use than that for which it was designed.
• The ELECTROCELOS S.A. is not responsible if safety standards were not taken into
account when installing the equipment, or for any deformation that may occur.
• The ELECTROCELOS S.A. is not responsible for insecurity and malfunction of the product
when used with components that were not sold by the them.
• The ELECTROCELOS S.A. informs that, to guarantee greater compatibility and proper
functioning, install only components MOTORLINE.
Mechanism use:
•This product was designed and manufactured strictly for the use indicated in this
manual.
• This control board is not appropriate for inflammable or explosive environments.
• Any other use not expressly indicated may damage the product and / or can cause
physical and property damages, and will void the warranty.
• Do not make any changes to the automation components and / or their accessories.
• Control board for indoor use with 230V connection.
• Keep remote controls away from children, to prevent the automated system from being
activated involuntarily.
• The customer shall not, under any circumstances, attempt to repair or tune the
automatism. Must call qualified technician only.
To Installer:
The installer must have certified professional knowledge at the level of mechanical
assemblies in doors and gates and control board programmation. He should also be
able to perform electrical connections in compliance with all applicable regulations.
• The installer should inform the customer how to handle the product in an emergency
and provide him the manual.
. SAFETY INSTRUCTIONS. CONTENT
STANDARDS TO FOLLOWINDEX

2
EN
. THE CONTROL BOARD
CONNECTION SCHEME
L LAMP MOTORE
ANTENNA
PUL DS
FAP FCH
AP COM CH
N
230~
CN1
CN2
230~ 24V
SEL SET
VR1
CODE
CODE PED
IN.CMD.AP.
LAMP/CORT
PGM.AUT
T.MOT
T.MOT.PED
T.PAUSA
F1
F2
DV NCCOM
12/24V
DV 12/24V
~~~~
(or)
OPEN
PHASE
NEUTRAL
FLASHLIGHT
MOTOR
CAPACITOR
LIMIT-SWITCHES
KEY SELECTOR / PUSH BUTTON
ANTENNA
PHOTOCELLS
110V
or
230V
CLOSE
1 13 35 52 24 46 67 7 8 9 10
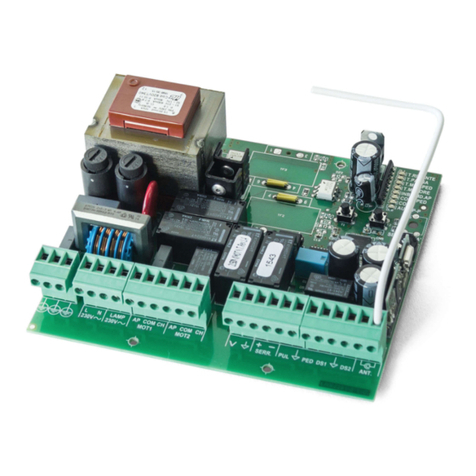
The MC1 is an electronic single phase control board with control system via built-in
radio, developed for the automations control for sliding gates or just 1 motor for swing
gate.
TRANSFORMER
110V OR 230V
ATTENTION:
The control board power supply depends on the value described in the
transformer!

3A 3B
ENEN
. THE CONTROL BOARD . THE CONTROL BOARD
TECHNICAL CHARACTERISTICS
Before proceeding to the control board configuration, note the following points listed
in the table below to better understand the control board's functions:
• PROGRAMMING PRERECOMENDATIONS
CN2CN2 CN1
Flashing / Courtesy light:
03 and 04 •This output allows connection of a 110V / 230V courtesy light or a
flashing light (see page 2). This output does not flash.
CN2
Step by step pushbutton:
03 and 04• This input (NO) allows to control the control board through
pushbuttons. When you receive the first order, it triggers the opening until the
motor's working time ends or until it detects the opening limit switch.
When it receives a second order, it triggers the closing.
If you receive an order during the opening or closing of the gate, the movement
stops and it's only restored (in the opposite direction from what it was before it
stops) after receiving a new order. During opening, if it receives a order to stop
(active T.PAUSA), it will temporize and close the gate.
CN2
TIMER functioning:
03 and 04 • The control board allows a connection of a TIMER. With this
device, you can set an exact time for the gate to perform the opening / closing
automatically. For example: If you program a time between 8 am and 10 am,
this will cause an opening contact at 8 am and will maintain the contact until
10am. At 10am, the gate will perform the closing, after waiting the pause time.
(It is important to enable automatic closure)
CN2
Safety circuits:
05 • This circuit allows photocells connection.
This device operates only in the gate closure, and when triggered, reverses the
direction gate movement.
CN2
Limit-switches:
06 to 08 • The control board needs the connection limit switches in opening
and closing (both NC). The trigger of any one of the limit switches causes the
immediate stop of the gate's movement.The limit switches triggering is signaled
by the LEDs FCH and FAP. When a limit switch is activated,the respective LED
goes off. The LED FAP corresponds to opening limit switch and the LED FCH to
the closing limit switch.
If you do not use limit switches (swing gate) should close with a shunt circuits
6-7 and/or 7-8 of the CN2 connector. It is mandatory the use of limit switches
on sliding gate motors!
• CONNECTOR’S DESCRIPTION
TECHNICAL CHARACTERISTICS
• Power Supply 110V or 230V AC | 50-60Hz | 900W max. (4A)
• Lightbulb or courtesy light output 110V/230V AC 500W max.
100W (max. resistive cargo)
50W (max. induced cargo)
• Motor’s output 110V/230V AC 50/60Hz 750W max.
• Output for powering accessories 24V AC 3W max.
• Working temperature -10°C to +55°C
• Incorporated Radio Receiver 433,92 Mhz
• Code types 12-18 bits or Rolling Code
• Maximum memory capacity 120 codes (CODE or CODE PED)
• Control board dimensions 108x138 mm
CN1
01 • 110V/230V Line Input (PHASE)
02 • 110V/230V Line Input (NEUTRAL)
03 • Lightbulb / Courtesy light’s output (GND/COM)
04 • Lightbulb / Courtesy light’s output (phase)
05 • Motor’s Output (opening)
06 • Motor’s Output (GND/COM)
07 • Motor’s Output (closing)
CN2
01 • Output for powering photocells (24V AC - 6W Max.)
02 • Output for powering photocells (GND/COM)
03 • Step-by-step pushbutton input (NO)
04 • GND/COM output
05 • Security devices input (NC)
06 • Opening limit-switch input (NC)
07 • GND/COM output
08 • Closing limit-switch input (NC)
09 • Antenna input (mass)
10 • Antenna input (hot pole)
ATTENTION
to output:
The output voltage depends on the supply voltage ( and )
4A 4B
FUSE 5x20
FUSE 5x20
SEL SET
CODE
CODE PED
IN.CMD.AP.
LAMP/CORT
PGM.AUT
T.MOT
T.MOT.PED
T.PAUSA
PUL DS FAP FCH
ENEN
. THE CONTROL BOARD . THE CONTROL BOARD
TECHNICAL SPECIFICATIONS
FCH
PUL
This LED signals the connection of accessories which control automatism
functioning like key selectors or push buttons. It lights up when it receives
accessories signals (contact changes from NO to NC). If you need to connect
several components in this entry, they must be connected in parallel mode
(direct connection on connector).
DS
The LED signals the connection of safety devices such as photocells or safety
edge (required to MR12 connection). This LED is lit when a device is connected
at the DS input (NC). Whenever the contact safety device is interrupted (NO |
eg object between photocells), the LED turns off.
If you need to connect multiple components on this input, they must be
connected in series mode.
FAP LED signals the connection of the opening limit switch. This LED stays lit as
soon as the opening limit switch is connected into the terminal 6 of CN2 (NC).
Whenever the opening limit switch is activated (NO), the LED will turn off.
FCH LED signals the connection of the closing limit switch. This LED stays lit as
soon as the closing limit switch is connected into the terminal 6 of CN2 (NC).
Whenever the closing limit switch is activated (NO), the LED will turn off.
• LEDS
There are LEDs in the control board to inform the installer about connection status of
the various components. Before the central configuration, note the behavior of these
LEDs, which must match those described in the table below.
• SEL/SET BUTTONS
• MOTOR'S FORCE AND SPEED
TECHNICAL SPECIFICATIONS
SEL key:
To select the function to change. This selection is identified by the
intermittency of LED corresponding to the selected function at that time.
Pressing the SEL key repeatedly will cycle through the various functions
to be programmed. The selection remains active for 10 seconds, and
after that time the control board returns to the original state (no active
selection).
SET key:
To program the selected function with the SEL key.
SEL
SET The SET key can be replaced by transmitter key, as long it finds itself
programmed.
VR1 potentiometer:
The control board has a "VR1" potentiometer to adjust the force and
speed of the motors, controlled by the microprocessor. Adjustment can be
made between 50% and 100% force / speed.
In each starting movement, the control board applies the maximum force
for 2 seconds, even when a force adjustment is made to a value other
than the maximum.
VR1
Whenyouadjustthe VR1 potentiometer,it is necessarytoredotheprogramming
course, because the maneuver and slowdown times may vary.
• FUSES
There are two fuses that protect the center against electrical overloads. These protection
devices are an essential part of the power distribution system as they prevent damage
to other circuit elements.
F1 T6.3AL250V - 3A 250V
F2 50mAL250V - 50mA 250V

5A 5B
ENEN
. INSTALLATION . INSTALLATION
CONTROL BOARD INSTALLATION
• CONDITIONS AND PRE VERIFICATIONS
• ESSENTIAL INSTALLATION STEPS
• Make sure that the motor is properly installed at the gate.
• Check if the ambient temperature values are acceptable for the functioning of this
control board.
• Perform the entire installation with the power off.
• Consult the manufacturer's instructions from all the components to install.
• Always make a ground connection directly to the motor's metal structure.
• Place the control board in the appropriate fixing location and tighten the screws to
secure it.
• Make the connections of all the accessories and components you want to use, according
to the wiring diagram (p. 2).
• Connect the control board to a 110V or 230V power supply according to the value
shown on the transformer (terminals 1 and 2 - CN1).
• Check that the limit switches are working properly. (P. 6A)
• Also check other devices like selectors or photocells. (P. 6B)
• Start by programming a transmitter (p. 7A).
• Now do an course's automatic programming (p.8B).
• If necessary, you can now adjust the strength / speed of the automatism in the VR1
potentiometer (p.4A). Whenever any change is made in this potentiometer, you must
redo the course's automatic programming.
• Put silicone or another type of sealing in the cable entries of the control board box in
order to prevent the entrance of insects or other elements that may damage the control
board.
INSTALLATION ESSENTIAL GUIDE
At this time, the control board is programmed with all the essential
functions for a proper functioning of the automation. If you want to enable
other control board functions, please check how to do so, on the following
pages.

6A 6B
ENEN
After installing the control board and connecting the wires, you must ensure that all
connected components are working properly. To do this, follow these steps:
First, you must define whether the operator is installed on the right or left of the gate.
This information will indicate which side is the opening and closing.
The photocells are a safety device that inform the control board that an object is
obstructing the gate's route. They send a signal to prevent the gate from damaging the
object.
The photocells are connected to the control board DS input (see wire connection
page). This input has an assigned LED that informs about the connection status of the
Components as key selector or push buttons are used to control the functioning of
the gate. These components are connected to the control board PUL input (see wiring
diagram on page 2). This input has an LED assigned that informs the connection status
of the connected components. This LED remains off when a component is connected
(NO mode).
To test the connection of photocells in the control
board, just interrupt the signal between the two
photocells putting his hand in front of one of them.
A sound similar to a "click" indicates that the signal
was interrupted and the LED DS should be off while
the photocells are interrupted. If it does not operate
on this way, there is a problem in the connection
between the photocells and the control board.
To test the key selector connection in the control
board, simply turn the key to one of the directions.
At this time, the PUL LED lights up (NC), and turns off
when the key go back to the original position (NO). If
it does not operate on this way, there is a problem in
the connection between the device and the control
board.
This test will be exemplified with the automation installed on the right.
Lean the automatism limit switch spring to the right until you hear a "click". The FAP LED
must turn off! Now Lean the automatism limit switch spring to the left until you hear a
"click". The FCH LED must turn off!
If the LEDs turn off oppositely, reverse the wires to the terminals 6 and 8 of CN2.
• LIMIT SWITCHES TEST
• PHOTOCELLS TEST
• KEY SELECTOR TEST
LEFT
INSTALLATION RIGHT
INSTALLATION
. PROGRAMMING . PROGRAMMING
PREINSTALLATION WARNINGS PREINSTALLATION WARNINGS
The limit switches are an important safety system of the motor. It is extremely
important that they are properly connected in the control board, otherwise it
may cause serious damage or injury.
OpenClose

7A 7B
CODE
SET
SEL
CODE PED
LAMP/CORT
PGM.AUT
T.MOT
T.MOT.PED
T.PAUSA
IN.CMD.AP.
CODE
SET
SEL
CODE PED
LAMP/CORT
PGM.AUT
T.MOT
T.MOT.PED
T.PAUSA
IN.CMD.AP.
CODE
SET
SEL
CODE PED
LAMP/CORT
PGM.AUT
T.MOT
T.MOT.PED
T.PAUSA
IN.CMD.AP.
SET
SEL
T.MOT
T.MOT.PED
T.PAUSA
CODE
CODE PED
LAMP/CORT
PGM.AUT
IN.CMD.AP.
SET
SEL
T.MOT
T.MOT.PED
T.PAUSA
CODE
CODE PED
LAMP/CORT
PGM.AUT
IN.CMD.AP.
SET
SEL
T.MOT
T.MOT.PED
T.PAUSA
CODE
CODE PED
LAMP/CORT
PGM.AUT
IN.CMD.AP.
ENEN
The control unit is supplied by the manufacturer with the ability to select some main
functions directly.
It is not possible to erase just one transmitter.
Attention: The "pedestrian passage" option occupies 1 slot of 120 available in the
control board's memory. In other words, if you program, in the same transmitter,
the CODE and CODE PED, you can still program 118 transmitters.
. PROGRAMMING . PROGRAMMING
MAIN MENU MAIN MENU
MAIN MENU
LED LED OFF LED ON
• CODE No programmed code Programmed (s) code (s)
• CODE PED. No programmed code Programmed (s) code (s)
• IN.CMD.AP CMD Opening Inhibition OFF CMD Opening Inhibition ON
• LAMP/CORT Flashing light mode Courtesy Light Mode
• PGM. AUT. Automatic Programming OFF Automatic Programming ON
• T. MOT. Working Time = 30 sec Prog. time automatically
• T. MOT. PED Pedestrian Working Time = 10 sec Prog. time automatically
• T. PAUSA Automatic Closing OFF Automatic Closing ON
This function allows you to program new transmitters to control the automatism.
The control board only accepts Dip-Switch code transmitters or Rolling Code MOTORLINE,
and has a maximum capacity of 120 codes.
When trying to program the 121st code, all the programming LEDs blink a few times
simultaneously signaling that the memory is full.
The control board allows you to program the gate to open just enough for the passage of
people without making a full opening. The CODE PED function allows to program a code
to command only this type of opening.
It is advised to do the programming of T.MOT.PED function to set the distance that the
door should open, otherwise the control board will open a pre-set distance.
The control board is supplied by the manufacturer with this function disabled.
01. Press the SEL key twice until the LED CODE PED begins to flash.
02. Press the SET key for 10 seconds and all the codes from this function are deleted.
Programming new transmitters:
Delete all configured transmitters:
Delete all configured transmitters for pedestrian opening:
Programming transmitters for pedestrian mode:
• CODE | PROGRAMMING TRANSMITTERS
• CODE PED | PEDESTRIAN FUNCTIONING
01 • Press the SEL key
once, and the CODE
LED begins to flash.
01 • Press SEL key
twice, and the CODE
PED LED begins to
flash.
01 • Press the SEL key
once, and the CODE
LED begins to flash.
02 • Press once the
transmitter's key you
want to program, for
1 sec.
02 • Press once the
transmitter's key you
want to program, for
1 sec.
02 • Press the SEL key
for 10 seconds! The
CODE LED turns off
and all transmitters
have been deleted.
03 • The CODE LED
remains permanently
lit, signaling the
program's success.
03 • The CODE PED LED
remains permanently
lit, signaling the
program's success.
You can not delete only one specific transmitter!

8A 8B
CODE
SET
SEL
CODE PED
LAMP/CORT
PGM.AUT
T.MOT
T.MOT.PED
T.PAUSA
IN.CMD.AP.
CODE
SET
SEL
CODE PED
LAMP/CORT
PGM.AUT
T.MOT
T.MOT.PED
T.PAUSA
IN.CMD.AP.
SET
SEL
T.MOT
T.MOT.PED
T.PAUSA
CODE
CODE PED
LAMP/CORT
PGM.AUT
IN.CMD.AP.
SET
SEL
T.MOT
T.MOT.PED
T.PAUSA
CODE
CODE PED
LAMP/CORT
PGM.AUT
IN.CMD.AP.
SET
SEL
T.MOT
T.MOT.PED
T.PAUSA
CODE
CODE PED
LAMP/CORT
PGM.AUT
IN.CMD.AP.
SET
SEL
T.MOT
T.MOT.PED
T.PAUSA
CODE
CODE PED
LAMP/CORT
PGM.AUT
IN.CMD.AP.
ENEN
The control board automatically sets a slowdown in opening and closing equal to
15% of the total course.
Aperture
85%
Normal speed 15%
slowdown
15%
slowdown
Closure
. PROGRAMMING . PROGRAMMING
MAIN MENU MAIN MENU
• INB. CMD. AP | TRANSMITTER INHIBITION DURING THE OPENING AND PAUSE TIME • PGM. AUT. | COURSE AUTOMATIC PROGRAMMING
• LAMP/CORT | FLASHING LIGHT / COURTESY LIGHT SELECTION
With the function activated, the control board rejects all the transmitters and devices
signals during the opening maneuvers and automatic pause time.
The control board is supplied by the manufacturer with this function deactivated.
With the limit switches already set, the control board allows automatic programming of
the working time (recommended).
The control board has a 110V / 230V AC output for connection of a flashing light or
courtesy light at terminals 3 and 4 of CN1. This output does not flash. Observe the three
possible behaviors:
Enable OPTION 1:
With the LED lit, press SEL 4 or 5 times, and when the LED flashes (normally or quickly)
press the SET button and the LED turns off.
Enable OPTION 2:
With the LED LAMP / CORT off, press 4 times the SEL key until this LED blinks normally.
Press the SET button and the LED lights permanently.
Enable OPTION 3:
With the LED LAMP / CORT off, press 5 times the SEL key until this LED flashes quickly!
Press the SET button and the LED lights permanently.
01 • Press the SEL
button the times
necessary until the
INB CMD AP LED
starts to flash. 01 • Unlock the motor, put the gate halfway and lock the motor.
02 • Press the SEL
button the times
necessary until the
PGM AUT LED starts
to flash.
02 • Press SET button
to enable / disable
the function.
03 • Press and hold
SET and the door
must begin to close!
Activate (LED ON) / deactivate (LED OFF) function: Enable automatic programming:
Automatic slowdown:
If the gate start to open, release the SET button, reverse the wires of links 5 and
7 of CN1, and start this program from the beginning.
04 • Allow the gate
to close, open and
close again without
releasing the SET
button!
05 • When closing the
2nd time, the PGM
AUTO LED will be lit
and the programming
has been successfully
completed.
1
2
OPTIONS
BEHAVIOR
(factory)
Opening Pause Time Closing 3min. After Closing
3min. After Closing
3min. After Closing
Opening Pause Time Closing
3Opening Pause Time Closing

9A 9B
CODE
SET
SEL
CODE PED
LAMP/CORT
PGM.AUT
T.MOT
T.MOT.PED
T.PAUSA
IN.CMD.AP.
CODE
SET
SEL
CODE PED
LAMP/CORT
PGM.AUT
T.MOT
T.MOT.PED
T.PAUSA
IN.CMD.AP.
SET
SEL
T.MOT
T.MOT.PED
T.PAUSA
CODE
CODE PED
LAMP/CORT
PGM.AUT
IN.CMD.AP.
SET
SEL
T.MOT
T.MOT.PED
T.PAUSA
CODE
CODE PED
LAMP/CORT
PGM.AUT
IN.CMD.AP.
SET
SEL
T.MOT
T.MOT.PED
T.PAUSA
CODE
CODE PED
LAMP/CORT
PGM.AUT
IN.CMD.AP.
SET
SEL
T.MOT
T.MOT.PED
T.PAUSA
CODE
CODE PED
LAMP/CORT
PGM.AUT
IN.CMD.AP.
SET
SEL
T.MOT
T.MOT.PED
T.PAUSA
CODE
CODE PED
LAMP/CORT
PGM.AUT
IN.CMD.AP.
SET
SEL
T.MOT
T.MOT.PED
T.PAUSA
CODE
CODE PED
LAMP/CORT
PGM.AUT
IN.CMD.AP.
SET
SEL
T.MOT
T.MOT.PED
T.PAUSA
CODE
CODE PED
LAMP/CORT
PGM.AUT
IN.CMD.AP.
SET
SEL
T.MOT
T.MOT.PED
T.PAUSA
CODE
CODE PED
LAMP/CORT
PGM.AUT
IN.CMD.AP.
SET
SEL
T.MOT
T.MOT.PED
T.PAUSA
CODE
CODE PED
LAMP/CORT
PGM.AUT
IN.CMD.AP.
SET
SEL
T.MOT
T.MOT.PED
T.PAUSA
CODE
CODE PED
LAMP/CORT
PGM.AUT
IN.CMD.AP.
ENEN
. PROGRAMMING . PROGRAMMING
MAIN MENU MAIN MENU
• T.MOT AND SLOWDOWN | PROGRAMMING MOTOR TIME AND RELAXATION MANUALLY • T. MOT. PED | PROGRAMMING PEDESTRIAN WORKING TIME
Unlike PGM.AUT, this function allows the programming of motor's time and slowdown
manually. Use it whenever PGM.AUT does not meet your needs. If you set the course
using this function after doing an automatic programming, the control board will forget
the automatic programming and assumes the programmed course manually.
This function allows you to manually program the distance that the gate opens to
pedestrian crossing. The control board is supplied by the manufacturer with a pedestrian
working time set at 10 seconds without slowdown.
The LED. T. MOT. will flash quickly indicating that the control board started programming
the closing maneuver and the automation starts to close.
The LED T.MOT.PED. will flash quickly indicating that the control board started
programming the pedestrian closing maneuver and the automation starts to close.
To make the programming without slowdown, leave the gate reach the opening limit
switch and press TWICE (quickly) the SET button.
The LED T. MOT. will flash quickly and the motor starts the closing maneuver.
Whenthe gatereachestheclosinglimitswitchagain, clickSET twicetofinish programming.
To make a program without slowdown, press TWICE the SET button when you want to set
the opening's end.
T. MOT.PED LED will flash quickly and the motor starts the closing maneuver.
Whenthe gatereachestheclosinglimitswitch,click SETtwiceagain tofinish programming.
Instead of using the central's SET button during programming, you can use the key
of a remote control that is already programmed.
Instead of using the control board's SET button during programming, you can use
the CODE key of an already programmed transmitter.
01 • Press SEL button
the times necessary
until the T.MOT. LED
starts to flash.
01 • Press SEL button
the times necessary
until the T.MOT. LED
starts to flash.
03 • Press SET button
for 1 second, so that
the motor starts the
slowdown.
05 • Press SET button
for 1 second, so that
the motor starts the
slowdown during
closing.
05 • Press SET button
for 1 second, so that
the motor starts the
slowdown during
closing.
03 • Press SET button
for 1 second, so that
the motor starts the
slowdown.
02 • Press SET button
for 1 second, so that
the motor starts the
opening.
02 • Press SET button
for 1 second, so that
the motor starts the
opening.
04 • Press again SET
when you reach the
opening limit switch.
06 • Press again SET
when you reach the
closing limit switch.
06 • Press again SET
when you reach the
closing limit switch.
04 • Press again SET
when you want to
set the end of the
pedestrian opening.
Programming motor's working time and slowdown (closed gate):
Programming pedestrian working time with slowdown (closed gate):
Programming motor's working time without slowdown (closed gate):
Programming pedestrian motor's working time without slowdown (closed gate):
If the motor starts to close, invert the terminal cables 5 and 7 of the CN1 connector.

10A 10B
CODE
SET
SEL
CODE PED
LAMP/CORT
PGM.AUT
T.MOT
T.MOT.PED
T.PAUSA
IN.CMD.AP.
CODE
SET
SEL
CODE PED
LAMP/CORT
PGM.AUT
T.MOT
T.MOT.PED
T.PAUSA
IN.CMD.AP.
SET
SEL
T.MOT
T.MOT.PED
T.PAUSA
CODE
CODE PED
LAMP/CORT
PGM.AUT
IN.CMD.AP.
SET
SEL
T.MOT
T.MOT.PED
T.PAUSA
CODE
CODE PED
LAMP/CORT
PGM.AUT
IN.CMD.AP.
SET
SEL
T.MOT
T.MOT.PED
T.PAUSA
CODE
CODE PED
LAMP/CORT
PGM.AUT
IN.CMD.AP.
SET
SEL
T.MOT
T.MOT.PED
T.PAUSA
CODE
CODE PED
LAMP/CORT
PGM.AUT
IN.CMD.AP.
SET
SEL
T.MOT
T.MOT.PED
T.PAUSA
CODE
CODE PED
LAMP/CORT
PGM.AUT
IN.CMD.AP.
SET
SEL
T.MOT
T.MOT.PED
T.PAUSA
CODE
CODE PED
LAMP/CORT
PGM.AUT
IN.CMD.AP.
ENEN
01 • Press SEL button
the times necessary
until the T.PAUSA LED
starts to flash.
02 • Press SET button.
The T.PAUSA LED
starts to flash quickly.
03 • Wait the desired
time for pause time.
(Eg 30 seconds)
04 • Press SET button.
T. PAUSA LED stays lit
and the pause time
is set.
. PROGRAMMING . PROGRAMMING
MAIN MENU EXTENDED MENU
• T. PAUSA | PROGRAMMING PAUSE TIME FOR AUTOMATIC CLOSING MAX MIN
• EXTENDED MENU ACCESS
This function allows you to set the time that the gate remains open after the end of the
opening maneuver. After this time, the control board automatically initiates the closing.
The control board is supplied by the manufacturer without automatic closure.
To access the Extended Menu 1 functions, follow these instructions:
The control board is supplied with extra functions that can be activated through the
extensed menu 1.
Activate or change the pause time for automatic closure:
Disable the automatic closing:
01 • Press SEL button
the times necessary
until the T.PAUSA LED
starts to flash. 01 • Continuously
press the SET button
for 5 seconds.
02 • Double-press
the SET button within
2 sec! The T.PAUSA
LED turns off and
the function stays
disabled.
02 • The T.MOT.
PED and T.PAUSA
LEDs start to flash
alternately.
EXTENDED MENU 1
LED LED OFF LED ON
• CODE Step by Step Mode Automatic mode
• CODE PED. Electric brake = OFF Electric brake = ON
• IN.CMD.AP Present Man = OFF Pres. APCH or CH = ON
• LAMP/CORT Slowdown = OFF Slowdown = ON
• PGM. AUT. Follow Me = OFF Follow Me = ON
• T. MOT. PGM at distance = OFF PGM at distance = ON
• T. MOT. PED Alternated flashing signal with LED T. PAUSA
• T. PAUSA Alternated flashing signal with LED T. MOT. PED
After entering the Extended Menu 1, you have 30 seconds to select any function
of this menu (using the SEL and SET keys). After 30 seconds without pressing any
button, the control board returns to the main menu.

11A 11B
CODE
SET
SEL
CODE PED
LAMP/CORT
PGM.AUT
T.MOT
T.MOT.PED
T.PAUSA
IN.CMD.AP.
CODE
SET
SEL
CODE PED
LAMP/CORT
PGM.AUT
T.MOT
T.MOT.PED
T.PAUSA
IN.CMD.AP.
CODE
SET
SEL
CODE PED
LAMP/CORT
PGM.AUT
T.MOT
T.MOT.PED
T.PAUSA
IN.CMD.AP.
CODE
SET
SEL
CODE PED
LAMP/CORT
PGM.AUT
T.MOT
T.MOT.PED
T.PAUSA
IN.CMD.AP.
SET
SEL
T.MOT
T.MOT.PED
T.PAUSA
CODE
CODE PED
LAMP/CORT
PGM.AUT
IN.CMD.AP.
SET
SEL
T.MOT
T.MOT.PED
T.PAUSA
CODE
CODE PED
LAMP/CORT
PGM.AUT
IN.CMD.AP.
SET
SEL
T.MOT
T.MOT.PED
T.PAUSA
CODE
CODE PED
LAMP/CORT
PGM.AUT
IN.CMD.AP.
SET
SEL
T.MOT
T.MOT.PED
T.PAUSA
CODE
CODE PED
LAMP/CORT
PGM.AUT
IN.CMD.AP.
ENEN
02 • Press the SEL key
once, and the CODE
LED begins to flash.
03 • Press the SET
button once to
change the operating
mode.
04 •
The CODE LED will light on / off permanently, indicating that the change of operation
mode was successful.
02 • Press SEL button
the times necessary
until the CODE PED
LED starts to flash.
03 • Press the SET
button once to
change the operating
mode.
04 • The
CODE PED LED on means that the function is active and the LED off means that the
function is disabled.
02 • Press SEL button
the times necessary
until the INB CMD AP
LED starts to flash.
03 • Press once SET
button to activate
/ deactivate the
function.
04 • The
INB CMD AP LED on means that the function is active and the LED off means that the
function is disabled.
02 • Press SEL button
the times necessary
until the LAMP/CORT
LED starts to flash.
03 • Press once SET
button to activate
/ deactivate the
function.
04 •
The LAMP/CORT LED will light on/off and the setup is complete.
. PROGRAMMING . PROGRAMMING
EXTENDED MENU EXTENDED MENU
• CODE | STEP BY STEP / AUTOMATIC FUNCTIONING
• CODE PED. | ELECTRIC BRAKE
• INB. CMD. AP | PRESENT MAN FUNCTIONING
• LAMP/CORT | SLOWDOWN
Automatic Mode Functioning (LED CODE ON):
• The first impulse transmitter/pushbutton triggers the opening of the gate.
• The second impulse (after gate fully opens) triggers the closing of the gate.
• If you press the transmitter key during opening or closing maneuver, the gate inverts
the direction of the operation until it reaches the limit switch.
With this function active, when the automatism finishes a maneuver (reaching the
limit switch), the control board briefly reverses the motor's power supply to stop it
immediately (eg. gates with inclination).
The control board is supplied by the manufacturer with this function disabled.
When this function is active, the control board only opens / closes the automatism while
the key of the transmitter / push button is pressed.
If it is released, the automatism stops immediately.
The control board is supplied by the manufacturer with this function disabled.
This function enables / disables the existence of slowdown in opening and closing.
With this function disabled, it is not possible to set a slowdown during the motor's
working time programation, in both manual and automatic programming.
When you activate this function, you must make a new working time program (manual
or automatic), so that the changes become operational.
The control board is supplied by the manufacturer with the slowdown active.
Enable (LED ON) / Disable (LED OFF) function:
Step by Step Mode Functioning (LED CODE ON):
For each order you send from a remote control / push button, the control board will
have a behave like: open-stop-close-stop-open - (...). The control board is supplied by
the manufacturer with the step by step active.
01 • Enter the Extended Menu 1 (see "EXTENDED MENU 1 ACCESS" on page 10B).
To change the operating mode, proceed as follows:

12A 12B
CODE
SET
SEL
CODE PED
LAMP/CORT
PGM.AUT
T.MOT
T.MOT.PED
T.PAUSA
IN.CMD.AP.
CODE
SET
SEL
CODE PED
LAMP/CORT
PGM.AUT
T.MOT
T.MOT.PED
T.PAUSA
IN.CMD.AP.
CODE
SET
SEL
CODE PED
LAMP/CORT
PGM.AUT
T.MOT
T.MOT.PED
T.PAUSA
IN.CMD.AP.
SET
SEL
T.MOT
T.MOT.PED
T.PAUSA
CODE
CODE PED
LAMP/CORT
PGM.AUT
IN.CMD.AP.
SET
SEL
T.MOT
T.MOT.PED
T.PAUSA
CODE
CODE PED
LAMP/CORT
PGM.AUT
IN.CMD.AP.
SET
SEL
T.MOT
T.MOT.PED
T.PAUSA
CODE
CODE PED
LAMP/CORT
PGM.AUT
IN.CMD.AP.
SET
SEL
T.MOT
T.MOT.PED
T.PAUSA
CODE
CODE PED
LAMP/CORT
PGM.AUT
IN.CMD.AP.
SET
SEL
T.MOT
T.MOT.PED
T.PAUSA
CODE
CODE PED
LAMP/CORT
PGM.AUT
IN.CMD.AP.
SET
SEL
T.MOT
T.MOT.PED
T.PAUSA
CODE
CODE PED
LAMP/CORT
PGM.AUT
IN.CMD.AP.
SET
SEL
T.MOT
T.MOT.PED
T.PAUSA
CODE
CODE PED
LAMP/CORT
PGM.AUT
IN.CMD.AP.
ENEN
. PROGRAMMING . PROGRAMMING
EXTENDED MENU EXTENDED MENU
• PGM. AUT. | FOLLOW ME
• T. MOT | PROGRAMMING TRANSMITTERS AT DISTANCE
With a programmed pause time, you can activate the "Follow Me" option. With this
option enabled, whenever the photocells detect the passage of a user / object, the
control board triggers the closing maneuver after 5 seconds.
The control board is supplied by the manufacturer with the function disabled.
This function allows you to program new transmitters without access directly to the
control board, by using another already programmed transmitter to open the memory.
The control board is supplied by the manufacturer with the function disabled.
01 • Enter the Extended Menu 1 (see "EXTENDED MENU 1 ACCESS" on page 10B).
Enable (LED ON) / Disable (LED OFF) function:
Program the idle force/speed through the Extended Menu 2:
Enable (LED ON) / Disable (LED OFF) function:
Programming transmitter at distance:
01 • Press the button of an already programmed transmitter for 11seg, controlling with a
clock, to open the control board's memory (when the memory opens, you hear a signal
through the flashing light).
02 • Press the new transmitter key for 1 second, to program it.
NOTE: If a new key is not pressed, after 10 seconds, the control board closes the memory.
TheExtendedMenu 2allowsyouto programthemotor'sforce/speedduringtheslowdown
phase (idling). The control board has 6 different levels of force/speed, represented by
the combination of lit LEDs, as indicated in the table below.
The control board is supplied by the manufacturer with the power set at level 3.
01 • Continuously
press the SET button
for 5 seconds to
activate the Extended
Menu 1.
03 • Press again the
SET key for 5 seconds.
05 • Now press
the SEL button
repeatedly to select
the desired level of
force.
02 • The LEDs T.MOT.
PED and T.PAUSA will
flash simultaneously.
04 • The T. MOT.
PED and T.PAUSA
LEDs stop flashing
alternately and
start flashing
simultaneously.
06 • Press the SET key
once, to selected that
option.
02 • Press SEL button
the times necessary
until the PGM. AUT.
LED starts to flash.
03 • Press once SET
button to activate
/ deactivate the
function.
04 • The
PGM. AUT. LED on means that the function is active and the LED off means that the
function is disabled.
02 • Press SEL button
the times necessary
until the T.MOT. LED
starts to flash.
03 • Press once SET
button to activate
/ deactivate the
function.
04 • The
T.MOT. LED on means that the function is active and the LED off means that the
function is disabled.
After entering the Extended Menu 2 , you have 30 seconds to select any function
of this menu (using the SEL and SET keys). After 30 seconds without pressing any
button, the control board returns to the main menu.
1
CODE
CODE PED
INB.CMD.AP
L.CORT
PGM.AUTO
T.MOT
Force Level
2345 6
LEDS

13A 13B
SET
SEL
T.MOT
T.MOT.PED
T.PAUSA
CODE
CODE PED
LAMP/CORT
PGM.AUT
IN.CMD.AP.
SET
SEL
T.MOT
T.MOT.PED
T.PAUSA
CODE
CODE PED
LAMP/CORT
PGM.AUT
IN.CMD.AP.
ENEN
. PROGRAMMING . MAINTENANCE
OTHER INFORMATION PARAMETERS TO TAKE CARE
• CONTROL BOARD'S RESET
• VERIFICATIONS
• ELIMINATION
• LEDS MANAGEMENT
If you need to restore the control unit to the factory settings, follow these steps:
Frequently check the installation for signs of lack of tightness or lubrication, imbalance
during functioning and traces of wear or deterioration.
Also check the condition of the installation and external components (switch, keyboard
or push buttons) and safety devices (photocells, safety edge) functioning. These are
exposed to external agents that may shorten their lifetime.
If the device requires repair, bring/send it to our service center.
At the end of its working life, the device must be removed from the place by a qualified
installer who must take into account all precautions and safety measures during the
procedure.
Never place the control board in household waste or uncontrolled landfills as it may
contaminate the environment. The control board must be placed in appropriate
recycling containers so that all components are separated according to their materials.
After 3 minutes of inactivity in the programming process, the control board automatically
turns off all the LEDs in order to save energy.
A simple click on a button (SEL, SET or programmed transmitter) will turn on the LEDs of
the programmed functions.
Before performing any maintenance, disconnect the control board from the
electric current.
01 • Press the SEL
and SET buttons
simultaneously for 10
seconds.
02 • All the LEDs
will light up
simultaneously and
then off, completing
the operation.

14A 14B
ENEN
To detect if the malfunction is on the control board or on the motor is, sometimes,
necessary to perform tests with connection directly to a V / V power supply.
For this, it is necessary to interpose a capacitor on the connection in order to the
automatism to work (check the type of capacitor to be used in the product manual).
The diagram below, shows how to make that connection and how to merge the different
components wires.
01 • Connect the power wires to the terminal, as shown below.
02 • Connect the automatism wires in the terminal, interposing a capacitor in the
opening and closing wires.
03 • Once these connections are completed, connect to a 110V / 230V power outlet,
depending on the motor / control board in test.
NOTES:
> To perform the tests, there is no need to remove the automatism from the place it is instal-
led, because in this way, it is possible to understand if the automatism can function properly
connected directly to the current.
You should use a new capacitor during this test to ensure that the problem does not lie on
it.
. TROUBLESHOOTING. TROUBLESHOOTING
COMPONENTS TEST PHOTOCELLS AND TRANSMITTERS TEST
The control board is prepared for the connection of safety devices in accordance with section
5.1.1.6 of EN 12453.
In every maneuver is performed a test for the Security Device and the lock.
In case of a function/connection failure the motor doesn’t start and every LED’s remain in
a intermittent mode, indicating the error. When the photocells operation is corrected, the
control board returns to it’s normal functioning. This action by the control board allows to
recognize failures in accordance with is mentioned in category 2 of EN 954-1.
In the position corresponding to each transmitter input in low voltage, the control board has
a LED to identify the condition of it. The LED ON indicates that the input is closed, while the
LED OFF indicates that the input is open.
• PHOTOCELLS TEST
• TRANSMITTER'S TEST
All the tests should be performed by qualified personnel due to the high risk
of accidents that may cause injury or death!
AUTOMATISM
8μF
Capacitor
1
2
3
2
COM 1
COM 2
COM
Ground Wire
Phase 2
Phase 1
Open
Close
Motor
Power Supply 1
Power Supply 2

15
EN
INSTRUCTIONS FOR SPECIALIZED INSTALLERS
06. TROUBLESHOOTING
INSTRUCTIONS FOR FINAL CONSUMERS
Anomaly Procedure Behavior Procedure II Discovering the origin of the problem
• Motor
doesn't work
• Make sure you have
110/230V power
supply connected to
automation and if it is
working properly.
• Still not working • Consult a qualified
MOTORLINE technician.
• Motor
doesn’t move
but makes
noise
• Unlock motor and
move the gate by hand
to check for mechani-
cal problems on the
movement.
• Encountered
problems?
• Consult an experienced
gate expert.
1 • Check all motion axis and associated motion systems related with the motor and the gate to find out what is the problem.
• The gate moves
easily?
• Consult a qualified
MOTORLINE technician.
• Motor opens
but doesn’t
close
• Unlock motor and
move the gate by hand
to closed position.
Lock motor again and
turn off power supply
for 5 seconds. Recon-
nect it and send order
to open gate using
transmitter.
• Gate opened but
didn’t close again.
1 • Check if there is any
obstacle in front of the
photocells;
2 • Check if any of the control
devices (key selector, push
button, video intercom, etc.)
of the gate are jammed and
sending permanent signal to
control unit;
3 • Consult a qualified
MOTORLINE technician
• Gate doesn’t
make
complete
route
• Unlock motor and
move gate by hand to
check for mechanical
problems on the gate.
• Encountered
problems?
• Consult an experienced
gate expert.
1 • Check all motion axis and associated motion systems related with the gate to find out what is the problem.
• The gate moves
easily?
• Consult a qualified
MOTORLINE technician.
1 • Open control board and check
if it hás 110/230V power supply;
2 • Check the control board input
fuses;
3 • Disconnect the motor from
control board and test them by
connecting directly to power
supply in order to find out if they
have problems (see page 14.A).
4 • If the motor works, the
problem is on the control board.
Pull it out and send it to our
MOTORLINE technical services
for diagnosis;
5 • If the motor doesn’t work,
remove them from installation
site and send to our MOTORLINE
technical services for diagnosis.
1 • Check capacitors, testing
operator with new capacitors;
2 • If capacitors are not the
problem, disconnect motors from
control board and test them by
connecting directly to power
supply in order to find out if they
have problems (see page 14.A);
3 • If the motors work, the
problem is from control board.
Pull it out and send it to our
technical services for diagnosis;
4 • If the motors doesn’t work,
remove them from installation
site and send to our MOTORLINE
technical services for diagnosis.
1 • Check capacitors, testing with
new capacitors;
2 • If capacitors are not the
problem, disconnect motor
from control board and test it
by connecting directly to power
supply in order to find out if it is
broken;
3 • If the motor doesn’t work,
remove it from installation site
and send to our MOTORLINE
technical services for diagnosis.
4 • If motor work well and move
gate at full force during the entire
course, the problem is from
controller. Set force using
trimmer on the board. Make a
new working time programming ,
giving suffient time for opening
and closing with appropriate
force (page 08.B or 9A).
5 • If this doesn’t work, remove
control unit and send it to
MOTORLINE technical services
services.
NOTE:
Setting force of the controller
should be sufficient to make the
gate open and close without
stopping, but should stop and
invert with a little effort from a
person. In case of safety systems
failure, the gate shall never cause
physical damaged to obstacles
(vehicles, people, etc.).
All MOTORLINE control boards have LEDs that
easily allow to conclude which devices are
with anomalies. All safety devices LEDs (DS)
in normal situations remain On. All "START"
circuits LEDs in normal situations remain Off.
If LEDs devices are not all On, there is some
security systems malfunction (photocells,
safety edges), etc. If "START" circuits LEDs
are turn On, there is a control device sending
permanent signal.
A) SECURITY SYSTEMS:
1 • Close with a shunt all safety systems
on the control board (check manual of the
control board in question). If the automated
system starts working normally check for the
problematic device.
2 • Remove one shunt at a time until you find
the malfunction device.
3 • Replace it for a functional device and
check if the motor works correctly with all the
other devices. If you find another one
defective, follow the same steps until you find
all the problems.
B) SISTEMAS DE START:
1 • Disconnect all wires from START terminal
input.
2 • If the LED turned Off,try reconnecting one
device at a time until you find the defective
device.
NOTE: In case procedures described in
sections A) and B) don’t result, remove control
board and send to our technical services for
diagnosis.
Table of contents
Other Motorline Control Unit manuals

Motorline
Motorline MC2 User manual

Motorline
Motorline MC2 Use and care manual

Motorline
Motorline MC75 Use and care manual

Motorline
Motorline MC7 User manual

Motorline
Motorline MC10-11 Use and care manual

Motorline
Motorline MC11 Use and care manual

Motorline
Motorline MC15SC Instruction Manual

Motorline
Motorline MC6 User manual

Motorline
Motorline MC2 User manual
Popular Control Unit manuals by other brands

ZURN
ZURN WILKINS BR4EC Installation and maintenance instructions

Nortel
Nortel DMS-100 Series Reference manual

Ross
Ross GearLite MUX-9258-A user guide

Samson
Samson 3241 Mounting and operating instructions

Rehau
Rehau RAUTHERM SPEED HKV-D P installation instructions

Fuji Electric
Fuji Electric MICREX-SX series user manual