Motorola AC1000 User manual

Warning: Charge the cordless audio conferencing unit for 24 hours before
use.
Model: AC1000
Digital Cordless Audio
Conferencing Unit
Easyto use cordless
conferencing unit,
ideal for the home
or oice.

Welcome...
to your new Motorola AC1000 Digital Cordless Audio Conferencing
Unit!
• Large speaker for quality sound.
• Full duplex for simultaneous talking.
• Cordless audio conferencing unit for convenient and flexible positioning.
• 50 Name and Number phonebook.
• Bright backlit display.
• Screensaver date and time display.
• Caller ID shows you who’s calling and see details of the last 50 callers in a Calls list.1
• Redial up to 30 of the last numbers called.
• Registerup to 5 cordless audio conferencing units to a single base.
• Choose from 15 dierent ringtones.
Need help?
If you have any problems setting up or usingyourAC1000, please contact Customer
Services on Services on (65) 68412668.
Email: [email protected]
Alternatively, you may nd the answer in the ‘Help’ section at the back of this guide.
1You must subscribe to your network provider’s Caller ID or Caller ID on Call Waiting
service for this feature to work. A subscription fee may be payable.
Please note that this equipment is not designed for making emergencytelephone
calls when the power fails. Alternative arrangements should be made foraccess to
emergency services.

This User Guide provides you with all the information you need to get the
most from your conferencing unit.
Before you make your rst call you will need to set up your phone. Follow
the simple instructions in ‘Getting Started’, on the next few pages.
IMPORTANT
Only use the telephone line cord supplied.
Got everything?
• AC1000 cordless audio conferencing unit
• AC1000 base
• 1 x 1500mAh rechargeable Ni-MH batterypack
• Power adaptor for the base
• Telephone line cord
ECOMOTO: a convergence of eorts by marketing, design, research, engineering
and supply chain management that leads to better products for everyone.A holistic
view that focuses on both social and environmental responsibility. A passion and a
shared point ofview.
The right thing to do.
• Meets and / or exceeds EMEAenvironmental regulatory requirements.
• Eco friendlypackaging with a minimum 20% post consumer recycled content.
• Phone housing is built with a minimum of 25% post consumer recycled content plastic.
• Energy eicient charger that meets EU Code of Conduct requirements.

4
1. Getting started .....................................................................6
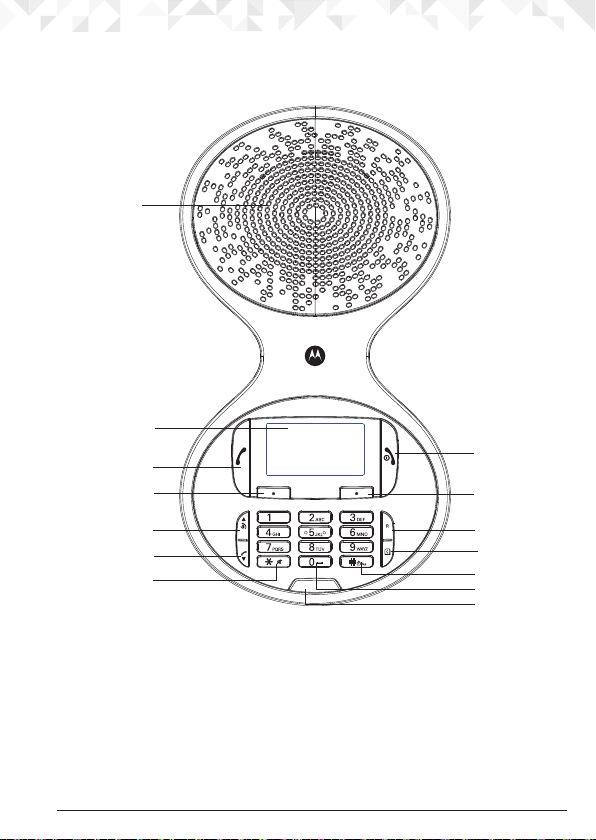
2. Getting to knowyour conferencing unit .............................9
3. Using the conferencing unit ..............................................14
3.1 Switch the cordless audio conferencing unit on / o...................................14
3.2 Calls ...............................................................................................................14
3.2.1 Make a call...........................................................................................14
3.2.2 Preparatory dialling.............................................................................14
3.2.3 Make a call using fast call keys............................................................14
3.2.4 End a call.............................................................................................14
3.2.5 Receive a call ......................................................................................14
3.3 Adjust the speaker volume ............................................................................14
3.4 Mute...............................................................................................................15
3.5 Intercom.........................................................................................................15
3.5.1 Make an internal call ...........................................................................15
3.5.2 Receive an internal call.......................................................................15
3.5.3 Transfer a call.......................................................................................15
3.5.4 3-way conference call.........................................................................15
3.6 Redial .............................................................................................................16
3.6.1 Dial an entry ........................................................................................16
3.6.2 View an entry.......................................................................................16
3.6.3 Copy a Redial list numberto the phonebook....................................16
3.6.4 Delete an entry....................................................................................17
3.7 Lock / unlock the keypad..............................................................................17
3.8 Paging / Find cordless audio conferencing unit ..........................................17
3.9 Voicemail .......................................................................................................17
4. Phonebook.........................................................................18
4.1 Store a name and number.............................................................................18
4.2 View the details or dial an entry.....................................................................19
4.3 Search an entry..............................................................................................20
4.4 Edit a name and number...............................................................................20
4.5 Assign a ringtone...........................................................................................20
4.6 Delete an entry ..............................................................................................20
4.7 Store a fast call number .................................................................................21
4.8 View a fast call number..................................................................................21
4.9 Clear a fast call number.................................................................................21
4.10 Access the phonebook during a call.............................................................21
4.11 Check the memory status .............................................................................22
4.12 Delete all entries............................................................................................22
5. Calls list...............................................................................23
5.1 New calls alert................................................................................................23
5.2 Dial a number in the Calls list ........................................................................23
5.3 View the details of an entry............................................................................24

5
5.4 Copy a Calls list number to the phonebook.................................................24
5.5 Delete an entry ..............................................................................................24
5.6 Delete the entire Calls list..............................................................................24
6. Date & Time........................................................................26
6.1 Set the date and time.....................................................................................26
6.2 Time format....................................................................................................26
7. Conferencing unit settings ................................................27
7.1 External Ringtone..........................................................................................27
7.2 Internal Ringtone...........................................................................................27
7.3 Ringer volume................................................................................................27
7.4 Key beep........................................................................................................28
7.5 Conrmation Tone.........................................................................................28
7.6 Name..............................................................................................................28
7.7 Display language ...........................................................................................29
7.8 Display contrast .............................................................................................29
7.9 Screensaver ...................................................................................................29
8. Base settings.......................................................................30
8.1 Auto answer ...................................................................................................30
8.2 Auto end calls.................................................................................................30
8.3 Auto Join Calls...............................................................................................30
8.4 PBX access code............................................................................................30
8.5 Recall mode...................................................................................................31
8.6 Dialling mode ................................................................................................31
8.7 Change the System PIN ................................................................................32
8.8 Restore default settings.................................................................................32
8.9 Registration ...................................................................................................32
8.9.1 Registering an additional cordless audio conferencing unit.............33
8.10 Default settings..............................................................................................34
9. Help.....................................................................................35
10. General information...........................................................37

6 Getting started
1. Getting started
IMPORTANT
Do not place your AC1000 in the bathroom or other humid areas.
Location
You need to place yourAC1000 base within 2 metres ofthe mains power socket and
telephone wall socket so that the cables will reach. The socket-outlet should be installed
near the equipment and should be easilyaccessible.
Make sure that it is at least 1 metre awayfrom other electrical appliances to avoid
interference.YourAC1000 works by sending radio signals between the cordless audio
conferencing unit and base.The strength of the signal depends on where you place the
base. Placing it as high as possible ensures the best signal.
RANGE
The unit has a range of up to 300 metres outdoors when there is a clear line of sight
between the base and cordless audio conferencing unit. Any obstruction between the
base and cordless audio conferencing unit will reduce the range signicantly. With the
base indoors and the cordless audio conferencing unit either indoors or outdoors, the
range will normally be up to 50 metres. Thick concrete and stone walls can severely aect
the range.
SIGNAL STRENGTH
The icon on your cordless audio conferencing unit indicates that you are within range
of the base. When out of range of the base, the icon flashes. If you are on a call, you will
hear a warning beep.
The line will hang up if the cordless audio conferencing unit moves out of range of the
base. Move closer to the base. The cordless audio conferencing unit will automatically
reconnect to the base.
Setting up
IMPORTANT
The base station must be plugged into the mains power at all times. Do not connect the
telephone line cord into the wall socket until the cordless audio conferencing unit is fully
charged. Use only the power adaptor and telephone line cord supplied with the product.

7Getting started
Connecting the base
1. Plug the telephone line cord into the socket marked on the underside of the base.
2. Plug the poweradaptor into the socket marked on the underside of the base and
plug the other end into the mains powerwall socket. Switch on the mains power.
Installing and charging the cordless audio conferencing unit
1. Remove the battery coverfrom the back of the cordless audio conferencing unit and
plug in the rechargeable Ni-MH battery pack supplied.
2. Clip the battery cover back into place.
3. If you are charging the batteries for the rst time, place the cordless audio
conferencing unit on the base to charge for at least 24 hours continuously.
4. When the cordless audio conferencing unit is fullycharged, icon will appear
steady on the display. Plug the other end of the telephone line cord (make sure that
one end is already plugged into the base) into the telephone wall socket.
IMPORTANT
Warning! Use only the approved rechargeable Ni-MH battery pack (1500mAh Ni-MH
rechargeable battery pack) supplied with your AC1000.
BATTERY LOW WARNING
If you hear a warning beep every 30 seconds during a call, you will need to recharge the
cordless audio conferencing unit before you can use it again.
When charging, icon will scroll on the display. Once charged scrolling will stop.
BATTERY PERFORMANCE
In ideal conditions, fully charged batteries should give up to 8 hours talk time or up to 100
hours standby time on a single charge.1
Note that new batteries do not reach their full capacity until they have been put to normal
use for several days.

8 Getting started
To keep your batteries in the best condition, leave the cordless audio conferencing unit o
the base for a few hours at a time.
Running the batteries right down at least once a week will help them last as long as
possible.
The charge capacity of rechargeable batteries will reduce with time as they wear out,
giving the cordless audio conferencing unit less talk / standby time. Eventually they will
need to be replaced.
After charging your cordless audio conferencing unit for the rst time, subsequent
charging time is about 6–8 hours a day. Batteries and cordless audio conferencing unit
may become warm during charging. This is normal.
1All talk and standbytimes are approximate and depend on features selected and usage
pattern.
Date and time
If you have subscribed to a Caller ID Service, the date andtime is set automatically for all
cordless audio conferencing units when you receive yourrst call.
If you do not have a Caller ID service, you can setthe date and time manually.
NOTE
In either case the year has to be manually set.
1. Press
Menu
, scroll dto
Date & Time
and press
Select
.
2. Scroll dto
Date & Time
and press
Select
.
3. Enterthe time (HH:MM) and press
Save
.
If the current time format setting is 12 hour, scroll uor dto select
am
or
pm
.
4. Enterthe date using the format DD/MM/YYYY e.g. 04/08/2015 for 4 August 2015 and
press
Save
.
5. Press eto return to standby.
Your AC1000 is now ready for use.

9Getting to know your conferencing unit
2. Getting to know your conferencing unit
Overview of your cordless audio conferencing unit
A Speaker
B Display
See page 11 for an overview of the displayicons.
C Talk
Make or answer a call
D Menu / OK / Mute / Left softkey
In standby mode, press to openthe Menu.
Press to select menu options and to conrm a displayed option.
During a call, press to turn mute on / o.
A
B
C
D
E
F
G
H
M
N
L
K
I
J

10 Getting to know your conferencing unit
E Redial list / Scroll up / Volume up
In standby mode, press to openthe redial list.
Scroll up through lists and menus.
During a call, press to increase the hands-free volume.
When the phone is ringing, press to increase the cordless audio conferencing unit
ringer volume.
F Calls List / Scroll Down / Volume down / Intercom
Press to enter the Calls list.
Scroll down through lists and menus.
During a call, press to decrease the hands-free volume.
When the phone is ringing, press to decrease the cordless audio conferencing unit
ringer volume.
Press and hold to make an internal call.
G * / Ringer On/O / Pulse to Tone dialling
Dial a *.
Press and hold to switch handset ringer on oro.
During a call, press to switch from pulse dialling to tone dialling.
H End / Exit / Switch cordless audio conferencing unit on/o
End a call.
When in a menu, go back to standbymode.
Press and hold to switch cordless audio conferencing unit o (when in standby) or on.
I Phonebook menu / Clear / Back / Right softkey
In standby mode, press to openthe phonebook menu.
Clear incorrect input during text editing.
Return to previous menu.
J Recall
Use recall (R) functions.
When on an external call, press to access a Call Waiting Line when you hear the call
waiting prompt signal. Press again to toggle between the two calls.
K Phonebook
Open the phonebook.
L Change case / Keypad lock / #
Press to change the case when entering letters / editing.
Press and hold to lock the keypad.
Dial a #.
M Pause / Space
Press and hold to enter a pause (P) when pre-dialling or storing numbers.
Press to insert a space in text editing.
N Microphone

11Getting to know your conferencing unit
Audio cordless unit LCD Display
Steadywhen the cordless audio conferencing unit is registered and within range of
the base. Flashes whenthe cordless audio conferencing unit is out of range or
searching for the base.
Handset ringervolume is O.
The keypad is locked.
Displays when you have new voicemails.1
Displays when you have missed calls and new number(s) in the Calls list.2
1This feature is dependent onyour Network Service provider supporting the service.A
subscription fee maybe payable.
2For this feature to work,you must subscribe to Caller ID Service from your network
operator. A subscription fee may be payable.
The approximate power levels ofyour batteryare indicated as follows:
Battery is fully charged
Battery is partially charged
Battery is running low
Battery is almost empty

12 Getting to know your conferencing unit
Overview of the base
A
A Page
In standby, press to ring the cordless audio conferencing unit(s).
Press and hold to enter registration mode when registering cordless audio
conferencing units.
Navigating the menu
YourAC1000 has an easyto use menu system on the unit.
Each menu has a list of options, which you can see on the menu map on the following
page.
When the cordless audio conferencing unit is in standby:
1. Press the left softkey
Menu
. The main menu is opened.
2. Then use uor dbuttons to scroll through the menu.
3. Soft key options
Select
and
Back
are displayed.
Press the left softkey
Select
to open a sub-menu orvalidate an option.
Press the right softkey option
Back
to go back to the previous menu level, correct a
character or cancel an action.
NOTE
If no buttons are pressed for 30 seconds or the cordless audio conferencing unit is placed
on the base / charger, the cordless audio conferencing unit returns to standby.

13Getting to know your conferencing unit
Menu map
Calls Lists
Missed Calls
Received Calls
Dialled Calls
Voicemail Calls
Delete Calls
Date & Time
Date & Time
Time Format
Settings
Set Handset
Ringtone
Ringing
External Ringtone
Internal Ringtone
Ringer Volume
Handset Tones
Keypad Tone
Conrmation Tone
Handset Name
Language
Display
Contrast
Screen Saver
Set Base
Call Settings
Auto Answer
Auto End Calls
Auto Join Calls
PBX Access Code
Recall Mode
Dialling Mode
System PIN
Master Reset
Registration
Register Handset
Deregister HS
Names
From menu in standby:
Search
Add Entry
Memory Status
Delete Phonebook
Press Pin standby
and phonebook list is
displayed, select
Options:
Show Details
Edit Entry
Ringtone
Delete Entry
Fast Call
Press Names during
a call
Phonebook list is
displayed, select
Options
:
Add Entry
Show Details
Edit Entry
Delete Entry

14 Using the conferencing unit
3. Using the conferencing unit
NOTE
Your cordless audio conferencing unit will automatically time the duration of all external
calls, the call timer will display on the screen. When the call ends, the total duration of your
talk time is shown for 2 seconds.
3.1 Switch the cordless audio conferencing unit on / o
1. Press and hold eto switch the cordless audio conferencing unit on or o.
3.2 Calls
3.2.1 Make a call
1. Press t.
2. When you hear the dial tone, dial the number.
3.2.2 Preparatory dialling
1. Dial the number rst. If you make a mistake press
Clear
to delete the last digit.
2. Press t, to dial the number.
NOTE
To enter a pause (P) when pre-dialling, see page 18.
3.2.3 Make a call using fast call keys
1. Press and hold the relevant keypad number to dial the pre-stored number directly.
NOTE
To store a fast call number, see page 21.
3.2.4 End a call
Press e, or if Auto End Calls is set to On, place the cordless audio conferencing unit back
on the base.
3.2.5 Receive a call
When you receive an external call, the phone rings and the phone number or name shows
on the display.
1. Press tto answer the call.
NOTE
If you prefer to simply lift up the cordless audio conferencing unit to answer a call, you will
need to switch Auto Answer on, see page 30.
3.3 Adjust the speaker volume
During a call, press uor dto increase or decrease the volume.There are 8 levelsto
choose from.

15Using the conferencing unit
3.4 Mute
You can muteyour cordless audio conferencing unit so thatyou can talk to someone
nearby without your caller hearing.
1. During a call, press
Secrecy
. The display shows
Call Muted
and your caller cannot hear
you.
2. Press
O
to resume your call.
3.5 Intercom
3.5.1 Make an internal call
If you have more than one cordless audio conferencing unit registered to the base, you
can make internal calls between two cordless audio conferencing units.
Internal Call
and
Handset X
displays to indicate an internal call.
1. Press and hold d, then press key 1~5 to select the cordless audio conferencing unit
you want to call.
2. Press
OK
.
3.5.2 Receive an internal call
When you receive an internal call,
Internal Call
and
Handset X
is displayed.
1. Press tto answer the call.
3.5.3 Transfer a call
You can transfer an external call to another cordless audio conferencing unit registered to
the base.
During an external call:
1. Press and hold d, then press key 1~5 to select the cordless audio conferencing unit
you want to call.
2. Press
OK
.
3. When the other cordless audio conferencing unit answers, press eto complete the
transfer.
4. If there is no answer from the other cordless audio conferencing unit and youwish to
return toyour external caller, press
End.
3.5.4 3-way conference call
You can hold a 3-way conference call between 2 internal callers and 1 external caller.
During a call with an external caller:
1. Press and hold d, then press key 1~5 to select the cordless audio conferencing unit
you want to call.
2. Press
OK
.
3. When the other cordless audio conferencing unit answers, press
Join
to connect all
three callers to begin the conference call.

16 Using the conferencing unit
4. If there is no answer from the other cordless audio conferencing unit, press
End
to
return to your external caller.
5. Press eto end the call.
3.6 Redial
The last 30 entries dialled are stored in the redial list.
3.6.1 Dial an entry
1. Press uto open the Redial list.
2. The last number dialled is highlighted.
3. Scroll uor dto the entry you want.
4. Press tto dial the entry orpress
Back
to return to standby.
3.6.2 View an entry
1. Press uto open the Redial list.
2. The last number dialled is highlighted.
3. Scroll uor dto the entry you want.
4. Press
Options
. The display shows
Show Details
.
5. Press
Select
and the displayshows the name and number, scroll dto see the date and
time of the call.
6. Press eto return to standby.
NOTE
If the caller’s number exactly matches an entry stored in the phonebook, the name is
displayed. Press left twice to see the caller’s number.
3.6.3 Copy a Redial list number to the phonebook
1. Press uto open the Redial list.
2. Scroll uor dto the entry you want.
3. Press
Options
.
Show details
is highlighted. Scroll dto
Save Number
.
4. Press
Select
. The display shows
Enter Name
.
5. Enterthe name and press
OK
. The numberis displayed.
6. Edit the numberif necessary,then press
Save
.
7. Press uor dto select the ringermelody youwant and press
Select
. The numberis
stored.
8. Press eto return to standby.
NOTE
See “ENTERING NAMES” and “WRITING TIPS” on page 18.

17Using the conferencing unit
3.6.4 Delete an entry
1. Press uto open the Redial list.
2. Scroll uor dto the entryyou want and press
Options
.
Show Details
is highlighted.
3. Scroll dto
Delete Call
4. Press
Select
to conrm or eto cancel.
3.7 Lock / unlock the keypad
You can lock the keypad so that it cannot be operated accidentally while carrying it
around.
NOTE
When the keypad is locked, you can still answer incoming calls and operate the cordless
audio conferencing unit as normal. When the call ends, the keypad lock comes on again.
1. Press and hold h.
icon is displayed.
2. To unlock the keypad, press
Unlock
. The display shows
Press # to Unlock Keys
.
3. Press hwithin 3 seconds.
3.8 Paging / Find cordless audio conferencing unit
You can alert a cordless audio conferencing unit user that they are wanted or locate a
missing cordless audio conferencing unit.
Paging calls cannot be answered by a cordless audio conferencing unit.
1. Press Ponthe underside of the base.All cordless audio conferencing units registered to
the base will ring and display
Paging Call
.
2. To stop the ringing, press Pon the base again or press
Stop
or anybutton on the
cordless audio conferencing unit.
3.9 Voicemail
If you have subscribed to yournetwork’s voicemail service (if available), yourAC1000
displays
New Voicemail
when you have a new message
,
if thevoicemail number is stored in
the phone you can press
Listen
to call the service. Press
Back
and the screen will display
to indicate the newmessage.
NOTE
This feature is dependent on your Network Service provider supporting the service. A
subscription fee may be payable.

18 Phonebook
4. Phonebook
You can store up to 50 names and numbers in the phonebook. Names can be up to 14
characters long and numbers up to 24 digits.You can also select dierent ringermelodies
for the phonebook entries.
4.1 Store a name and number
If theAC1000 is connected to a switchboard, you mayneed to enter a pause in a number.
This gives the switchboard time to nd an outside line. A pause is normally stored after
the switchboard access code (e.g. 9). When storing a number, press and hold 0until
the display shows P. You can then continue storing the phone number.
If you have subscribed to Caller ID Service and wishto display the name ofyour caller
instead of the number, save the full telephone number including the area code to your
phonebook.
You can store multiple entries with the same name. However, to prevent unnecessary
duplicated entries, you can only store the same number once.
1. Press
Names
to enterthe phonebook menu.
2.
Search
is highlighted.
3. Scroll dto
Add Entry
and press
Select
.
4. Enter a name and press
OK
.
5. Enter a numberand press
Save
.
6. Scroll uor dto the melodyyou want and press
Select
. The entryis stored.
7. Press eto return to standby.
NOTE
Cancel storing an entry by pressing eat any time during the process.
When a new entry is stored it will automatically copy to the other cordless audio
conferencing units registered to the base.
ENTERING NAMES
Use the alphanumeric keypad to enter names in the phonebook.
For instance to enter the name Paul
P Press
7once
A Press
2once
U Press
8twice
L Press
5three times
To enter a space, press 0.
WRITING TIPS
Press uor dto move between characters/digits.
Press
Clear
to delete a character, or press and hold
Clear
to delete all characters.

19Phonebook
CHARACTER MAP
Key Case Assigned characters and symbols
1L / U . , - ? ! ¡ ¿ ‘ @ : ; / 1
2L a b c 2 ä æ å à Ç
U A B C 2 Ä Æ Å Ç
3L d e f 3 è é
U D E F 3 É
4L g h i 4 ì
U G H I 4
5L j k l 5
UJ K L 5
6L m n o 6 ö Θò ñ
U M N O 6 Ö ΘÑ
7L p q r s 7 ß
U P Q R S 7
8L t u v8 ù ü
U T U V 8 Ü
9L w x y z 9
UW X Y Z 9
0L / U Space 0
hL / U Short press to switch between Abc, abc, ABC and 123 mode
L = Lower case
U = Upper case
4.2 View the details or dial an entry
1. In standby, press P. The rst entry is highlighted on the display.
2. Scroll uor dto the entryyou want.
Or
To search alphabetically, press the keywith the rst letterof the name, e.g. if the name
begins with N, press 6twice. The display shows the rst entry beginning with N. If
required, scroll uor dto the exact entry.
3. Press tto dial the displayed entry.
Or
To see the details, press
Options
.
3.
Show Details
is highlighted. Press
Select
. The name, numberand ringtone of the entry
are displayed.
4. Press tto dial the displayed entryor press eto return to standby.

20 Phonebook
4.3 Search an entry
1. Press
Names
to enterthe phonebook menu.
2.
Search
is highlighted. Press
Select
. The rst entry is highlighted on
the display.
3. Enterthe rst letter of the nameto search alphabetically then scroll uor dto the exact
entry.
4. Press tto dial the displayed entryor press eto return to standby.
4.4 Edit a name and number
1. In standby, press P. The rst entry is highlighted on the display.
2. Enterthe rst letter of the nameto search alphabetically then scroll uor dto the exact
entry. Press
Options
.
3. Scroll dto
Edit Entry
and press
Select
.
4. Edit the name and press
OK
to conrm. Press
Clear
to delete a character, or press and
hold
Clear
to delete all characters.
5. Edit the numberand press
Save
. Press
Clear
to delete a character, or press and hold
Clear
to delete all characters.
6. Scroll uor dto the ringtone you want and press
Select
. The entry
is stored.
7. Press eto return to standby.
4.5 Assign a ringtone
1. In standby, press P. The rst entry is highlighted on the display.
2. Enterthe rst letter of the nameto search alphabetically then scroll uor dto the exact
entry. Press
Options
.
3. Scroll dto
Ringtone
and press
Select
.
4. Scroll uor dto the ringtone you want and press
Select
.
The ringtone is saved.
5. Press eto return to standby.
4.6 Delete an entry
1. In standby, press P. The rst entry is highlighted on the display.
2. Enterthe rst letter of the nameto search alphabetically then scroll uor dto the exact
entry. Press
Options
.
3. Scroll dto
Delete Entry
and press
Select
.
4. Display shows
Delete <name>?
. Press
Ye s
to conrm.
5. Press eto return to standby.
Table of contents
Other Motorola Conference System manuals
Popular Conference System manuals by other brands

Grandstream Networks
Grandstream Networks IPVT10 Administration guide

Cisco
Cisco TelePresence System Codec C60 Administrator's guide

Lenovo
Lenovo ThinkSmart View Plus Deployment guide

GeoDesy FSO
GeoDesy FSO GigaPico Next AutoFocus user manual

NovaStar
NovaStar MeetUs user manual

Yealink
Yealink W70B DECT user manual