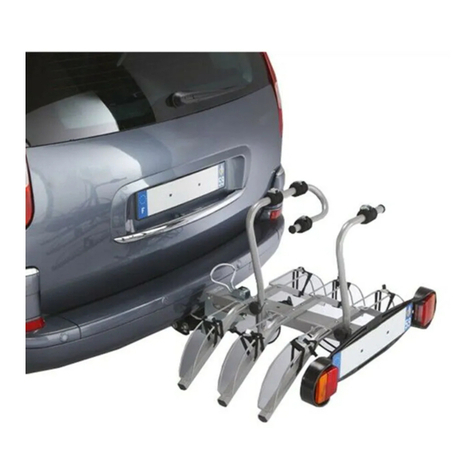
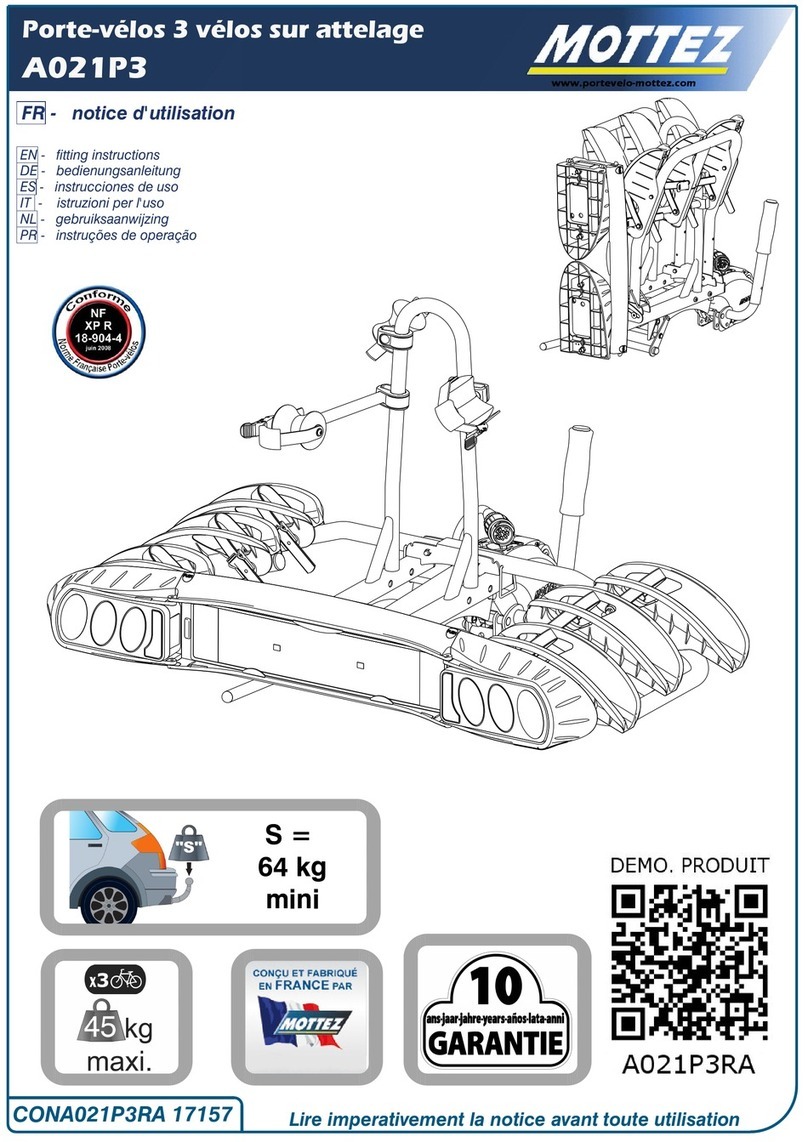
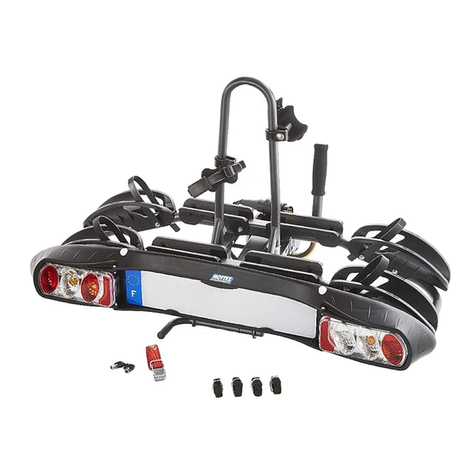
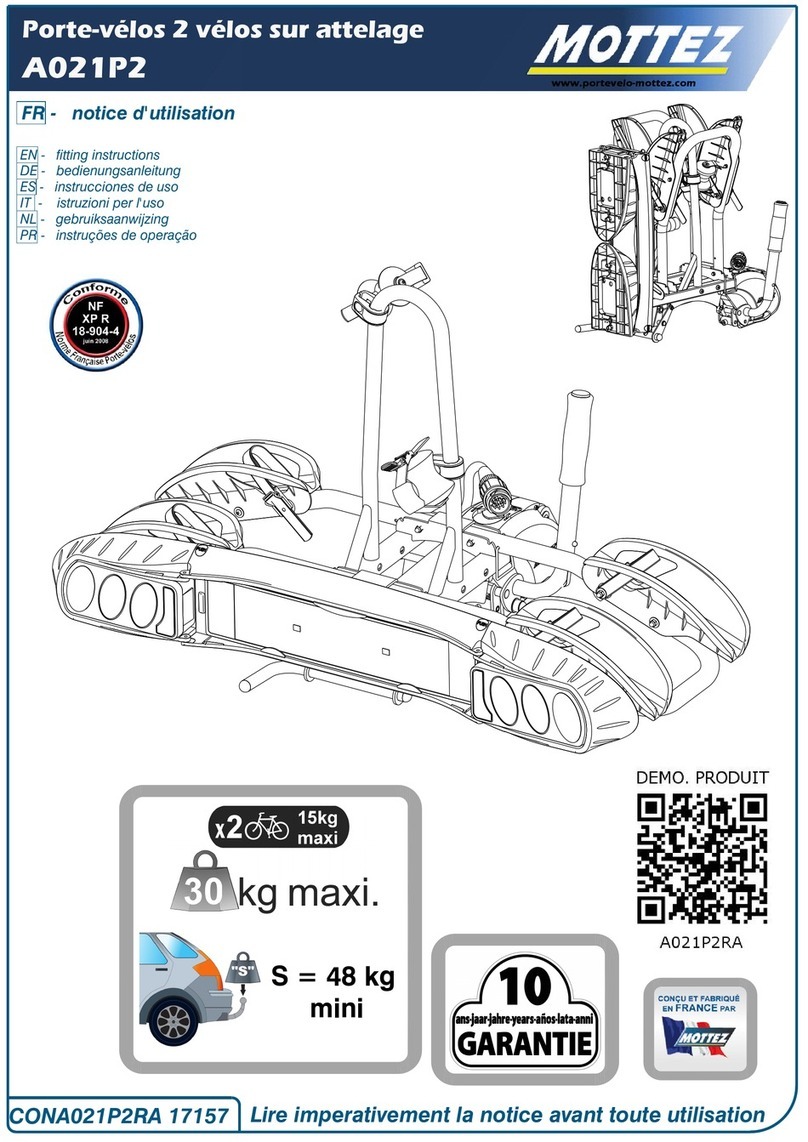
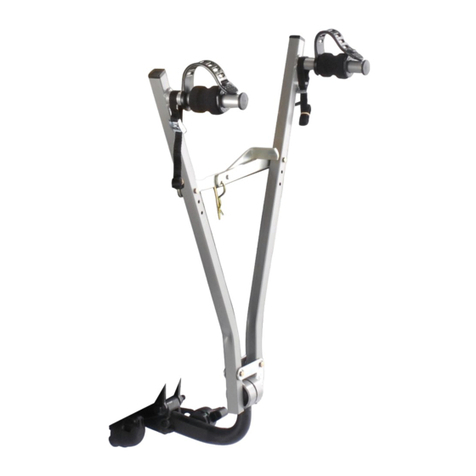
Mottez A025PMON User manual


ENGLISH
You have just purchased a MOTTEZ cycle carrier, a product designed and manufactured in France.
Thank you for choosing our product, we hope you will be completely satisfied with it.
It is essential that you read these instructions before use.
Weight empty 4.5 kg / Maximum permitted load on cycle carrier: 45 kg or 3 bicycles.
This cycle carrier must not be used on vehicles other than those indicated in the vehicle application
list.
- For your safety and that of other users and to limit your liability, read the recommendations that we
have prepared carefully; they are not meant to be exhaustive and do not absolve you from your duty to
respect basic common sense rules.
- Keep these recommendations for use in your vehicle and ensure that they are read by any person
who installs the cycle carrier or drives the vehicle while it is installed.
- The cycle carrier may only be used for the transport of bicycles.
- Look after the straps and only use them if they are in perfect condition. Do not use them for other
purposes or with other fixing buckles.
- Check that bicycle components are properly secured (wheels, saddle, etc.). It is essential to remove
detachable accessories from bicycles (drinks bottle, removable lights, pump, etc.) or they may be lost.
- The rear load limit must be respected.
1 – Fitting the upper straps and sleeves:
- Thread the two upper straps A through the upper buckles. PAY ATTENTION TO THE DIRECTION
OF INSERTION.
2 – Adjusting the cycle carrier:
- Adjust the number X1 of the cycle support arm in accordance with the application guide for your
vehicle.
- Re-tighten the handles.
- ENSURE THAT IN THE TIGHTENED POSITION THE SUPPORT ARM IS PROPERLY LOCKED IN
POSITION.
3 – Fitting the cycle carrier to the vehicle:
- Attach the two upper straps to the upper metal edge of the tailgate.
NEVER SUPPORT THE CYCLE CARRIER OR THE STRAPS ON A COMPOSITE (PLASTIC)
SPOILER.
- For vehicles with a frameless rear screen (glued screen) or with a wide rubber seal, use the special
adapter* (Kit ref. A027B).
- Measure the length L of the straps in accordance with the application guide for your vehicle.
4 – Checking:
- Check that only the sleeves M are in contact with a sufficiently solid part of the bodywork (bumper,
strengthening bar, rib, window, etc.) and also check the strength of the strap attachment points.
- Ensure that no other part of the cycle carrier touches the vehicle. For safety purposes leave a gap of
several centimetres between the car body and the cycle carrier’s framework.
5 – Fitting the side straps:
- Thread the two side straps A through the buckles.
PAY ATTENTION TO THE DIRECTION OF INSERTION.
6 – Attaching the side straps to the vehicle:
- Attach the two side straps to the metal edge of the side of the tailgate.
- Ensure that the loops do not pass around the sleeves N.
7 – Fitting the lower straps:
- Pass the two lower straps A through the lower buckles. PAY ATTENTION TO THE DIRECTION OF
INSERTION.
Attaching to the vehicle: 7a) ON THE SIDE BEAMS (metal part under the vehicle)
or 7b) ON THE TAILGATE (metal tailgate rim).
NEVER SUPPORT ON OR FIX TO A PLASTIC COMPONENT.

ENGLISH
7a – Fitting the lower straps to the side beams:
- Pass the two hooks B through the loops formed by the lower straps A.
- Attach the lower straps under the vehicle to the metal side beams or metal hooks.
- Ensure that the straps are not too close to the silencer, as there is a risk of damage.
Fixing to the bumper is not permitted
7b – Fitting the lower straps on to the tailgate:
- Attach to two lower straps to the lower metal rim of the tailgate.
NEVER SUPPORT ON A PLASTIC COMPONENT.
8 – Tightening the straps:
- Tighten the straps to obtain perfect positioning on the car.
- Check that everything is properly tightened by pushing the cycle carrier hard in all directions; it
should not move on the vehicle. If this is not the case, tighten all the straps again.
9 – Fitting the complete grip straps:
- Attach the complete grip straps (red), C and D, to the cycle carrier’s framework.
10 – Strapping on the bicycles:
- Position the first bicycle with the chain facing towards the vehicle.
- Fit the bicycles alternately facing in the opposite direction, so that the handlebars do not foul on each
other.
- The bicycles must be distributed correctly on the cycle carrier, snugly and as close to the vehicle as
possible. The centre of gravity of the assembly must be as low as possible, without the bicycles being
able to touch the ground when passing over an obstacle (speed bump, etc.).
- Loads sticking out beyond the cycle carrier must comply with current regulations and must be
appropriately fixed. It is the user’s responsibility to comply with the standards applying in each country
where the carrier is used.
E.g. In France the load must not exceed a total width of 2.5 m.
- Ensure that cycle tyres are not too close to the vehicle’s tail pipe; hot exhaust gases could damage
them.
11 – Strapping on the bicycles:
- It is essential to fix the bicycle frames using straps E, securing them firmly to the cycle carrier’s
frame.
ATTENTION: THESE STRAPS PROVIDE YOUR SAFETY.
12 – Complete grip of the bicycles:
- Pass the complete grip straps, C and D (red), through the wheels: they prevent the bicycles falling
off.
- They ensure that the bicycles are held on the frame.
ATTENTION: THESE STRAPS PROVIDE YOUR SAFETY.
13 – Checking the tightness of the straps:
- The lower cycle carrier straps must be re-tightened.
- Check the other straps to ensure that there is no movement.
- Check that everything is properly tight by attempting to move the bicycles; they must not move on the
cycle carrier. If this is not the case, tighten all the straps again.
- Do not allow the straps to flap in the wind; use the elastic straps E provided.
14 - Use:
- Comply with current regulations and the Highway Code.
-We draw your attention to the fact that incorrect installation or use can result in danger for you and
others, for which you may be held liable.

ENGLISH
ADAPT YOUR DRIVING
- Every time the cycle carrier is used, check before departure and regularly during the journey that
everything is properly tight (screws, knobs, straps, etc.).
The fixings for the bicycles and the cycle carrier must be checked after fitting and regularly during the
journey. Re-tighten if necessary.
IMPORTANT: Your vehicle is now longer and wider. Take this into account when manoeuvring.
- Drive with care: any load carried behind a vehicle affects its behaviour (turning, crosswinds, road
surface, reversing, tight turns, etc.).
- Reduce your speed, especially when turning or passing obstacles and be aware of increased braking
distances.
- Do not use the cycle carrier off-road or on bumpy roads: excessive shaking could damage your cycle
carrier and your vehicle.
YOU ALONE ARE RESPONSIBLE FOR INCORRECT USE OF FAILURE TO FOLLOW
INSTRUCTIONS.
- Do not raise the vehicle’s tailgate when the cycle carrier is fitted.
- It is recommended that you remove the cycle carrier after use, in order not to inconvenience
pedestrians or other motorists.
- Never leave the cycle carrier attached to the vehicle in automated car washes, especially roller
washes.
- Keep and maintain the cycle carrier in good condition, store it suitably, rolling up the straps.
15 - Visibility:
- The number plate and lights must remain visible. If they are partially obscured: fit a complete
indicator bar with lights.
- Your number plate must comply with the Highway Code.

ESPAÑOL
Acaba de adquirir un portabicicletas MOTTEZ, producto concebido y fabricado en Francia.
Le agradecemos esta elección y esperamos que sea completamente de su agrado.
Leer imperativamente el manual antes de utilizar el producto.
Peso en vacío 4,5 kg / Capacidad máxima del portabicicletas: 45 kg por 3 bicicletas.
El portabicicletas no debe utilizarse en vehículos distintos de los que aparecen recogidos en la lista
de asignación.
- Por su seguridad y la de los demás usuarios, y para evitar que su responsabilidad se vea
comprometida, lea atentamente las diversas recomendaciones que hemos preparado a su atención;
estas recomendaciones no son limitativas y no le eximen de respetar las normas básicas de
prudencia.
- Conserve estas recomendaciones de uso en su vehículo y obligue su lectura a todas las personas
que vayan a instalar el portabicicletas o vayan a conducir el vehículo con el portabicicletas integrado.
- El portabicicletas sólo debe utilizarse para transportar bicicletas.
- Conservar y emplear correas en perfecto estado, no utilizarlas para otros usos o con otras hebillas
de bloqueo.
- Verificar el buen apriete de las piezas de las bicicletas transportadas (ruedas, sillín...); es imperativo
retirar los accesorios amovibles de las bicicletas (cantimplora, luces amovibles, bomba, etc.), ya que
existe riesgo de que se produzcan pérdidas.
- Debe respetarse la capacidad de la carga trasera.
1 - Montaje de correas superiores:
- Enhebrar las 2 correas superiores A en las hebillas superiores. ATENCIÓN AL SENTIDO DE PASO.
2 – Ajuste del portabicicletas:
- Ajustar el número X1 del arco de soporte de bicicletas conforme a la tabla de asignación del
vehículo.
- Volver a apretar las empuñaduras.
- ASEGURARSE DE QUE EL ARCO ESTÉ BIEN BLOQUEADO EN POSICIÓN CERRADA.
3 - Montaje del portabicicletas en el vehículo:
- Enganchar las 2 correas superiores en la arista metálica superior de la puerta del maletero.
NO APOYAR EN NINGÚN CASO EL PORTABICICLETAS O LAS CORREAS EN UN ALERÓN DE
COMPUESTO (PLÁSTICO).
- Para los vehículos con luneta trasera sin armazón (cristal pegado) o con una junta ancha de caucho,
utilizar el adaptador específico* (Kit ref. A027B).
- Medir la longitud L de las correas conforme a las tablas de asignación del vehículo.
4 - Control:
- Asegurarse de que sólo los manguitos M estén apoyados en una parte suficientemente sólida de la
carrocería (parachoques, refuerzo, nervadura, cristal, etc.) y de la buena resistencia de los puntos de
enganche de las correas.
- Asegurarse de que ninguna otra parte del portabicicletas toque el vehículo. Por motivos de
seguridad, dejar un intervalo de unos centímetros entre la carrocería y el armazón del portabicicletas.
5 - Montaje de correas laterales:
- Enhebrar las 2 correas laterales A en las hebillas.
ATENCIÓN AL SENTIDO DE PASO.
6- Enganche de correas laterales en el vehículo:
- Enganchar las 2 correas laterales en la arista metálica lateral de la puerta del maletero.
- Atención: las presillas no deben rodear los manguitos N.
7 – Montaje de correas inferiores:
- Pasar las 2 correas inferiores A por las hebillas inferiores. ATENCIÓN AL SENTIDO DE PASO.
Enganche en el vehículo: 7a) EN LOS LARGUEROS (parte metálica debajo del vehículo)
o 7b) EN LA PUERTA DEL MALETERO (arista metálica del maletero).
NO APOYAR EN NINGÚN CASO NI FIJAR EN UNA PARTE DE PLÁSTICO.

ESPAÑOL
7a – Montaje de las correas inferiores sobre los largueros:
- Pasar los 2 ganchos B por las hebillas formadas por las correas inferiores A.
- Enganchar las 2 correas inferiores bajo el vehículo a un larguero metálico o ganchos de metal.
- No colocar las correas demasiado cerca del tubo de escape, podría estropearse.
Prohibida la fijación en el parachoques.
7b – Montaje de las correas inferiores en la puerta de maletero:
- Enganchar las 2 correas inferiores en la arista metálica inferior del maletero.
NO APOYAR EN NINGÚN CASO NI FIJAR EN UNA PARTE DE PLÁSTICO.
8 - Apriete de las correas:
- Tensar las correas para una perfecta colocación en el coche.
- Controlar el correcto apriete del conjunto moviendo con fuerza el portabicicletas en todos los
sentidos, no debe desplazarse en el vehículo. En caso contrario, volver a tensar todas las correas.
9 - Montaje de las correas de apriete total:
- Enganchar las correas de apriete total (rojo) C y D al armazón del portabicicletas.
10 - Montaje de bicicletas:
- Colocar la primera bicicleta con el plato hacia el vehículo.
- Colocar las bicicletas en filas paralelas en sentidos opuestos para que los manillares no molesten.
- Las bicicletas deben estar correctamente repartidas por el portabicicletas, de manera compacta y lo
más cerca posible del vehículo. El centro de gravedad del conjunto debe ser lo más bajo posible, de
manera que las bicicletas no toquen el suelo al salvar un obstáculo (badén...).
- Las cargas que sobresalgan por los extremos del portabicicletas deben cumplir las prescripciones
del reglamento vigente y deben estar convenientemente sujetas. Es responsabilidad del usuario
cumplir las normas de circulación aplicables en cada país.
Ej.: en Francia, la carga no debe superar 2,5 m de ancho en total.
- No colocar los neumáticos de las bicicletas demasiado cerca de la salida de escape, los gases
calientes de escape podrían estropearlos.
‐LacargaquesobresalgapordetrásdelosvehículosdeberáserseñalizadapormediodelaseñalV‐
20alaqueserefiereelReglamentoGeneraldeVehículos.Estaseñalsedeberácolocarenelextremo
posteriordelacargademaneraquequedeconstantementeperpendicularalejedelvehículo.
11 – Atado de bicicletas:
- Fijar imperativamente los cuadros de las bicicletas con correas pequeñas E, apretar firmemente
sobre el armazón del portabicicletas.
ATENCIÓN: SU SEGURIDAD QUEDA GARANTIZADA POR ESTAS CORREAS.
12 – Apriete total de las bicicletas:
- Pasar las correas de apriete total C y D (rojo) a través de las ruedas: impiden la pérdida de las
bicicletas.
- Aseguran el mantenimiento de las bicicletas sobre el armazón.
ATENCIÓN: SU SEGURIDAD QUEDA GARANTIZADA POR ESTAS CORREAS.
13 – Control de apriete de las correas:
- Las correas inferiores del portabicicletas deben estar retensadas.
- Verificar las demás correas para una perfecta inmovilización.
- Controlar el buen apriete del conjunto moviendo las bicicletas, no deben moverse en el
portabicicletas. En caso contrario, volver a tensar todas las correas.
- No dejar << flotar >> las correas al viento, utilizar las cintas elásticas E suministradas.
14 – Uso:
- Respetar los reglamentos vigentes y el código de circulación.
- Llamamos su atención sobre el hecho de que una mala instalación o un mal uso pueden tener
consecuencias peligrosas para usted mismo y para los demás, y pueden comprometer su
responsabilidad.

ESPAÑOL
ADAPTAR LA CONDUCCIÓN:
- Cada vez que use el producto, verifique antes de la salida y con regularidad durante el trayecto la
buena sujeción del conjunto (tornillos, discos, correas...).
Después de su colocación, deben verificarse las fijaciones de las bicicletas y del portabicicletas, y
regularmente durante todo el viaje. Volver a apretar en caso necesario.
ATENCIÓN: su vehículo es más largo y más ancho, téngalo en cuenta al realizar las maniobras.
- Conduzca con prudencia: cualquier carga transportada en la parte trasera de un vehículo afecta a su
comportamiento (virajes, viento lateral, revestimiento de la calzada, marcha atrás, viraje ajustado,
etc.).
- Reducir la velocidad, en concreto en los virajes y en el paso de obstáculos, y tener en cuenta el
aumento de las distancias de frenado.
- No utilizar el portabicicletas en caminos todoterreno o accidentados: las fuertes sacudidas podrían
estropear el portabicicletas o el vehículo.
EN CASO DE MAL USO O INCUMPLIMIENTO DE LAS CONSIGNAS, SÓLO SE VERÁ
COMPROMETIDA SU RESPONSABILIDAD.
- No abrir el maletero del vehículo provisto del portabicicletas.
- Se recomienda retirar el portabicicletas tras el uso con el fin de no sorprender a un peatón o a un
automovilista distraído.
- No dejar en ningún caso el portabicicletas en el vehículo durante los lavados automáticos, en
concreto, durante el lavado con rodillos.
- Mantener y conservar el portabicicletas en buen estado, guardarlo en lugar conveniente enrollando
las correas.
15 – Visibilidad:
- La chapa de matrícula y las luces deben permanecer visibles; si estas últimas quedan parcialmente
ocultas: instalar una placa de señalización completa con luces.
- Su matrícula debe ser conforme con el código de circulación.

DEUTSCH
Sie haben gerade einen MOTTEZ-Fahrradträger, ein in Frankreich konzipiertes und hergestelltes
Produkt, erworben. Wir danken Ihnen für diese Wahl, die, so hoffen wir, Sie voll zufrieden stellen wird.
Bitte vor Gebrauch unbedingt die Hinweise lesen.
Leergewicht 4,5 kg / Maximaltraglast des Fahrradträgers: 45 kg bei 3 Fahrrädern.
Der Fahrradträger darf nur auf Fahrzeugen verwendet werden, die in der Zuordnungsliste aufgeführt
sind.
- Zu Ihrer und der Sicherheit anderer Nutzer und um eine Haftbarmachung zu vermeiden, lesen Sie
bitte sorgfältig die verschiedenen Empfehlungen, die wir für Sie ausgearbeitet haben; diese
Empfehlungen sind nicht erschöpfend und befreien Sie nicht von der Pflicht, elementare
Vorsichtsregeln zu beachten.
- Bewahren Sie die Gebrauchsempfehlungen in Ihrem Fahrzeug auf und lassen Sie sie von jeder
Person lesen, die den Fahrradträger installieren oder das mit ihm versehene Fahrzeug steuern will.
- Der Fahrradträger darf nur für den Fahrradtransport eingesetzt werden.
- Halten und gebrauchen Sie die Gurte in einwandfreiem Zustand und benutzen Sie diese nicht für
andere Zwecke.
- Prüfen Sie das korrekte Festziehen von Teilen der transportierten Fahrräder (Räder, Sattel usw.),
wobei es dringend erforderlich ist, bewegliches Fahrradzubehör (Trinkflasche, Beleuchtung,
Luftpumpe usw.) abzumontieren - Verlustrisiko.
- Die zulässige Anhängelast muss beachtet werden.
1 – Montage der Obergurte
- Beide Obergurte A in die oberen Schließen einfädeln. AUF DURCHGANGSRICHTUNG ACHTEN.
2 – Justierung des Fahrradträgers
- Nummer X1 des Fahrradtragbügels gemäß Zuordnungstabelle Ihres Fahrzeugs justieren.
- Griffe nachziehen.
- SICH VERGEWISSERN, DASS BÜGEL IN VERRIEGELTER STELLUNG KORREKT BLOCKIERT
IST.
3 – Anbringen des Fahrradträgers am Fahrzeug
- Beide Obergurte an der oberen Metallkante der Hecktür befestigen.
FAHRRADTRÄGER ODER GURTE NIEMALS AUF EINEM VERBUNDSPOILER (PLASTIK)
ABSTÜTZEN !
- Bei Fahrzeugen mit Heckfenster ohne Beschlag (geklebte Scheibe) oder mit breiter Gummidichtung
den speziellen Adapter* (Kit mit Artikelnummer A027B) einsetzen.
- Länge L der Gurte gemäß Zuordnungstabelle Ihres Fahrzeugs messen.
4 – Kontrolle
- Sich vergewissern, dass nur die Puffer M sich auf einem ausreichend soliden Teil der Karosserie
(Stoßstange, Verstärkung, Rippe, Scheibe usw.) abstützen, und gute Widerstandskraft der
Gurtbefestigungspunkte prüfen.
- Sich vergewissern, dass kein Teil des Fahrradträgers das Fahrzeug berührt. Zur Sicherheit einen
Zwischenraum von einigen Zentimetern zwischen Karosserie und Trägergestell lassen.
5 – Montage der Seitengurte
- Beide Seitengurte A in die Schließen einfädeln.
AUF DURCHGANGSRICHTUNG ACHTEN.
6 – Befestigung der Seitengurte am Fahrzeug
- Beide Seitengurte an der seitlichen Metallkante der Hecktür befestigen.
- Achtung: die Durchläufe dürfen nicht die Puffer N umschließen.
7 – Montage der Untergurte
- Beide Untergurte A durch die unteren Schließen ziehen. AUF DURCHGANGSRICHTUNG ACHTEN.
- Anbringen am Fahrzeug: 7a) AN DEN LÄNGSTRÄGERN (Metallteil unter dem Fahrzeug)
oder 7b) AN DER HECKTÜR (Metallkante des Kofferraums).
NIEMALS AUF EINEM PLASTIKTEIL ABSTÜTZEN ODER BEFESTIGEN !

DEUTSCH
7a - Montage der Untergurte auf Längsträger
- Beide Haken B in die durch die Untergurte A gebildeten Schließen einfügen.
- Beide Untergurte unter dem Fahrzeug an einem Längsträger oder Metallhaken anbringen.
- Darauf achten, dass die Gurte dem Auspuff nicht zu nahe kommen – Beschädigungsrisiko.
Befestigung an Stoßstange verboten !
7b - Montage der Untergurte auf Hecktür
- Beide Untergurte an der unteren Metallkante des Kofferraums anbringen.
NIEMALS AUF EINEM PLASTIKTEIL ABSTÜTZEN ODER BEFESTIGEN !
8 – Anziehen der Gurte
- Gurte für perfekten Sitz auf dem Fahrzeug anziehen.
- Korrektes Festziehen der Gesamtheit kontrollieren, indem Sie den Fahrradträger in alle Richtungen
rütteln - er darf sich auf dem Fahrzeug nicht bewegen ! Andernfalls alle Gurte nachziehen.
9 – Montage der Gesamtumspannungsgurte
- Gesamtumspannungsgurte C und D (rot) am Fahrradträgergestell anbringen.
10 – Montage der Fahrräder
- Erstes Fahrrad mit Tretkurbel auf zum Fahrzeug hingewandter Seite positionieren.
- Fahrräder gegenseitig versetzt anordnen, um nicht durch die Lenker gestört zu werden.
- Fahrräder müssen auf dem Träger korrekt verteilt werden, in kompakter Weise und so nah wie
möglich am Fahrzeug. Die Last muss korrekt über den Heckfahrradträger verteilt werden. Der
Schwerpunkt des Ganzen muss so tief wie möglich liegen, ohne dass die Fahrräder beim Antreffen
von Straßenunebenheiten (Querrinnen usw.) ein Bodenkontaktrisiko laufen.
- Lasten, die über die äußersten Enden des Fahrradträgers hinausragen, müssen die geltenden
Straßenverkehrsvorschriften erfüllen und ordentlich befestigt werden. Es obliegt dem Benutzer, sich
nach den im jeweiligen Land anwendbaren Straßenverkehrsvorschriften zu richten.
Beispiel: In Frankreich darf die Last 2,5 m Gesamtbreite nicht überschreiten.
- Darauf achten, die Fahrradreifen nicht zu dicht am Auspuff zu platzieren, da die heißen Abgase sie
beschädigen können.
11 – Vergurtung der Fahrräder
- Fahrradrahmen unbedingt mit den Riemen E befestigen, auf dem Gestell Ihres Fahrradträgers
festzurren.
ACHTUNG: IHRE SICHERHEIT WIRD DURCH DIESE GURTE GARANTIERT !
12 – Gesamtumspannung der Fahrräder
- Gesamtumspannungsgurte C und D (rot) durch die Räder hindurch ziehen: sie verhindern das
Verlieren der Fahrräder.
- Sie stellen den Halt der Fahrräder auf dem Trägergestell sicher.
ACHTUNG: IHRE SICHERHEIT WIRD DURCH DIESE GURTE GARANTIERT !
13 – Kontrolle des Anziehens der Gurte
- Untergurte des Fahrradträgers müssen nachgezogen werden.
- Übrige Gurte auf perfekte Blockierung prüfen.
- Korrektes Festziehen des Ganzen durch Rütteln der Fahrräder kontrollieren - diese dürfen sich auf
dem Träger nicht bewegen. Andernfalls alle Gurte nachziehen.
- Gurte nicht im Wind « flattern » lassen, mitgelieferte Gummibänder E benutzen.
14 – Gebrauch
- Geltende Regeln und Straßenverkehrsordnung beachten.
- Wir weisen Sie darauf hin, dass schlechte Installation und unsachgemäßer Gebrauch für Sie selbst
und Dritte gefährliche Folgen haben und Ihre Haftung auslösen können.

DEUTSCH
FAHRWEISE ANPASSEN:
- Bei jedem Gebrauch vor Abfahrt und auf der Strecke den einwandfreien Zustand des Ganzen
(Schrauben, Rädchen, Gurte usw.) regelmäßig prüfen.
Befestigungen der Fahrräder und des Trägers müssen nach Anbringung und während der Reise
regelmäßig kontrolliert werden. Im Bedarfsfall nachzurren.
ACHTUNG: Ihr Fahrzeug ist länger und breiter - bei Fahrmanövern berücksichtigen !
- Fahren Sie vorsichtig: jede am Fahrzeugheck transportierte Last beeinflusst das Fahrverhalten
(Kurven, Seitenwind, Straßenbelag, Rückwärtsfahrt, scharfe Kurve usw.).
- Geschwindigkeit reduzieren, besonders in Kurven und beim Vorbeifahren an Hindernissen;
Verlängerung des Bremswegs berücksichtigen.
- Fahrradträger nicht auf Querfeldeinfahrten oder unebenen Wegen verwenden: die starken Stöße
könnten Ihren Fahrradträger und Ihr Fahrzeug beschädigen.
BEI UNSACHGEMÄSSEM GEBRAUCH UND NICHTBEACHTUNG DER WEISUNGEN SIND SIE
ALLEIN FÜR DIE FOLGEN VERANTWORTLICH.
- Kofferraumtür bei angebrachtem Fahrradträger nicht öffnen.
- Es wird empfohlen, den Fahrradträger nach Gebrauch abzumontieren, um einen Fußgänger oder
unaufmerksamen Autofahrer nicht zu überraschen.
- Bei automatischer Autowäsche, insbesondere mit rotierenden Walzen, den Fahrradträger niemals
auf dem Fahrzeug belassen !
- Fahrradträger in gutem Zustand halten und pflegen und ihn mit eingerollten Gurten ordentlich
abstellen.
15 – Sichtbarkeit
- Kennzeichen und Rücklichter müssen sichtbar bleiben. Falls Letztere teilweise verdeckt sind:
Zweitkennzeichen sowie Blink-, Rück- und Bremslichter installieren.
- Zweitkennzeichen muss den Regeln der Straßenverkehrsordnung entsprechen.

ITALIANO
Nel ringraziare dell’acquisto di un portabiciclette MOTTEZ, prodotto interamente progettato e
fabbricato in Francia, auspichiamo che il prodotto risulti gradito.
Leggere obbligatoriamente il foglio istruzioni prima dell’uso.
Peso a vuoto: Kg. 4,5 / Capacità massima del portabiciclette: Kg. 45 per 3 biciclette.
Il portabiciclette non deve essere utilizzato su veicoli diversi da quelli indicati nella tabella di
omologazione veicoli.
- Per la sicurezza della persona e di qualsiasi altro utente, per evitare di essere ritenuti responsabili,
leggere con attenzione le varie raccomandazioni che proponiamo all’attenzione dell’utente. Queste
raccomandazioni non sono limitative e non dispensano dal rispettare le regole elementari di prudenza.
- Conservare queste istruzioni d’uso all’interno del veicolo e farle leggere a chiunque possa installare il
portabiciclette o guidare il veicolo con il portabiciclette installato.
- Il portabiciclette deve essere utilizzato solo ed esclusivamente per il trasporto di biciclette.
- Tenere e utilizzare le cinghie in perfetto stato e non usarle per scopi diversi o con altri anelli di
bloccaggio.
- Verificare il corretto serraggio delle parti delle biciclette trasportate (ruote, sella, …). Togliere
obbligatoriamente gli accessori amovibili delle biciclette (borraccia, fanali amovibili, pompa, etc.) per
non rischiare di perderli.
- Deve essere rispettata la capacità di carico posteriore.
1 – Montaggio delle cinghie superiori:
- Infilare le 2 cinghie superiori A negli appositi anelli della parte superiore. FARE ATTENZIONE AL
SENSO DI PASSAGGIO.
2 – Regolazione del portabiciclette:
- Regolare il numero X1 del braccio supporto bici in base alla tabella di omologazione del veicolo.
- Serrare di nuovo le maniglie.
- ACCERTARSI CHE, IN POSIZIONE SERRATA, IL BRACCIO SUPPORTO BICI SIA
CORRETTAMENTE BLOCCATO.
3 – Posizionamento del portabiciclette sul veicolo:
- Agganciare le 2 cinghie superiori sullo spigolo metallico superiore del portellone posteriore.
NON APPOGGIARE IL PORTABICICLETTE O LE CINGHIE SU SPOILER COMPOSITO
(PLASTICA).
- Per i veicoli con lunotto posteriore senza armatura (vetro incollato) o con guarnizione larga in
gomma, utilizzare l’apposito adattatore* (Kit rif. A027B).
- Misurare la lunghezza L delle cinghie secondo le tabelle di omologazione del veicolo.
4 - Controllo:
- Accertarsi che solo i manicotti M siano in appoggio su una parte sufficientemente solida della
carrozzeria (paraurti, rinforzo, nervatura, vetro, etc ...) e che la resistenza dei punti d’aggancio delle
cinghie sia ben salda.
- Accertarsi che nessun altro elemento del portabiciclette tocchi il veicolo. Per sicurezza, lasciare uno
spazio di qualche centimetro fra carrozzeria e armatura del portabiciclette.
5 – Montaggio delle cinghie laterali:
- Infilare le 2 cinghie laterali A negli anelli.
FARE ATTENZIONE AL SENSO DI PASSAGGIO.
6 – Aggancio delle cinghie laterali sul veicolo:
- Agganciare le 2 cinghie laterali sullo spigolo metallico laterale del portellone posteriore.
- Attenzione! I passanti non devono circondare i manicotti N.
7 – Montaggio delle cinghie inferiori:
- Passare le 2 cinghie inferiori A negli anelli della parte inferiore. FARE ATTENZIONE AL SENSO DI
PASSAGGIO.
Aggancio sul veicolo: 7a) SUI LONGHERONI (la parte metallica sotto al veicolo)
o 7b) SUL PORTELLONE POSTERIORE (spigolo metallico del portabagagli). NON APPOGGIARE O
FISSARE SU PARTI IN PLASTICA.
Table of contents
Languages:
Other Mottez Automobile Accessories manuals