Operating manual English
5
Never start the unit and never
leave it running in a closed room
or building. Use the unit outdoors
only.
Do not use the unit with wet
hands.
Wear eye and ear protection when
using the unit. If working in a dusty
environment, wear a face or dust
mask. A long-sleeved shirt
is recommended.
Wear thick, long trousers , boots
and gloves. Do not wear loose
clothing, jewellery, short trousers,
sandals and do not walk barefoot.
Pin your hair above your shoul-
ders. If required, wear a hair net.
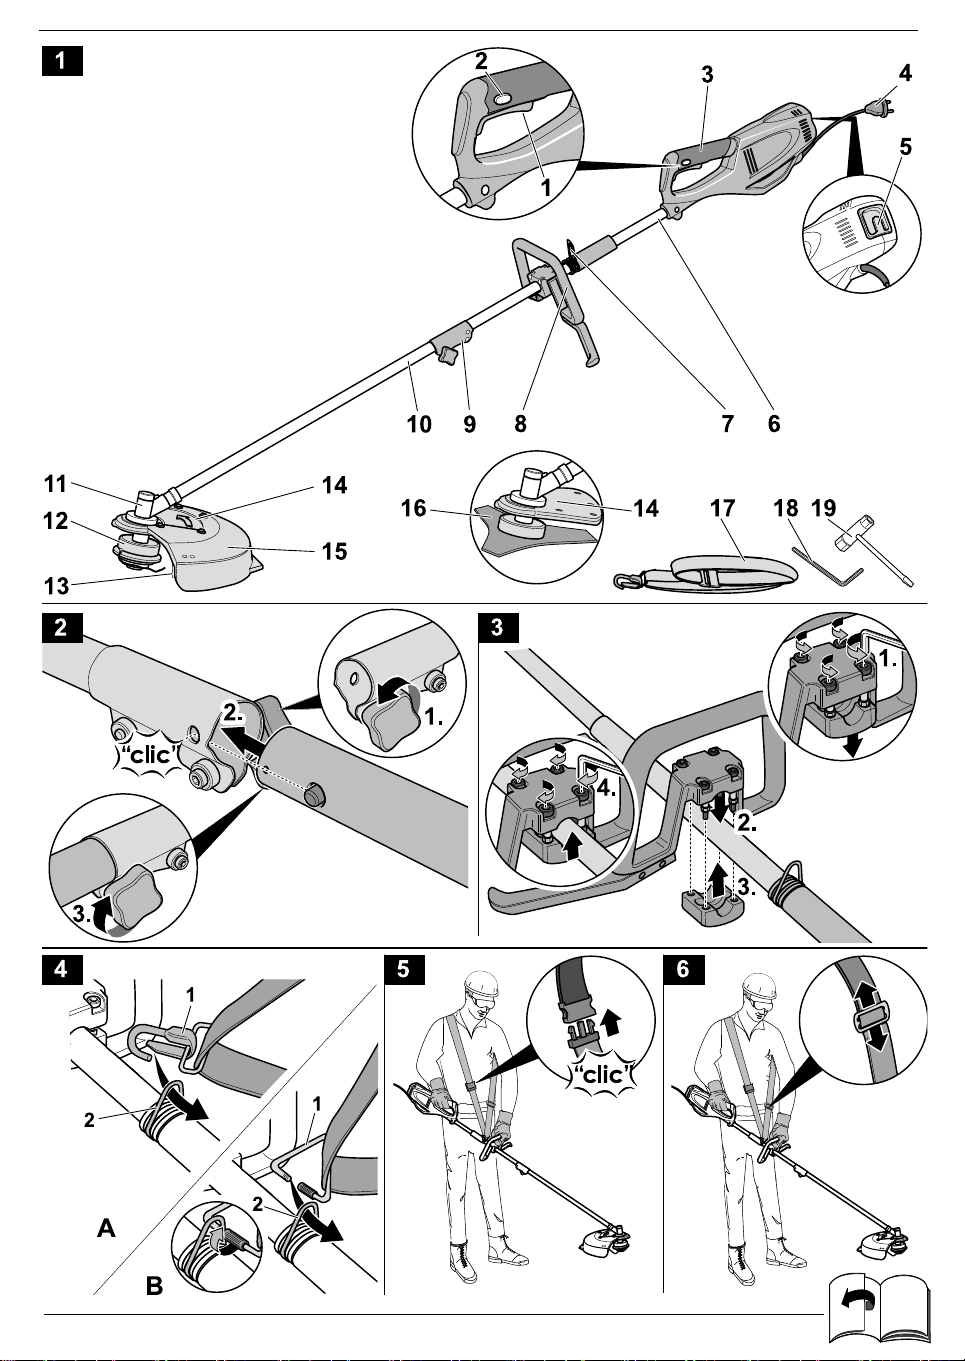
The cutting attachment cover
must always be attached.
When operating with the line
head, the line head cover must
also be attached. The correct trim
line must be installed.
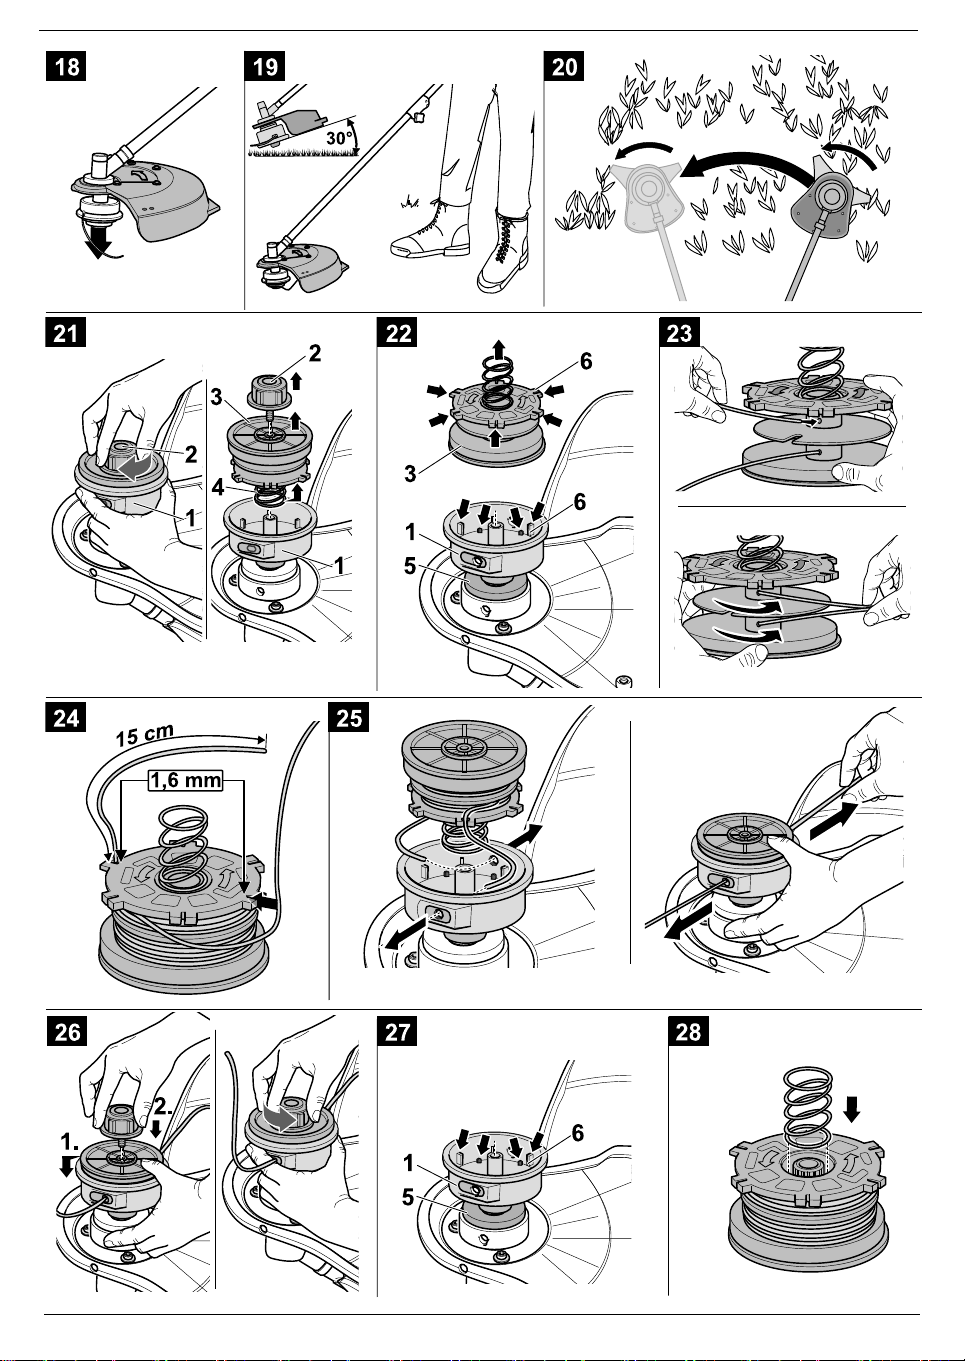
Both trim lines must be pulled out
for operation. The trim line must
not be pulled out over the end
of the line head cover.
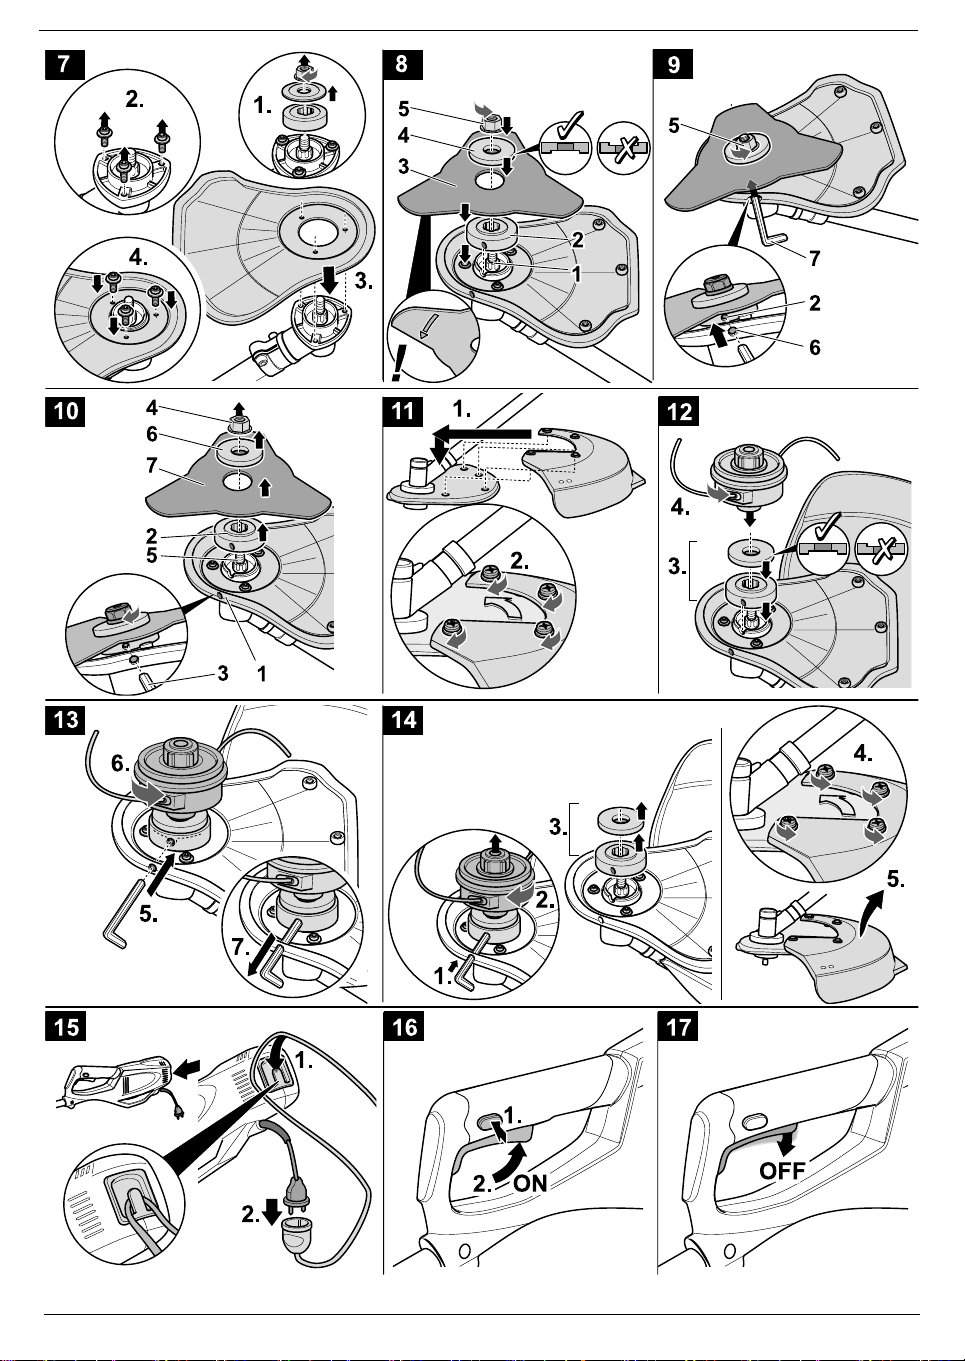
Before switching on the unit,
ensure that the line spool/cutting
blade cannot strike an object.
Adjust the hand grip to your size
so that you can hold the unit firmly.
When operating the unit, always
hold it firmly with both hands:
one hand on the rear handle,
the other hand on the hand grip.
When operating the unit, always
wear the shoulder belt.
Avoid starting the unit unintentio-
nally. Be ready to operate the unit
as soon as you switch it on.
User and unit must be in a stable
position when the unit is started.
Follow the instructions for starting
and stopping the engine.
Do not stretch too far over the unit.
Always have a secure footing and
keep your balance.
Operate the unit in daylight or
adequate artificial lighting only.
Do not use the unit in adverse
weather conditions, e.g. if there
is a probability of rain or a storm.
Never carry the unit by the power
cord.
Always guide the unit power cord
away from the unit to the rear.
Never operate the unit with
a defective operating switch.
When the switch is released,
the unit must stop immediately.
Keep your hands, face and feet
away from all moving parts.
Do not touch the cutting attach-
ment while it is rotating and do not
attempt to stop it.
Always switch off the engine if you
cannot start cutting immediately
or if you are moving from one
place to another.
If unusual vibrations occur, switch
off the engine immediately.
Check the unit for damage.
If the unit is damaged, contact
a specialist company.
Before removing blockages or
performing other work on the unit,
switch off the motor and pull out
the mains plug.
Use only original spare parts
for repairs.
These parts can be purchased
from your authorised dealer.
Never use parts, accessories
or attachments which are not
authorised for this unit.
Otherwise, the user may be serio-
usly injured and the unit damaged.
In addition, your warranty may
be deemed null and void.
Keep the unit clean and ensure
that there are no plants or other
objects caught between the
cutting attachment and guard.
Have all repairs carried out by
a repair shop only.
Working with the cutting
blade (depending on model)
Before operating the unit, please
read all safety instructions care-
fully.
Always keep the hand grip bet-
ween user and cutting attachment.
Never cut material if the cutting
blade is 75 cm or higher above
ground level.
The unit may recoil if the rotating
blade strikes an object which
cannot be cut immediately.
Recoils may be strong enough
to throw the unit and/or user in any
direction and may cause the user
to lose control of the unit.
Recoils may occur without
warning if the blade gets caught,
jams or locks. This can easily
happen in areas in which the
material to be cut is difficult to see.
Never use the undergrowth blade
to cut undergrowth thicker than
12.7 mm. Otherwise, violent
recoils may occur.
When using the cutting blade, the
cutting attachment cover must
always be attached.
Do not attempt to touch or stop
the blade while it is rotating.
If you strike or ensnare a foreign
object, immediately switch off the
engine and check whether the unit
has been damaged.
Have the repair damaged before
continuing to use the unit.
Do not use the unit with a bent,
cracked or blunt blade.
Throw away bent, twisted,
cracked or broken blades.
Do not sharpen the cutting blade.
The sharpened tip of the blade
may break off during operation.
This may result in serious injuries.
Replace the blade.
Clean the cutting blades with
a household detergent to remove
any remnants. Lubricate the blade
with machine oil to prevent rust.
Store and lock away the blade
securely to protect it from damage
and unauthorised use.
Other safety instructions
Before storing or transporting
the unit, leave the engine to cool
down.
Protect your unit while it is being
transported.
Store the unit in a dry condition,
locked away or high up to prevent
unauthorised use and damage.
Keep the unit away from children.
Never douse or splash the unit
with water or other liquids.
Keep the unit dry, clean and free
of dust. Clean the unit after each
use and follow the instructions
for cleaning and storage.
Keep this manual.
Read it frequently and use
it to instruct other users.
If you lend this unit to somebody
else, also include this manual.