INTRODUCTION
Please read the instructions before beginning to install your MullToa toilet. Experience
has shown that problem that can occur are almost all related to installation and
maintenance.To ensure hassle-free use, take a moment to read through the manual.
THREE IMPORTANT THINGS TO REMEMBER:
– When the toilet is used, room temperature should be at least 18 °C.
– If you are away for more than two days, always turn the power off to the
composting toilet 15e and 25e and put the cover in the seat opening,
otherwise the compost will become dry.
The 55ai and 65ai will be set in stand-by mode automatically.
– The heating element in the room can also be switched off, the composting toilet
will not be damaged by freezing.
2
CONTENTS
How MullToa works 3
Your MullToa package 3
Installation package 3
Optional accessories 3
Composting toilet in cross section — parts 3
Installation 4
What you need 4
Pipe installation 4
Temperature 4
Air supply 4
Assembly 5
Starting the empty toilet 5
Care 55, 65ai 6–15, 25e 8
Regular care 55, 65ai 6–15, 25e 8
Set the heater 55, 65ai 6–15, 25e 8
Liquid in the level tube 55, 65ai 6–15, 25e 8
Keep the right temperature 55, 65ai 6–15, 25e 8
Mixing 55, 65ai 7–15, 25e 9
Emptying the humus tray 55, 65ai 7–15, 25e 9
Grate 55, 65ai 7–15, 25e 9
Float 55, 65ai 7–15, 25e 9
Emptying freqency 55, 65ai 7–15, 25e 9
Empying before season 55, 65ai 7–15, 25e 9
Switch the power off! 55, 65ai 7–15, 25e 9
Leaving the house 55, 65ai 7–15, 25e 9
At the end of season 55, 65ai 7–15, 25e 9
At the season start 55, 65ai 7–15, 25e 9
FAQ 10-11
Bad odor 10
Compost too dry 10
Compost too wet 10
Insects in the toilet 10
Replacing the shear pin 11
Spare parts and service? 11
3
How the MullToa works
MullToa is a biological toilet that composts waste, toiletpaper and evaporates liquid, in the toilet itself.The
composting process takes place using nature's own microorganisms, without the need of any chemicals.The
toilet should be used as any other. Controlled air supply and heat, as well as regular mixing of the compost
accelerates the composting process and converts toilet waste into eco-friendly humus.This makes a nutrient
rich supplement for your garden.
Your MullToa box
The box contains:
The Toilet, a bag of humus and a rake.
Ceiling or wall installation (optional)
The installation package Ceiling contains:Ventilation pipes, (4 x 1.1 metre ventilation pipe, with 55 mm outside diameter),1 x
Exterior pipe (1 x110 mm outer diameter), 2 x Insulation (1 metres), 1 x reduction coupling (55/110 mm), 1 x roof flashing,
1 x insect netting.
The installation package Wall contains: 2 x 45 ° pipe insulation 55 mm, Insulation 1 x 50 cm, inside and outside cover,
1 x Exterior pipe 45 °, 2 x ventilation pipe,2 x Insulation 55 mm/1 m, 1 x Exterior pipe 110mm, 1 x Exterior pipe 110 mm,
(belled), 1 x reduction sleeve, 1 x insect netting.
Extra accessories
Optinal accessories are available: Bends (30 ° and 45 °), additional insulation, straight pipes, humus starter,
extra tray.
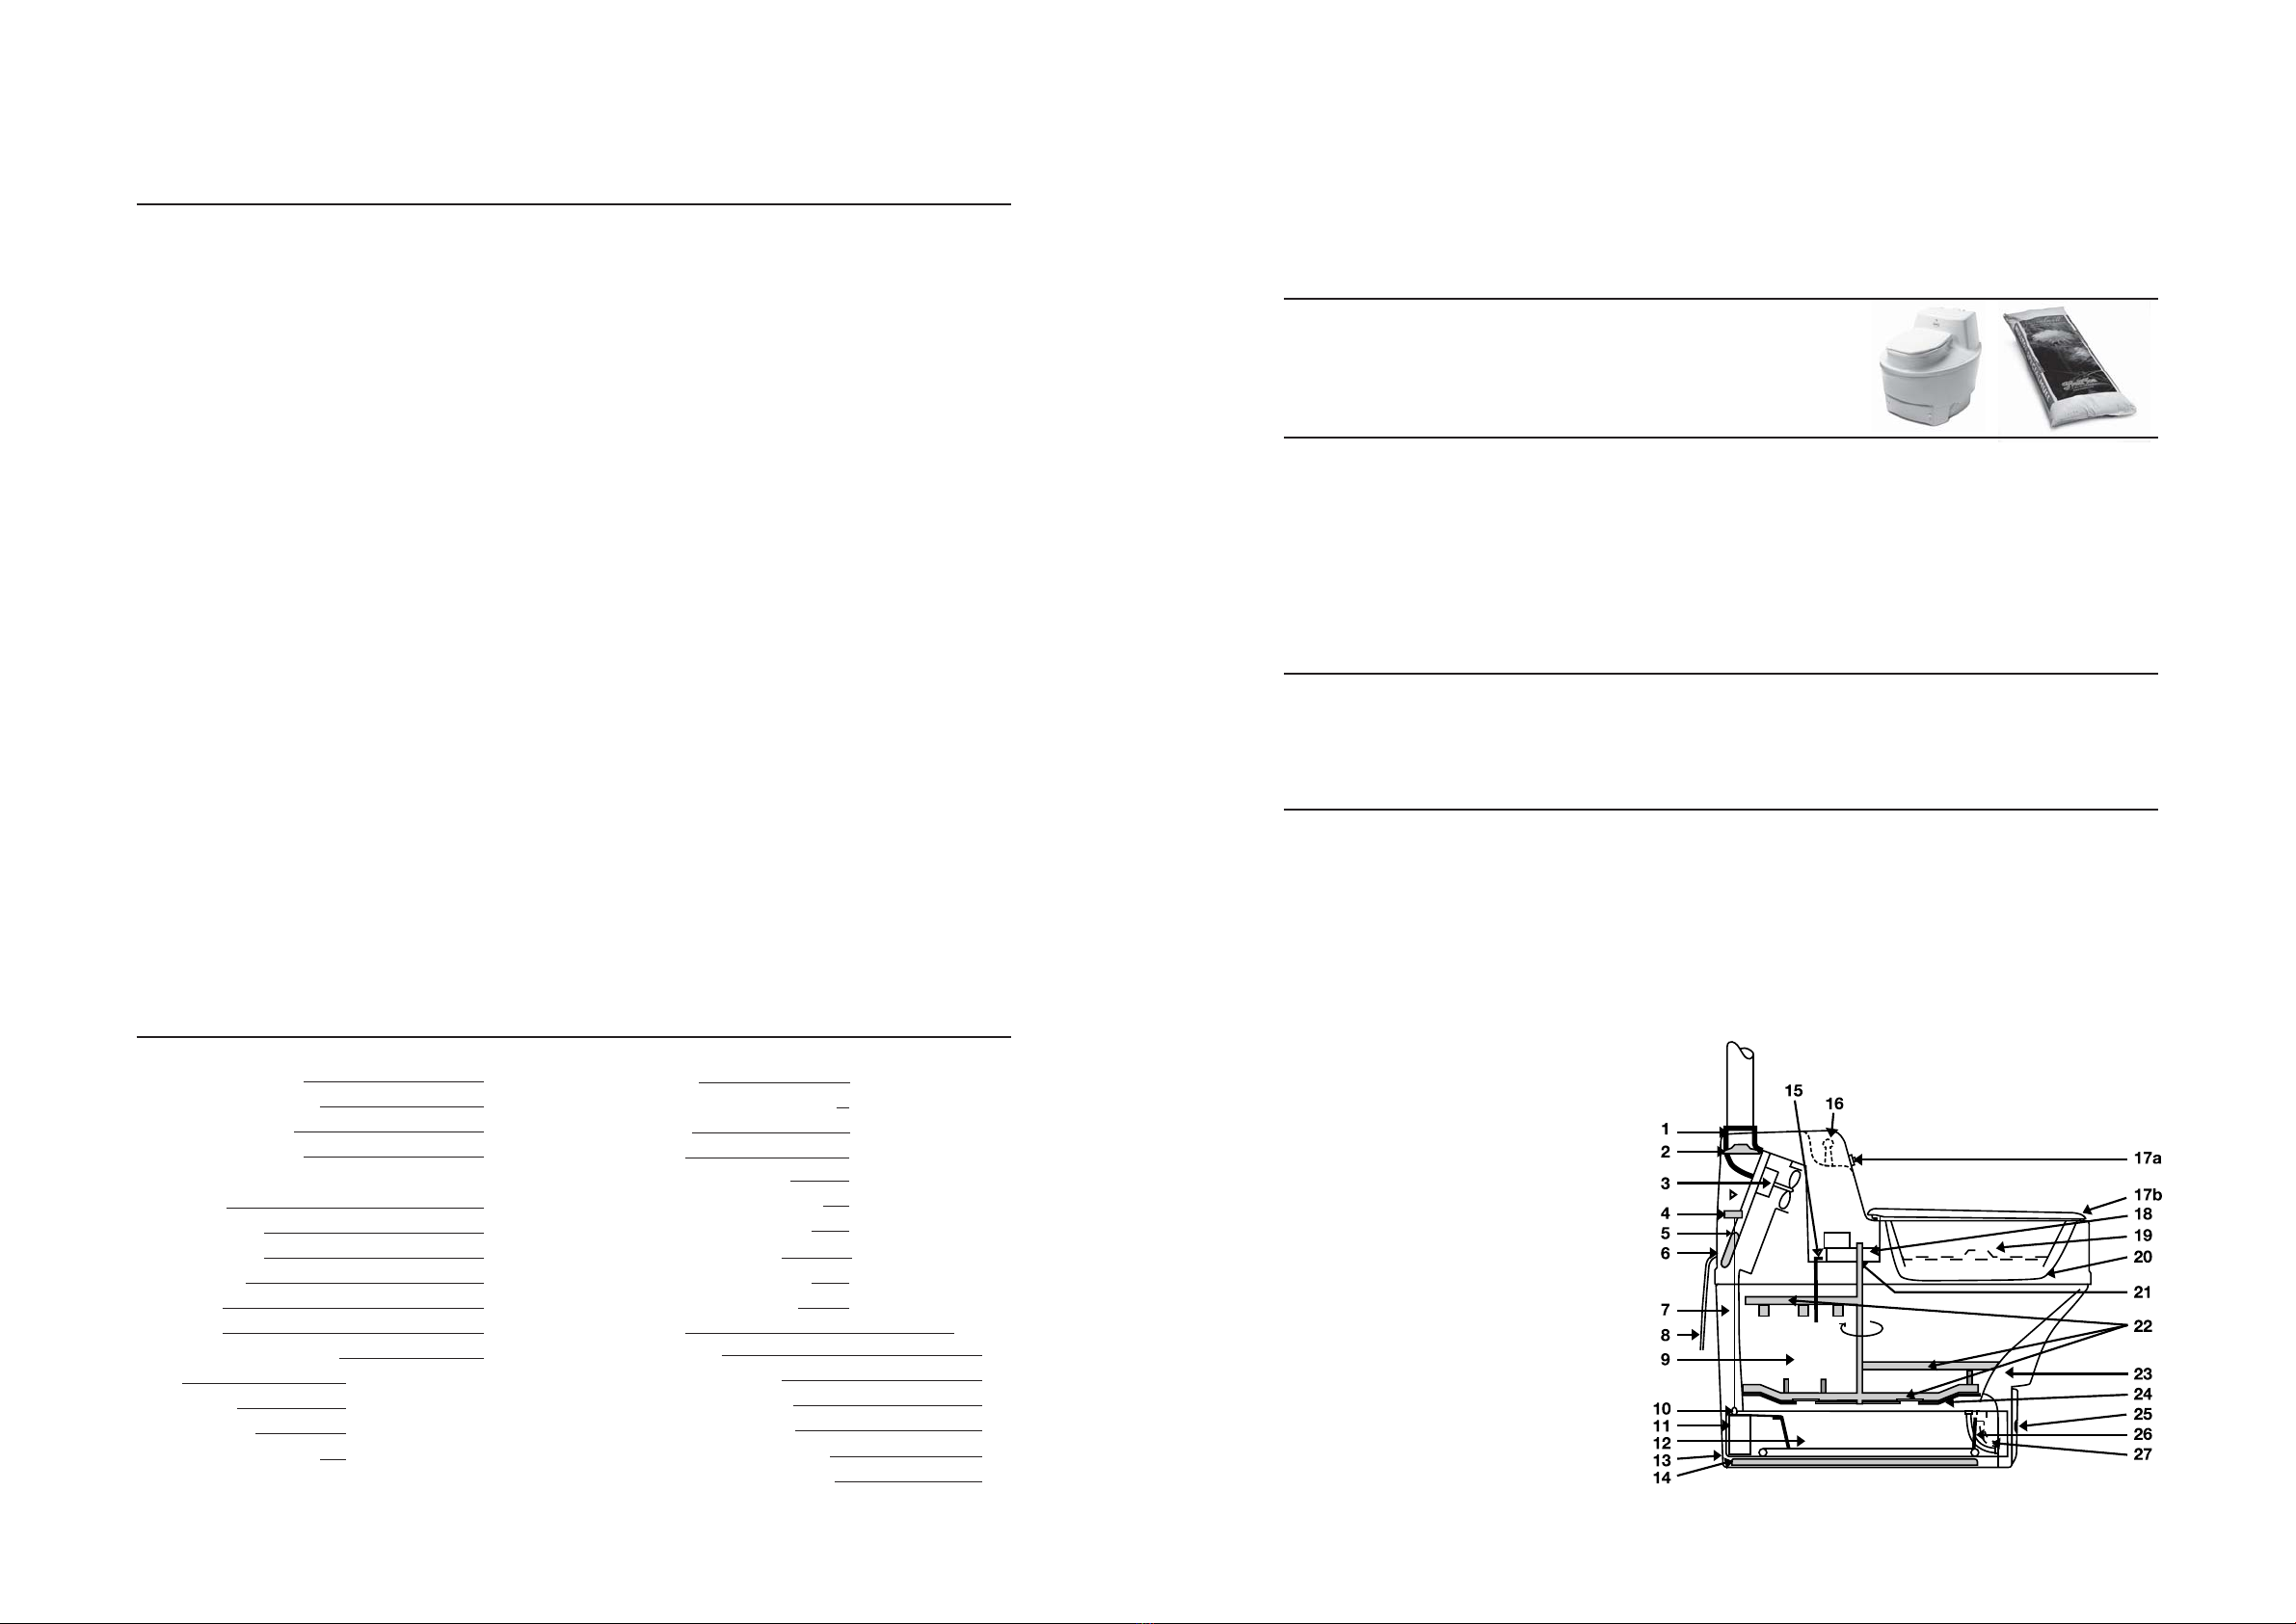
Composting toilet in cross section
1. Rubber Coupling
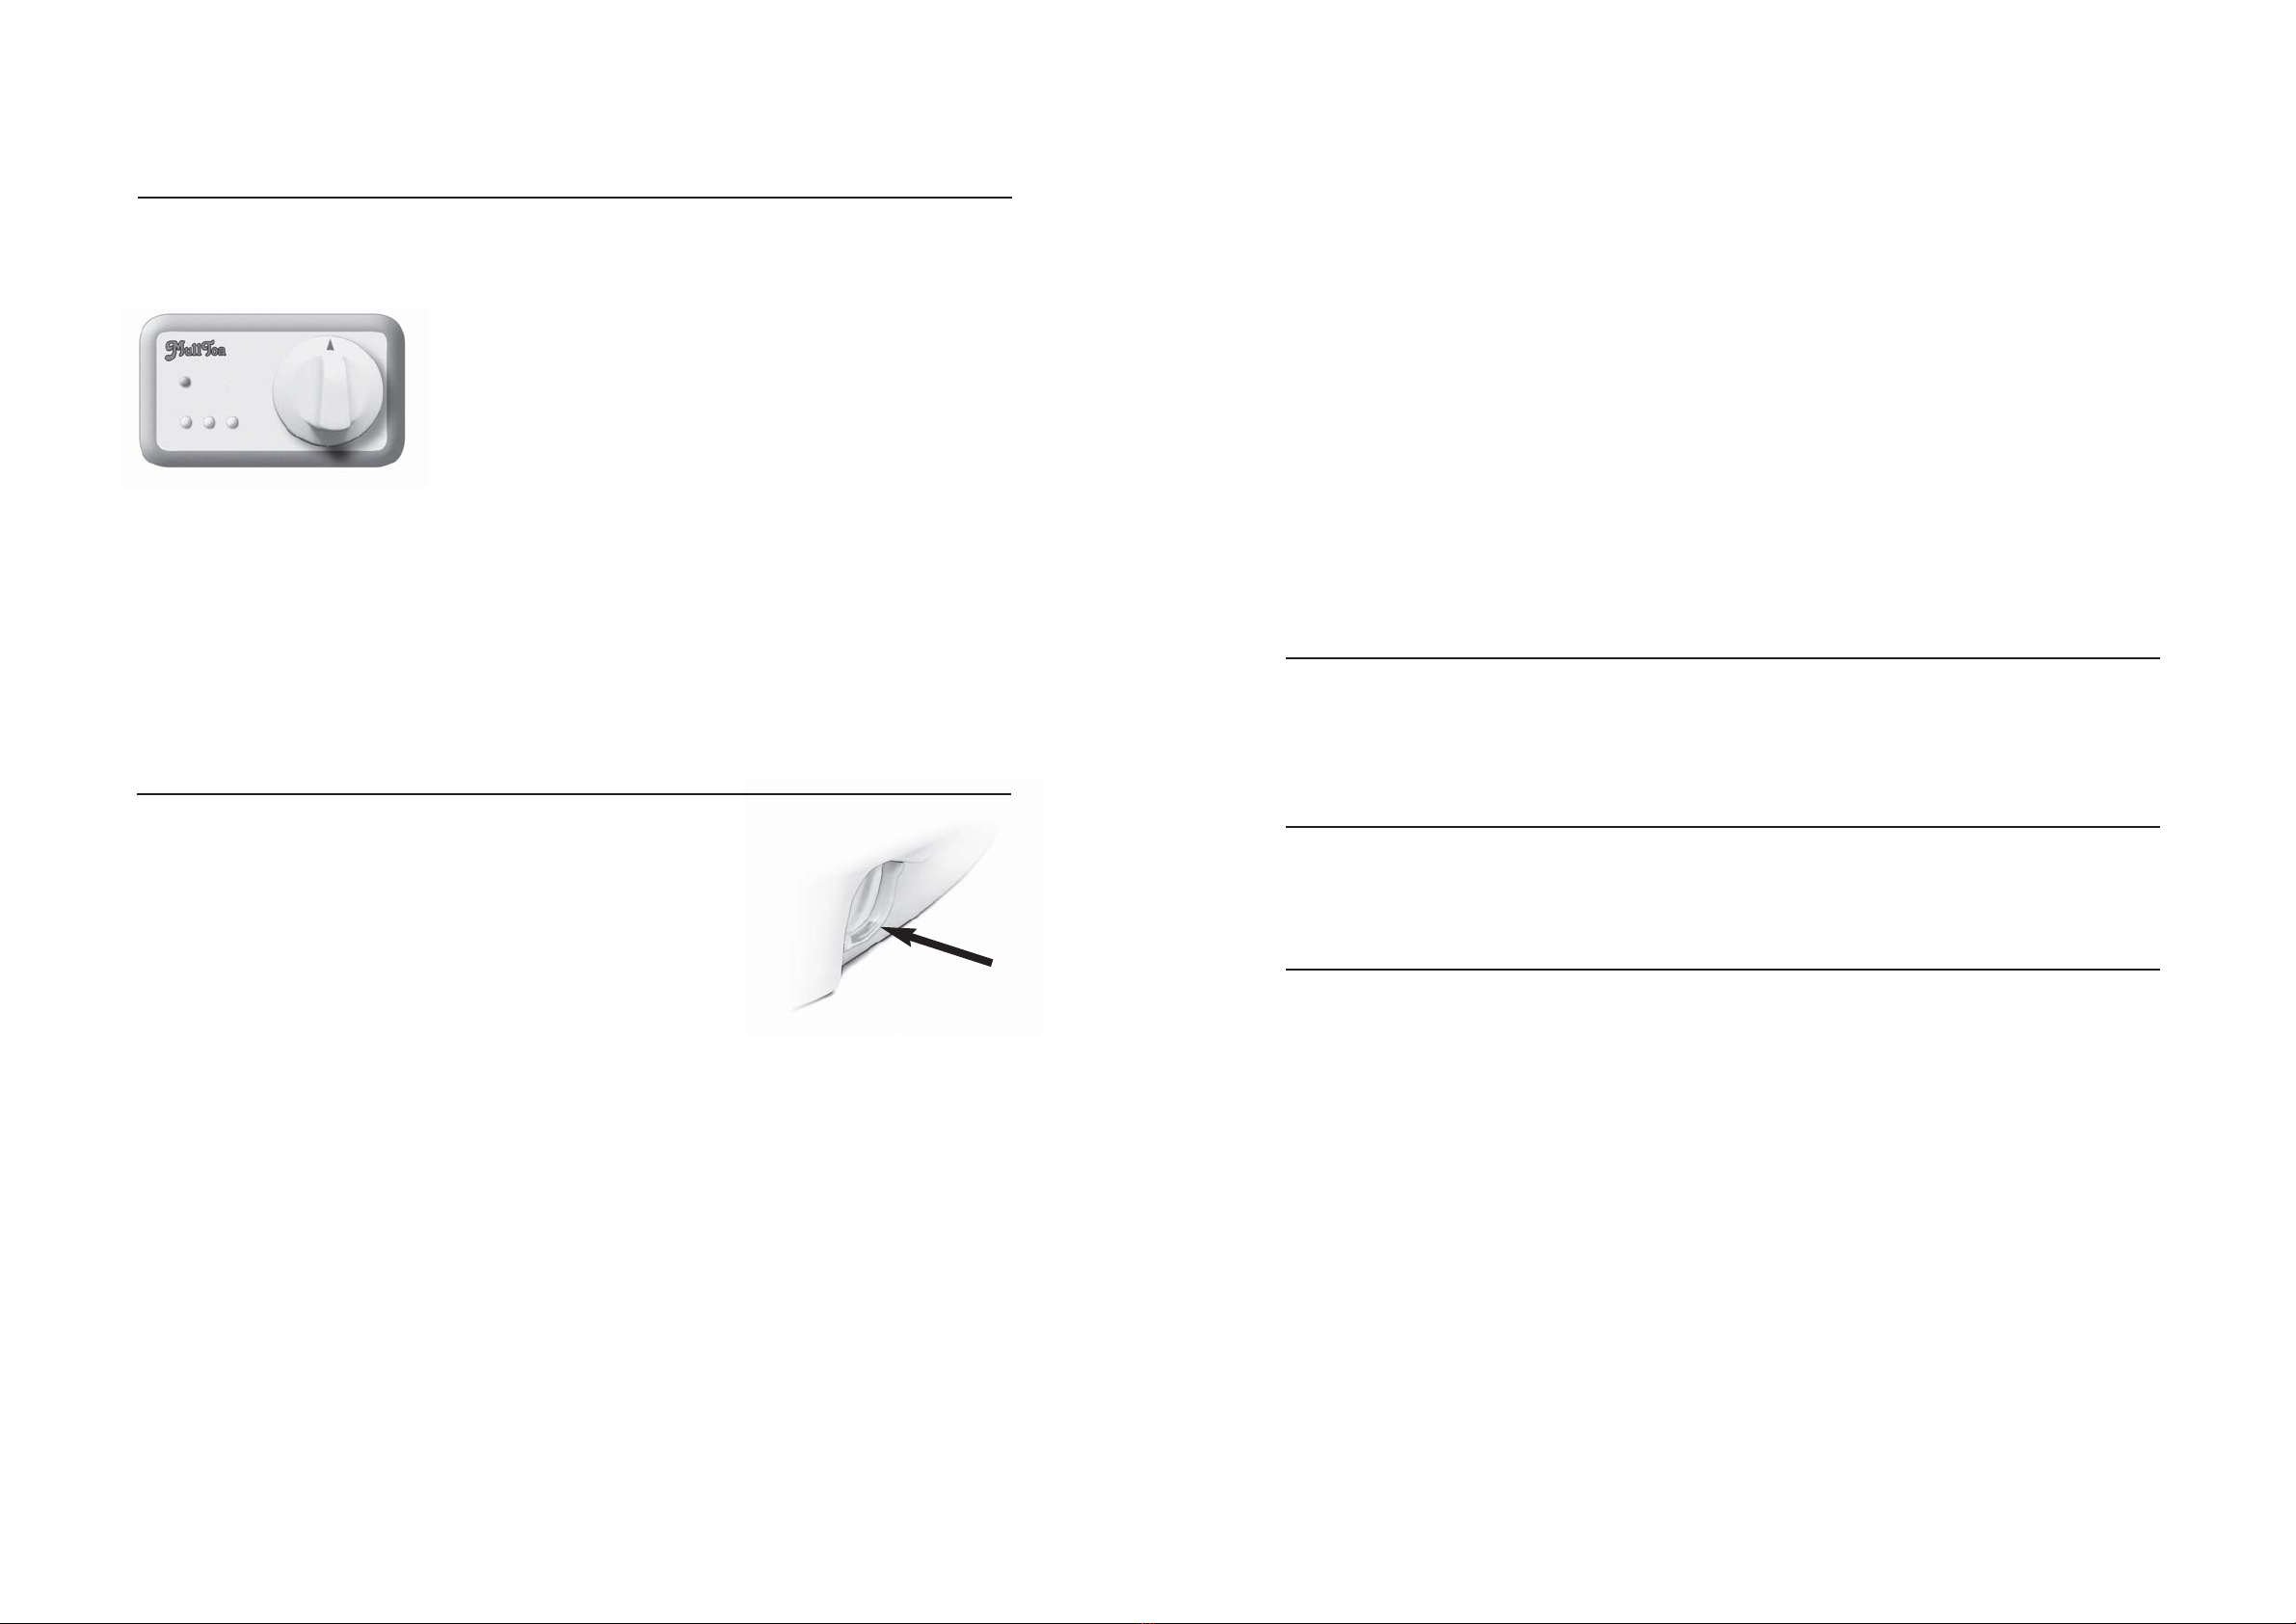
2.Adjustable setting 15e/25e, Display 55ai/65ai
3. Fan motor
4. Liquid indicator switch 55ai/65ai
5. Plug
6. Heating element
7.Airflow
8. External Cord
9. Composting chamber
10. Liquid level indicator 55ai/65ai
11. Float (in tray) 55ai/65ai
12.Tray
13. Overflow connection (55ai/65ai)
14. Lower heating element
25. Sensor arm compost level
26. Handle Mixing 15e
17 a. Sensor magnet
b. nut for compost cover
18. Mixer motor 25e/55ai/65ai/
19. Cover removable
20. Compost cover
21.Shearpin 25e/55ai/65ai
22. Shaft with mixer arms
a. Upper mixing arm
b. Fixed arm (55ai/65ai)
c. Lower mixing arm with grating
c)
b)
a)
23.Airflow
24. Grate
25. Froncover
26. Liquid tube, owerflow (at the left hand side, seen from the front)
27. Liquid tube, tray (at the right hand side, seen from the front)