5
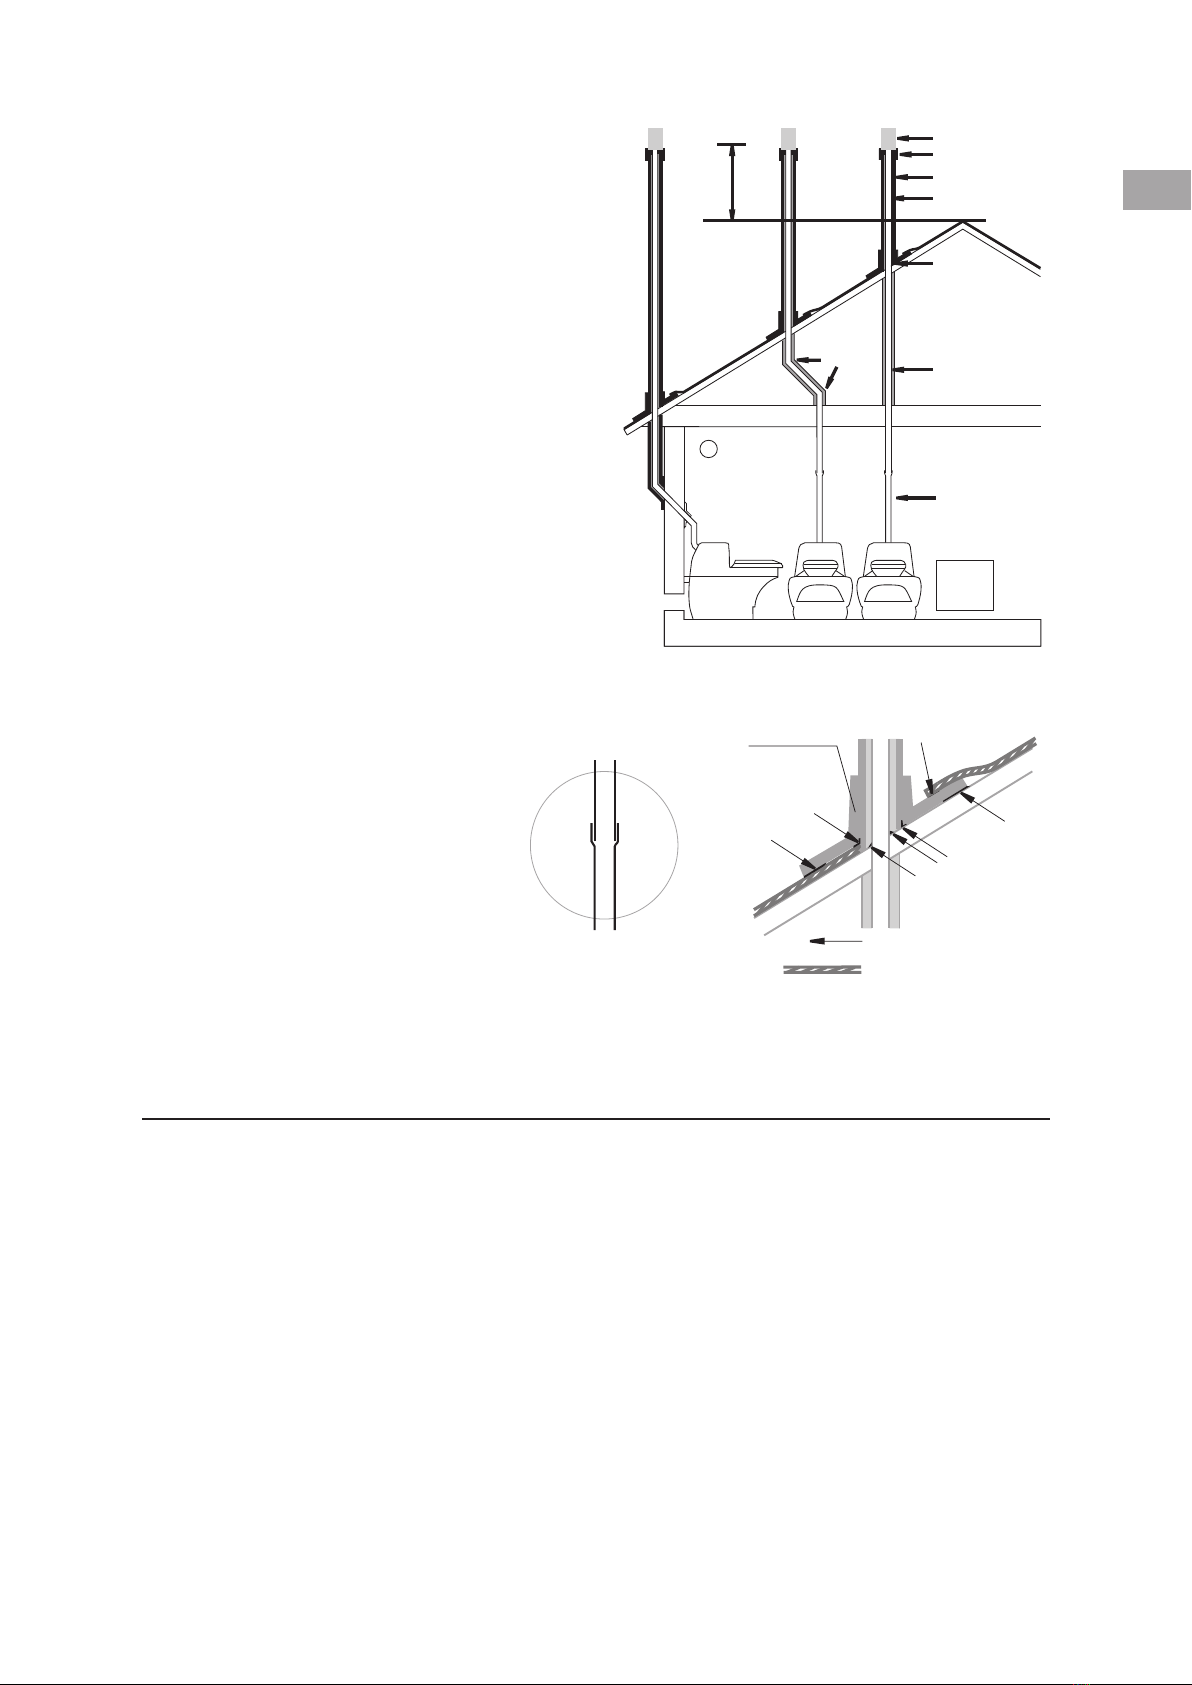
Option B – ventilation through the roof
Priot to mounting the Installation Kit and Connection
Kit are needed; these can be purchased from the
place where the toilet was purchased.To install the
ventilation pipe, loosen the two through screws
holding the fan motor in place.Then install it using
the two extra screws that are in the lower section,
under the fan motor. Place the connecting piece on
the fan cover.
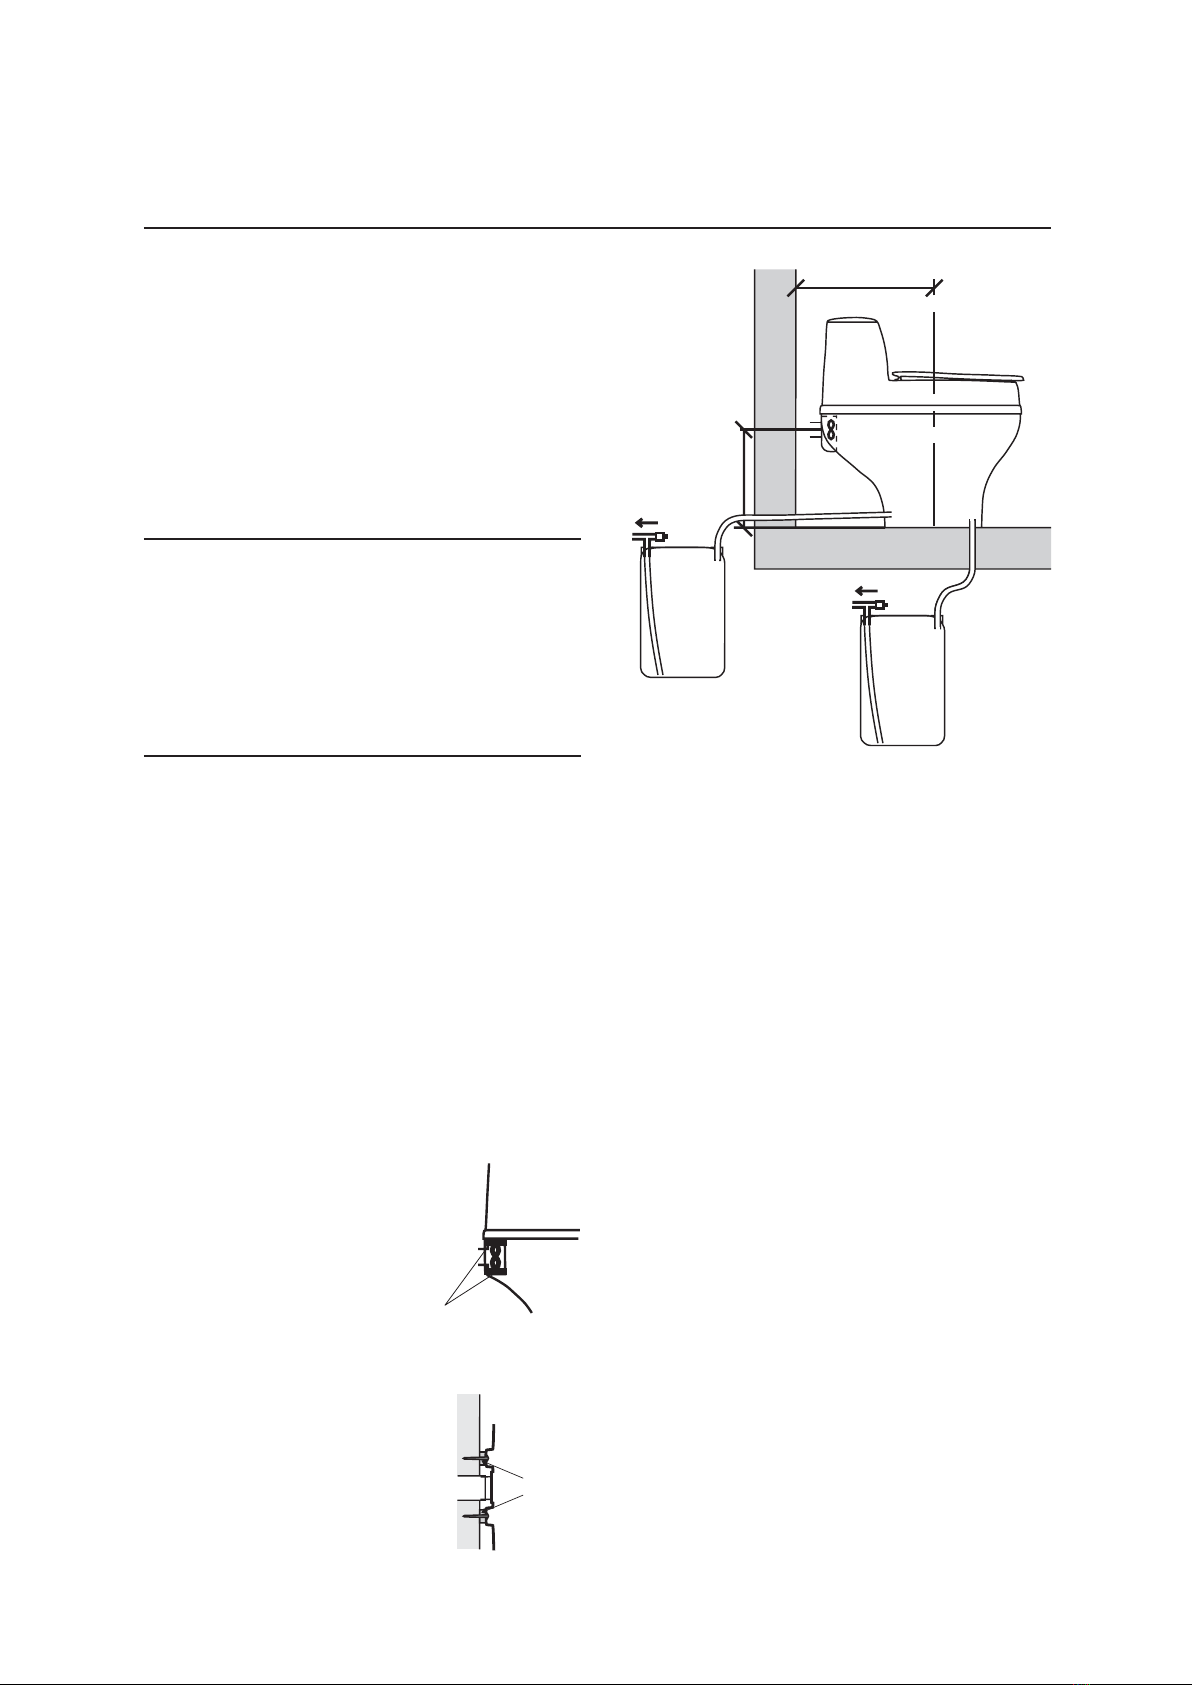
•Lift off the upper section (1) of the toilet, remove
the inner container (9).
•Drill or cut a hole in the lower section for the
urine hose, according to
chosen option (7A or 7B).
•Position the lower section
(10) against the external
wall of the room.
•Mark for wall brackets,
ventilation pipe and hose.
•Measure and drill a hole in
the roof for the ventilation
pipe, 55 mm. Saw a hole for
the urine hose (25 mm).
•Pass the urine hose
through the floor/wall
and seal with silicone.
•Set the lower section in position and seal between
the floor and the toilet. Connect the urine hose to
the urine bowl. Fix the hose using hose clamps,
being careful not to damage the nipple.
•Mount the ventilation pipes unsleeved end into the
rubber coupling. Screw the toilet securely to the
wall using screws and washers.
•Install the ventilation pipe and seal the passage
through the exterior roof using asphalt sealant to
prevent leaks.
•Insulate all piping that passes through cold spaces
(e.g. in the loft and on the outside of the building)
– this is to prevent condensation.
•Cut the exterior pipe to fit the angle of the roof.
•Position the roof flashing – use soapy water to
make this easier. For those with a tin roof, it may
be best to get a metal worked to make some
metal flashing.
•Place the outer pipe with the roof flashing over
the insulated ventilation pipe.
•Adjust the roof flashing to the external roof and
seal firmly with asphalt sealant between the
flashing and the roof.
•Once all the piping is insulated and covered, fit
the reducing coupling on the top, and then fit the
insect netting.
•Place a bag in the composting chamber and fold it
over the edge. Place the container inside the lower
section and check that the metal railing covers the
edge of the urine bowl and that the bag does not
cover the fan.The bag is tightened in the front by
the metal railing and in the back by the handle.
•Pour approximately 5 litres of Special humus into
the toilet.
•Plug into an earthed socket.
IMPORTANT! Insulate the pipe according to the
instructions. Do not use pipe bends over 45 degrees
and avoid having more that two; this is to ensure a
natural draught when the toilet is not in use.
FAN
pre-mounted
screws
fix the cover
using screws
and nuts
Attachment
Option B
(from above)
W
A
L
spacers
pip
Use no more than 2 pipe bends, and none over 45° angle, to ensure a natural draught.
MAX 45°
B2B1
non-
sleeved
sleeved
pipe
RUBBER
FLASHING
sealing using asphalt sealant
roof covering (tile,
felting or tin/plastic)