MullToa Separera Mini User manual

Installation- och bruksanvisning
Separera Mini med urinbehållare
Denna urinseparerande toalett är tillverkad av kretsloppsanpassat material och är konstruerad för att tillfredsställa höga krav
under många år.Vad innebär det att man separerar avfallet? Toaletten är utformad så att den redan vid toalettbesöket skiljer
(separerar) det fasta avfallet från vätskan (urinen). Detta innebär att Separera har två behållare, den ena för urin och den
andra för det fasta avfallet.
Kontakta Miljö- och Hälsoskyddskontoret
Kontakta Miljö- och Hälsovårdskontoret för att bli befriad från latrinhämtningsavgift och för att få reda på lokala,
aktuella hälsovårdsregler. Detta gäller alltid vid installation, oavsett typ av toalett.
Separera kartongen innehåller
Installationspaketet för alternativ A (väggenomföring)
Toalettstol • Täcklock • Efterkomposteringskärl med lock • Urinbehållare urtagbar 7 liter
Skruv med brickor enligt alt.A Ventilationsrör 50 cm för vägg • Näthuv • Miljöpåse (10 st)
Vid ventilationsdragning över tak behöver man komplettera med två paket:
Installationspaketet för alternativ B (utluftning genom tak)
Installationspaketet innehåller: Ventilationsrör (4x1,1meter 55 mm ytterdiameter)
Ytterrör (1x 1meter 110 mm ytterdiameter) • Isolering (2 x 1meter) • Reduceringsmuff • 1Takstos • Näthuv.
Anslutningspaket innehåller:
Väggfästel, Rörkrök 90 grader, Skruv
Extra tillbehör
Miljöpåsar • Specialmull • Ejektortank
Separera Mini i
genomskärning
1. El kassett med fläktmotor
2. Anslutningssladd med adapter
3. Innerbehållare för fast avfall
4. Toalettsits mjukstängande
5. Överdel
6. Underdel
7. Insyningsskydd
8. Urinbehållare, urtagbar
1
2
3
6
7
4
5
8
Sep-Mini-instruksv-2022-4sid.qxp_Layout 1 2022-05-11 13:39 Sida 2

Verktyg:
Borrmaskin, hålsåg 55 och 35mm, silikon
Lufttillförseln
Se till att lufttillförseln är god, exempelvis genom en luftspalt
under dörren eller ventil. Evakueringen av luften skall ske
genom toaletten, korsdrag bör undvikas.
Montering
Utluftning kan ske genom yttervägg eller upp genom tak.
Alternativ A - utluftning genom yttervägg
Med toaletten medföljer installationssats enligt Alt.A.
1.Lyft av överdelen (5) på toaletten, lyft ur
innerbehållaren (3) och urinbehållare (8).
2. Mät upp för ventilationsdragning genom yttervägg.
höjd 359 mm från golv till centrum hål.
3. Borra upp hål i yttervägg för ventilationsröret
(55 mm).
4. Placera underdelen (6) på plats mot toalettrummets
yttervägg, markera för skruv mot vägg.
5. Montera ventilationsröret, täta med silikon runt
röret både på insidan och utsidan. Montera näthuv
på röret.
6. Anslut toaletten mot ventilationsröret.
Skruva fast toaletten i väggen.
7. Placera en påse i innerbehållaren och vik den över
kanten. Montera ramen så den låser påsen. Placera
behållaren i underdelen och kontrollera att påsen
inte täcker fläkten.
8. Sätt urinbehållaren på plats.
9. Montera tillbaka överdelen.
10. Sätt i stickkontakten.
11. Kontrollera att Separerar dekalen lyser grönt,
för att säkerställa att nivåvakten i behållaren
har kontakt.
INSTALLATION
Alternativ A Alternativ B
Sep-Mini-instruksv-2022-4sid.qxp_Layout 1 2022-05-11 13:39 Sida 3

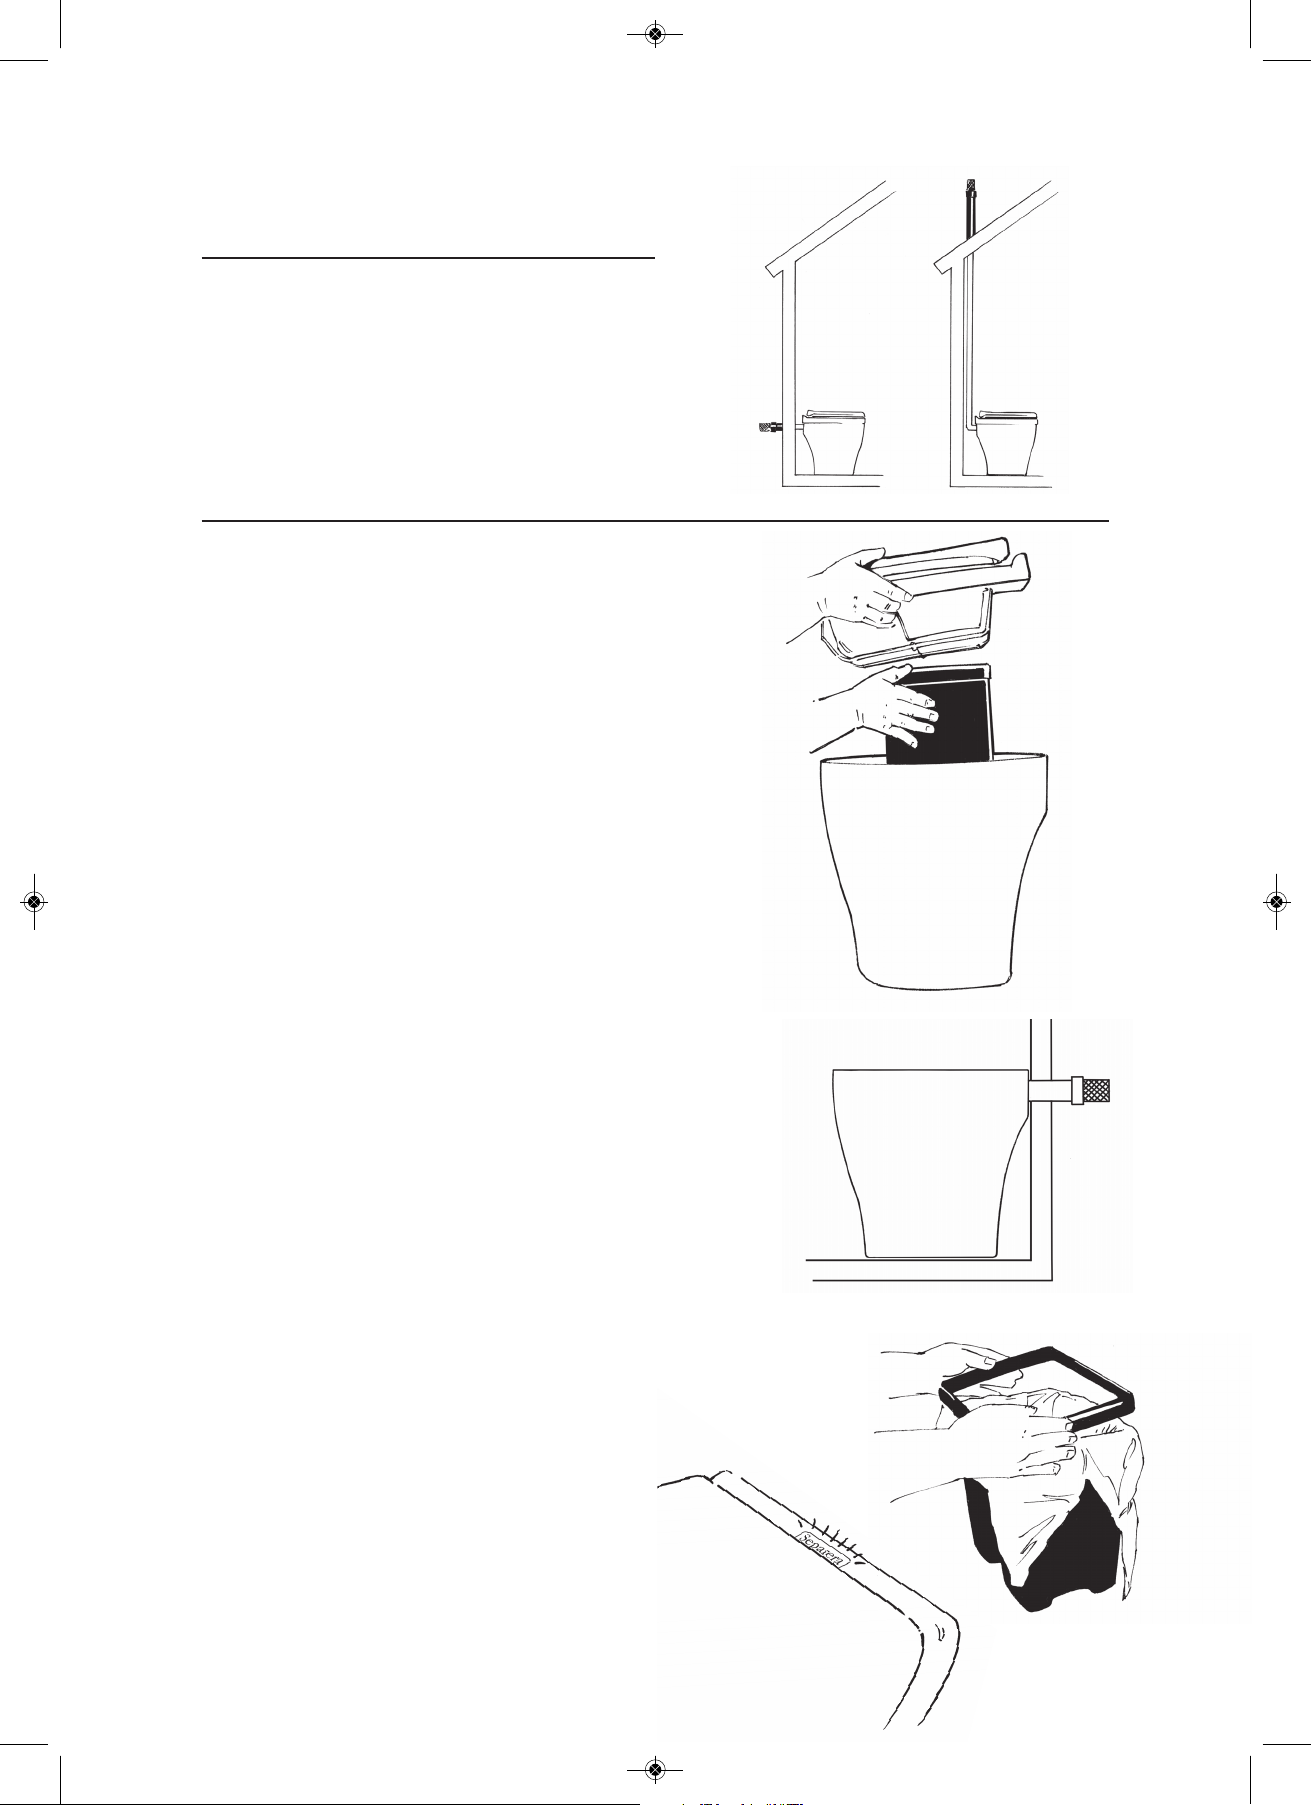
Alternativ B - utluftning genom tak
För montering behövs tillbehör Installationspaket Tak
och Anslutningssats
1. Lyft av överdelen (5) på toaletten, tag ur
urinbehållaren (8) och innerbehållaren (3).
2. Montera väggfästet tillfälligt på underdelen (6),
placera underdelen på plats mot toalettrummets
yttervägg, markera för väggfästet.
3. Demontera väggfästet från toaletten, gör hål
och montera väggfästet i väggen.
4. Montera vinkelanslutning i anslutningsstosen.
Skruva fast toaletten i väggfästet.
5. Mät ut och tag upp hål i tak, diameter 55 mm.
6. Montera röret, täta genomgången i yttertaket med
asfaltkitt så att det inte uppstår läckage.
7. Isolera all rördragning som sker i från toalettutrymmets
innertak och uppåt - detta för att förhindra kondens.
8. Kapa av ytterröret så att det passar med takets vinkel.
9. Trä på takstosen på ytterröret - använd såpvatten
så går det lättare. För den som har plåttak kan det
vara lämpligt att kontakta en plåtslagare för att
göra en plåtstos.
10. Trä på ytterröret över det isolerade ventilationsröret.
11. Justera takstosen mot taket och täta ordentligt med
asfaltkitt mellan stosen och yttertaket.
12. När ytterröret är monterat, montera reduceringsmuff
och näthuv.
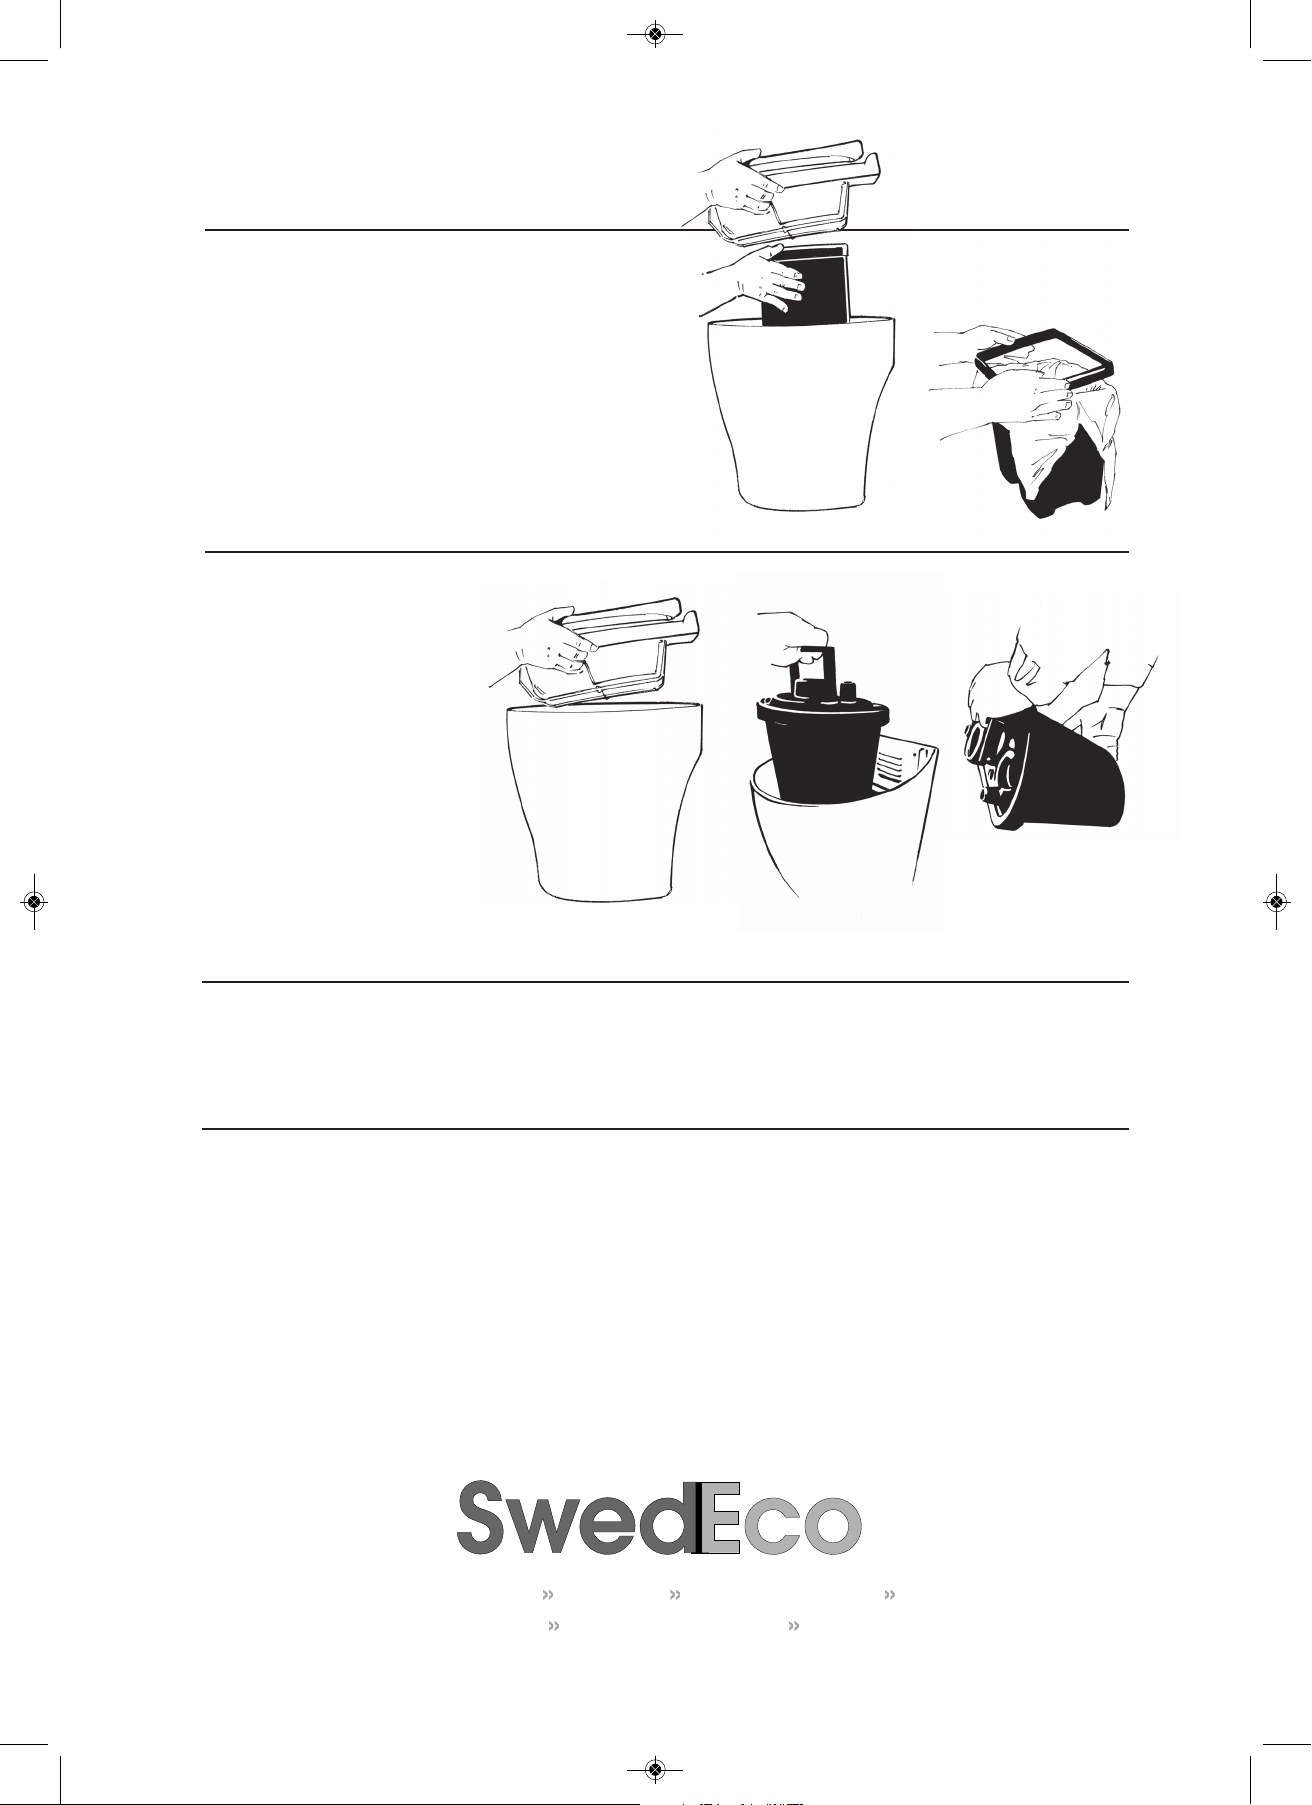
13. Placera en påse i innerbehållaren och vik den över
kanten. Montera ramen så att den låser påsen. Placera
behållaren i underdelen och kontrollera att påsen
inte täcker fläkten.
14. Sätt urinbehållaren på plats.
15. Montera tillbaka överdelen.
16. Sätt i stickkontakten.
17. Kontrollera att Separerar dekalen lyser grön, för
att säkerställa att nivåvakten i behållaren har kontakt.
Sep-Mini-instruksv-2022-4sid.qxp_Layout 1 2022-05-11 13:39 Sida 4

Swedish Ecology AB Klippan 1J S-414 51 Göteborg Sweden
www.mulltoa.com
Det fasta avfallet
Vid normal användning producerar en familj på fyra personer
ca 7 liter fast avfall per vecka.
Man lyfter då ur innerbehållaren och bär ut den, knyter ihop
påsen och flyttar över påsen till efterkomposteringskärlet lägger
på ett par liter MullToa specialmull eller jord och sätter på locket.
Placera därefter behållaren på en skuggig plats i trädgården
för efterförvaring. Efterförvaringstiden blir i regel 6-9 månader
innan innehållet kan användas som jordförbättringsmedel. Sätt i
en ny miljöpåse och sätt tillbaka innerbehållaren i toaletten.
Urinhantering
När urinbehållaren är full så kommer
Separera dekalen ändra färg från grönt
till rött.
1. Bryt strömmen
2. Tag av överdelen
3. Lyft ur urinbehållaren
4. Töm på avsedd plats
5. Skölj ren med vatten
6. Sätt tillbaka urinbehållaren
7. Sätt i kontakten och kontrollera att dekalen lyser grönt.
El-anslutning
Separera är godkänd för installation i våtutrymmen. Om nätsladden skadas måste den bytas av tillverkaren eller av annan
behörig person.
Allmänna råd
•Man bör emellanåt göra rent urinskålen med varmt vatten för att förhindra saltavlagringar.
•Har det kommit insekter i toaletten så kan man strö MullToa Flugstopp på komposten.
•Skulle dålig lukt uppstå i utrymmet så kontrollera att röranslutningarna är täta och tilluften tillräcklig.
•Vid rengöring av toaletten används endast milda rengöringsmedel utan slipmedel.
•Flugstopp och miljöpåsar kan beställas i vår webshop.
SKÖTSEL
Sep-Mini-instruksv-2022-4sid.qxp_Layout 1 2022-05-11 13:50 Sida 1

Grafisk design och produktion: ADHT. Tryck: Typoprint. 2022
User manual for Separera Mini
with urine container
This urine separating toilet is constructed from eco-friendly material and is designed to cope with high demand over many
years.What does separating waste mean? Well, the toilet is designed so solid waste is separated from the liquid (urine).This
means that Separera has two containers, one for urine and another for solid waste.
Both must be dealt with in accordance with local regulations.
Contacting Environmental Health
Contact Environmental Health office regarding local health regulations.This applies when installing any type of toilet
The Separera box contains
Toilet with fan • Lid• Urine hose (1.5 m) • Screw with washer for wall bracket according to option A
•Ventilation Pipe 50 cm for wall • Insect netting • 2 Composting containers • Latrine Bags (10 pcs)
The installation kit contains:
Ventilation pipes (4x1.1m ventilation pipe with 55 mm outer diameter), exterior pipe (1x 1.1m with 110 mm outer
diameter), insulation (2 x 1m), reducing coupling, roof flashing and insect netting.The connection kit used in installation
option B can be ordered from your dealer.
Wall connectionkit:
Wallbracket • Pipebend 90 degrees • Screw /washers
Further accesories
Ejector Tank, Latrine Bags.
Separera Mini
cross section
1. Fan motor
2. Plug / Cord
3. Inside container with a bag
4.Toilet seat, soft close
5. Upper section
6. Lower section
7. Compost cover
8. Urine container
1
2
3
6
7
4
5
8
Sep-Mini-instruk-Behollare-EN-2022-4sid.qxp_Layout 1 2022-05-10 14:56 Sida 2

Tools:
Drill, Holesaw for 55 och 35mm hole, Silicon
Air supply
Make sure there is a good air supply, for example, through a
10 mm gap under the door or a vent.Air will be evacuated
through the toilet, cross-draughts must be avoided.
Assembly
Ventilation can be either through an external wall or up
through the roof.
Option A – ventilation through external wall
The toilet is supplied with an installation kit according to
Option A.
1.Lift off the upper section (5) of the toilet, remove the
urine container (8) waste container (3).
2. Measure and mark for the ventilationpipe through
the wall, hole centre 359 mm from the floor.
3. Make a hole in the external wall for the ventilation
pipe (55 mm).
4. Set the lower section in position and mark for
fastening in the wall.
5. Fit the ventilation pipe and seal in- and outside using
silicone. Fit the insect netting.
6. Set the lower section in position and connect to the
ventilation pipe.
7. Fasten the toilet securely to the wall using screws
and washers.
8. Place a bag in the composting chamber and fold it
over the edge. Put the frame in position to lock the
bag. Place the container inside the lower section and
make sure that the bag does not cover the fan.
9. Put the urine container in position.
10. Put the upper section back in place.
11. Plug in.
11. Check that the Separera logo is turning green to
confirm that the urinecontainer is in correct position.
INSTALLATION
Option A Option B
Sep-Mini-instruk-Behollare-EN-2022-4sid.qxp_Layout 1 2022-05-10 14:50 Sida 3

Option B – ventilation through the roof
Prior to installation of the Installation Kit and Connection Kit
are needed.These can be purchased from the place where
the toilet was bought.
1. Lift the upper section (5) of the toilet, remove the urine
container (8) and waste container (3).
2. Fasten the wallbracket temporairly on the lower section
(7), put the lower sektion in posision aginst the wall.
Mark for the bracket.
3. Remove the wallbracket from the toilet. Install the
bracket on the wall.
4. Put the 90 degrees bend on the outlet.
Set the lower section in position and fasten it to the
wallbracket.
5. Make a hole in the roof for the ventilation pipe, 55 mm.
6. Install the ventilation pipes unsleeved end into the
90 degrees coupling.
7. Insulate all piping that passes through cold spaces
(e.g. in the attic and on above roof.This is to prevent
condensation.
8. Cut the exterior pipe to fit the angle of the roof.
9. Position the roof flashing. For tin roof, its better to have a
sheetmetal worker to make the flashing.
10. Put the outer pipe with the roof flashing over the
insulated ventilation pipe.
11. Adjust the roof flashing to the external roof and seal
firmly with asphalt sealant between the flashing and
the roof.
12. Once all the piping is insulated and covered, fit the
reducing coupling on top, and then fit the insect netting.
13. Place a bag in the composting chamber and fold it over
the edge. Put the frame in position to lock the bag. Place
the container inside the lower section and make sure that
the bag does not cover the fan.
14. Put the upper section back in place.
15. Plug in.
16. Check that the Separera logo is green to confirm that the
urinecontainer is in correct position.
Sep-Mini-instruk-Behollare-EN-2022-4sid.qxp_Layout 1 2022-05-10 14:55 Sida 4

Swedish Ecology AB Klippan 1J S-414 51 Göteborg Sweden
www.mulltoa.com
Grafisk design och produktion: ADHT. Tryck: Typoprint. 2022
Solid waste
With normal use, a family of four produces around 7 litres of solid
waste per week.The emptying frequency depends on usage.
For example, after 2-3 weeks use by 4 people it will be time to
switch composting chambers.
Lift out the inner container, take it out, add a little topsoil and
put on the lid. Place the container in a shady place for composting.
It takes 6 to 9 months of composting before the contents can be
used as a fertiliser. Put a latrine bag in the other inner container.
Urine container
When the urine container is full the lamp
will change from green to red.
1. Disconnect the power
2. Lift the upper section (6) of the toilet
3. Lift the urine container (8)
4. Empty
5. Rinse the container with hot water
6. Put it back
7. Connect to power. Check that the
Separera logo is green to confirm that
the urine-container is in correct position.
MAINTENANCE
Electrical connection
Separera is approved for installation in wet rooms. For permanent installation, a qualified electrician must install a multi-pole
switch. If the mains supply cable is damaged it must be replaced by the manufacturer or other qualified person.
General advice
•If insects get into the toilet, you can sprinkle BioLet Insektsstopp on the compost.
•If you do experience a bad odour in the room, check the pipe connections are properly sealed and if there is an adequate air supply.
•To clean the toilet, use only mild detergent. Never use abrasive cleaning agents.
•If the toilet is installed as option B and you leave the house for more than 2 days, switch off the fan and put the cover in the toilet
opening. If there is a good natural draft no odour will occour.
•Empty the solid waste regulairly, the bags start to decompose after 2-3 week.
Sep-Mini-instruk-Behollare-EN-2022-4sid.qxp_Layout 1 2022-05-10 14:59 Sida 1
Table of contents
Languages:
Other MullToa Toilet manuals