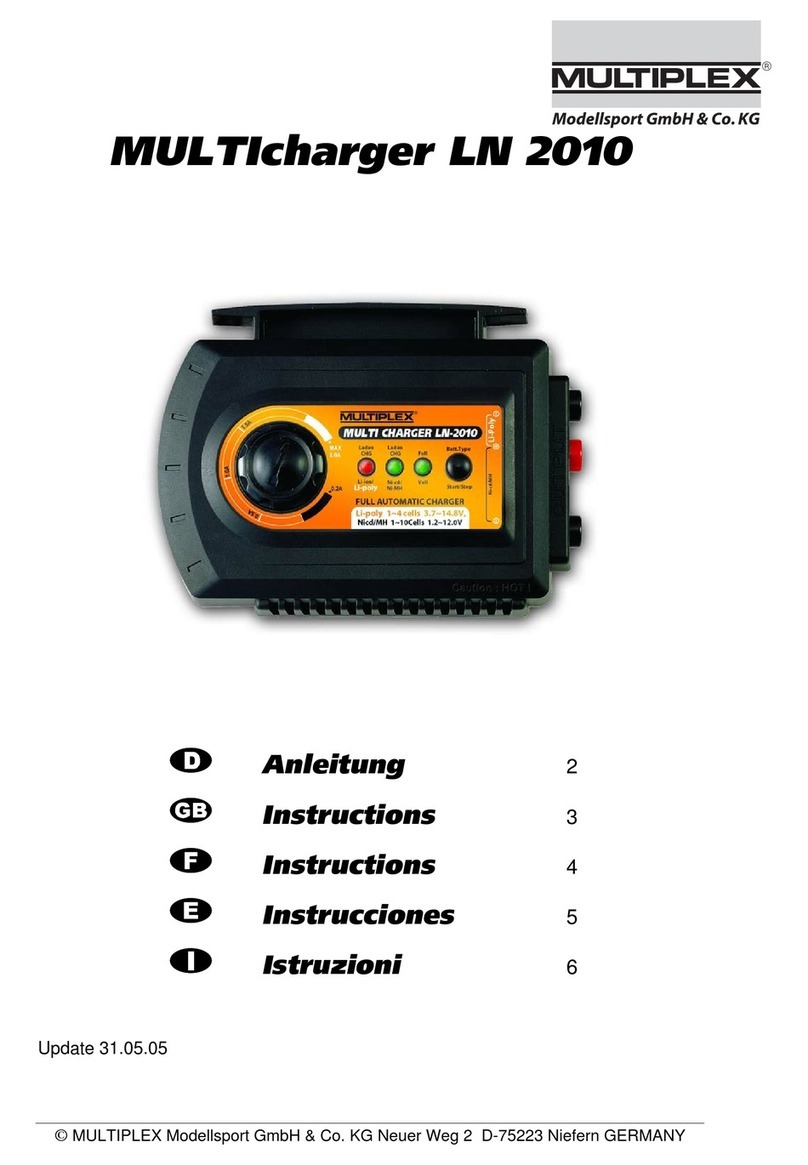
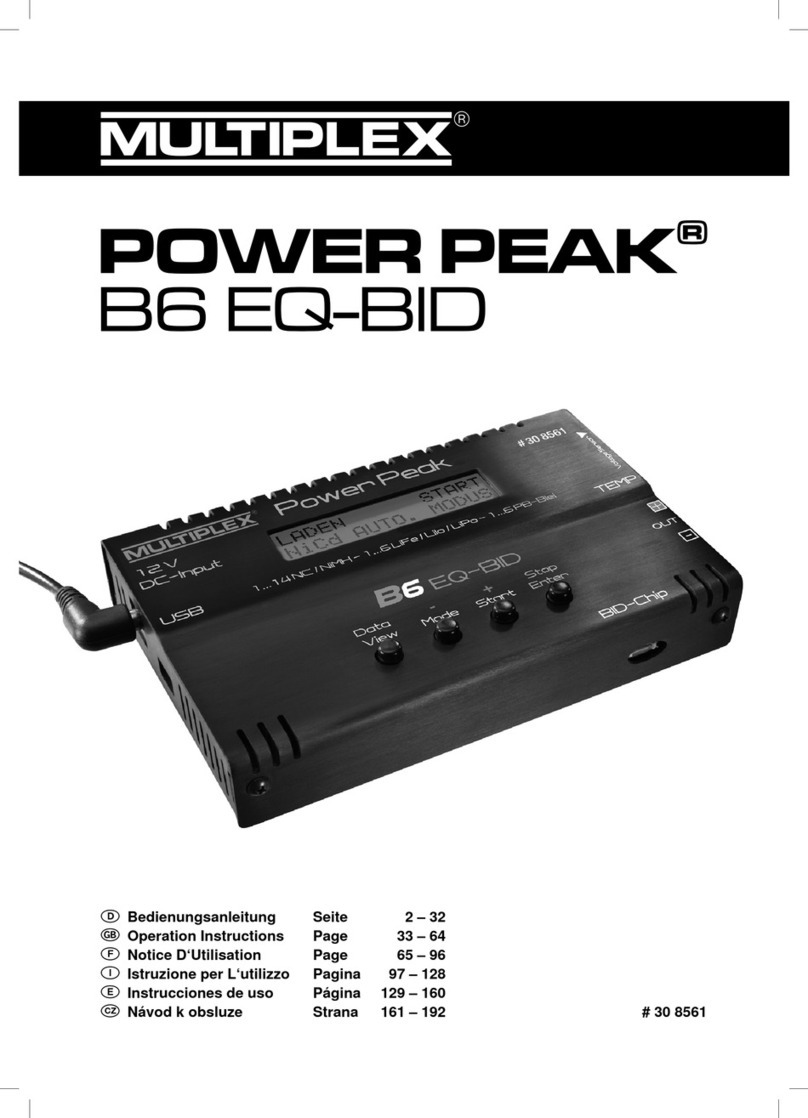
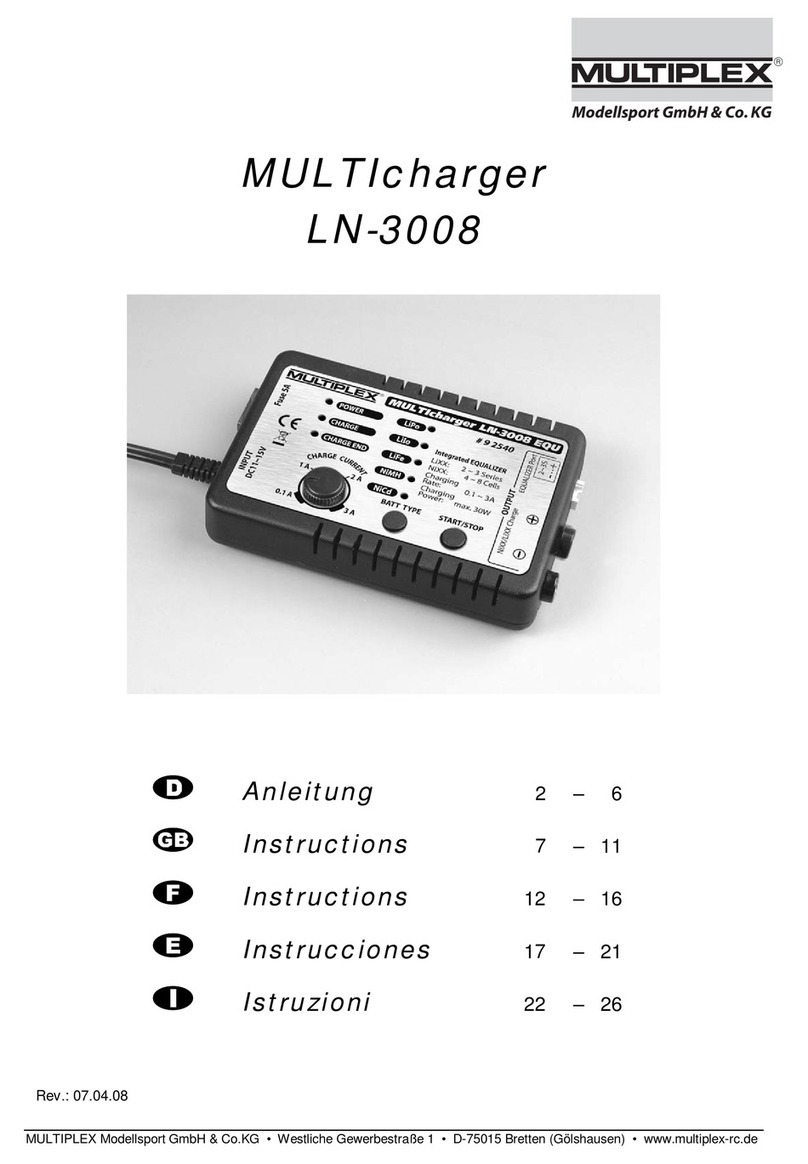
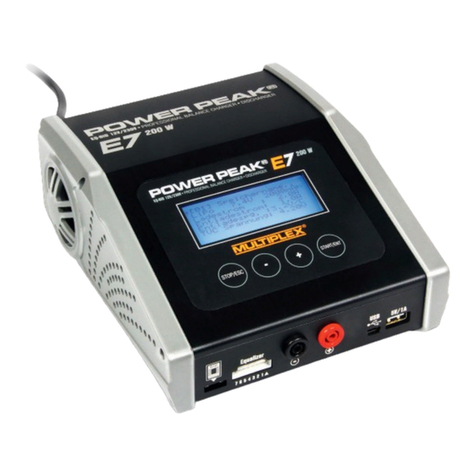
Multiplex MULTIcharger User manual

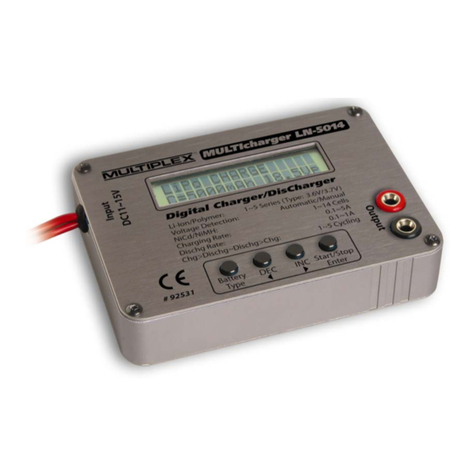
Bedienungsanleitung MULTIcharger LN-5014
MULTIPLEX Modellsport GmbH & Co.KG • Neuer Weg 2 • D-75223 Niefern-Öschelbronn • www.multiplex-rc.de
MULTIcharger LN-5014 # 9 2523 (05-04-08/NSCH)
1. Technische Daten
Eingangsspannung 11 – 15 V
Akkutypen, Zellenzahl 1 – 14 Zellen NiCd
1 – 14 Zellen NiMH
1 – 5 Zellen LiPo oder LiIo
1 – 6 Zellen Bleiakkus
Ladestrom 0,1 A – 5 A (max. 50 W)
Entladestrom 0,1 A – 1 A (max. 5 W)
Erhaltungsladestrom 0 – 200 mA
Abschaltverfahren Delta-Peak für NiCd und NiMH
Konstantstrom / Konstantspannung für
LiPo und LiIo
Lade/Entlade-Zyklen max. 5 Zyklen, geladen oder leer
beenden
LCD 2 Zeilen, 16 Zeichen, beleuchtet
2. CE-Konformitätserklärung
Die Firma MULTIPLEX Modellsport GmbH & Co.KG erklärt für das Ladegerät MULTIcharger 5014 die Übereinstimmung mit
folgenden harmonisierten Richtlinien der EU: EN 50081, EN 50082, EN 55014, EN 55022
3. Sicherheitshinweise
!Vor Inbetriebnahme Anleitung lesen.
!Gerät nicht öffnen, keine technischen Änderungen vornehmen.
!Ausschließlich schnellladefähige Li-Ion/Polymer, NiCd- oder NiMH-Akkus laden.
!Ladehinweise des Akkuherstellers beachten (insbesondere bei Li-Ion/-Polymer-Akkus !)
!Nur Zellen gleichen Typs/Kapazität im Batterieverbund (Akku-Pack) laden.
!Nicht zwei Akku-Packs gleichzeitig laden.
!Keine Akkus laden, die stark erwärmt sind, zuerst auf Umgebungstemperatur abkühlen lassen.
!Ladegerät und Akku nicht verpolt anschließen.
!Ladegerät im Betrieb nicht unbeaufsichtigt lassen.
!Ladegerät kann sehr warm werden. Vorsicht bei Berührung.
⇒Gerät nicht abdecken, für ausreichende Kühlung sorgen.
⇒Gerät nicht direkter Sonnenstrahlung aussetzen.
!Ladegerät, Akku und Zuleitungen von brennbaren oder temperaturempfindlichen Gegenständen fern halten.
!Ladegerät vor Feuchtigkeit schützen.
4. Eigenschaften
• Eingangsspannung 11 bis 15 V Gleichspannung
• Laden und entladen von
1 bis 14 Zellen NiCd / NiMH
1 bis 5 Zellen Lithium-Polymer (LiPo) o. Lithium-Ionen (LiIo)
2 V bis 12 V Bleiakkus
• Ladestrom einstellbar von 0,1 A bis 5 A
• Entladestrom einstellbar von 0,1 A bis 1 A
• Delta-Peak-Abschaltung für NiCd- und NiMH-Akkus
• Ladung mit Konstantstrom/Konstantspannung für Lithium-
Akkus (LiPo und LiIo)
• Leicht, kompakt, transportfreundlich
• Automatische Lade/Entlade-Zyklen
• Beleuchtetes LC-Display, 2 x 16 Zeichen
• Fehlermeldungen für unzulässige Eingangsspannung,
falscher Anschluss oder Verpolung an Ein- oder Ausgang,
schlechten Akkuzustand und interne Fehler
• Stabiles Alugehäuse
5. Tastenfunktionen
Taste BATTERY-TYPE
Wenn Sie diese Taste kurz drücken, beginnt der aktuelle Akku-Typ NiCd, NiMH, LiPo/LiIo oder Pb (Blei) zu blinken.
Während der Akku-Typ blinkt, schaltet jeder Druck auf die Taste BATTERY-TYPE zum nächsten Akku-Typ weiter (NiCD ÎNiMH Î
LiIo/LiPo ÎPb ÎNiCd Î...).
Wenn eine der anderen Tasten (oder keine Taste) gedrückt wird, hört das Blinken nach ca. 5 sec wieder auf.
Wenn Sie diese Taste länger drücken, werden die aktuellen Ladeeinstellungen für ca. 3 sec. Angezeigt.
Taste ENTER/START
Wenn Sie diese Taste kurz drücken, beginnt der im aktuellen Menü einstellbare Wert zu blinken.
Wird die Taste ENTER nochmals gedrückt, beginnt der nächste einstellbare Wert zu blinken.
Wird länger als ca. 3 sec keine Taste gedrückt, hört das Blinken wieder auf.
Wenn Sie diese Taste länger drücken, beginnt der Ladevorgang.
Tasten INC/DEC
Mit diesen Tasten kann der angewählte Wert größer oder kleiner gemacht, oder in einer Auswahlliste geblättert werden.

Bedienungsanleitung MULTIcharger LN-5014
MULTIPLEX Modellsport GmbH & Co.KG • Neuer Weg 2 • D-75223 Niefern-Öschelbronn • www.multiplex-rc.de
MULTIcharger LN-5014 # 9 2523 (05-04-08/NSCH)
6. NiCd-Mode
1
Î
nNiCd
Ladestrom
In diesem Menü wird mit den Tasten INC und DEC der Ladestrom im Bereich von 0,1 A bis 5 A in Schritten von 50 mA eingestellt.
Zum Abschließen der Einstellung drücken Sie ENTER.
Entladestrom
In diesem Menü wird mit den Tasten INC und DEC der gewünschte Entladestrom zwischen 0,1 A und 1 A eingestellt. Zum
Abschließen der Einstellung drücken Sie ENTER.
Spannung für das Ende der Entladung
In diesem Menü wird mit den Tasten INC und DEC die Abschaltspannung für das Beenden der Entladung eingestellt. Der Wert kann
zwischen 0,1 V und 16,8 V liegen. Zum Abschließen der Einstellung drücken Sie ENTER.
Lade/Entlade-Zyklen (Cycle)
In diesem Menü können Sie die Arbeitsweise für die Laden/Entladen-Zyklen einstellen.
C->D charge to discharge = Ende mit leerem Akku
D->C discharge to charge = Ende mit Vollem Akku
Anzahl der Zyklen: 1 bis 5
Zum Abschließen der Einstellung drücken Sie ENTER.
7. NiMH-Mode
1
Î
oNiMH
Ladestrom
In diesem Menü wird mit den Tasten INC und DEC der Ladestrom im Bereich von 0,1 A bis 5 A eingestellt. Zum Abschließen der
Einstellung drücken Sie ENTER.
Entladestrom
In diesem Menü wird mit den Tasten INC und DEC der gewünschte Entladestrom zwischen 0,1 A und 1 A eingestellt. Zum
Abschließen der Einstellung drücken Sie ENTER.
Spannung für das Ende der Entladung
In diesem Menü wird mit den Tasten INC und DEC die Abschaltspannung für das Beenden der Entladung eingestellt. Der Wert kann
zwischen 0,1 V und 16,8 V liegen. Zum Abschließen der Einstellung drücken Sie ENTER.
Lade/Entlade-Zyklen (Cycle)
In diesem Menü können Sie die Arbeitsweise für zyklisches Laden / Entladen einstellen. Zum Abschließen der Einstellung drücken
Sie ENTER.
8. LiPo- und LiIo-Mode
1
Î
pLiPo & LiIo
Mit diesem Lader könne Sie bis zu 5 Lithium-Zellen laden. Das kombinierte Laden mit Konstantstrom und Konstantspannung
garantiert volle Lithium-Ionen und Lithium-Polymer-Akkus. Zuerst wird mit konstantem Strom geladen. Sobald eine Zellenspannung
von ca. 4 V erreicht ist, schaltet der Lader auf Konstantspannung um. Der Ladevorgang mit konstanter Spannung wird beendet, wenn
der Ladestrom unter 100 mA sinkt. Dadurch wird das Ladeende bei voll geladenem Akku sicher gestellt.
Akku-Kapazität
In diesem Menü wird mit den Tasten INC und DEC die Kapazität des zu ladenden Akkus zwischen 100 mAh und 5.000 mAh in
Schritten von 50 mAh eingestellt. Zum Abschließen der Einstellung drücken Sie ENTER.
Spannung für Lithium-Ionen-Akkus (LiIo)
In diesem Menü wird mit den Taten INC und DEC die Nennspannung des anzuschließenden Akkupacks für das Laden und Entladen
eingestellt. Mögliche Werte sind 3,6 V, 7,2 V, 10,8 V, 14,4 V und 18,0 V. Zum Abschließen der Einstellung drücken Sie die Taste
ENTER.
Spannung für Lithium-Polymer-Akkus (LiIo)
In diesem Menü wird mit den Taten INC und DEC die Nennspannung des anzuschließenden Akkupacks für das Laden und Entladen
eingestellt. Mögliche Werte sind 3,7 V, 7,4 V, 11,1 V, 14,8 V und 18,5 V. Zum Abschließen der Einstellung drücken Sie die Taste
ENTER.
Entladestrom
In diesem Menü wird mit den Tasten INC und DEC der gewünschte Entladestrom zwischen 0,1 A und 1 A eingestellt. Zum
Abschließen der Einstellung drücken Sie ENTER.
Akku-Typ
In diesem Menü wird mit den Tasten INC und DEC zwischen den Akkutypen LiPo und LiIo gewählt. Zum Abschließen der Einstellung
drücken Sie ENTER.
Ladestrom
Aus Sicherheitsgründen arbeitet der Lader bei Lithium-Zellen (LiPo oder LiIo) immer mit 1 C als Ladestrom. Der Strom wird mit der
eingestellten Akkukapazität berechnet.
Beispiel für eine LiPo-Zelle mit 1500 mAh: 1 C = 1500 mAh, Ladestrom = 1,5 A
HINWEIS: Akkutyp korrekt wählen!
Die maximalen Spannungen betragen 4,1 V für Litium-Ionen-Akkus (LiIo) und 4,2 V für Litium-Polymer-Akkus (LiPo). Wegen der
unterschiedlichen Spannungen ist es äußerst wichtig die Auswahl des Akkutyps (LiPo oder LiIo) sorgfältig durchzuführen und zu
überprüfen. Bei falscher Einstellung können Akkus beschädigt/zerstört werden oder sogar explodieren. Es besteht Brand- und
Verletzungsgefahr.

Bedienungsanleitung MULTIcharger LN-5014
MULTIPLEX Modellsport GmbH & Co.KG • Neuer Weg 2 • D-75223 Niefern-Öschelbronn • www.multiplex-rc.de
MULTIcharger LN-5014 # 9 2523 (05-04-08/NSCH)
9. Bleiakku-Mode
1
Î
qPB
10.Anzeigen
Anzeigen während des Ladens oder Entladens
INPUT BATTERY
VOLTAGE ERROR Wird in diesen Anzeigen die Taste ENTER kurz gedrückt, können die aktuellen Werte
verändert werden.
OUTPUT BATTERY
REVERSE POLARITY Wenn Sie in diesen Anzeigen die Taste ENTER länger drücken, wird der Lade- oder
Entladevorgang abgebrochen.
Anzeige nach dem Ladeende
END 030:00 00000
NC 100mA 10.75V Wenn Sie in dieser Anzeige die Taste ENTER drücken, gelangen Sie wieder in das
Hauptmenü.
Anzeige der aktuellen Werte
Wenn Sie die Taste BATTERY-TYPE länger als 3 sec. drücken, erscheinen die oben abgebildeten Anzeigen der aktuellen Werte des
Akkus und des Ladevorgangs. Mit den Tasten INC und DEC können Sie zwischen den drei Fenstern wechseln.
Wenn Sie länger als 3 sec. keine Taste drücken, erscheint wieder die normale Anzeige.
11.Fehlermeldungen
INPUT BATTERY
VOLTAGE ERROR Eingangsspannung unter 11,0 V oder über 15,0 V
OUTPUT BATTERY
REVERSE POLARITY Akku verpolt am Lader angeschlossen
CHECK THE BATT.
OPEN CIRCUIT Unterbrechung im Ladestromkreis
NO BATTERY
Kein Akku am Ausgang des Laders angeschlossen
OUTPUT CIRCUIT
PROBLEM Interner Fehler im Lader
INPUT = 12.00V
OUTPUT = 13.18V
ChgCAPA=00000mAh
DchCAPA=00000mAh
CHG PEAK = 12.00V
DCHG AVR = 13.18V

Operating Instructions MULTIcharger LN-5014
MULTIPLEX Modellsport GmbH & Co.KG • Neuer Weg 2 • D-75223 Niefern-Öschelbronn • www.multiplex-rc.de
MULTIcharger LN-5014 # 9 2523 (05-04-08/NSCH)
1. Specification
Input voltage 11 – 15 V
Battery type, cell count 1 – 14 cells NiCd
1 – 14 cells NiMH
1 – 5 cells LiPo or LiIo
1 – 6 cells lead-acid
Charge current 0,1 A – 5 A (max. 50 W)
Discharge current 0,1 A – 1 A (max. 5 W)
Trickle charge current 0 – 200 mA
Charge termination method
Delta-Peak for NiCd and NiMH
Constant current / constant voltage for
Li-Po and Li-Io
Charge/discharge cycles max. 5 cycles, ending charged or
discharged
LCD 2 lines, 16 characters, illuminated
2. CE- Conformity Declaration
MULTIPLEX Modellsport GmbH & Co. KG declares that the MULTIcharger LN-5014 conforms with the following harmonised EU
directives: EN 50081, EN 50082, EN 55014, EN 55022
3. Safety notes
!Read the instructions before using the charger for the first time
!Do not open the case, and do not modify the unit in any way
!Use the charger exclusively to recharge rapid-charge capable Li-Ion / Li-Polymer, NiCd or NiMH batteries
!Observe the battery manufacturer’s charging instructions (especially with Li-Ion and Li-Polymer batteries !)
!Use the charger only to recharge packs consisting of cells of the same type and capacity
!Do not attempt to charge two battery packs simultaneously
!Do not recharge packs which are hot to the touch; allow them to cool down to ambient temperature first
!Do not connect charger and battery with reverse polarity
!Do not leave the charger operating unsupervised
!The charger may become hot when operating - take care when touching the unit
⇒Do not cover the charger; provide adequate cooling
⇒Do not subject the charger to direct sunshine
!Keep the charger, battery and cables well away from flammable or temperature-sensitive objects
!Protect the charger from damp
4. Characteristics
• Input voltage 11 to 15 V D.C.
• Charging and discharging of
1 to 14 Zellen Ni-Cd / Ni-MH cells
1 to 5 Lithium-Polymer (Li-Po) or Lithium-Ion (Li-Io) cells
2 V to 12 V lead-acid batteries
• Charge current variable from 0.1 A to 5 A
• Discharge current variable from 0.1 A to 1 A
• Delta-Peak charge termination with Ni-Cd and Ni-MH
batteries
• Constant current / constant voltage charging for Lithium
batteries (Li-Po and Li-Io)Lightweight, compact, easy to
transport
• Automatic charge / discharge cycles
• Illuminated LCD screen, 2 x 16 characters
• Error messages for out-of-range input voltage, incorrect
connection or reversed polarity at input or output, poor
battery state and internal errors
• Strong aluminium case
5. Button functions
BATTERY TYPE button
When you press this button, the currently set battery type - Ni-Cd, Ni-MH, Li-Po / Li-Io or Pb (lead-acid) - starts to flash.
While the battery type is flashing, further presses on the BATTERY TYPE button switch to the next battery type in the following
sequence (Ni-CD ÎNi-MH ÎLi-Io / Li-Po ÎPb ÎNi-Cd Î...).
If you press another button (or no button), the battery type ceases to flash after about five seconds.
If you hold this button pressed in, the current charge settings are displayed for about three seconds.
ENTER / START button
If you press this button briefly, the variable value in the current menu starts flashing.
If you press the ENTER button again, the next variable value starts to flash.
If you press no button for about three seconds, the value ceases flashing.
Holding this button pressed in starts the charge process.
INC/DEC buttons
With these buttons flashing values can be incremented or decremented, or selected from a list.

Operating Instructions MULTIcharger LN-5014
MULTIPLEX Modellsport GmbH & Co.KG • Neuer Weg 2 • D-75223 Niefern-Öschelbronn • www.multiplex-rc.de
MULTIcharger LN-5014 # 9 2523 (05-04-08/NSCH)
6. NiCd mode
1
Î
nNiCd
Charge current
In this menu the charge current can be set within the range 0.1 A to 5 A in increments of 50 mA using the INC and DEC buttons.
Press ENTER to conclude the setting process.
Discharge current
In this menu the discharge current can be set within the range 0.1 A to 1 A using the INC and DEC buttons. Press ENTER to
conclude the setting process.
Final discharge voltage
In this menu the termination voltage for the discharge process can be set within the range 0.1 V to 16.8 V. Press ENTER to conclude
the setting process.
Charge / Discharge cycles (Cycle)
In this menu you can set the method of working for the charge / discharge cycles.
C->D charge to discharge = ending with discharged battery
D->C discharge to charge = ending with fully charged battery
Number of cycles: 1 to 5
Press ENTER to conclude the setting process.
7. NiMH mode
1
Î
oNiMH
Charge current
In this menu the charge current can be set within the range 0.1 A to 5 A in increments of 50 mA using the INC and DEC buttons.
Press ENTER to conclude the setting process.
Discharge current
In this menu the discharge current can be set within the range 0.1 A to 1 A using the INC and DEC buttons. Press ENTER to
conclude the setting process.
Final discharge voltage
In this menu the termination voltage for the discharge process can be set within the range 0.1 V to 16.8 V. Press ENTER to conclude
the setting process.
Charge / Discharge cycles (Cycle)
In this menu you can set the method of working for the charge / discharge cycles. Press ENTER to conclude the setting process.
8. LiPo and LiIo mode
1
Î
pLiPo & LiIo
You can use the unit to charge a maximum of five Lithium cells. The combined charge method, with constant current and constant
voltage, ensures that your Lithium-Ion and Lithium-Polymer batteries are fully charged every time. The unit starts by charging at a
constant current. As soon as the pack reaches a cell voltage of about 4 V the charger switches over to constant voltage. The constant
voltage charge process is terminated when the charge current falls below 100 mA. This ensures that the battery really is fully charged
at the end of the charge process.
Battery capacity
In this menu the capacity of the battery to be charged can be set within the range 100 mAh to 5000 mAh in increments of 50 mAh
using the INC and DEC buttons. Press ENTER to conclude the setting process.
Voltage for Lithium Ion batteries (Li-Io)
In this menu the nominal voltage of the battery to be connected for charging and discharging can be set using the INC and DEC
buttons. Possible values are 3.6 V, 7.2 V, 10.8 V, 14.4 V and 18.0 V. Press ENTER to conclude the setting process.
Voltage for Lithium-Polymer batteries (Li-Io)
In this menu the nominal voltage of the battery to be connected for charging and discharging can be set using the INC and DEC
buttons. Possible values are 3.7 V, 7.4 V, 11.1 V, 14.8 V and 18.5 V. Press ENTER to conclude the setting process.
Discharge current
In this menu the desired discharge current can be set within the range 0.1 A to 1 A using the INC and DEC buttons. Press ENTER to
conclude the setting process.
Battery type
In this menu the battery type Li-Po or Li-Io can be selected using the INC and DEC buttons. Press ENTER to conclude the setting
process.
Charge current
For safety reasons the charger always uses the 1 C value as the charge current for Lithium cells (Li-Po or Li-Io). The current is
calculated from the battery capacity you have entered.
Example for a Li-Po cell of 1500 mAh capacity: 1 C = 1500 mAh, charge current = 1.5 A
NOTE: take care to select the correct battery type!
The maximum voltage for Lithium batteries is as follows: 4.1 V per cell for Lithium-Ion (Li-Io) batteries, 4.2 V per cell for Lithium-
Polymer (Li-Po) batteries. The difference in voltage makes it extremely important to select the correct battery type (Li-Po or Li-Ion)
with great care, and to check the setting before starting the charge process. If you select the wrong battery type, the pack may be
damaged or ruined, and could even explode. Fire and injury risk!

Operating Instructions MULTIcharger LN-5014
MULTIPLEX Modellsport GmbH & Co.KG • Neuer Weg 2 • D-75223 Niefern-Öschelbronn • www.multiplex-rc.de
MULTIcharger LN-5014 # 9 2523 (05-04-08/NSCH)
9. Lead-acid battery mode
1
Î
qPB.
10.Screen displays
Displays during charging or discharging
INPUT BATTERY
VOLTAGE ERROR If you press the ENTER button briefly while these messages are displayed, it is possible
to alter the existing values.
OUTPUT BATTERY
REVERSE POLARITY If you hold the ENTER button pressed in while these messages are displayed, the
charge or discharge process is halted
Display after charge termination
END 030:00 00000
NC 100mA 10.75V Pressing the ENTER button while this message is displayed returns you to the main
menu.
Display of current values
If you hold the BATTERY TYPE button pressed in for longer than three seconds, the displays shown above appear, giving the current
values for the battery and the charge process. You can switch between the three windows using the INC and DEC buttons.
If you do not press any button for longer than about three seconds, the screen reverts to the normal display.
11.Error messages
INPUT BATTERY
VOLTAGE ERROR Input voltage below 11.0 V or above 15.0 V
OUTPUT BATTERY
REVERSE POLARITY Battery connected to the charger with reversed polarity
CHECK THE BATT.
OPEN CIRCUIT Break in charge circuit
NO BATTERY
No battery connected to the charger’s output
OUTPUT CIRCUIT
PROBLEM Internal error in charger
INPUT = 12.00V
OUTPUT = 13.18V
ChgCAPA=00000mAh
DchCAPA=00000mAh
CHG PEAK = 12.00V
DCHG AVR = 13.18V

Instructions MULTIcharger LN-5014
MULTIPLEX Modellsport GmbH & Co.KG • Neuer Weg 2 • D-75223 Niefern-Öschelbronn • www.multiplex-rc.de
MULTIcharger LN-5014 # 9 2523 (05-04-08/NSCH)
!Ces instructions font partie intégrante du produit. Celle-ci contient des informations importantes ainsi que des
consignes de sécurités. Elle doit donc être consultable à tous moments et à joindre lors d’une revente à tierce personne.
1. Données techniques
Tension d’alimentation 11 – 15 V
Type d’accu, nbr. d’éléments 1 – 14 éléments NiCad
1 – 14 éléments NiMH
1 – 5 éléments LiPo ou LiIo
1 – 6 éléments au Plomb
Courant de charge 0,1 A – 5 A (max. 50 W)
Courant de décharge 0,1 A – 1 A (max. 5 W)
Courant de maintien de charge 0 – 200 mA
Mode d’arrêt de charge détection Delta-Peak
pour NiCad et NiMH
Courant constant / tension constante
pour les LiPo et LiIo
Cycles charge/décharge max. 5 cycles, avec arrêt à la pleine
charge ou décharge
LCD 2 lignes, 16 colonnes, rétro éclairé
2. Déclaration de conformité CE
La société MULTIPLEX Modellsport GmbH & Co.KG déclare par ce document que le chargeur MULTIcharger LN-5014 est conforme
et en harmonie avec les directives de la communauté européenne: EN 50081, EN 50082, EN 55014, EN 55022
3. Consignes de sécurités
!Lire attentivement les instructions avant utilisation
!Ne pas ouvrir l’appareil, n’effectuer aucune modification technique
!Brancher uniquement des accus Li-Ion/Polymère, NiCd ou NiMH supportant la charge rapide
!Respecter les instructions de charge des fabricants d’accus (surtout pour les accus Li-Ion/-Polymère !).
!Charger uniquement des éléments de même type/capacité constituant le pack d’accu
!Ne chargez pas deux packs d’accu en même temps
!Ne chargez pas de packs d’accus chauds, Le laisser d’abord revenir à température ambiante
!N’inversez pas la polarité du pack d’accu ou du chargeur
!Ne laissez pas le chargeur sans surveillance lors de son utilisation
!Le chargeur peut chauffer beaucoup. Attention lors de sa manipulation.
⇒Ne jamais couvrir le chargeur, veillez à assurer une bonne ventilation.
⇒Ne jamais exposer l’appareil directement au soleil
!Laissez le chargeur, les accus et les câbles à bonne distance de produits inflammables ou sensibles à la
température
!Protégez le chargeur contre l’humidité
4. Caractéristiques
• Tension d’alimentation de 11V à 15 V continue
Charge et décharge de
1 à 14 éléments NiCd / NiMH
1 à 5 éléments Lithium-Polymère (LiPo) ou Lithium-Ion (LiIo)
2 V à 12 V accu au plomb
• Courant de charge réglable de 0,1 A à 5 A
• Courant de décharge réglable de 0,1 A à 1 A
• Arrêt de charge/décharge par Delta-Peak pour les accus
NiCd et NiMH
• Charge en mode Courant constant/Tension constante pour
les accus au Lithium (LiPo et LiIo)
• Léger, compact et facilement transportable
• Cycles de charges/décharges automatiques
• Ecran LCD de 2 x 16 caractères rétro éclairé
• Indications d’erreurs en cas de tension d’alimentation
inadaptée, mauvais branchement ou inversion de polarité sur
l’entrée ou la sortie, mauvais état des accus ou problème
interne
• Boîtier robuste en aluminium
5. Fonctions des touches
Touche BATTERY-TYPE
Si vous appuyez brièvement cette touche, l’indication du type actuel d’accu NiCd, NiMH, LiPo/LiIo ou Pb (plomb) se met à clignoter.
Pendant que l’indication type d’accu clignote, chaque action sur la touche BATTERY-TYPE vous fait aller au type suivant (NiCD Î
NiMH ÎLiIo/LiPo ÎPb ÎNiCd Î...).
S’il y a une action sur une autre touche (ou pas d’action), le clignotement s’arrêtera automatiquement après 5 secondes.
Si vous appuyez plus longtemps sur cette touche, l’appareil vous indiquera les paramètres actuellement mémorisés pendant environ
3 secondes.
Touche ENTER/START
Si vous appuyez brièvement cette touche, la valeur de réglage du menu actuel se met à clignoter.
La valeur suivante va clignoter si vous appuyez à nouveau sur cette touche.
Le clignotement s’arrêtera si aucune touche n’est actionnée pendant plus de 3 secondes.
En maintenant cette touche actionnée, le processus de charge va débuter.
Touches INC/DEC
Avec ces touches vous pouvez modifier des valeurs clignotantes ou choisir d’une liste.

Instructions MULTIcharger LN-5014
MULTIPLEX Modellsport GmbH & Co.KG • Neuer Weg 2 • D-75223 Niefern-Öschelbronn • www.multiplex-rc.de
MULTIcharger LN-5014 # 9 2523 (05-04-08/NSCH)
6. Mode NiCd
1
Î
nNiCd
Courant de charge
Dans ce menu, en utilisant les touches INC et DEC, vous sélectionnez le courant de charge entre 0,1A et 5A par pas de 50 mA. Pour
validez votre réglage il suffit d’appuyer sur ENTER.
Courant de décharge
Dans ce menu, en utilisant les touches INC et DEC, vous sélectionnez le courant de décharge entre 0,1A et 1A. Pour validez votre
réglage il suffit d’appuyer sur ENTER.
Tension de fin de décharge
Dans ce menu, en utilisant les touches INC et DEC, vous sélectionnez la tension seuil de fin de décharge. La valeur peut se trouver
entre 0,1V et 16,8V. Pour validez votre réglage il suffit d’appuyer sur ENTER.
Cycles charge/décharge
Dans ce menu vous pouvez déterminer le mode de travail du cycle de charge/décharge.
C->D charge to discharge = le cycle s’arrête avec un accu vide
D->C discharge to charge = le cycle s’arrête avec un accu plein
Nombre de cycles: 1 à 5
Pour validez votre réglage, appuyer sur ENTER.
7. Mode NiMH
1
Î
oNiMH
Courant de charge
Dans ce menu, en utilisant les touches INC et DEC, vous sélectionnez le courant de charge entre 0,1A et 5A. Pour validez votre
réglage il suffit d’appuyer sur ENTER.
Courant de décharge
Dans ce menu, en utilisant les touches INC et DEC, vous sélectionnez le courant de décharge entre 0,1A et 1A. Pour validez votre
réglage il suffit d’appuyer sur ENTER.
Tension de fin de décharge
Dans ce menu, en utilisant les touches INC et DEC, vous sélectionnez la tension seuil de fin de décharge. La valeur peut se trouver
entre 0,1V et 16,8V. Pour validez votre réglage il suffit d’appuyer sur ENTER.
Cycles de charge/décharge
Dans ce menu vous pouvez déterminer le mode de travail du cycle de charge/décharge. Pour validez la réglage, appuyer sur ENTER.
8. Mode LiPo et LiIo
1
Î
pLiPo & LiIo
Avec ce chargeur vous pouvez charger jusqu’à 5 éléments Lithium. La combinaison des modes de charges courant constant et
tension constante garantie la pleine charge des accus Lithium-Ion et Lithium-Polymère. Dans un premier temps vous chargez en
courant constant. A partir du moment où la tension de l’élément atteint env. 4V, la chargeur passe en mode tension constante. Ce
mode est arrêté lorsque le courant de charge passe en dessous des 100mA. Cela permet de garantir que la fin de charge s’effectuera
bien avec un accu plein.
Capacité de l’accu
Dans ce menu, en utilisant les touches INC et DEC, vous sélectionnez la capacité de l’accu à charger entre 100mAh et 5000mAh par
pas de 50mAh. Pour validez votre réglage il suffit d’appuyer sur ENTER.
Tension pour les accus Lithium-Ion (LiIo)
Dans ce menu, en utilisant les touches INC et DEC, vous sélectionnez la tension nominale du pack d’accu pour la charge et la
décharge. Les valeurs à votre disposition sont 3,6 V, 7,2 V, 10,8 V, 14,4 V et 18,0 V. Pour validez votre réglage il suffit d’appuyer sur
ENTER.
Tension pour les accus Lithium-Polymère (LiPo)
Dans ce menu, en utilisant les touches INC et DEC, vous sélectionnez la tension nominale du pack d’accu pour la charge et la
décharge. Les valeurs à votre disposition sont 3,7 V, 7,4 V, 11,1 V, 14,8 V et 18,5 V. Pour validez votre réglage il suffit d’appuyer sur
ENTER.
Courant de décharge
Dans ce menu, en utilisant les touches INC et DEC, vous sélectionnez le courant de décharge entre 0,1A et 1A. Pour validez votre
réglage il suffit d’appuyer sur ENTER.
Type d’accu
Dans ce menu, en utilisant les touches INC et DEC, vous sélectionnez le type d’accu LiPo ou LiLo. Pour validez votre réglage il suffit
d’appuyer sur ENTER.
Courant de charge
Pour des raisons de sécurité, le chargeur travail toujours avec un courant de charge de 1C pour les éléments Lithium (LiPo ou LiIo).
Le courant de charge est calculé en fonction de votre sélection de la capacité de votre pack d’accu à charger.
Exemple pour un élément LiPo de capacité de 1500 mAh: 1 C = 1500 mAh, courant de charge = 1,5 A
REMARQUE: sélectionnez le bon type d’accu!
La tension maximale est de 4,1V pour un accu Litium-Ion (LiIo) et de 4,2V pour un accu Litium-Polymère (LiPo). Du fait de cette
différence de tension nominale, il est vital de déterminer avec précision le type d’accu (LiPo ou LiIo) que vous souhaitez charger et de
vérifier plusieurs fois avant de lancer la charge. La conséquence d’une mauvaise sélection du type d’accu est une destruction de
celui-ci et même une explosion. Il y a risque d’incendie et même de dangers corporels.

Instructions MULTIcharger LN-5014
MULTIPLEX Modellsport GmbH & Co.KG • Neuer Weg 2 • D-75223 Niefern-Öschelbronn • www.multiplex-rc.de
MULTIcharger LN-5014 # 9 2523 (05-04-08/NSCH)
9. Mode accu au plomb
1
Î
qPB.
10.Affichage
Indications pendant la charge ou la décharge
INPUT BATTERY
VOLTAGE ERROR Dans ce menu, vous pouvez modifier les paramètres en appuyant brièvement sur la
touche ENTER.
OUTPUT BATTERY
REVERSE POLARITY Dans ce menu, vous pouvez arrêter le processus de charge ou de décharge en
appuyant plus longtemps sur la touche ENTER.
Indications après l’arrêt de charge
END 030:00 00000
NC 100mA 10.75V Dans ce menu, vous retournez au menu principal en appuyant sur la touche ENTER.
Affichage des valeurs instantanées
Si vous actionnez la touche BATTERY-TYPE pendant plus de 3 secondes, il apparaîtra sur votre afficheur les indications ci-dessus
représentants les paramètres actuels concernant l’accu et le processus de charge. Vous pouvez naviguer entre ces trois fenêtres à
l’aide des touches INC et DEC.
Vous repassez à l’affichage normal si aucune touche est appuyée pendant plus de 3 secondes.
11.Messages d’erreurs
INPUT BATTERY
VOLTAGE ERROR Tension d’alimentation en dessous de 11,0 V ou au-dessus de 15,0 V
OUTPUT BATTERY
REVERSE POLARITY Inversion de polarité de l’accu connecté au chargeur
CHECK THE BATT.
OPEN CIRCUIT Interruption du circuit de charge
NO BATTERY
Pas d’accu détecté à la sortie du chargeur
OUTPUT CIRCUIT
PROBLEM Erreur interne du chargeur
INPUT = 12.00V
OUTPUT = 13.18V
ChgCAPA=00000mAh
DchCAPA=00000mAh
CHG PEAK = 12.00V
DCHG AVR = 13.18V

Instrucciones MULTIcharger LN-5014
MULTIPLEX Modellsport GmbH & Co.KG • Neuer Weg 2 • D-75223 Niefern-Öschelbronn • www.multiplex-rc.de
MULTIcharger LN-5014 # 9 2523 (05-04-08/NSCH)
!Este manual de instrucciones es parte del producto. En él se incluye información importante, así como consejos de
seguridad. Por este motivo se ha de tener en todo momento a mano e incluirlo en caso de venta del producto a terceros.
1. Características Técnicas
Alimentación 11 – 15 V
Tipo de baterías, Elementos 1 – 14 Elementos NiCad
1 – 14 Elementos NiMH
1 – 5 Elementos LiPo o LiIo
1 – 6 Elementos de plomo
Corriente de carga 0,1 A – 5 A (max. 50 W)
Corriente de descarga 0,1 A – 1 A (max. 5 W)
Corriente de mantenimiento 0 – 200 mA
Detección de fin de carga
Delta-Peak para NiCad y NiMH
Corriente constante / Tensión constante
para LiPo y LiIo
Ciclos carga/descarga máx. 5 ciclos, finalizando con carga o
descarga completa
LCD 2 líneas, 16 caracteres, con iluminación
2. Declaración de Conformidad de la CE
La empresa MULTIPLEX Modellsport GmbH & Co.KG declara para el cargador MULTIcharger LN-5014 DC la coincidencia con las
siguientes y directrices armonizadas de la UE: EN 50081, EN 50082, EN 55014, EN 55022
3. Safety notes
!Leer las instrucciones antes de la puesta en funcionamiento
!No abrir el dispositivo, no realizar modificaciones técnicas
!Cargar exclusivamente baterías de iones de polímeros de litio, NiCd o NiMH de carga rápida
!Respetar los consejos del fabricante de las baterías (¡especialmente los de las baterías de iones de polímeros de litio!)
!Cargar solo células del mismo tipo/capacidad en conexión con la batería (paquete de baterías)
!No cargar dos baterías al mismo tiempo
!No cargar baterías que estén muy calientes. Primero dejar enfriar hasta temperatura ambiente
!No conectar el cargador a la batería con la polaridad invertida
!Vigilar siempre el cargador durante su funcionamiento
!El cargador se puede calentar mucho. Cuidado al tocar
⇒No cubrir el dispositivo, proporcionar suficiente ventilación
⇒No exponer el dispositivo directamente al sol
!Mantener el cargador, la batería y los cables alejados de material inflamable o sensibles a la temperatura
!Proteger el cargador de humedad
4. Peculiaridades
• Alimentación por corriente continua desde 11 hasta 15 V
• Carga y descarga de:
1 a 14 elementos NiCad / NiMH
1 a 5 elementos de Polímero de Litio (LiPo) o Iones de Litio
(LiIo)
Baterías de plomo de 2 V a 12 V
• Corriente de carga ajustable desde 0,1 A hasta 5 A
• Corriente de descarga ajustable desde 0,1 A hasta 1 A
• Detección de fin de carga mediante Delta-Peak para baterías
NiCad y NiMH
• Carga con tensión/corriente constante para baterías de Litio
(LiPo y LiIo)
• Ligero, compacto y fácil de transportar
• Ciclos automáticos de carga y descarga
• Visor LCD con iluminación, 2 x 16 caracteres
• Mensajes de error para tensión incorrecta de entrada,
conexión errónea o inversión de polaridad en entrada y
salida, detección de baterías en mal estado y errores
internos
• Resistente carcasa de Aluminio
5. Funciones de las teclas
Tecla BATTERY-TYPE
Pulsando esta tecla brevemente, empezará a parpadear el tipo de batería actual NiCad, NiMH, LiPo/LiIo o Pb (Plomo).
Mientras que esté parpadeando el tipo de batería, cada vez que se pulse la tecla BATTERY-TYPE se pasará al siguiente tipo de
batería (NiCaD ÎNiMH ÎLiIo/LiPo ÎPb ÎNiCad Î...).
Si se pulsa otra tecla (o no se pulsa ninguna), dejará de parpadear transcurridos 5 segundos.
Si la pulsación de la tecla es prolongada, se mostrarán los parámetros de carga durante 3 segundos.
Tecla ENTER/START
Con una breve pulsación, empezará a parpadear el menú de ajustes.
Si vuelve a pulsar la tecla ENTER, el siguiente valor a ajustar comenzará a parpadear.
Si no se pulsa ninguna tecla durante más de 3 segundos, dejará de parpadear la opción.
Dejando la tecla pulsada, comenzará el proceso de carga
Teclas INC/DEC
Con estas teclas modificar los valores relucandos o seleccionar de una lista.

Instrucciones MULTIcharger LN-5014
MULTIPLEX Modellsport GmbH & Co.KG • Neuer Weg 2 • D-75223 Niefern-Öschelbronn • www.multiplex-rc.de
MULTIcharger LN-5014 # 9 2523 (05-04-08/NSCH)
6. Modo NiCd
1
Î
nNiCd
Corriente de carga
En este menú, usando las teclas INC y DEC podrá ajustar la corriente de carga desde 0,1 A hasta 5 A en incrementos de 50 mA.
Para confirmar la selección, pulse la tecla ENTER.
Corriente de descarga
En este menú, usando las teclas INC y DEC podrá introducir la corriente de descarga deseada desde 0,1 A hasta 1 A. Para confirmar
la selección, pulse la tecla ENTER.
Tensión mínima de fin descarga
Usando las teclas INC y DEC en este menú, podrá definir el voltaje mínimo con el que se pondrá fin al proceso de descarga. Los
rango de valores oscila desde los 0,1 V y 16,8 V. par confirmar el valor, pulse la tecla ENTER.
Ciclos de carga/descarga (Cycle)
En este menú podrá definir el modo de funcionamiento de los ciclos de carga/descarga.
C->D carga y descarga = Se finaliza con la batería descargada
D->C descarga y carga = Se finaliza con la batería totalmente cargada
Número de ciclos: De 1 a 5
Para confirmar los valores, pulse la tecla ENTER.
7. Modo NiMH
1
Î
oNiMH
Corriente de carga
En este menú, usando las teclas INC y DEC podrá ajustar la corriente de carga desde 0,1 A hasta 5 A en incrementos de 50 mA.
Para confirmar la selección, pulse la tecla ENTER.
Corriente de descarga
En este menú, usando las teclas INC y DEC podrá introducir la corriente de descarga deseada desde 0,1 A hasta 1 A. Para confirmar
la selección, pulse la tecla ENTER.
Tensión mínima de fin descarga
Usando las teclas INC y DEC en este menú, podrá definir el voltaje mínimo con el que se pondrá fin al proceso de descarga. Los
rango de valores oscila desde los 0,1 V y 16,8 V. par confirmar el valor, pulse la tecla ENTER.
Ciclos de carga/descarga (Cycle)
En este menú podrá definir el modo de funcionamiento de los ciclos de carga/descarga.
C->D carga y descarga = Se finaliza con la batería descargada
D->C descarga y carga = Se finaliza con la batería totalmente cargada
Número de ciclos: De 1 a 5
Para confirmar los valores, pulse la tecla ENTER.
8. Modo LiPo y LiIo
1
Î
pLiPo & LiIo
Con este cargador podrá cargar hasta 5 elementos de Litio. El proceso de carga con tensión y corriente constante garantiza que las
baterías de Iones o Polímeros de Litio se carguen por completo. Se comienza entregando una corriente constante. Tan pronto como
se alcanza la tensión de 4V. por elemento, se conmuta a la entrega de una tensión constante. Este proceso de tensión constante
finalizará, cuando la corriente entregada caiga por debajo de los 100 mA. Mediante este procedimiento se garantiza la carga
completa de este tipo de baterías.
Capacidad de las baterías
En este menú, y usando las teclas INC y DEC, podrá introducir la capacidad nominal de las baterías desde 100 mAh y hasta 5.000
mAh en incrementos de 50 mAh. Para finalizar el ajuste, pulse la tecla ENTER.
Tensión para baterías de Iones de Litio (LiIo)
En este menú, pulsando las teclas INC y DEC, puede ajustar la tensión nominal de las baterías para la carga y descarga. Los valores
posibles son 3,6 V, 7,2 V, 10,8 V, 14,4 V y 18,0 V. Pulse ENTER para confirmar el valor.
Tensión para baterías de Polímeros de Litio (LiPo)
En este menú, pulsando las teclas INC y DEC, puede ajustar la tensión nominal de las baterías para la carga y descarga. Los valores
posibles son 3,7 V, 7,4 V, 11,1 V, 14,8 V y 18,5 V. Pulse ENTER para confirmar el valor.
Corriente de descarga
En este menú, pulsando las teclas INC y DEC podrá seleccionar la corriente de descarga deseada desde 0,1 A y hasta 1 A. Para
finalizar el ajuste, pulse la tecla ENTER.
Tipo de baterías
Una vez más, pulsando las teclas INC y DEC dentro de este menú, podrá elegir entre los tipos de baterías LiPo y LiIo. Para finalizar
el ajuste pulse la tecla ENTER.
Corriente de carga
Por razones de seguridad. El cargador siempre funcionará con una corriente de carga de 1C trabajando con baterías de Litio (LiPo o
LiIo). La corriente se calculará dependiendo de la capacidad de la batería.
Ejemplo para un elemento LiPo de 1500 mAh: 1 C = 1500 mAh, Corriente de carga = 1,5 A
ATENCIÓN: ¡Seleccione cuidadosamente el tipo de batería!

Instrucciones MULTIcharger LN-5014
MULTIPLEX Modellsport GmbH & Co.KG • Neuer Weg 2 • D-75223 Niefern-Öschelbronn • www.multiplex-rc.de
MULTIcharger LN-5014 # 9 2523 (05-04-08/NSCH)
Las tensiones máximas son de 4,1 V para las baterías de Iones de Litio (LiIo) y 4,2 V par alas de polímero de Litio (LiPo). Ya que las
tensiones son distintas, especialmente crítico el seleccionar de manera adecuada el tipo de batería (LiPo o LiIo) y volver a comprobar
antes de cada carga. Con un ajuste inadecuado, se pueden llegar a dañar las baterías e incluso, a explotar. Esto implica la
posibilidad de sufrir quemaduras o provocar incendios.
9. Modo baterías de Plomo
1
Î
qPB.
10.Indicaciones / Mensajes
Se muestra durante la carga o descarga
INPUT BATTERY
VOLTAGE ERROR Si mientras se muestra este mensaje pulsa brevemente la tecla ENTER, podrá
modificar los parámetros actuales.
OUTPUT BATTERY
REVERSE POLARITY Si mantiene pulsada la tecla ENTER mientras se muestra este mensaje, se interrumpirá
el proceso de carga o descarga.
Se muestra al finalizar la carga
END 030:00 00000
NC 100mA 10.75V Al pulsar la tecla ENTER mientras se muestra esta pantalla, volverá al menú principal.
Indicación de los valores actuales
Si pulsa la tecla BATTERY-TYPE durante más de 3 segundos, se le mostrarán las pantallas superiores indicando los ajustes
actuales y el proceso de carga. Puede cambiar ente estas tres pantallas pulsando las teclas INC y DEC.
Si no pulsa ninguna tecla durante 3 segundos, se volverá a la pantalla normal.
11.Mensajes de error
INPUT BATTERY
VOLTAGE ERROR Tensión de entrada inferior a 11,0 V o superior a 15,0 V
OUTPUT BATTERY
REVERSE POLARITY Batería conectada al cargador con polaridad invertida
CHECK THE BATT.
OPEN CIRCUIT Desconexión de la batería durante el proceso
NO BATTERY
No hay ninguna batería conectada al cargador
OUTPUT CIRCUIT
PROBLEM Error interno del cargador
INPUT = 12.00V
OUTPUT = 13.18V
ChgCAPA=00000mAh
DchCAPA=00000mAh
CHG PEAK = 12.00V
DCHG AVR = 13.18V

Istruzioni MULTIcharger LN-5014
MULTIPLEX Modellsport GmbH & Co.KG • Neuer Weg 2 • D-75223 Niefern-Öschelbronn • www.multiplex-rc.de
MUL
T
Icharger LN-5014 # 9 2523 (05-04-08/NSCH)
!Queste istruzioni sono parte integrante del prodotto e contengono informazioni importanti. Per questo motivo è
indispensabile conservarle con cura e, in caso di vendita del prodotto, di consegnarle all’acquirente.
1. Dati tecnici
Tensione in entrata 11 – 15 V
Tipo e numero elementi 1 – 14 elementi NiCad
1 – 14 elementi NiMH
1 – 5 elementi LiPo o LiIo
1 – 6 elementi a piombo
Corrente di carica 0,1 A – 5 A (max. 50 W)
Corrente di scarica 0,1 A – 1 A (max. 5 W)
Corrente di mantenimento 0 – 200 mA
Fine carica Delta-Peak per NiCad e NiMH
Corrente costante / Tensione costante
per LiPo e LiIo
Cicli carica/scarica max. 5 cicli, fine carica con pacco
batteria carico o scarico
LCD 2 righe, 16 caratteri, retroilluminato
2. Dichiarazione di conformità CE
La ditta MULTIPLEX Modellsport GmbH & Co. KG dichiara che il caricabatterie MULTIcharger 5014 DC rispetta le seguenti normative
CEE: EN 50081, EN 50082, EN 55014, EN 55022
3. Avvertenze
!Prima di mettere in funzione, leggere le istruzioni
!Non aprire l’apparecchio e non apportare modifiche
!Caricare esclusivamente batterie al litio, NiCd o NiMh adatte alla carica veloce
!Rispettare le avvertenze di carica allegate al pacco batteria (in particolare con pacchi batteria al litio
!Caricare solo elementi dello stesso tipo e capacità (pacco batteria))
!Non caricare contemporaneamente due pacchi batteria
!Non caricare batterie surriscaldate; farle prima raffreddare a temperatura ambiente
!Non collegare il caricabatteria e la batteria con polarità invertita
!Non lasciare incustodito il caricabatterie durante il suo funzionamento
!Attenzione: il caricabatterie può diventare molto caldo.
⇒Non coprire l’apparecchio, non ostacolare il ricircolo d’aria attorno all’apparecchio
⇒Non posizionare l’apparecchio sotto il sole
!Non posizionare il caricabatterie, la batteria ed i cavi su o vicino a superfici o oggetti facilmente infiammabili o sensibili
alle alte temperature
!Proteggere il caricabatterie dall’umidità
4. Caratteristiche particolari
• Tensione in entrata 11 fino a 15 V, corrente continua
• Carica e scarica di
1 fino 14 elementi NiCd / NiMH
1 fino 5 elementi ai polimeri di litio (LiPo) o litio-ioni (LiIo)
pacchi batteria al piombo con 2 V fino a 12 V
• Corrente di carica regolabile da 0,1 A a 5 A
• Corrente di scarica regolabile da 0,1 A a 1 A
• Fine carica Delta-Peak per pacchi batteria NiCd e NiMH
• Carica con corrente costante/tensione costante per pacchi
batteria al litio (LiPo e LiIo)
• Leggero, compatto, facile da trasportare
• Cicli di carica/scarica automatici
• Display LCD retroilluminato, 2 x 16 caratteri
• Indicazione errori per tensione in entrata non ammessa,
collegamento errato o inverso in entrata e uscita, cattivo
stato del pacco batteria ed errore interno
• Robusta scatola in alluminio
5. Funzioni dei tasti
Tasto BATTERY-TYPE
Con la pressione veloce di questo tasto è possibile impostare il pacco batteria NiCd, NiMH, LiPo/LiIo o Pb (piombo). Il pacco batteria
attuale comincia a lampeggiare.
In questa fase ogni nuova pressione del tasto BATTERY-TYPE richiama in sequenza i diversi tipi di pacchi batteria
(NiCd ÎNiMH ÎLiIo/LiPo ÎPb ÎNiCd Î...).
Se si preme un altro tasto (o nessun tasto) il pacco batteria indicato smette di lampeggiare dopo ca. 5 sec.
La pressione lunga di questo tasto richiama per ca. 3 sec. le impostazioni di carica attuali.
Tasto ENTER/START
Con la pressione veloce di questo tasto si richiama il primo valore da impostare nel menu attuale. Il valore comincia a lampeggiare.
La nuova pressione del tasto ENTER fa lampeggiare il valore successivo.
Il valore da impostare smette di lampeggiare se non si preme un tasto entro ca. 3 secondi.
La pressione lunga di questo tasto fa iniziare la fase di carica.
Tasti INC/DEC
Con questi tasti si possono cambiare i valori lampeggianti o sceglire di una lista.

Istruzioni MULTIcharger LN-5014
MULTIPLEX Modellsport GmbH & Co.KG • Neuer Weg 2 • D-75223 Niefern-Öschelbronn • www.multiplex-rc.de
MUL
T
Icharger LN-5014 # 9 2523 (05-04-08/NSCH)
6. Modalità NiCd
1
Î
nNiCd
Corrente di carica
In questo menu è possibile impostare con i tasti INC e DEC la corrente di carica fra 0,1 A e 5 A in passi da 50 mA. Per terminare
l’impostazione premere ENTER.
Corrente di scarica
In questo menu è possibile impostare con i tasti INC e DEC la corrente di scarica fra 0,1 A e 1 A. Per terminare l’impostazione
premere ENTER.
Tensione di fine scarica
In questo menu è possibile impostare con i tasti INC e DEC la tensione corrispondente al fine scarica. Il valore può essere regolato
fra 0,1 V e 16,8 V. Per terminare l’impostazione premere ENTER.
Cicli di carica/scarica (Cycle)
In questo menu è possibile impostare la modalità di funzionamento dei cicli di carica/scarica.
C->D charge to discharge = Fine con pacco batteria scarico
D->C discharge to charge = Fine con pacco batteria carico
Numero cicli: 1 fino a 5
Per terminare l’impostazione premere ENTER.
7. Modalità NiMH
1
Î
oNiMH
Corrente di carica
In questo menu è possibile impostare con i tasti INC e DEC la corrente di carica fra 0,1 A e 5 A. Per terminare l’impostazione premere
ENTER.
Corrente di scarica
In questo menu è possibile impostare con i tasti INC e DEC la corrente di scarica fra 0,1 A e 1 A. Per terminare l’impostazione
premere ENTER.
Tensione di fine scarica
In questo menu è possibile impostare con i tasti INC e DEC la tensione corrispondente al fine scarica. Il valore può essere impostato
fra 0,1 V e 16,8 V. Per terminare l’impostazione premere ENTER.
Cicli di carica/scarica (Cycle)
In questo menu è possibile impostare la modalità di funzionamento dei cicli di carica/scarica. Per terminare l’impostazione premere
ENTER.
8. Modalità LiPo y LiIo
1
Î
pLiPo & LiIo
Questo caricabatterie permette di caricare fino a 5 elementi al litio. La carica combinata con corrente e tensione costanti garantisce
una carica perfetta dei pacchi batteria ai polimeri di litio e litio-ioni. Nella prima fase, la carica avviene con corrente costante. Una
volta raggiunta una tensione per elemento di ca. 4 V, il caricabatterie passa alla seconda fase della carica con tensione costante. La
procedura di carica con tensione costante termina quando la corrente di carica scende aldisotto dei 100 mA. In questo modo il fine
carica corrisponde esattamente al pacco batteria completamente carico.
Capacità del pacco batteria
In questo menu è possibile impostare con i tasti INC e DEC la capacità del pacco batteria fra 100 mAh e 5.000 mAh in passi da 50
mAh. Per terminare l’impostazione premere ENTER.
Tensione per pacchi batteria al litio-ioni (LiIo)
In questo menu è possibile impostare con i tasti INC e DEC la tensione nominale del pacco batteria per la carica e scarica. I valori
possibili sono 3,6 V, 7,2 V, 10,8 V, 14,4 V e 18,0 V. Per terminare l’impostazione premere ENTER.
Tensione per pacchi batteria ai polimeri di litio (LiPo)
In questo menu è possibile impostare con i tasti INC e DEC la tensione nominale del pacco batteria per la carica e scarica. I valori
possibili sono 3,7 V, 7,4 V, 11,1 V, 14,8 V e 18,5 V. Per terminare l’impostazione premere ENTER.
Corrente di scarica
In questo menu è possibile impostare con i tasti INC e DEC la corrente di scarica fra 0,1 A e 1 A. Per terminare l’impostazione
premere ENTER.
Tipo pacco batteria
In questo menu è possibile impostare con i tasti INC e DEC il tipo di pacco batteria LiPo o LiIo. Per terminare l’impostazione premere
ENTER.
Corrente di carica
Per motivi di sicurezza il caricabatterie carica gli elementi al litio (LiPo o LiIo) sempre con una corrente di 1 C. La corrente viene
calcolata prendendo come riferimento la capacità del pacco batteria impostata.
Esempio per un elemento LiPo con 1500 mAh: 1 C = 1500 mAh, corrente di carica = 1,5 A
NOTA: Impostare correttamente il tipo di pacco batteria!
La tensione massima per gli elementi al litio-ioni (LiIo) è di 4,1 V, quella per gli elementi ai polimeri di litio è di 4,2 V (LiPo). Per questo
motivo assicurarsi assolutamente che l’impostazione del tipo di pacco batteria sia stata effettuata correttamente. Con un’impostazione
errata il pacco batteria può danneggiarsi, eventualmente anche esplodere. Pericolo di incendio e di ferimento.

Istruzioni MULTIcharger LN-5014
MULTIPLEX Modellsport GmbH & Co.KG • Neuer Weg 2 • D-75223 Niefern-Öschelbronn • www.multiplex-rc.de
MUL
T
Icharger LN-5014 # 9 2523 (05-04-08/NSCH)
9. Modalità pacchi batteria al piombo
1
Î
qPB.
10.Indicazioni
Indicazioni durante la carica o scarica
INPUT BATTERY
VOLTAGE ERROR Con queste indicazioni, la pressione del tasto ENTER permette di modificare il valori
impostati.
OUTPUT BATTERY
REVERSE POLARITY Con queste indicazioni, la pressione lunga del tasto ENTER fa terminare la procedura di
carica o scarica.
Indicazione a fine carica
END 030:00 00000
NC 100mA 10.75V Con questa indicazione, la pressione del tasto ENTER permette di richiamare il menu
principale.
Indicazione dei valori attuali
Per richiamate le schermate riportate sopra, con i valori attuali del pacco batteria e della procedura di carica, premere per più di 3
sec. il tasto BATTERY-TYPE. Per sfogliare le tre schermate premere i tasti INC e DEC.
Se nessun tasto viene premuto entro 3 sec., il caricabatterie passa all’indicazione normale.
11.Indicazioni d’errore
INPUT BATTERY
VOLTAGE ERROR Tensione in entrata inferiore a 11,0 V o superiore a 15,0 V
OUTPUT BATTERY
REVERSE POLARITY Pacco batteria collegato al caricabatterie con polarità invertita
CHECK THE BATT.
OPEN CIRCUIT Interruzione del circuito di carica
NO BATTERY
Nessun pacco batteria collegato all’uscita del caricabatterie
OUTPUT CIRCUIT
PROBLEM Errore interno al caricabatterie
INPUT = 12.00V
OUTPUT = 13.18V
ChgCAPA=00000mAh
DchCAPA=00000mAh
CHG PEAK = 12.00V
DCHG AVR = 13.18V

Menus MULTIcharger LN-5014
MULTIPLEX Modellsport GmbH & Co.KG • Neuer Weg 2 • D-75223 Niefern-Öschelbronn • www.multiplex-rc.de
MULTIcharger LN-5014 # 9 2523 (05-04-08/NSCH)
NiCd CHARGE
C=3.0A
BATT TYPE NiCd DISCHARGE
D=0.50A 4.8 V
NiCd CYCLE D->C 5
C=3.0A D=0.50A
NiCd CHARGE
C=3.0A
BATTERY CHECK
WAIT PLEASE. . . .
CHG 0:00 00000
NC + 3.0 1.200
NiCd DISCHARGE
D=0.50A 4.8 V
NiCd DISCHARGE
D=0.50A 4.8 V
BATTERY CHECK
WAIT PLEASE. . . .
DCH 0:00 00000
NC - 3.0 1.200
NiCd CYCLE D->C 5
C=3.0A D=0.50A
NiCd CYCLE D->C 5
C=3.0A D=0.50A
NiCd CYCLE D->C 5
C=3.0A D=0.50A
NiCd CYCLE D->C 5
C=3.0A D=0.50A
BATTERY CHECK
WAIT PLEASE. . . .
DCH 0:00 00000
NC + 3.0 1.200
NiCd CYCLE C->D 5
C=3.0A D=0.50A
START
START
INC DEC
INC DEC
INC DEC
INC DEC
INC DEC
INC DEC
INC DEC
INC INC
DEC DEC
DEC
INC
ENTER
ENTER
ENTER
ENTER
ENTER
ENTER
ENTER
START
nNiCd
NiMH CHARGE
C=3.0A
NiMH DISCHARGE
D
=
0
.
50A
4
.
8
V
NiMH CYCLE D->C 5
C=3.0A D=0.50A
NiMH CHARGE
C=3.0A
BATTERY CHECK
WAIT PLEASE. . . .
CHG 0:00 00000
NH + 3.0 1.200
NiMH DISCHARGE
D=0.50A
4
.
8
V
ENTER
NiMH DISCHARGE
D=0.50A 4.8 V
BATTERY CHECK
WAIT PLEASE. . . .
DCH 0:00 00000
NH - 3.0 1.200
NiMH CYCLE D->C 5
C=3.0A D=0.50A
NiMH CYCLE D->C 5
C=3.0A D=0.50A
NiMH CYCLE D->C 5
C=3.0A D=0.50A
NiMH CYCLE D->C 5
C=3.0A D=0.50A
BATTERY CHECK
WAIT PLEASE. . . .
DCH 0:00 00000
NH + 3.0 1.200
START
START
START
ENTER
ENTER
ENTER
ENTER
NiMH CYCLE C->D 5
C=3.0A D=0.50A
BATT TYPE
DECINC
DECINC
DECINC
DECINC
DECINCDECINC
INC INC
INC
DEC DEC
DEC
ENTER ENTER
oNiMH

Menus MULTIcharger LN-5014
MULTIPLEX Modellsport GmbH & Co.KG • Neuer Weg 2 • D-75223 Niefern-Öschelbronn • www.multiplex-rc.de
MULTIcharger LN-5014 # 9 2523 (05-04-08/NSCH)
LiIo CHARGE
C=3000mAh 10.8Vp
LiIo DISCHARGE
D
=.
0
.
50
A
10
.
8V
p
LiIo CHARGE
C=3000mAh 10.8Vp
LiIo CHARGE
C=3000mAh 10.8Vp
BATTERY CHECK
WAIT PLEASE. . . .
CHG 0:00 00000
LI + 3.0 1.200
LiIo DISCHARGE
D=0.50A 10.8Vp
LiIo DISCHARGE
D=0.50A 10.8Vp
BATTERY CHECK
WAIT PLEASE. . . .
DCH 0:00 00000
LI + 3.0 1.200
START
INC INC
INCINC
DEC
DECDEC
DEC
INC
DEC
BATT TYPE
START
Lithium type
LiIo
INC
DEC
Lithium type
LiIo
DEC
Lithium type
LiPo
INC
ENTER
ENTER
ENTER
ENTER
PB CHARGE
C=3.0A 12Vpack DEC
INC PB DISCHARGE
D
=
0
.
50A
12V
pac
k
BATT TYPE
PB CHARGE
C=3.0A 12Vpack
PB CHARGE
C=3.0A 12Vpack
BATTERY CHECK
WAIT PLEASE. . . .
CHG 0:00 00000
Pb + 3.0 1.200
PB DISCHARGE
D
=
0
.
50A
12V
pac
k
PB DISCHARGE
D=0.50A 12Vpack
BATTERY CHECK
WAIT PLEASE. . . .
CHG 0:00 00000
Pb - 3.0
1200
ENTER
ENTER
PB CHARGE
C=3.0A 12Vpack
INC DEC
PB CHARGE
C=3.0A 12Vpack
PB DISCHARGE
D=.50A 12Vpack
INC INC
INC INC
INC
INC DEC
DEC
DEC
DECDEC
DEC
ENTER
ENTER
START
START
pLiPo & LiIo
qPB
This manual suits for next models
1
Table of contents
Languages:
Other Multiplex Batteries Charger manuals

Multiplex
Multiplex Power Peak B6 EQ-BID Reference guide

Multiplex
Multiplex LN-2010 User manual

Multiplex
Multiplex MULTIcharger LN-3008 EQU User manual

Multiplex
Multiplex MULTIcharger 810 WWC User manual

Multiplex
Multiplex POWER PEAK E7 User manual

Multiplex
Multiplex POWER PEAK A4 User manual

Multiplex
Multiplex MULTIcharger 4010 DC User manual

Multiplex
Multiplex MULTIcharger LN-5014 User manual

Multiplex
Multiplex Power Peak B6 EQ-BID User manual

Multiplex
Multiplex MULTIcharger L-703 EQU User manual