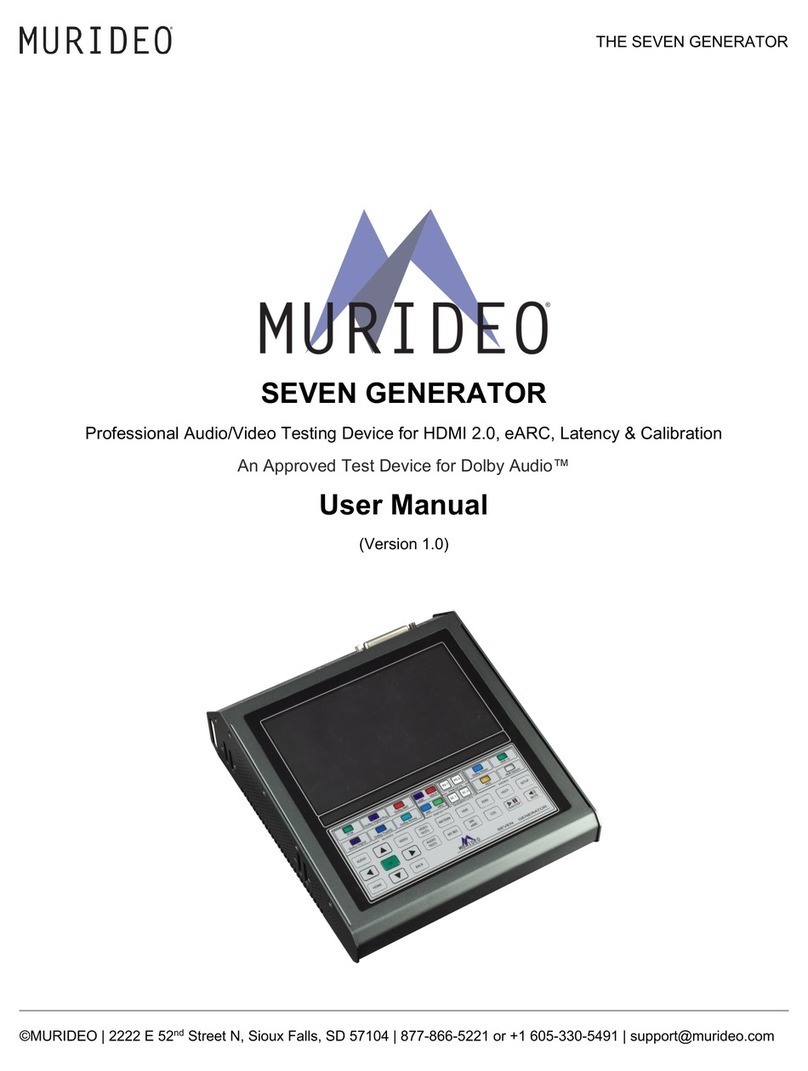
Murideo MU-SEVEN-G-8K User manual

1
MU-SEVEN-G-8K
Professional Audio/Video Testing Device for HDMI 2.1, ARC/eARC, Latency &
Calibration An Approved Test Device for Dolby Audio ™

INTRODUCTION .................................................................................. 6
FEATURES .......................................................................................... 6
IN THE BOX ....................................................................................... 6
FREE PC SOFTWARE ............................................................................. 6
FRONT PANEL OVERVIEW ...................................................................... 8
A - DISPLAY ....................................................................................... 8
B - AUDIO/VIDEO OUTPUT INFO BAR ....................................................... 9
C - KEYPAD ....................................................................................... 9
AUDIO SIGNAL OUTPUT INDICATOR LIGHTS .............................................. 9
EARC, ARC, HDCP, AND HPD SIGNAL OUTPUT INDICATOR LIGHTS ................... 9
VIDEO SIGNAL/FORMAT OUTPUT INDICATOR LIGHTS .................................. 10
PS-1/PS-2 ......................................................................................... 10
SC-1/SC-2 ......................................................................................... 10
NAVIGATION SHORTCUT BUTTONS .......................................................... 10
MEDIA CONTROLS .............................................................................. 11
MENU NAVIGATION ............................................................................. 11
CONNECTIONS ................................................................................... 12
AV SYNC SENSORS .............................................................................. 12
HDMI PORTS ..................................................................................... 12
CONNECTIONS CONT. .......................................................................... 13
AUDIO INPUT .................................................................................... 13
AUDIO OUTPUTS ................................................................................ 13
CONTROL ......................................................................................... 13
POWER ............................................................................................ 14
NAVIGATION TUTORIAL ....................................................................... 14
FRONT PANEL: SHORTCUT BUTTONS ...................................................... 18
PRESET BUTTONS ............................................................................... 26
TO SAVE A PRESET (PS-1/PS-2): ............................................................ 26
SHORTCUT BUTTONS ........................................................................... 27
2

3
TO SAVE A SHORTCUT (SC-1/SC-2): ....................................................... 27
VIDEO GENERATOR ............................................................................. 28
TIMING & RESOLUTION: ...........................................................................28
PATTERN SELECT: ............................................................................. 28
FPGA: ............................................................................................. 29
ISF PATTERNS: .................................................................................. 29
DVS HDR PATTERNS: ........................................................................... 29
UHD SDR PATTERNS: ........................................................................... 30
DOLBY VISION: .................................................................................. 30
HD PATTERNS: ................................................................................... 31
PVA PATTERNS (UHD): ......................................................................... 31
SPEARS & MUNSIL (FHD): .................................................................... 32
USER PATTERN (STILLS): ..................................................................... 32
IRE WINDOW: .................................................................................... 32
SHORTCUTS: ..................................................................................... 33
COLOR SPACE: ................................................................................... 33
BT2020 SETTING: ............................................................................... 33
COLOR DEPTH: .................................................................................. 34
HDCP SETUP: .................................................................................... 34
HDMI/DVI SETUP: .............................................................................. 34
HDR: ............................................................................................... 35
VIDEO TEST: ..................................................................................... 35
AUDIO GENERATOR: ............................................................................ 36
PCM AUDIO: ...................................................................................... 36
PCM AUDIO SAMPLING RATE: ................................................................ 36
PCM AUDIO BIT DEPTH: ....................................................................... 37
PCM AUDIO SINEWAVE TONE: ............................................................... 37
PCM AUDIO AUDIO VOLUME: ................................................................. 37
AUDIO CHANNEL /SPEAKER CONFIGURATION: ........................................... 38

4
DOLBY AUDIO GENERATOR: .................................................................. 39
DOLBY DIGITAL: ................................................................................ 39
DOLBY DIGITAL PLUS: ......................................................................... 39
DOLBY MAT: ...................................................................................... 40
DOLBY MAT (DOLBY TRUEHD): .............................................................. 40
MY STREAMS: .................................................................................... 41
EXT. ANALOG L/R INPUT: ..................................................................... 41
DTS AUDIO GENERATOR: ...................................................................... 41
DTS-HD HIGH RESOLUTION: ................................................................. 42
DTS-X: ............................................................................................. 43
DTS EXPRESS: ................................................................................... 43
MY STREAMS: .................................................................................... 43
AUDIO TESTS: ................................................................................... 44
SOURCE-SPEAKER TEST: ...................................................................... 44
SYNC & LATENCY TESTS: ...................................................................... 46
VIDEO SETTINGS: ............................................................................... 46
DOLBY VISION SETTINGS: .................................................................... 47
AUDIO STREAM START ADJUST: ............................................................. 47
AV SENSOR FUNCTIONALITY TEST: ......................................................... 47
ARM AV LATENCY: ............................................................................... 48
ARM ARC LATENCY: ............................................................................. 50
ARM EARC LATENCY: ........................................................................... 51
EDID, EARC CDS: ............................................................................... 52
SINK DEVICE EDID INFO: ..................................................................... 52
EARC/ARC AUDIO INFO: ....................................................................... 53
ARC HPD CTL: ................................................................................... 53
EARC PHYSICAL HPD CTL: .................................................................... 53
HDMI +5V POWER CTL: ....................................................................... 54
EARC TX LATENCY: ............................................................................. 54

5
EARC RX LATENCY: ............................................................................. 54
SYSTEM SETUP: ................................................................................. 55
IP MANAGEMENT: ............................................................................... 55
ARC/EARC OUT SETUP: ........................................................................ 55
VITALS: ........................................................................................... 56
FAN CONTROL: .................................................................................. 56
RESET ALL SETTINGS: ......................................................................... 57
UPDATING FIRMWARE .......................................................................... 58
FCC INTERFERENCE AND COMPLIANCE STATEMENT .................................... 58
FCC WARNING ................................................................................... 58
CAUTION .......................................................................................... 58
WARRANTY AND GETTING HELP ............................................................. 59
OBTAINING THE WARRANTY SERVICE ...................................................... 60
DISCLAIMER OF WARRANTY .................................................................. 61
GETTING HELP ................................................................................... 62
LEGAL NOTICES ................................................................................. 62

Introduction
The SEVEN Generator is the next generation in HDMI test and measurement equipment from Murideo.
An approved test device for Dolby Vision™ and Dolby Audio™, the SEVEN hosts an unmatched suite of
audio and video tests. This device is the GO-TO tool for the video device, display, or repeater manufac-
turer as well as the consummate video professional.
The impressive video capabilities of the SEVEN include native 10/12 Bit BT2020 video output with over
1000 patterns, including HDR, SDR, Dolby Vision, and HLG. Test patterns are generated from FPGA or
raw YUV les for a truly native experience and include video playback. The SEVEN includes the full suite
of patterns from Diversied Video Solutions and other patterns and videos from Bill Wetzel, ISF, PVA,
Portrait Displays, and Spears & Munsil. This device is the ideal solution for display calibration and evalu-
ation. The test suite allows the user to construct a test signal with any video format and any audio for-
mat, then execute a test based on your own parameters and allows for reporting. The device has 1.5TB
of storage, with reservations for up to 3 minutes of 4K60 4:4:4 video playback so the user can quickly
load patterns using the USB 3.0 interface. The SEVEN is also capable of 120 frame video playback.
The impeccable performance in video generation is just the beginning. As a test device approved by
Dolby Laboratories, Inc., SEVEN was designed with advanced audio testing capabilities, including A/V
Sync (Lip Sync), Audio Latency, and Dolby Audio. This approved test device for Dolby Audio contains all
current Dolby Audio streams, including; Dolby Digital, Dolby Digital Plus (w/Dolby Atmos), Dolby MAT
(Dolby Atmos), and Dolby True HD (w/ Dolby Atmos). The Audio Suite of tests is available in HDMI Tx,
ARC Tx, and eARC Tx. With additional features like tone generation, frequency sweeps, AV Sync mea-
surements, audio latency measurements, this is an audio swiss army knife. The built-in photo-diode
sensor and microphone allow you to get real-time sync and latency measurements from HDMI and ARC/
eARC.
In the Box
·SEVEN Generator
·Hard Case
·Mini XLR Microphone
·Optical Sensor
·USB cable
·Mini Tripod
·Power Supply (12V/5A Locking Barrel Type)
6
Features
·Complete HDMI 2.0 Support (All Revisions)
·600 Mcsc - 2160P @60 4:4:4 Maximum Resolution
·40Gbps FRL HDMI 2.1 Support
·4K BT2020 (WCG) 10/12 Bit Support (Native)
·Dolby Vision, HDR 10, HLG, SDR
·HDCP 2.3 Support
·ARC/eARC Tx and Rx
·1080P 120Hz patterns and video playback
·ISF Labs Certied
·Control - Front Panel/PC Software/WebUI
·Haptic Front Keypad
·API (Application Programming Interface) Available
upon request
·7” 1080P Display
·Custom Test Pattern, Video Clip, and Audio Stream
Uploader PC Software
·USB 3.0 for fast uploads
·Reservation for up to 3 minutes of full 4K video
·Native YUV/RGB File upload and playback
Free PC Software
·PC Control Software
·Device Log
·Protocol Analyzer
·User Audio Uploader
·User Video Uploader
Available for download at www.murideo.com
Price - $0.00 !!!
NOTE: This document contains many technical terms and acronyms. If you are unsure of what these
mean we have a full GLOSSARY of Audio Video terms with denitions available at www.murideo.com

7

FRONT PANEL OVERVIEW
A - Display
The SEVEN-G includes a High Resoltution 1080P Full Color Display.
8

B - Audio/Video Output Info Bar
The AUDIO / VIDEO OUTPUT INFO BAR includes all pertinent video and audio output information includ-
ing resolution, timing, color space, color depth, PQ, audio format, sample rates, data size (bit depth),
audio frequency, and audio channel count.
9
C - Keypad
Audio Signal Output Indicator Lights
These lights indicate which audio format is currently
being generated by the SEVEN-G-8K.
In the example to the right, PCM audio is currently
selected as the audio output.
eARC, ARC, HDCP, and HPD Signal Output Indicator Lights
ARC/eARC lights indicate if an ARC/eARC is enabled on the SEVEN-G-8K
and the connected device under test.
·OFF - Disabled
·ON - Enabled on the SEVEN-G-8K and connected device under test
·FLASHING - Enabled on the SEVEN-G-8K but not on connected de-
vice under test

10
Video Signal/Format Output Indicator Lights
These lights indicate which version of HDR is currently selected. All
o indicates an SDR Video signal (no HDR).
PS-1/PS-2
Preset Shortcut Buttons
For more information see Page 23.
SC-1/SC-2
Shortcut Buttons
For more information see Page 24.
Navigation Shortcut Buttons
Use these buttons to quickly jump to your favorite/commonly used menus/settings.
For more information see Pages 14-21.
HDCP Light indicates if HDCP is enabled on the SEVEN-G-8K.
HPD Light indicates if a Hot Plug is detected with a device connected to
the HDMI OUTPUT of the SEVEN-G-8K

11
Media Controls
RUN/STOP Button
Use this button to pause/continue video clips.
MUTE Button
Use this button to MUTE/UNMUTE the AUDIO OUTPUT of the SEVEN-G-8K.
Menu Navigation
UP/DOWN/LEFT/RIGHT Buttons
These buttons are used to navigate through menus.
OK Buttons
Press this button after you have highlighted your menu item to conrm your selection.

Connections
12
AV SYNC SENSORS
Visual Probe - connect the included light sensor for video or
audio/video latency tests. After connecting the sensor to the
SEVEN-G-8K, place the sensor in the middle of the display.
The sensor can also be attached to a tripod if you are using
it to test video or audio/video latency of a 2 piece projec-
tion system.
Microphone - This mini-XLR connection is where you
connect the included microphone for audio or audio/
video latency tests. After connecting the microphone to
the SEVEN-G-8K, place the microphone as close to the
display’s speaker (or a speaker in the audio system) as
possible.
NOTE: We have found extension cables that work with the visual probe and microphone. These can be
used in applications where the included cables are too short. If you would like a recommendation on ex-
HDMI PORTS
HDMI OUTPUT - Using a known good HDMI cable, connect
the SEVEN-G-8K to the device you’d like to test.
HDMI INPUT - Using a known good HDMI cable, connect the
SEVEN-G-8k to the source you’d like to test.

CONTROL
The SEVEN-G-8K has multiple connections
for control. These can be used to control the
SEVEN-G-8K remotely, for FW updates, or for
uploading custom test patterns, audio les, or
video clips. The connections are:
·IP Control - Use an Ethernet cable to connect the SEVEN-G-8k to a network to access the Web UI.
NOTE: For this to work properly your PC must be on the same network as the SEVEN-G-8K. The
default IP address is 192.168.1.239, but can be changed in the System Setup menu if needed.
·RS-232 Control - Use a DB9 cable to connect the SEVEN-G-8K to a PC. You can now remotely
control the SEVEN-G-8K via RS-232 protocol. This can also be used to access and use any of the
included SEVEN-G-8K software packages.
·Serial Link - Use a 3-pin terminal to connect the SEVEN-G-8K to a PC. You can now remotely
13
Connections Cont.
Audio INPUT
2 CH. LINE LEVEL EXT. AUDIO INPUT - Use this 3.5mm
input to connect an external audio source to the SEVEN-G-
8K. This can be used if you have audio test tones or perhaps
music clips from another device.
Audio OUTPUTS
Extracted S/PDIF Audio OUTPUT - Connect the SEVEN-G-8K to
an external audio preamp, amplier, AVR, or any other device
that has an audio input. Use this to test/conrm audio signals.
NOTE: This is only used to pass the extracted audio from the
HDMI stream. These cannot be used as a “stand alone” audio
output from the SEVEN-G-8K. There are 2 connections:
·TOSLINK
·Digital Coax

14
Navigation Tutorial
If this is your rst time using the SEVEN-G-8K take a few moments to learn how to navigate through the
SEVEN-G-8K’s menu system. In this example we are going to select a DVS HDR Evaluation test pattern,
then a Chroma Sub 500 test pattern.
POWER
·12V/3A - Here is where you connect the SEVEN-G-8K’s power supply.
NOTE: Only use the included power supply.
·POWER SWITCH - This a simple ON/OFF switch to power the SEVEN-G-
8K o (down position) or ON (up position).
control the SEVEN-G-8K via RS-232 protocol. This can also be used to access and use any of the
included SEVEN-G-8K software packages.
·USB 3.0 - Use a USB cable to connect the SEVEN-G-8K to a PC. . You can now remotely control
the SEVEN-G-8K via RS-232 protocol. This can also be used to access and use any of the included
SEVEN-G-8K software packages.
NOTE: You MUST use the USB connection for uploading custom test patterns, audio les, or video clips.
If loading FW you can use whichever control connection is most convenient to you.
UP
DOWN
LEFT RIGHT
OK

15
1. Verify that your SEVEN-G-8K is Powered OFF.
2. Connect a high-performance HDMI cable to your SEVEN-G-8K’s “HDMI OUTPUT” port to an “HDMI IN-
PUT” of an HDR10 compatible display.
3. Power Up the SEVEN-G-8K using the On/O switch.
4. Starting from the MAIN MENU screen (this is the default menu when you power on, or you can press
the HOME shortcut button to get to the MAIN MENU). Use the UP/DOWN ARROW buttons and high-
light the “VIDEO GENERATOR” menu.
5. Press the GREEN “OK” button.
6. Looking at the right side of the screen, notice that the “TIMING & RESOLUTION” OPTION is now high-
lighted in ORANGE.
7. Press the “ARROW DOWN” button to highlight “PATTERN SELECT”.
8. Press the GREEN “OK” button.
9. Looking at the left side of the screen, notice new sub-menu selections under the “VIDEO GENERATOR”
/ “PATTERN SELECT” menu tree.
10. Arrow Down and highlight the “DVS HDR PATTERNS” menu item.

16
11. Press the GREEN “OK” button.
12. On the right side of the screen, notice that the “CLIPPING & COLOR” OPTION is now highlighted in
ORANGE.
13. Arrow Down and highlight the “EVALUATION” OPTION.
14. Press the GREEN “OK” button.
15. Press the “RIGHT ARROW” button until the “City Sunset” test pattern is highlighted in BLACK, then
press the GREEN “OK” button to select. The “City Sunset” test pattern should now be visible on the
display that you have your SEVEN-G-8K plugged into.

17
16. Use the navigation arrow buttons to highlight the “Chroma Sub 500” pattern in BLACK.
17. Press the GREEN “OK” button to select.
18. Select any other patterns you might like to look at. When you are nished exploring, press the
“BACK” button several times OR press the “HOME” button to jump back to the “MAIN MENU” screen.

18
Front Panel: Shortcut Buttons
The following pages cover the SEVEN-G-8K’s shortcut buttons.
HOME
Pressing the “HOME” button will jump to the SEVEN-G-8K’s Main Menu.
Note: This is the default menu when the SEVEN-G-8K is powered on.

19
VIDEO
Pressing the “VIDEO” button will jump to the Video Generator menu. Here you can select and change the
output settings. See Pages 24-30 for more details.
VIDEO TESTS
Pressing the “VIDEO TESTS” button will jump to the Video Tests menu. See Page 31 for more details.

20
AUDIO
Pressing the “AUDIO” button will jump to the Audio Generator menu. See Page 32-34 for more details.
AUDIO TESTS
Pressing the “AUDIO TESTS” button will jump to the Audio Tests menu. See Page 32-39 for more details.
Table of contents
Other Murideo Test Equipment manuals
Popular Test Equipment manuals by other brands

Ametek
Ametek NSG 4070C1 Quick start guide and safety instructions

Midtronics
Midtronics EXP-4311 Series instructions

Keysight Technologies
Keysight Technologies N7015A Quick Start and Accessories Guide

EKO Instruments
EKO Instruments MP-01 quick start guide

Gossen MetraWatt
Gossen MetraWatt METRISO PRIME 10 operating instructions

Inficon
Inficon Quantus LP100 operating manual