MUURIKKA Nokkela TO6841 User manual

Opa Muurikka Oy • Teollisuuskatu 8, 50130 Mikkeli, Finland • www.muurikka.fi
TO6841
Electric Grill / Smoking Oven 900 W
Assembly instructions / Instructions

Parts
Chip plate carriers
Closing plate
Heat resistor and fixed closing plate
Lifting handle
Lock knob
Side knob
Upper part
Legs fastening
Heating element’s input hole
Side knob fastening
Lower part
Legs Fat plate Chip plate
Griddle
Assembly instructions
Heat resistor’s supports
Resistor support into the upper part (grilling
position)
Resistor supports into the lower part (smoking
position)
Resistor’s carrier
1
1
3
232

Fasten the resistor’s supports to the lower part and the upper part as shown in the picture. Two of these supports have a resistor’s carrier to make the heat
resistor lock in place. Fasten the supports that have a carrier to the side opposite to the resistor’s input hole. The longer carrier fastens to the upper part and the
shorter to the lower part. The resistor’s support with no resistor’s carrier fastens to the lower part. NOTE! The four chip plate carriers fasten to the lower part’s
resistor’s supports at the same time.
1
2
3
2
1
2
3
Fasten the legs to the ends of the lower part with six
screws so that the check nuts enter the lower part.
Fasten the lifting handle and the side knob to the
upper part.
Fasten the lock knob by spinning it in place in the
threaded hole in the plate in the side of the upper
part. Do not turn it so much that the device will not
open.
Resistor’s carrier

B grilling
thread the resistor in place through the resistor’s input hole into the
upper part so that the resistor is left on the resistor’s support. Make
sure that the resistor fastens under the resistor’s carriers and that the
resistor will not move during use. Lock the resistor with screws in the
fixed closing plate in the threaded holes in the upper part (two M5)
from the outside. Fasten the loose closing plate in the threaded holes in
the lower part into the resistor’s input hole from the outside. Make sure
that no holes or openings are left between the closing plates and the
lower part and the upper part.
NOTE! Make sure that the resistor fastens under the resistor’s carriers and that the resistor will
not move during use.
Fastening the resistor
First decide whether to use the device for smoking or grilling.
A smoking
thread the resistor in place through the resistor’s input hole into the
lower part onto the resistor’s supports. Make sure that the resistor
fastens under the resistor’s carriers and that the resistor will not move
during use. Lock the resistor with screws in the fixed closing plate in the
threaded holes in the lower part (two M5) from the outside. Fasten the
loose closing plate in the threaded holes in the upper part into the
resistor’s input hole from the outside. Make sure that no holes or
openings are left between the closing plates and the lower part and the
upper part.
A smoking B grilling

If you use the device for smoking, place the chip plate with chips onto the chip plate carriers and put the fat
plate and the griddle in place. For grilling, use the fat plate and griddle only, not the chip plate. To make it easier
to clean the fat plate, place a piece of aluminium foil on it. Make sure that no air holes in the fat plate are covered
by foil.
The device is ready for use.
NOTE! While smoking or grilling, turn the upper part with the side knob only. The lifting handle on the upper part
is only intended for moving the device when the device is cold. Do not use the lock knob to lock the upper part to the
lower part during use!
grilling
smoking
Place the chip plate on the carriers Do not use the chip plate.
1 1
Put the griddle and the fat plate in place in the lower part. Make
sure that the holes in the lower part are not covered.
Put the griddle and the fat plate in place in the lower part. Make
sure that the holes in the lower part are not covered.
3 3
Place the griddle on the fat plate
2
Place the griddle on the fat plate
2

Instructions
Specifications:
power: 900 W, 50 Hz
moisture resistance: IPX4
electrical connection: 230 V, 50 Hz
For outdoor use only. Connect to an earthed socket.
Before first use:
Wash the griddle, fat plate and chip plate. Dry carefully.
Smoking:
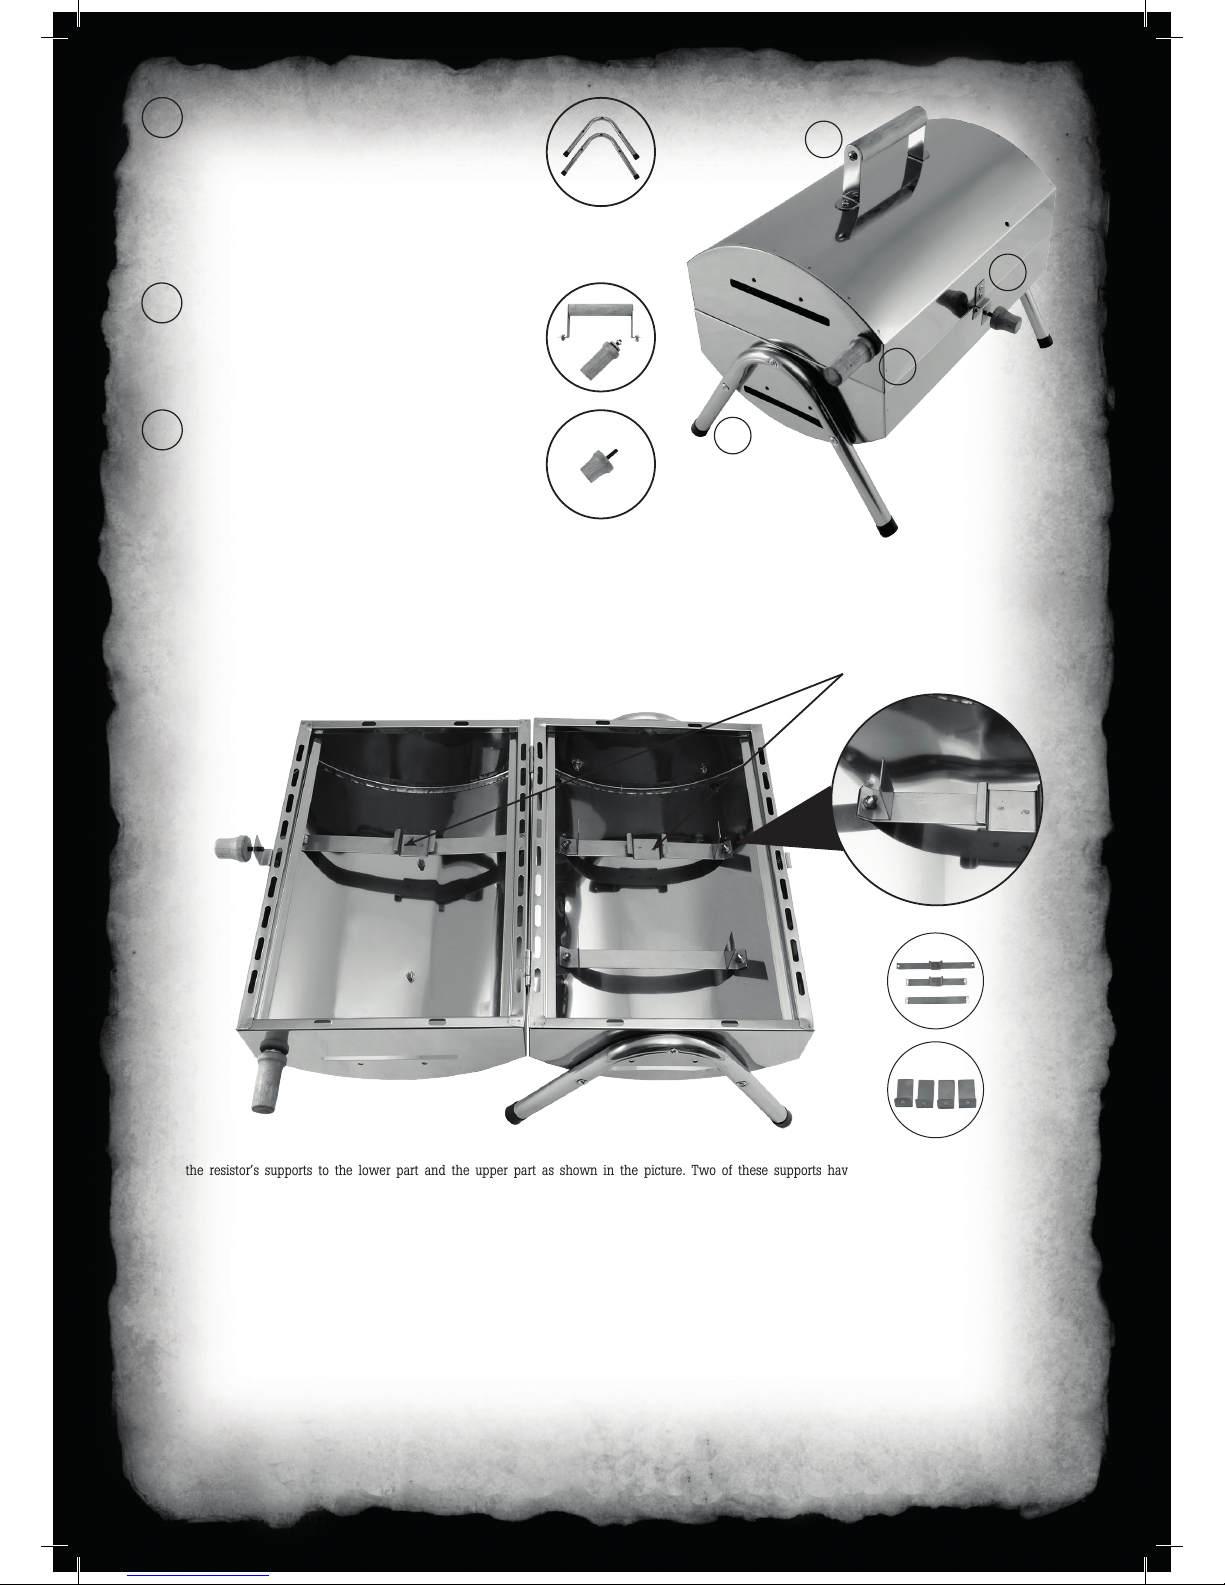
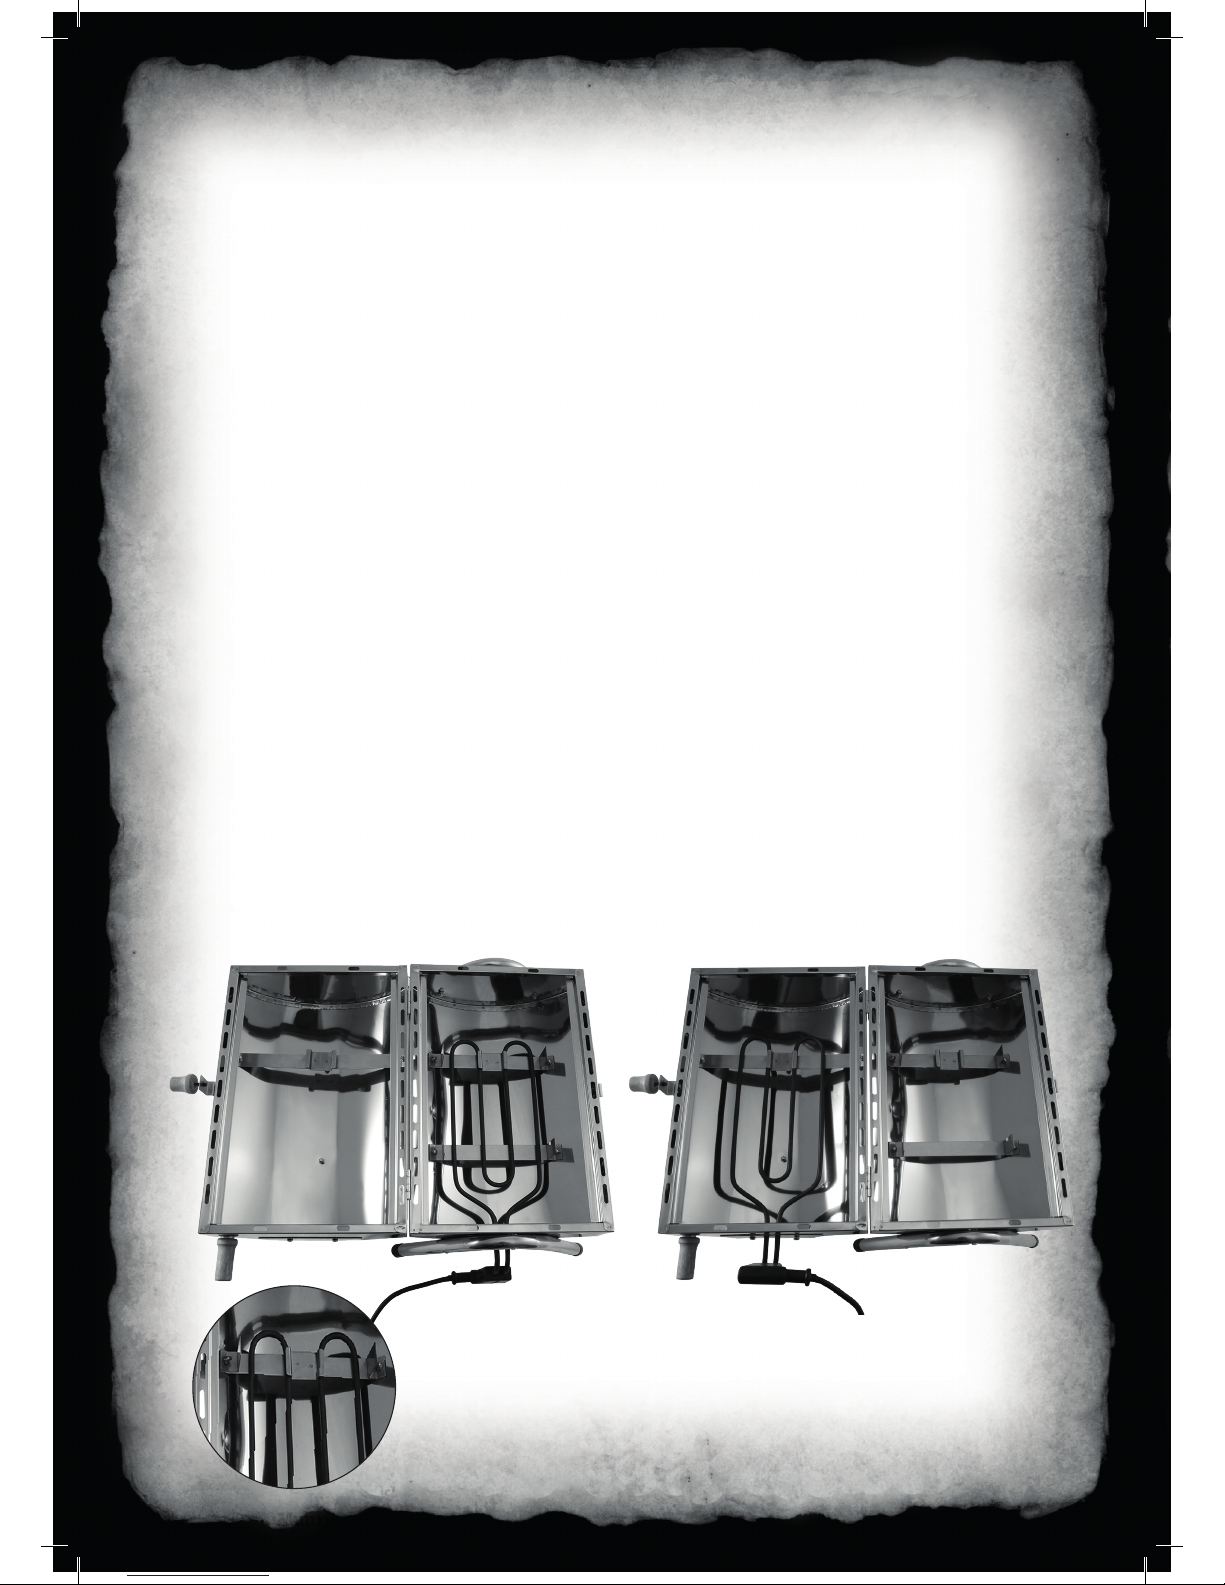
The electric resistor should be fit to the lower part of the device. Sprinkle 1-2 dl of moistened smoking chips on the chip plate
and place the chip plate on the carriers. If you use coarse smoking chips, the chips will not catch fire too fast. The most common
chip wood is alder. Other suitable woods are apple, oak, cherry and beech. Each wood will produce its own smoke flavour.
Put the fat plate in place. To protect the fat plate and make it easier to clean, you may place a piece of aluminium foil on the fat
plate. IMPORTANT! Do not cover any holes in the fat plate.
Place the fishes or the fish fillets on the griddle and close the device. Do not lock the upper part to the lower part during smoking.
The locking mechanism should be used only for lifting and moving the device while the device is cold. Salt may leave pitting
corrosion on the device, so it is a good idea to add salt to the fish only after smoking. Plug the cord into an earthed socket and
smoke the fish until done. At the end of these instructions, you will find approximate smoking times in relation to fish weight.
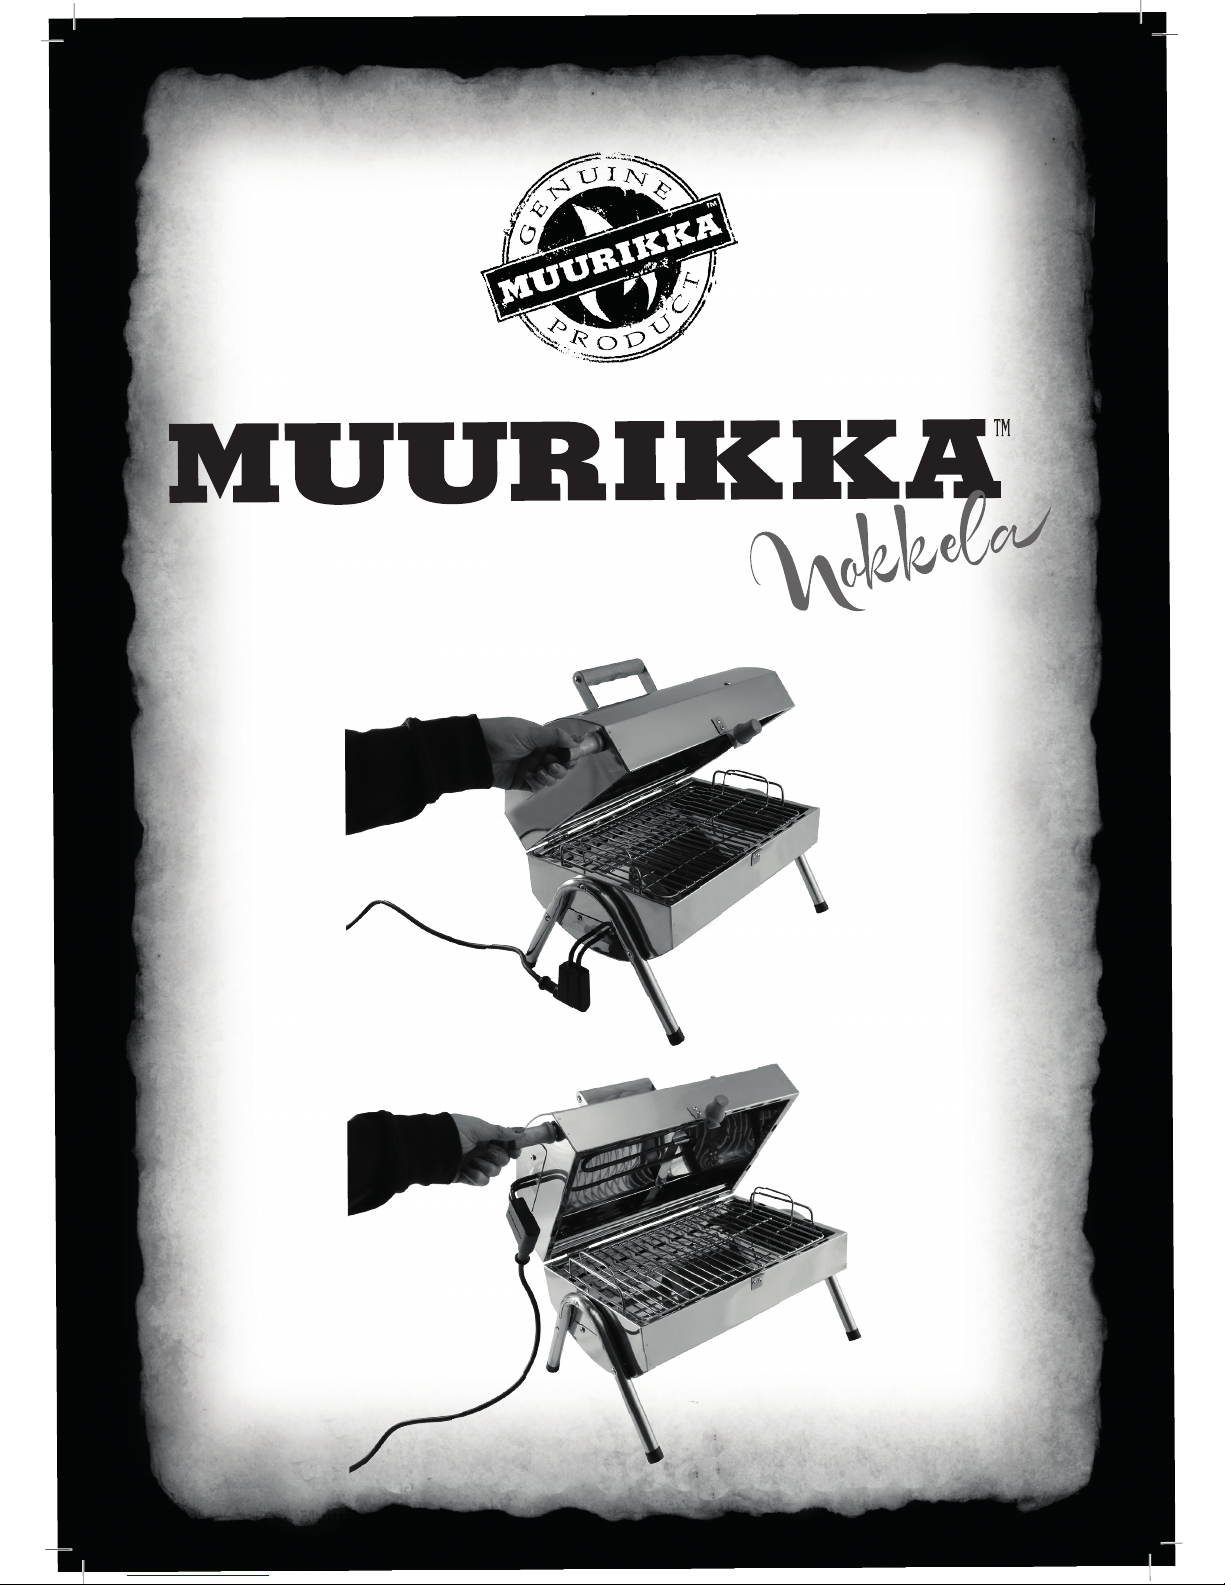
During smoking and while the device is hot, use the knob in the side of the upper part to open and close the device. The handle
on the upper part should be used only for moving the device while the device is cold.
When the fish is done, unplug the device. IMPORTANT! Do not forget to switch off the device.
Grilling:
The electric resistor should be fit to the upper part of the device. When the resistor is above the food to be grilled, the food is
grilled by the thermal radiation. This makes it possible to grill without smell, as the fat hits the fat plate and not the resistor.
Put the fat plate in place. To protect the fat plate and make it easier to clean, you may place a piece of aluminium foil on the fat
plate. IMPORTANT! Do not cover any holes in the fat plate. Place the griddle on the fat plate and the food to be grilled on the
griddle. Close the device. During grilling and while the device is hot, use the knob in the side of the upper part to open and close
the device. The handle on the upper part should be used only for moving the device while the device is cold.
The device is suitable for grilling sausages, hot sandwiches, steaks, vegetables... If you want browning on both sides, turn the
food a few times during grilling.
Cleaning:
Wash the griddle, the fat plate and the chip plate immediately after use, the parts are machine washable. You can also use a grill
brush or a coarse sponge for cleaning the parts. Wipe the dirt from the surfaces of the upper part and the lower part when the
device is cool. Dry the parts and the device carefully after washing them. You can also heat the parts inside the device for a few
minutes. If you intend to wash the device by immersing it in water, remove the resistor before immersing the device.
Storage:
Store the device in a dry place.
Warnings:
• Do not use coal or other combustible materials in this device.
• The device should be connected to a protected and earthed socket with no more than 30 mA.
•The cord should be checked for faults and the device must not be used if the cord is damaged. The cord is fixed firmly to the
resistor, and if either one is damaged, the whole resistor unit must be replaced.
•This device may not be used by persons (including children) with limited physical, sensory or mental abilities or lack of
experience or knowledge, even if these persons are supervised or have been taught to use the device.
• The surfaces of the device become very hot during use. Do not carry or move the device while it is still hot.
• Do not let children play with the device.
• Do not let the cord touch the device when the device is hot.
• This device is not designed to be used with a timer or remote control.
• Before use, place the device on a steady, fire-resistant base where sparks from burning smoking chips cannot start a fire.
• Always use heat-resistant gloves when handling the device, the fat plate and the chip plate and they are hot.
• After use, unplug the device. Do not forget to switch off the device.

0,5 kg 1 kg
Fish 15 - 25 min 25 - 35 min
Shellfish and crayfish 10 - 15 min 25 - 30 min
Fowl 40 - 45 min 50 - 55 min
Pork 30 - 35 min 40 - 45 min
Beef 20 - 25 min 40 - 45 min
Mutton 30 - 35 min 40 - 45 min
Vegetables 20 min 20 min
Potatoes 40 min 40 min
Corn cobs 60 min 60 min
The durations are approximate. Trying is the best way to find the right duration. Please consider while using the Smo-
king Oven that the temperature may rise very quickly. So you have to keep watching the cooking process. You can use
a meat thermometer as an aid.
EXAMPLES OF SMOKING DURATIONS
”Muurikka Nokkela is a line of products that you can easily put together and take with you. The Nokkela products are suitable for hiking or
camping, in the boat or even on a balcony with not so much space. Nokkela products can be combined with other Muurikka products to build a
comprehensive set of cooking supplies. Each Nokkela product is a combination of compactness, versatility and a brilliant concept.”
Opa Muurikka Oy • Teollisuuskatu 8, 50130 Mikkeli, Finland • www.muurikka.fi

Screws
Heat resistor’s supports
6 x M5 x 10
Heat resistor and fixed closing plate
Closing plate
4 x M5 x 10
Legs 6 x M5 x 24

Table of contents
Other MUURIKKA Grill manuals

MUURIKKA
MUURIKKA KOTAKEITTIO TUNDRA GRILL 80 User manual

MUURIKKA
MUURIKKA to6842 User manual

MUURIKKA
MUURIKKA NOKKELA TO6823 User manual

MUURIKKA
MUURIKKA Savuton Hiiligrilli User manual

MUURIKKA
MUURIKKA 6820 User manual

MUURIKKA
MUURIKKA Tundra Grill User manual

MUURIKKA
MUURIKKA Nokkela 54430010 User manual

MUURIKKA
MUURIKKA KOTAKEITTIO APETIVO User manual

MUURIKKA
MUURIKKA to6830M User manual

MUURIKKA
MUURIKKA KOTAKEITTIO Tundra Grill User manual