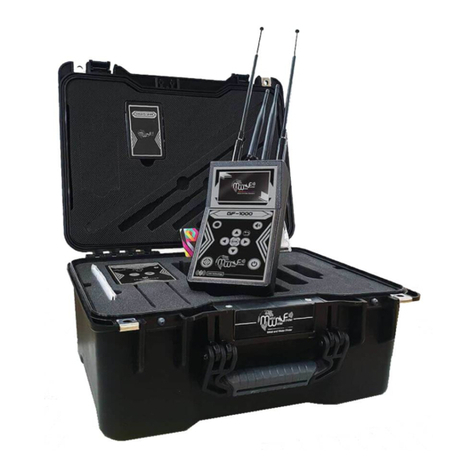
MWf Gold Radar User manual

Gold Radar User’s manual
Metal and Water Finder
User’s Manual
WWW.MWF-USA.COM

Contents
Page 1
Metal and Water Finder
Contents
Technical specification
Safety information
Device parts
Interfaces and components of Device
Overview
Assembly
Setup wizard
Page 1
Page 2
Page 3
Page 5
Page 7
Page 8
Page 10
Page 11
Start searching Page 13
Notes Page 17

The user must practice before starting the detecting operations and
discoveries
Store in Cool and dry place 15-40 C 5%-75% humidity Read & Understand
The User's manual
before using this device
Page
Safety information
2
The operating in high voltage areas
would limit the results and
performance
Don't operate two devices with
same method of search at the
same place
The operator Must remove any
metals that might affect the
opreatin eg:Rings,watch, belt....
Any attempt to tamper the device
or unapproved maintenance
would void the warranty
Don't store in high temperature or
high humidity
It’s better to turn off mobile while
using the device.
Disconnect the batteries before
long time storage
For best power endurance and
reliability. use heavy duty and high
quality batteries thats for the devices
which work on removable batteries

Page
Technical specification
3
Bluetooth none
Wireless: none
Search system : Built-in ionic and radar search system
Operating processor: MICROCONTLLER PIC18 & ARM 7
Operating frequency: 50 MHz
7.4v 3000 mAh/ output 12v
Power consumption: Maximum of consumption 350 MA
Battery life: 8 work hours
Charger: 5.1 volt 3 amp / Charging Time 3 hours
Display Type: TFT Color Monitor 4.3 ” , 65536 Color, 48Mhz , CDMA GPU
Specialized to detects: Gold
Targets Discrimination: Yes, detects gold only
Target Selection System: none
Depth Search: 50 M
Distance Search: 100 M
Search principle:
Processing the Signal Received level of ionic radiation
Results feedback:
Indicators of graphical radar data, acoustic, oscilloscope and
signal strength, and vibration alerts.
Power:

Voice alerts:
Vibrating alert:
Operating temperature:
Storage temperature:
Humidity:
Weight:
Dimensions:
Bag dimensions:
Technical specification
Page 4
From -15° C to 60° C
From -15° C to 40° C
Compound: 1 kg – disjointed in the bag: 3 kg
19X13X19.5 cm
40.5x35x21 cm
Yes , by graphical interface to locate the path and direction of
the target, and Acoustic commands.
It can be stored and work in the degree rate of air humidity of
level 90%.
Automatic smart
guidance system:
Yes
Yes

This sensor needs to connect into its own entrance at the
front of the device by using connectivity socket.
Ion and Radar sensor.
The unit is responsible to control of the settings and search
options.
The batteries was built inside it.
Also it’s responsible to issuing the search acoustic ,optical and
vibrations results.
Main Control Unit
Needs to contact through the headphones jack, who is to the right
side of the device.
Headphones
An electric charger to recharge the device's battery
Values: Input: 240-100VAC / 60-50Hz / 0.4 amps
Output: 5volts AC / 3amp / 15 Watt.
Charger
Device parts
Page 5

1
2
1
2
3
5
Socket to connect the Sensor
ON/OFF key
3View screen
4Socket of the charger
5Socket of the headphones
4
Interfaces
Page 6

1
1
2
Connect the radar sensor through
the socket who is at the front of the
main unit of the device.
2
When you disconnect the radar
sensor from the main unit please
make sure you are pressuring on the
empowerment Key as shown in the
picture.
Overview
Page 7

To start using the device : rstly press on the power key which you can nd it in the
right side of the main unit.
At the beginning the device will show us welcome screen and then the device name
screen.
ON / OFF
key
Setup wizard
Page 8

You can change these settings later by moving to the list of settings in the
main screen of the device
After selecting the required parameters , the device will move to the main
device screen.
When you run the device in the rst time the device will be asked to select some of the
primary and standards parameters like :
- Time
- Language
- Where do you want to use the device (old areas - mountainous areas - desert areas -
searching through the car)
Note :
In the case while the device isn't connected with the radar sensor , the radar interface on
the screen will be in gray and ineffective.
Note :
Setup wizard
Page 9

To access into screen of device settings click on the settings icon at the top of
the screen to move to the main settings screen which contains several options
like the follows
Setup wizard
Page 10

sound settings : allows you to set the sound level with the possibility of
activating the vibration feature on or deactivate it .
Brightness: this option allows you the possibility to modify the screen brightness.
Setup wizard
Page 11

Time : this option allows you to modify the time in the device
Language: This option allows you to change the device language.
Setup wizard
Page 12

Reset : restore the device to the default operating mode.
About: When you click on this option the device will show us a screen containing
information about the device's manufacturer and the device's release time .
Setup wizard
Page 13

Carry the device in parallel with the ground as shown in the picture
You have to start the search from the north to the south that is mean the
person who carry the device should to stand in the north side of the place of
target expected.
After select the required settings, the device will be ready to begin the search
operation.
Soil
NorthSouth
Setup wizard
Page 14

When the device nd the target site , will install the Cursor on the radar screen
toward the target location and will appear a point on the radar clarify the
whereabouts of the target.
After making sure that we are standing in the right direction and carry the device
properly as described in the previous two steps.
We move the device 180 ° to scan the site is fully as shown
Soil
NorthSouth
Move to the right and the left to fully scan the site
Right
Left
°180
Setup wizard
Page 15

In the case of the device without connecting with the radar sensor the radar interface will
be gray and ineffective.
after connect the radar sensor the radar interface will be active and radar sensors start the
process.
Note
Repeat step # 3 and move toward the target point will note that the target point
will moving on the radar indicator.
repeat until the point move to the middle of the radar indicator on the screen.
that mean in this case the user is standing on the of the target site as shown in
the picture
Setup wizard
Page 16

Soil
SouthNorth
Target
After selecting the target point now we have to determine how much depth of the
target beneath the soil, and this is done through the following steps:
- Select the option (determine depth) on the screen.
- Will appear a screen Include some instructions to determine the depth of the
target as shown in the picture.
Setup wizard
Page 17

Soil
The amount of the target depth below the soil
- After readers the instructions and click on the start button, carry the device and
guide the direction of the radar sensor soil and walking straight toward one of the
four directions as shown.
Setup wizard
Page 18

When you begin calculate the depth and the moving to the depth screen , Note
the presence of scale on the screen, the tape is blank in the presence of the target
point and lled with as we move away from the target in one of four directions.
When the meter full, we measure the distance between the target and the point
where the tape is full , then is the depth of the target amount is below the soil, as
shown in the drawing.
Setup wizard
Page 19
Table of contents
Other MWf Metal Detector manuals