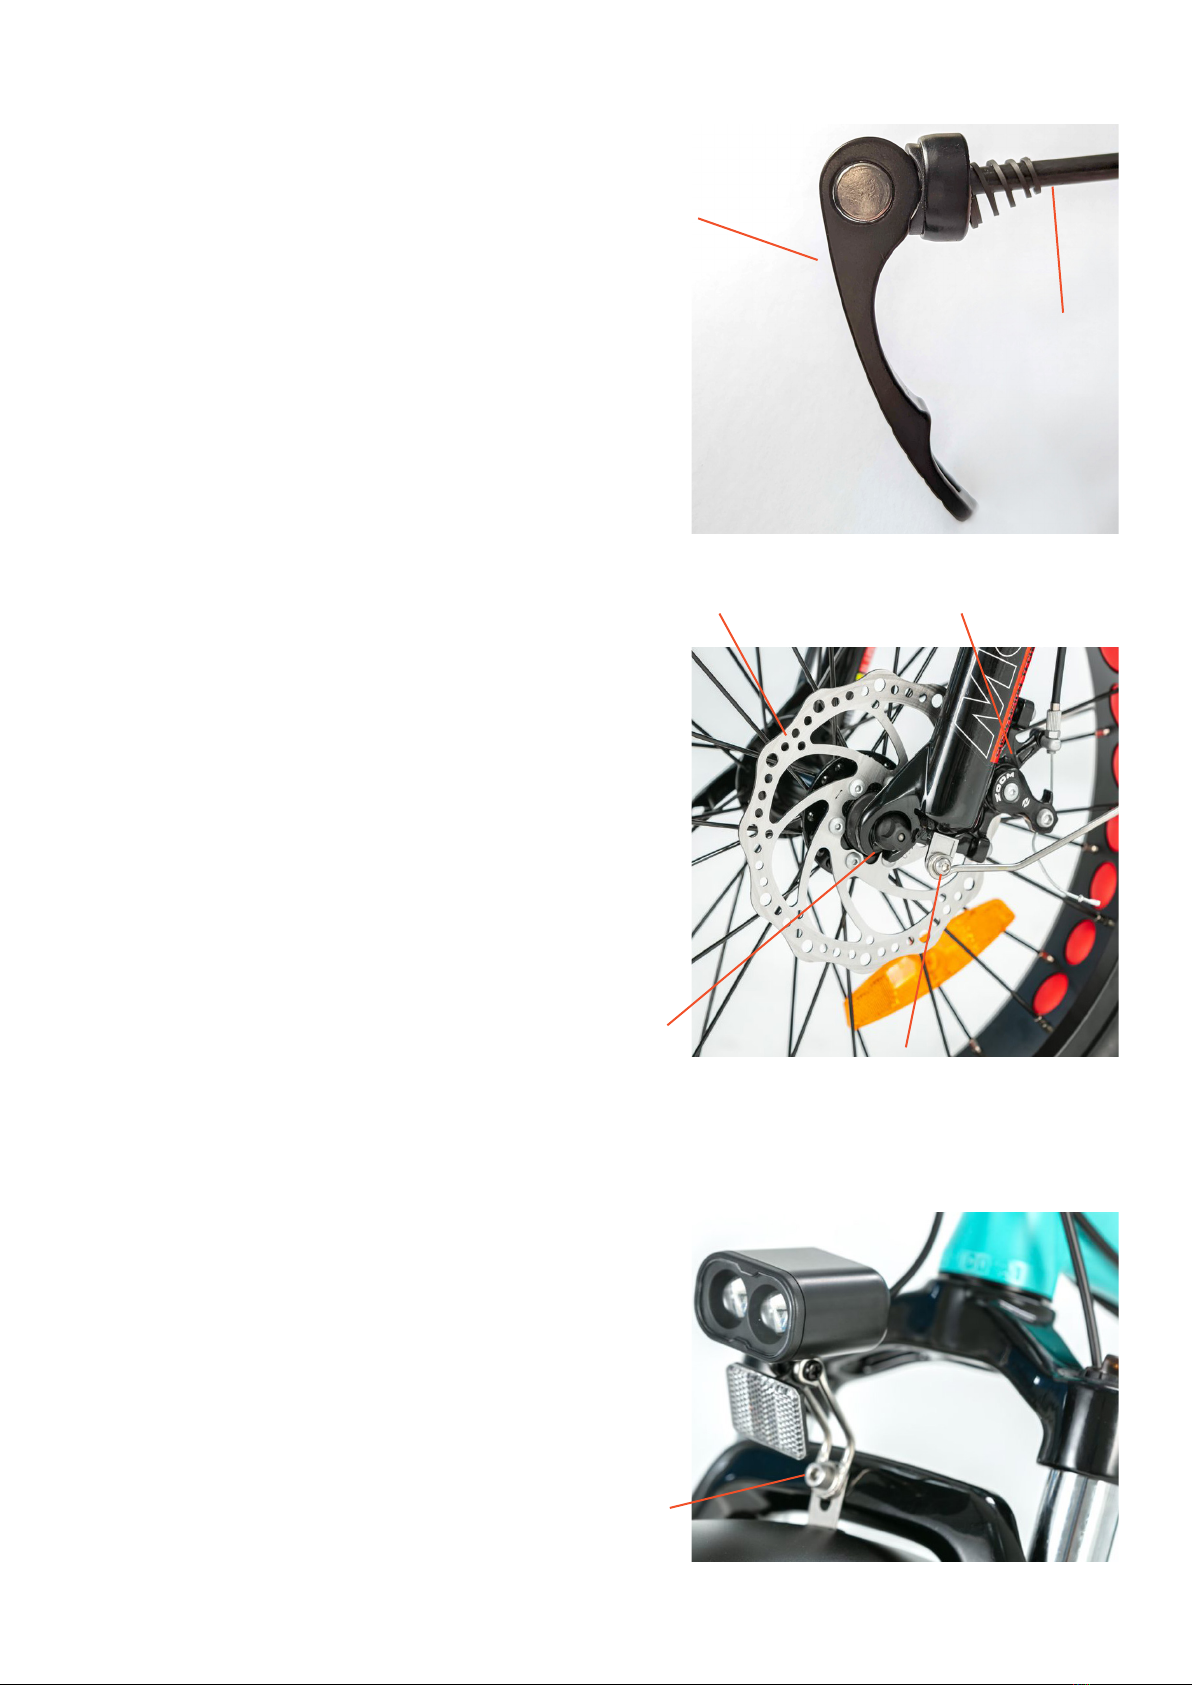
Mycle The Cadence User manual

The Cadence
Assembly Instructions
Thank you for choosing Mycle and we’re thrilled to have you join our community of
myclists. Your Cadence comes pre-built, but there is a small amount of assembly
required to get it ready to ride. When you’ve unboxed your bike and removed all
packaging, read on for your full assembly and quick start instructions. The Charge
comes unfolded, with the handlebars folded down and the front wheel removed.
If you have any questions, you can reach out to our friendly customer care team on
01295 231105

Step 1
Inserting the front wheel
The Charge comes with a quick release front
wheel, making it easy to put on and take o
without tools.
Add the quick release scewer into the centre of
your front wheel and loosley secure the nut on
the other end by 2 or 3 turnes. There should be
enough space to accomodate the forks either
side of the wheel. Leave the quick release lever in
open position.
Your front wheel can only go in one way because
of the position of the disc and disc brakes.
Holding the wheel upright, slide the forks over
the skewer with the springs on the outside. Make
sure the brake disc fits evenly in-between the
brake calliper.
With the lever still in the open position, hold onto
the quick release nut and start rotating clockwise
until the lever is firm to close. This might take a
few attempts to get the right level of resistance.
You want to be able to feel enough resistance
against the lever to know the wheel is safely
secured in the forks, but not too much that you
can’t close it.
It is important that you don’t just tighten the
nut with a closed lever, as this can become loose
while riding. It is also important you close the
lever tight enough so the wheel is firmly in place
and will not fall out if you meet an uneven road
surface. Check the quick release is secure before
every ride.
Add the mudguard by securing to the mudguard
fixings either side of the wheel and to the centre
of the suspension fork, using the bolts provided.
Your front light will also fasten to this central fork
position.
Brake Calliper
Brake Disc
Quick
release nut
Quick
release lever
Quick
release
skewer
Mudguard fixing
Bolt for
mudguard &
front light

Quick
release
skewer
Step 2
Unfolding the handlebars
Put down the kickstand so the bike stands up
without you having to hold it. Your Charge will
travel with the handlebars folded.
To unfold, simply lift the bars up into place from
its hinges. Straightn the lever so it locks into
place. There should and will be sme resistance as
the locking mechanism secures.
Pull around the safety catch so the bars are
properly secutred. This safety catch will again be
a little resistant, but is important for re-enforcing
the handlebars and should wlays be fixed on
when riding.
If the handlebars and the fork aren’t alligned,
you can adjust this by removing the rubber bung
at the top of the bars, loosing the allen key bolt
slightly. Stand in front of the bike with the wheel
inbetween your knees and gently rotate the bars
to align with the wheel. Tighten the bolt back up
and pop the bung back in place.
To change the rotation of the handlebars, simple
loosen the 4 bolts on the stem plate, rotate the
bars to your prefered riding position, and tighten
the bolts back up. When tighteening, use a cross
sequence to ensure even pressure is applied so
the stem can sit flush.
To extend the handlebars, open the quick release
lever on the handlebar tube and extend the inner
tube to your desired height. Close the lever to
secure in place.
There should be resistance agianst the lever to
make sure the handlebars are secure. If more
resistance is required, simply open the lever,
tighten the nut on the other side by a rotation or
two, and close the lever again.
Step 3
Unfold the pedals
Your pedals will arrive folded inwards. To unfold,
simply push the main casing of the pedal inwards
and flip down. It is important not to force the
pedal down to avoid damaging any of the pedal
components.

Step 4
Charge your battery
To remove the battery you first need to
tilt the saddle forward. On the back of the
saddle is a lever. Push upwards on the lever to
release the saddle and tilt forwards.
You will find the battery keys zip tied to the
handlebar cables. Each battery comes with a
set of 3 keys. Keep these safe.
Take one of the keys and put it into the
key lock of the battery. Turn to the unlock
position, which will close the bolt in the back
of the battery. Simply take the battery by its
handle and slide upwards. You can now take
your battery indoors to charge.
Before first use, your battery should be left to
charge for a full charge until the indicator on
the charging pack turns green.
To put the battery back in, slide it down the guide
rrail until it clicks into place, turn the key to the
locking position so the locking pin pops out of the
back, and close down the saddle so it clicks into
place.
Step 5
Set your saddle height
Your saddle should be high enough that your leg
fully extends when pedalling, but doesn’t loose
contact with the pedal.
Simply use the quick release lever to adjust the
saddle as required. If the seat tube is slipping
down when riding, simply open the lever, tighten
the lever bolt, and closing the lever back up again.
The lever should feel tighter to close and the seat
tube more secure.

Folding your charge
Folding the handlebars
Rotate the safety catch away from the locking
lever. Pull the locking lever down to release the
folding mechanism.
Around where the bars fold is a locking catch.
Pull this away from the bars gently to release the
fold and fold the bars downwards.
Fold in the pedals
To fold, simply push inwards and flip the pedal
upwards. Do not forse the pedal as this could
cause damage to the rotary mechanism.
Fold in the frame
Open the silver quick release lever in the middle
of the bike and slide it 180 degrees out and away
Locking
catch
Locking
lever
Safety catch
Handlebar fold
from the lock. Stand on the inside of the bike
(so the bike will fold away from you) as this
will give you the best position to be able to
fold the bike easily.
To release the fold, pull up the quick release
lever and hold the position until the start
of the fold has opened. Push the bike in the
middle (you might find you can do this with
your knee) to start the fold. Once the start of
the fold has begun, you can release the lever
and continue to fold the bike by bringing
both ends of the bike together with your
arms.
Secure with the Velcro Mycle tie. You can
pull along using either the floor stand or
the curved handle on the frame.


Press and hold
down to activate
walking mode


Other manuals for The Cadence
1
Other Mycle Bicycle manuals