PG 3 MYTANA DRAINTRACKER USER MANUAL
V ie w in g f ile s o n t h e m o n it o r
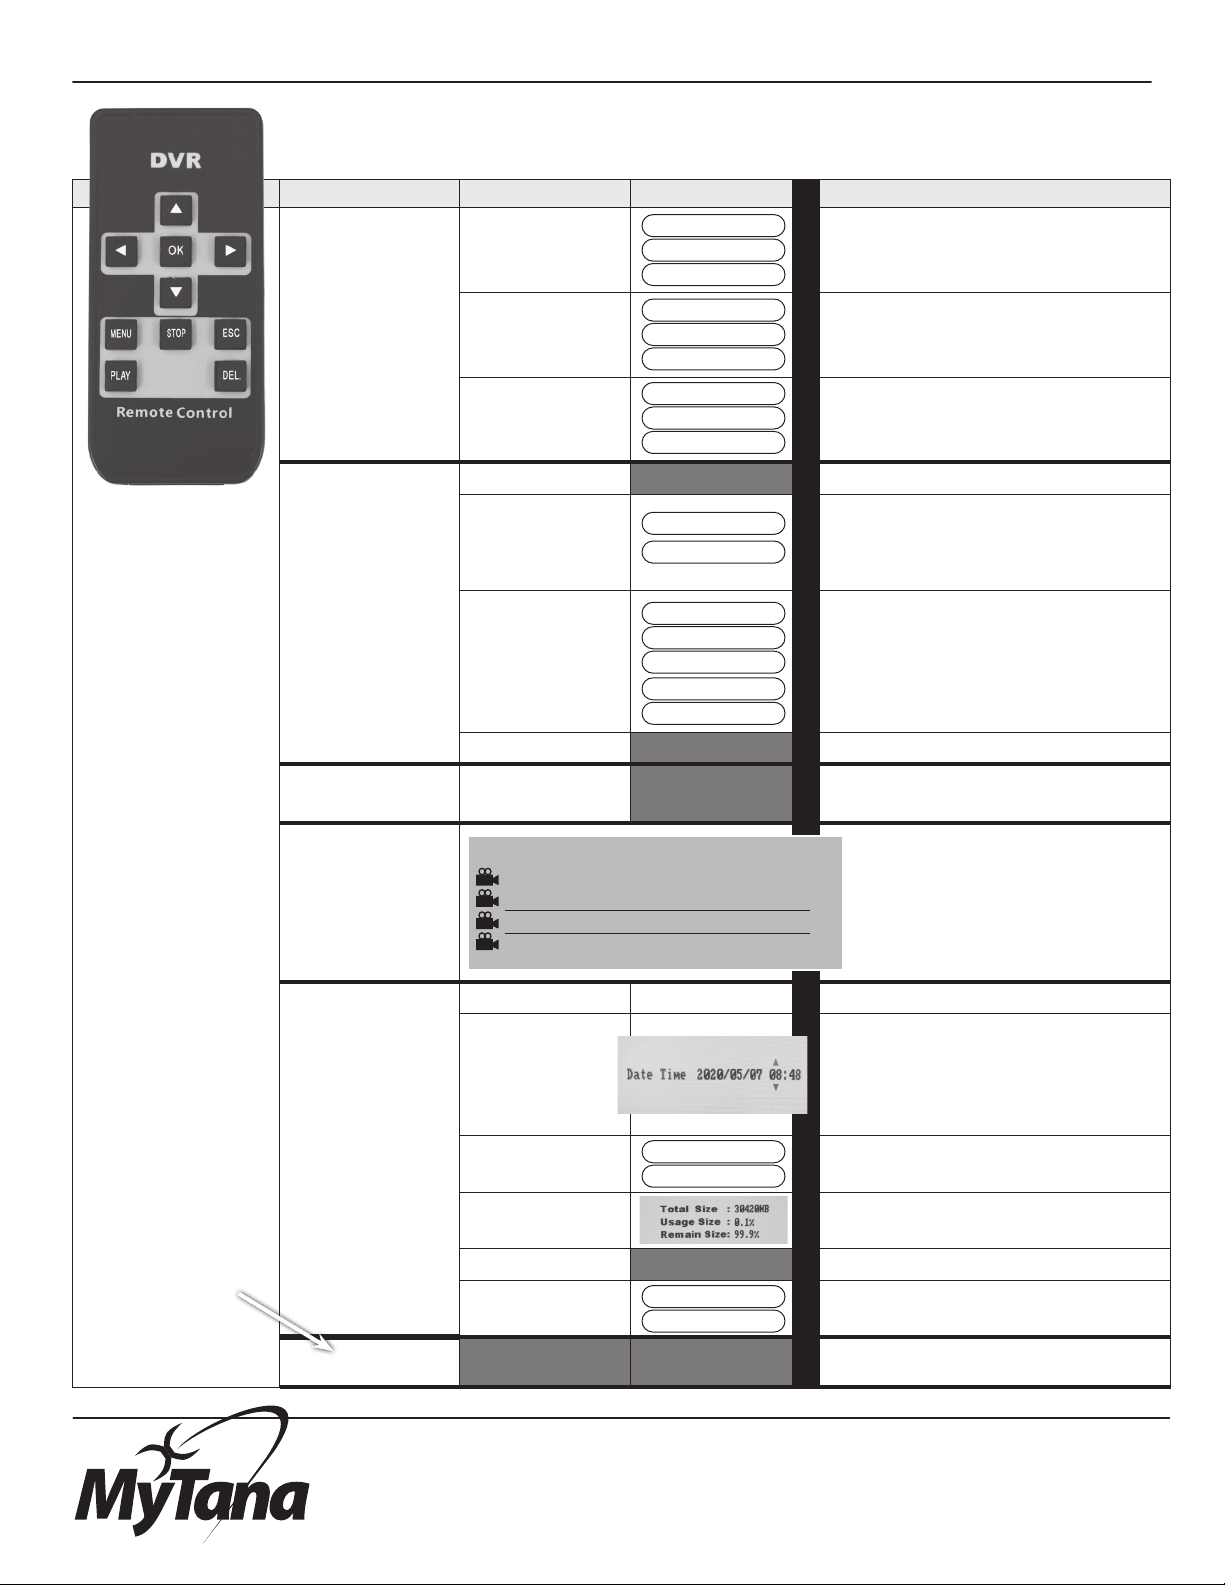
Using the remote, navigate to the Playback menu, press OK.
• Select your desired video or snapshot from the list (see back
page for instructions on how to select), then press OK
uCAUTION: If you press PLAY instead of OK it
will take you to the delete le yes/no screen
FOR VIDEO PLAYBACK:
• Press PLAY to view the recording
• Press PLAY again while video is playing to pause
• Press left or right arrows while video is playing to rewind
or fast forward at 1X or 2X or 4X speed
• Press STOP while video is playing to stop video playback
WHEN FINISHED VIEWING BOTH VIDEO AND SNAPSHOTS:
• ESC key takes you back to the list of les screen
• Press ESC again to return to main menu
D e le t in g f ile s u s in g t h e r e m o t e
Using the remote, navigate to the Playback menu, press OK.
• select the video or snapshot you want to delete (see back
page for instructions on how to select) then press DEL
• the Delete screen will appear, select Yes to conrm your
choice to delete the le
• the list of les screen will return – if there are no les on the
SD card, a “No File” message will show
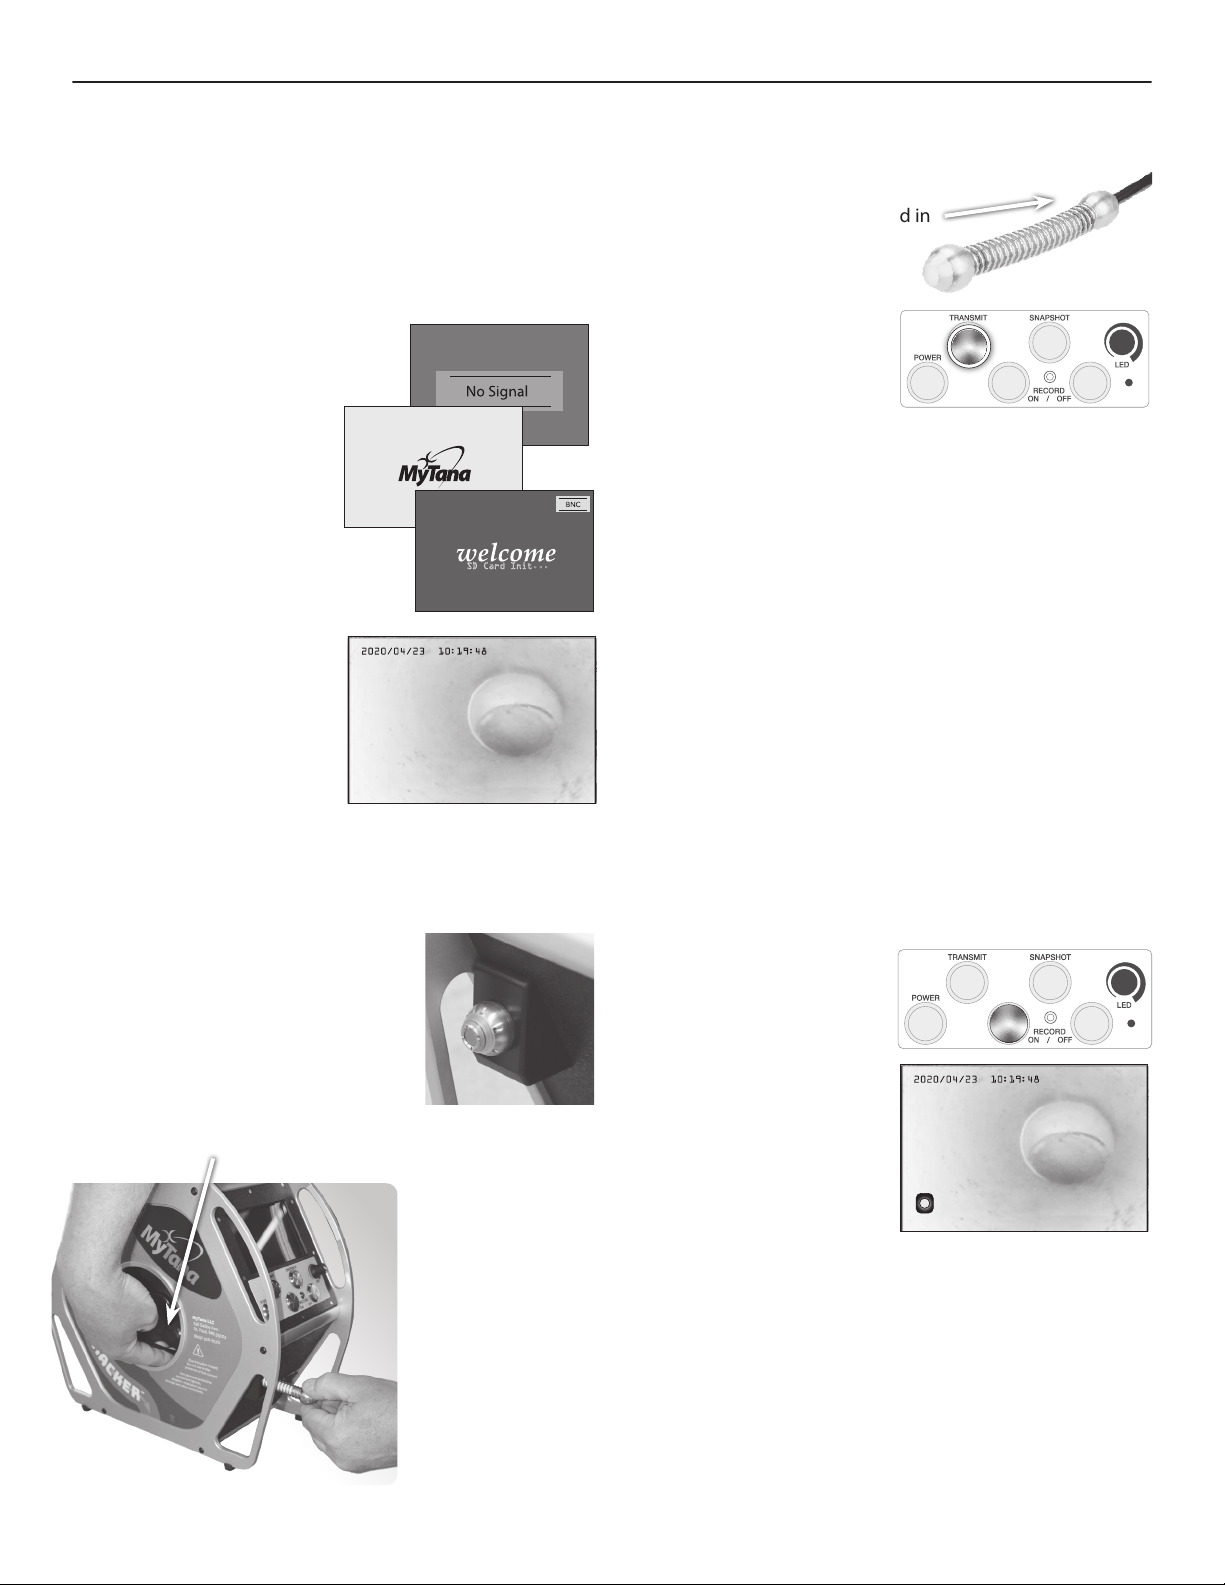
Charging the DrainTracker
The camera can be powered by either being plugged into a
wall outlet or using the internal 12 VDC battery. The battery
can operate up to 6-7 hours with continuous
use. Actual time will vary depending on age of
battery, use of sonde, recording functions, LED
brightness and ambient temperature.
We recommend recharging the battery after
use, or periods of non-use storage. To recharge,
plug the power cord in to a standard wall outlet. A full recharge
takes only a few hours. Overnight charging is ok, but not
needed. Prolonged charging can reduce the battery life.
Maintenance and Care tips
• Don’t use a camera to clear blockages. This can result in a
buckled, kinked or broken push rod, or damaged camera head.
• Inspection systems’ control panels are water resistant, but
not waterproof, be sure to keep it away from spray and avoid
using controls with wet/dirty gloves.
• When pulling the camera out of the line, wipe the push rod
down with a cleaning solution on a rag.
See other tips on our website at blog.mytana.com
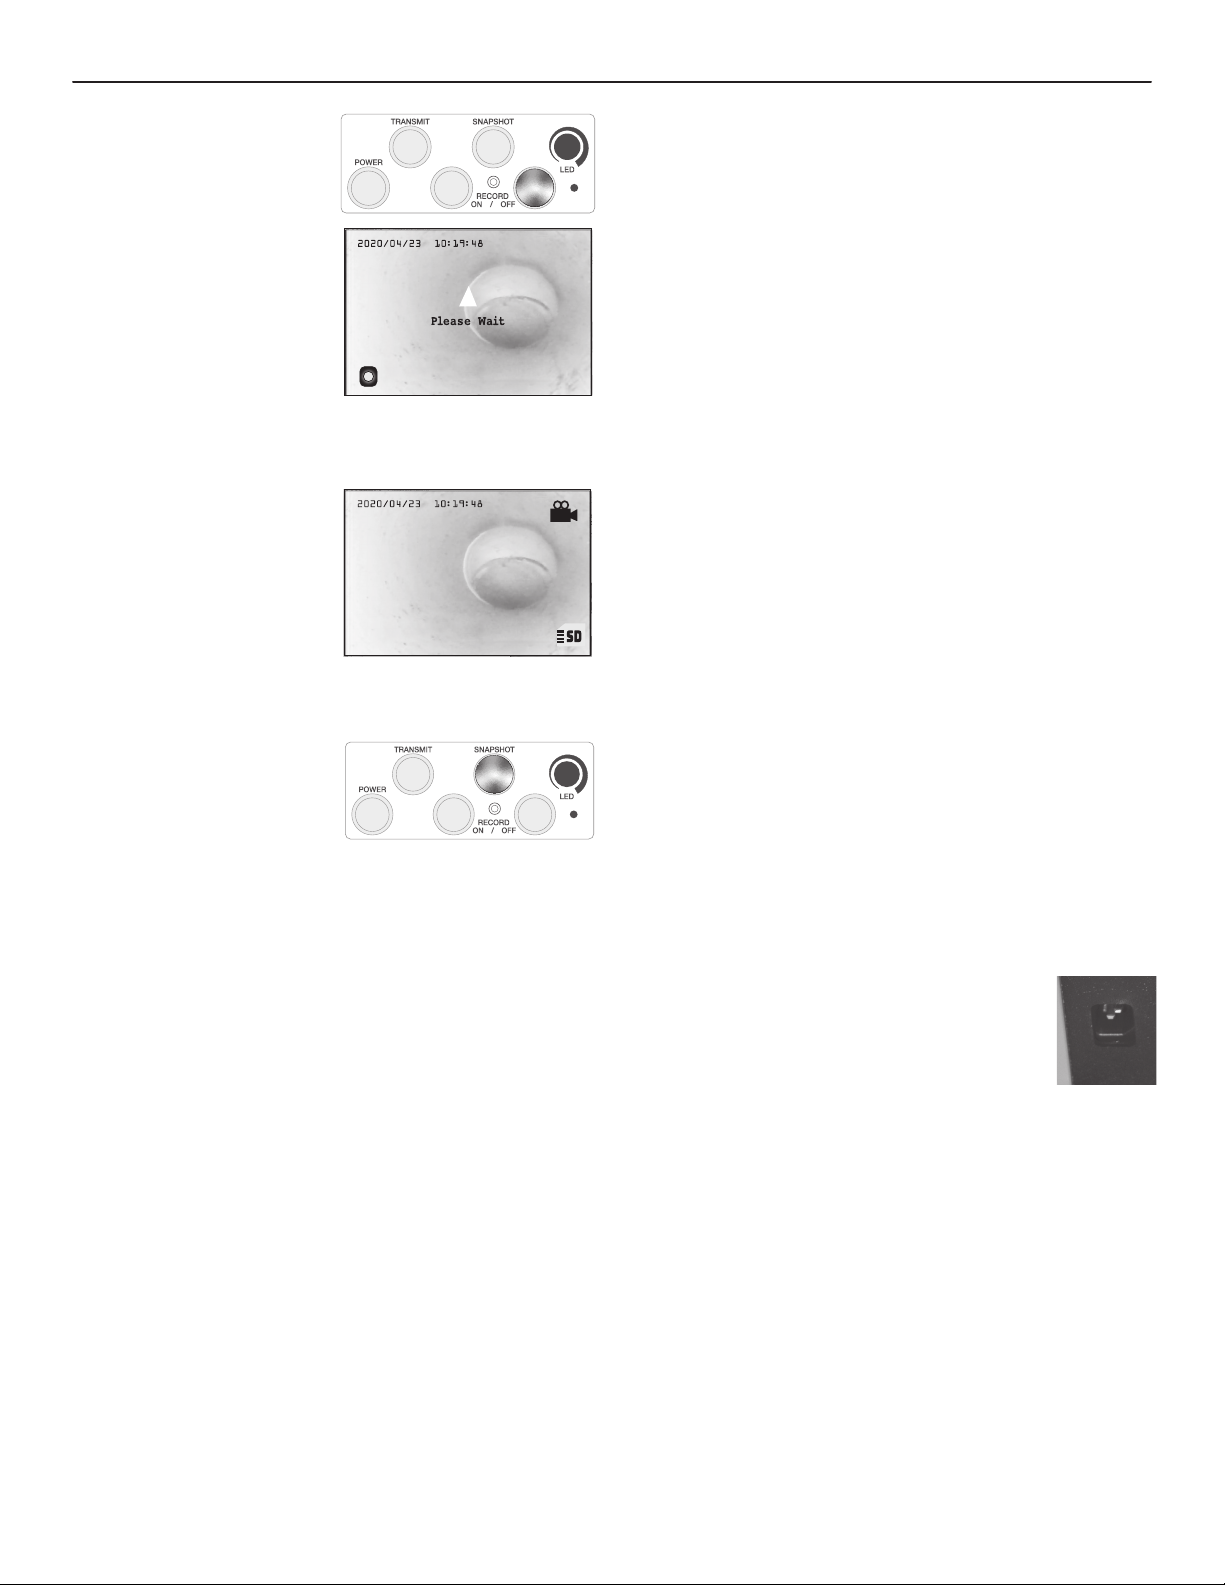
To stop recording –
Press the RECORD OFF button
to stop video recording.
The le(s) will then be
saved onto the SD card
and a “PLEASE WAIT”
message will display
temporarily in the center
of the screen while this
happens.
uDo not power down the camera during this time or
the le will not write onto the SD card.
Once les have been success-
fully processed and saved to
the SD card, additional icons
appear on the screen:
• camera symbol
• approximate time remaining
on SD card, and card icon
To capture a still photo (snapshot)
Press the SNAPSHOT button
to record a still photo of what
is on screen. Image will be
automatically saved to the
SD card.
You can’t take snapshots at the same time you are
recording video.
Viewing and Deleting Files
Video and snapshot les can be viewed or deleted two ways:
• using the remote to view/delete les on the DrainTracker’s
monitor (instructions follow, also refer to back page)
• transfer the les from the SD card to a computer, then
view/delete them on the computer (see below)
T o t r a n s f e r f ile s
Power the DrainTracker o. Remove the SD card from its slot
and insert it in to your computer‘s SD port. Working from the
computer you can then view, delete, upload or email les:
• either from the SD card
• OR transfer them to your computer’s storage to ensure you
have a backup and les don’t get deleted
uThe DrainTracker’s system is set to overwrite les when
the SD card is lled, and it will automatically delete
300 MB of the oldest les.
REC
SD Card Init...
23:42:20
23:42:20
00:02:04
23:42:20
REC
REC
SD Card Init...
23:42:20
23:42:20
00:02:04
REC
REC
SD Card Init...
23:42:20
23:42:20
00:02:04
Power cord port on
back side of camera.