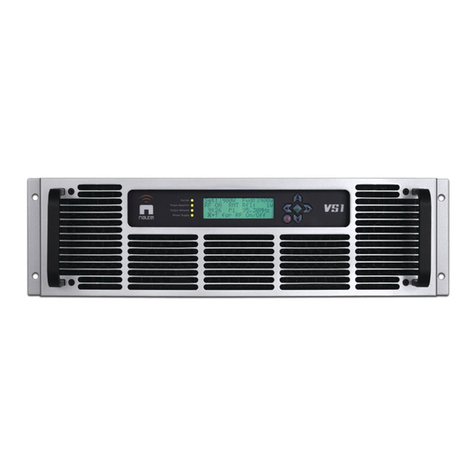
Nautel VX150 Manual

2: OPERATIONS & MAINTENANCE
MANUAL
VX150 TO VX2
TRANSMITTER
Document ID: NHB-VX150-VX2-OPS
Version: 1.0
Issue Date: 2022-12-08
Status: Standard


VERSION 1.0 2022-12-08 PAGE III
VX-LP OPERATIONS & MAINTENANCE MANUAL
Contact Information
Nautel Limited
10089 Peggy’s Cove Road
Hackett’s Cove, NS Canada B3Z 3J4
Toll Free: +1.877.6NAUTEL (662.8835)
(Canada & USA only) or
Phone: +1.902.823.3900 or
Fax: +1.902.823.3183
Nautel Inc.
201 Target Industrial Circle
Bangor, Maine USA 04401
Phone: +1.207.947.8200
Fax: +1.207.947.3693
Customer Service (24-hour support)
+1.877.628.8353 (Canada & USA only)
+1.902.823.5100 (International)
Email: [email protected]
Web: www.nautel.com
The comparisons and other information provided in this document have
been prepared in good faith based on publicly available information.
For verification of materials, the reader is encouraged to consult the
respective manufacturer's most recent publication on the official
website or through contact with Customer Service.
© Copyright 2022 NAUTEL. All rights reserved.


VX150 TO VX2 OPERATIONS & MAINTENANCE MANUAL TABLE OF CONTENTS
VERSION 1.0 2022-12-08 PAGE V
CONTENTS
Contact Information iii
Release Control Record vii
Description 2.1.1
Ac-Dc Power Stage 2.1.1
Control/Excitation/Monitor Stage 2.1.2
RF Stage 2.1.4
Operating the Transmitter 2.2.1
User Interfaces 2.2.3
Advanced User Interface (AUI) 2.2.6
Managing and Displaying Dashboard Panels 2.2.15
AUI Main Menu 2.2.23
Front Panel User Interface (FPUI) 2.2.85
Routine Maintenance 2.3.1
Scheduled Maintenance 2.3.1
Replacing an Air Filter 2.3.2
Performing On-Air Checks 2.3.4
Non-standard maintenance 2.4.1
List of terms 2.5.1

VX150 TO VX2 OPERATIONS & MAINTENANCE MANUAL TABLE OF CONTENTS
PAGE VI VERSION 1.0 2022-12-08

VX150 TO VX2 OPERATIONS & MAINTENANCE MANUAL
VERSION 1.0 2022-12-08 PAGE VII
RELEASE CONTROL RECORD
ISSUE DATE REASON
1.0 2022-12-08 Initial release for VX low power models. Supports hardware
versions:
VX150, VX300, VX600 (NARF81)
VX1 (NARF79)
VX1.5, VX2 (NARF80)
Supports software version VX SW 6.0.0 and later.

VX-LP OPERATIONS & MAINTENANCE MANUAL
PAGE VIII VERSION 1.0 2022-12-08

VX150 TO VX2 OPERATIONS & MAINTENANCE MANUAL DESCRIPTION
VERSION 1.0 2022-12-08 PAGE 2.1.1
SECTION 2.1: DESCRIPTION
This section provides a high-level description of the transmitter’s key sections. The transmitter circuitry
is subdivided into three basic stages:
Ac-Dc Power Stage
Control/Excitation/Monitor Stage - see page 2.1.2
RF Stage - see page 2.1.4
Refer to Figure Figure 2.1.1 through Figure Figure 2.1.3, at the end of this section, for high level block
diagrams of the VX150 to VX2. For detailed electrical schematics of the transmitter and its sub-
assemblies, refer to Section 4 of the VX150 to VX2 Troubleshooting Manual.
Ac-Dc Power Stage
The ac-dc power stage provides power to operate the +12 V Power Supply, which generates the +12 dc
voltage that is used throughout the transmitter. This supplies the voltage to operate cooling fans, IPA
(intermediate power amplifier), and power all PWBs. The ac-dc power stage also contains a PA (power
amplifier) Power Supply that provides positive dc voltage (PA volts) to the PA PWB(s) for the RF power
amplifier(s). The PA Power Supply, and its output voltage range, varies with the transmitter model. For
VX150 to VX600 transmitters, the output voltage range is between +18 and 53 V dc. For VX1 to VX2
transmitters, the output voltage range is between +23 and 65 V dc.
For normal operation:
VX150 to VX600 transmitters accept a single-phase, 90 - 265 V ac (120/220 V ac nominal)
input.
VX1 to VX2 transmitters accept a single-phase, 185 - 265 V ac (220 V ac nominal) input.
NOTE
: VX1 to VX2 transmitters can operate from a 90 - 185 V ac input, but at reduced output power.
The ac-dc power stage consists of Power Supply Interface PWB (A4), Low Voltage Power Supply (LVPS)
(U2) and PA power supply (U3).
Power Supply Interface PWB
The Power Supply Interface PWB (A4):
accepts the ac input voltage and provides input voltage for the PA Power Supply and +12 V
Power Supply.
distributes LVPS voltage to the RF drive stage and the control/monitor stage.
distributes PA voltage to the PA PWB and the control/monitor stage.

VX150 TO VX2 OPERATIONS & MAINTENANCE MANUAL DESCRIPTION
PAGE 2.1.2 VERSION 1.0 2022-12-08
provides RS485 serial communication between the System Interface PWB and the +53V PA
Power Supply.
provides status and alarm outputs from the PA Power Supply, such as Module Present, Power
Fail Warning, Rectifier Fault and Overtemp Warning (provided to the System Interface PWB
over a serial bus).
+12 V Power Supply
The +12 V Power Supply (U2) converts the ac input voltage to the regulated output (+12 V dc). This
voltage is used to power all the PWBs, the cooling fans and the IPA.
PA Power Supply
The PA Power Supply (U3) converts the ac input voltage to a regulated dc supply (PA volts) for the RF
amplifier(s). The PA Power Supply, and its output voltage range, varies with the transmitter model. For
VX150 to VX600 transmitters, the output voltage range is between +18 and 53 V dc. For VX1 to VX2
transmitters, the output voltage range is between +23 and 65 V dc. The output voltage is regulated
based on a serial control input from the Power Supply Interface PWB (A4). The PA Power Supply also
senses out-of-regulation on the ac input and dc output, and applies a Power Fail Warning signal to the
Exciter PWB. Both conditions cause the PA Power Supply to shut itself down, thus shutting down the
transmitter's RF output. Some PA Power Supply signals are applied to the Exciter PWB, via the System
Interface PWB, for system level monitoring.
Control/Excitation/Monitor Stage
The control/excitation/monitor stage performs many critical functions for the transmitter. The primary
components of the control/excitation/monitor stage are the Exciter PWB (A1), Analog Audio PWB (A2),
System Interface PWB (A3), Power Supply Interface PWB (A4), and front panel user interface (FPUI). The
FPUI consists of the Display Module (U1) and the Front Panel User Interface PWB (A5).
The Front Panel User Interface PWB uses a rotary pushbutton to navigate through the various FPUI
menus. The front panel has a pushbutton switch (BACK) to allow the user to return to the previous
menu. There are two front panel LEDs that display the status for remote (enable) ON or OFF and RF ON
or OFF.
The Exciter PWB (A1) provides all the user remote I/O (input/output) interfacing for the transmitter. An
AUI (advanced user interface) can be remotely accessed, which contains a menu-based series of pages
that serve specific functions.
An SD card (U4) provides a storage medium that has the operating system (OS) for the transmitter and
stores the presets and calibration data.
VX150 TO VX2 OPERATIONS & MAINTENANCE MANUAL DESCRIPTION
VERSION 1.0 2022-12-08 PAGE 2.1.3
Exciter PWB
The Exciter PWB (A1) accepts external audio program information and generates the modulated RF
drive source for the IPA PWB (A6). It performs all primary control functions of the transmitter.
Other functions of the Exciter PWB are:
accepts analog modulation sources from Analog Audio PWB
accepts digital modulation sources
generates the signals that enables the PA Power Supply and controls its output voltage
hosts Ethernet server and remote control I/O
accepts forward power sample from directional coupler
accepts interlock input and provides interlock/muting protection
accepts SWR shutdown from System Interface PWB
Analog Audio PWB
The Analog Audio PWB (A2) accepts external audio and composite signals, digitizing them for further
processing on the Exciter PWB (see the
VX150 to VX2 Installation Manual
for details on various
program input types). It also generates a Pilot Sample.
System Interface PWB
The System Interface PWB (A3) interfaces with the Exciter PWB to perform the following functions:
contains monitoring and protection circuits to prevent transmitter damage under adverse or
fault conditions, including high speed SWR protection.
monitors the current value of various parameters including cooling fan tachometer outputs,
transmitter output reflected power, heatsink and intake temperature, and PA current levels.
measures and monitors the output voltage from the +53 V PA Power Supply as well as the
low voltage power supplies.
provides local interfacing for the transmitter. Local interfacing is performed via the local FPUI
on the transmitter and the front panel LCD display (320 x 240 pixels). The FPUI contains a
menu-based series of pages that serve specific functions.

VX150 TO VX2 OPERATIONS & MAINTENANCE MANUAL DESCRIPTION
PAGE 2.1.4 VERSION 1.0 2022-12-08
RF Stage
The RF power stage accepts the RF drive input and generates the final RF output.
For VX150 to VX1 transmitters, it consists of Exciter PWB (A1), IPA PWB (A6), PA PWB (A7), PA Low
Pass Filter PWB (A9) and Directional Coupler PWB (A11).
For VX1.5 and VX2 transmitters, it consists of Exciter PWB (A1), IPA PWB (A6), Splitter PWB (A12), two
PA PWBs (A7 and A8), two PA Low Pass Filter PWBs (A9 and A10), Combiner PWB (A13) and Directional
Coupler PWB (A11).
IPA PWB
The IPA PWB amplifies the RF drive signal from the Exciter PWB to the proper level required to drive the
RF amplifier(s) in the PA PWB(s).
For VX150 to VX1 transmitters, the IPA’s output RF drive signal is applied to the System Interface PWB,
where the PA Bias dc voltage is coupled onto the RF drive signal, then it is applied to the PA PWB.
For VX1.5 and VX2 transmitters, the IPA’s output RF drive signal is applied through the System Interface
PWB to the Splitter PWB, where the PA Bias dc voltage is coupled onto the RF drive signals, then they
are applied to PA PWBs.
Splitter PWB
Used in VX1.5 and VX2 transmitters only. The Splitter PWB splits the RF signal from the IPA PWB into
two equal amplitude signals for the two PA PWBs. Two bias signals are coupled to the RF signals to
provide RF + Bias drive signals to the two PA PWBs.
PA PWB(s)
The PA PWB(s) accepts the RF + Bias drive from the System Interface PWB (for VX150 to VX1) or from
the Splitter PWB (for VX1.5 and VX2), and PA volts input from the Power Supply Interface PWB. The RF
output of the PA PWB(s) is controlled by a combination of gate bias set point, RF drive and PA volts. At
low power levels, the RF drive level must be reduced to reduce power below the minimum possible
level at minimum PA volts.
PA Low Pass Filter PWB(s)
The PA low pass filter PWB(s) (A9 and A10, as applicable) is connected to the output of the PA PWB(s)
to reject harmonics prior to being applied to the Directional Coupler (A11) (via the Combiner PWB for
VX1.5 and VX2 transmitters).

VX150 TO VX2 OPERATIONS & MAINTENANCE MANUAL DESCRIPTION
VERSION 1.0 2022-12-08 PAGE 2.1.5
Combiner PWB
Used in VX1.5 and VX2 transmitters only. The Combiner PWB combines the RF output signals from both
PA PWBs and applies it to the Directional Coupler (A11).
Directional Coupler
The Directional Coupler (A11) samples the transmitter's forward and reflected power and generates the
Fwd Pwr Sample (A11J2) and Refld Pwr Sample (A11J3) signals applied to the Exciter PWB and System
Interface PWBs for protection and monitoring. RF monitor provides -33 dBc typical, -32 dBc maximum
coupling (minimum 1 V RMS at 75 W) at A11J1, which is applied to the panel mount BNC connector on
the rear panel. This can be used with a modulation monitor.

VX150 TO VX2 OPERATIONS & MAINTENANCE MANUAL DESCRIPTION
PAGE 2.1.6 VERSION 1.0 2022-12-08

VERSION 1.0 2022-12-08 PAGE 2.1.7
Figure 2.1.1: VX150/VX300/VX600 Transmitter Block Diagram
2235-8300-BLK01 Iss. A
ANALOG AUDIO
PWB
MPX/SCA 1
MPX/SCA 2
ANALOG LEFT
ANALOG RIGHT
EXCITER
PWB
AES 1
AES 2
USB 1
USB 2
ETHERNET
XMTR LINK
RDS/SYS CTRL
REMOTE IN
INTERLOCK
EXTERNAL RF SAMPLE
FRONT PANEL
USER INTERFACE
PWB
USB 3
SD CARD
ORBAN AUDIO
PROCESSOR
(OPTIONAL)
SYSTEM INTERFACE
PWB
AMBIENT TEMP
SENSOR
HEATSINK
TEMP SENSOR
FAN 1
FAN 2
DISPLAY
POWER SUPPLY
INTERFACE
PWB
AC IN
+12V
POWER SUPPLY
+18V-53V PA
POWER SUPPLY
IPA
PWB
PA
PWB
LOW PASS FILTER
PWB
DIRECTIONAL
COUPLER
PWB
RF OUT
RF MONITOR
REMOTE OUT
19kHz OUT

VERSION 1.0 2022-12-08 PAGE 2.1.8
Figure 2.1.2: VX1 Transmitter Block Diagram
2235-8100-BLK01 Iss. A
ANALOG AUDIO
PWB
MPX/SCA 1
MPX/SCA 2
ANALOG LEFT
ANALOG RIGHT
EXCITER
PWB
AES 1
AES 2
USB 1
USB 2
ETHERNET
XMTR LINK
RDS/SYS CTRL
REMOTE IN
INTERLOCK
EXTERNAL RF SAMPLE
FRONT PANEL
USER INTERFACE
PWB
USB 3
SD CARD
ORBAN AUDIO
PROCESSOR
(OPTIONAL)
SYSTEM INTERFACE
PWB
AMBIENT TEMP
SENSOR
HEATSINK
TEMP SENSOR
FAN 1
FAN 2
DISPLAY
POWER SUPPLY
INTERFACE
PWB
AC IN
+12V
POWER SUPPLY
+23V-65V PA
POWER SUPPLY
IPA
PWB
PA
PWB
LOW PASS FILTER
PWB
DIRECTIONAL
COUPLER
PWB
RF OUT
RF MONITOR
REMOTE OUT
19kHz OUT

VERSION 1.0 2022-12-08 PAGE 2.1.9
Figure 2.1.3: VX1.5/VX2 Transmitter Block Diagram
2235-8200-BLK01 Iss. A
ANALOG AUDIO
PWB
MPX/SCA 1
MPX/SCA 2
ANALOG LEFT
ANALOG RIGHT
EXCITER
PWB
AES 1
AES 2
USB 1
USB 2
ETHERNET
XMTR LINK
RDS/SYS CTRL
REMOTE IN
INTERLOCK
EXTERNAL RF SAMPLE
FRONT PANEL
USER INTERFACE
PWB
USB 3
SD CARD ORBAN AUDIO
PROCESSOR
(OPTIONAL)
SYSTEM INTERFACE
PWB
AMBIENT TEMP
SENSOR
HEATSINK
TEMP SENSOR
FAN 1
FAN 2
DISPLAY
POWER SUPPLY
INTERFACE
PWB
AC IN
+12V
POWER SUPPLY
+23V-65V PA
POWER SUPPLY
IPA
PWB
PA 1
PWB
LOW PASS FILTER
PWB
COMBINER
PWB
RF OUT
RF MONITOR
REMOTE OUT
19kHz OUT
SPLITTER
PWB
PA 2
PWB
LOW PASS FILTER
PWB
DIRECTIONAL
COUPLER
PWB

VX150 TO VX2 OPERATIONS & MAINTENANCE MANUAL OPERATING THE TRANSMITTER
VERSION 1.0 2022-12-08 PAGE 2.2.1
SECTION 2: OPERATING THE TRANSMITTER
This section provides the following information about operating the VX150 to VX2 transmitter:
User Interfaces - see page 2.2.3
Advanced User Interface (AUI) - see page 2.2.7
Logging into the AUI - see page 2.2.10
AUI Pages - see page 2.2.12
AUI Menu page - see page 2.2.14
Managing and Displaying Dashboard Panels - see page 2.2.16
Describing Dashboard Panel Options - see page 2.2.18
Alarms - see page 2.2.19
Audio Inputs - see page 2.2.19
Modulation - see page 2.2.20
Dashboard Meters - see page 2.2.20
Spectrum Analyzer - see page 2.2.22
AUI Main Menu - see page 2.2.24
Alarms - see page 2.2.25
Meters - see page 2.2.26
Presets - see page 2.2.28
Scheduler - see page 2.2.46
Settings - see page 2.2.48
Audio Processing - see page 2.2.49
Exciter VCXO - see page 2.2.52
External 10 MHz - see page 2.2.53
Network - see page 2.2.54
Notifications - see page 2.2.56
Security Certificates - see page 2.2.59

VX150 TO VX2 OPERATIONS & MAINTENANCE MANUAL OPERATING THE TRANSMITTER
PAGE 2.2.2 VERSION 1.0 2022-12-08
SNMP - see page 2.2.60
Spectrum Mask - see page 2.2.62
System Preferences - see page 2.2.63
Thresholds - see page 2.2.63
Time - see page 2.2.64
Transmitter Info - see page 2.2.66
Users - see page 2.2.67
Remote I/O - see page 2.2.71
Reports - see page 2.2.77
Software - see page 2.2.82
Sign Out - see page 2.2.85
Front Panel User Interface (FPUI) - see page 2.2.86
Front Panel UI Menu - see page 2.2.87
Alarms - see page 2.2.91
Logs - see page 2.2.92
Meters - see page 2.2.94
Network - see page 2.2.100
Presets - see page 2.2.103
Settings - see page 2.2.119
Software - see page 2.2.141

VX150 TO VX2 OPERATIONS & MAINTENANCE MANUAL OPERATING THE TRANSMITTER
VERSION 1.0 2022-12-08 PAGE 2.2.3
User Interfaces
NOTE:
Nautel recommends you make a complete backup clone of the transmitter’s SD card in the event
the SD card in the transmitter becomes corrupted or damaged. Use a Class 10 SD card with a minimum
8 GB capacity (e.g., Nautel part number UB114, vendor part number Cactus KS8GR-245, or equivalent).
The user can interface with the VX150 to VX2 using one of three methods:
Remotely, via a LAN connection, using the Advanced User Interface (AUI) pages (see Advanced User
Interface (AUI)). You can enable remote control from the front panel by pressing the Remote button,
which will turn green when enabled.
Locally, using the transmitter’s Front Panel UI and its rotary button (see Front Panel User Interface
(FPUI), on page 2.2.86).
Remotely, via remote input/output (I/O) wiring connected to the rear of the transmitter to the
remote I/O D-sub connectors on the real panel (see Remote I/O, on page 2.2.71 for AUI or Remote I/
O, on page 2.2.130 for FPUI). Refer to the VX150 to VX2 Installation Manual for I/O details).
See the complete menu hierarchy illustrated in Figure 2.2.2 (for the remote AUI menu) and Figure 2.2.3
(for the Front Panel UI menu). When a user interfacing function can be performed from both the AUI
and the Front Panel UI, both are described in this section.
Other manuals for VX150
3
This manual suits for next models
1
Table of contents
Other Nautel Transmitter manuals

Nautel
Nautel GV20 User manual

Nautel
Nautel NG1000 Programming manual

Nautel
Nautel GV60 Programming manual

Nautel
Nautel ND500II Manual

Nautel
Nautel FM10011 User manual

Nautel
Nautel NX100 User manual

Nautel
Nautel NX50 User manual

Nautel
Nautel XR12 Programming manual

Nautel
Nautel VX150 User manual

Nautel
Nautel NX5 AM User manual

Nautel
Nautel NV15 User manual

Nautel
Nautel NX5 Manual

Nautel
Nautel NX5 AM Manual

Nautel
Nautel XR6 User manual

Nautel
Nautel NV30 User manual

Nautel
Nautel GV10 Programming manual

Nautel
Nautel VS300 Programming manual

Nautel
Nautel ND500II Owner's manual

Nautel
Nautel NX15 User manual

Nautel
Nautel J1000 User manual