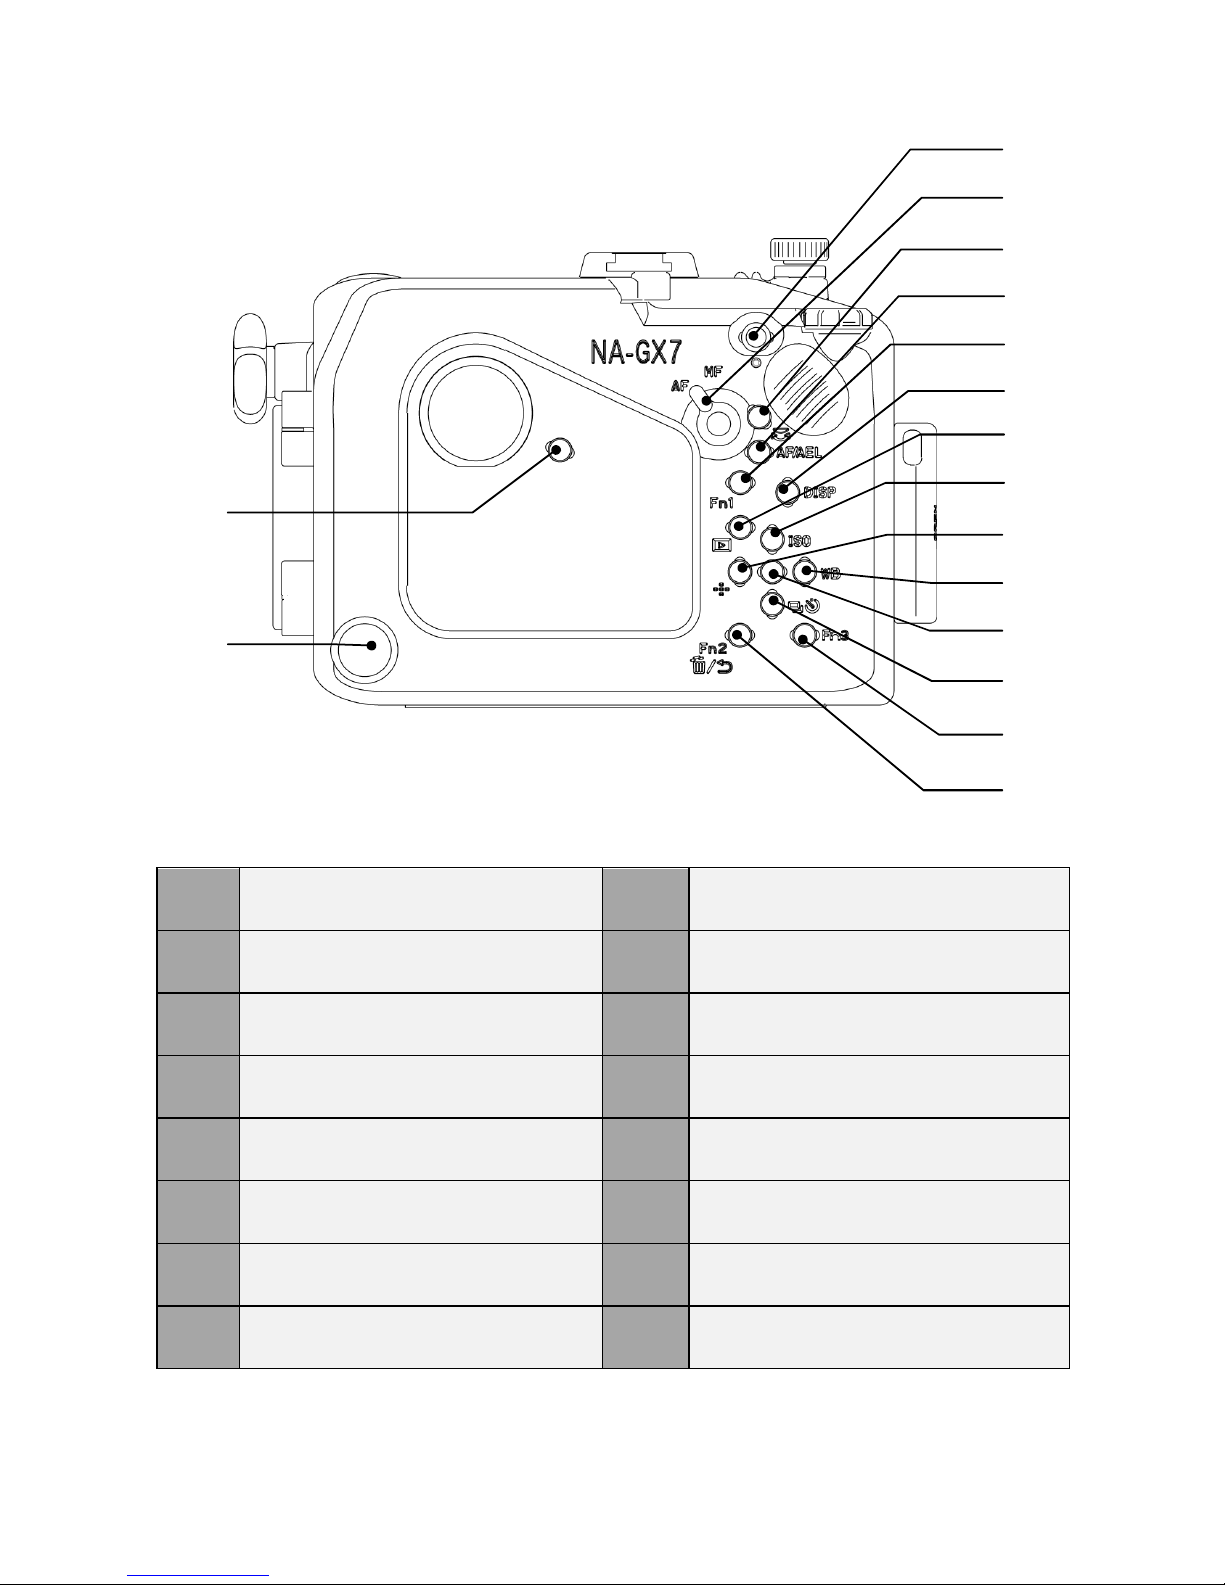
Nauticam NA-GX7 User manual
Other Nauticam Camera Accessories manuals

Nauticam
Nauticam SFE2470GM-Z User manual

Nauticam
Nauticam NA-A6300 User manual

Nauticam
Nauticam M28C1R200-M28A1R170 User manual

Nauticam
Nauticam NA-G7X User manual

Nauticam
Nauticam 17229 User manual

Nauticam
Nauticam N100 X1855-Z User manual

Nauticam
Nauticam NA-EM10II User manual

Nauticam
Nauticam 17954 User manual

Nauticam
Nauticam NA-C70 User manual

Nauticam
Nauticam 16335 User manual

Nauticam
Nauticam 19569 User manual

Nauticam
Nauticam NA-LX10 User manual

Nauticam
Nauticam NA-EM1X User manual

Nauticam
Nauticam SLE1424-Z User manual

Nauticam
Nauticam NA-a1 User manual

Nauticam
Nauticam TTL Flash Trigger User manual

Nauticam
Nauticam NA-502 User manual

Nauticam
Nauticam N50 Short Port 17 with Bayonet Mount User manual

Nauticam
Nauticam NA-EM10III User manual

Nauticam
Nauticam NA-RX100IV User manual


Popular Camera Accessories manuals by other brands

Viltrox
Viltrox EF-NEX Mount instructions

Calumet
Calumet 7100 Series CK7114 operating instructions

Ropox
Ropox 4Single Series User manual and installation instructions

Cambo
Cambo Wide DS Digital Series Main operating instructions

Samsung
Samsung SHG-120 Specification sheet

Ryobi
Ryobi BPL-1820 Owner's operating manual