NDS TEMPRA TBL 100 User manual

1
TEMPRA
User Manual
VALID FOR THE FOLLOWING MODELS
TBL 100
TBL 100 F
TBL 120
TBL 120 F
TBL 150
TBL 150 F
ENGLISH

2
This electronic device is subject to the European
Directive 2012/19/EU. according to the local waste
disposal rules, do not dispose of old products with
normal household waste. The proper disposal of
products that can no longer be used prevents potential
negative consequences for the environment and for the
population.
INSTRUCTIONS FOR THE PROPER DISPOSAL!

INDEX
1. safety instructions 2
2. Package contents 4
3. DESCRIPTION 4
4. structure 6
5. Installation 8
6. Tempra batteries Parallel 9
7. Wiring and fuses 10
8. N-bus Network and Controllers 11
9. n-BUS / Ci-bus selection 12
10.Master and slave 12
11.Bus power supply 13
12.Feeding Tempra 13
13.OPERATION 14
14.Charge 18
15.Discharge 19
16.BLUETOOTH 20
17. led indicator 21
18.ALARMS 21
19.Technical features 25
20.WARRANTY 28

1. SAFETY INSTRUCTIONS
• This equipment is not suitable for use in rooms
where children are likely to be present.
• Carefully check the device integrity, connection
cables and connectors.
• To avoid overheating, do not install the device in a
sealed environment, always prefer well ventilated
places.
• Do not place the device on highly flammable
surfaces or environments (eg: paper, cloth, etc.).
• Protect the device from sunlight or direct heat
sources.
• To avoid malfunctions, DO NOT install and use the
device in very humid environments, in contact with
water splashes, various liquids, or exposed to rain.
• To avoid risk of electric shock and/or fire, the
vehicle's fuel system must be in good condition.
• In the event of electrolyte leakage, do not touch the
battery. In case of contact, rinse immediately with
lukewarm water and consult a doctor immediately.
• Take care during installation that the two poles of
the TEMPRA Battery do not come into contact with
each other. Use insulated equipment and do not
place and/or leave metal objects near the product.
• In case of anomalies in the conformity of the
product do not use it! it is strictly forbidden to open
the device. Repairs may only be carried out by
qualified technical personnel using original spare
parts.
• Keep the instruction manual near the device for
easy access to the essential safety, use and
maintenance information.
• The information contained in this manual may be
changed without notice. NDS Energy s.r.l. reserves
the right to make changes and improvements to the
product at any time without notice and without
obligation to apply these changes to the devices
previously distributed.
2

• Product images are purely indicative and may
therefore not be fully representative of the
characteristics of the product, differing in colour, size
or accessories.
3
Symbol
Meaning
Pay attention
Comply with battery operating
temperatures
Do not install and use the device in very humid
environments, in direct contact with splashes of
water, liquids or atmospheric agents
Do not expose to fire or heat sources
This equipment is not suitable for use in rooms
where children are likely to be present
Read the manual carefully
Switching on the battery

2. PACKAGE CONTENTS
Check the contents of the package:
1x TEMPRA Battery
1x Black pole cover (for the Negative pole)
1x Red pole cover (For the Positive pole)
3. DESCRIPTION
The TEMPRA battery with N-BUS system has an
excellent power-to-weight ratio thanks to the new
cells NDS HDP (high density power): a concentrate of
power in a minimum space!
Up to 150Ah capacity in the size of a classic L5 box.
The L5 box is a standard size that usually holds a
maximum of 100Ah and fits under the Fiat Ducato
seat.
The reliable Lithium Iron Phosphate (LiFePO4)
technology of the TEMPRA battery provides huge
advantages over traditional Lead Acid batteries (AGM,
GEL, Free Acid). Some of the most interesting
features include fast and efficient charging with high
currents and low dispersion, absence of sulphation
(which plagues lead-acid batteries), low self-
discharge (less than 3%/month), which, combined
with its 60% reduced weight and remarkable number
of cycles (over 3000), make this battery the ideal
companion for any state-of-the-art recreational
vehicle.
The BMS's charge management and Smart Balance
ensure that the cells are always efficient and perform
over time.
4

The heated versions of the TEMPRA Lithium battery
(those with an “F” at the end of the product code) are
designed to be used even in extreme temperatures, up
to -30°C, so the batteries can be used in all weather
conditions.
Due to the N-BUS protocol, the TEMPRA battery is an
integral part of the NDS energy ecosystem and you can
control all your devices (with N-BUS) with a single
display, such as the DTB 01 Display Bus (optional) or the
NDS Mobile App available for iOS and Android.
MAIN FEATURES
•HDP cells - Same size +50% more capacity
50% more capacity in the same size as a standard L5
box (100Ah).
Where there used to be 100Ah, there are now 150Ah.
•Ready to use even at low temperatures
The integrated heating system allows the Tempra
battery to be used at temperatures as low as -20°C,
so the battery is always in perfect working condition,
even in extreme situations.
•Everything under control with Display Bus and
Mobile App
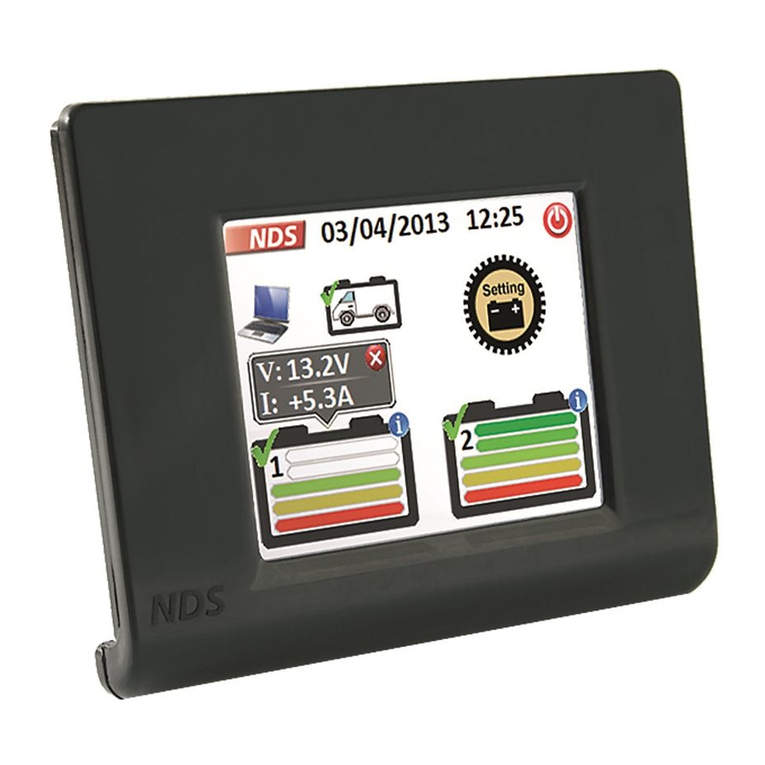
The new controllers: DTB01 Display Bus and NDS
Mobile App, allow you to manage your battery and
all other N-BUS devices with a single device.
•Compatible with any charger
BMS Smart developed by NDS will automatically
adjust all the charging parameters in the optimal
way for your TEMPRA battery.
•BMS Smart
Powerful and intelligent for longer battery life,
protections, Smart Balance, charge management
and communication in one board.
5

4. STRUCTURE
The battery has 2 terminals (negative and positive)
with threaded hole and 1 Multicolour LED indicator
on top.
On the side, there's a "Setup and connections"
compartment to make the settings for battery
operation, to connect it to the N-BUS network and to
connect the DTB01 touch screen display (optional).
See the following 2 figures for all references.
6
TERMINALS AND LED INDICATOR
REFERENCE
FUNCTION
A
Negative terminal
B
Positive terminal
C
Multicolor LED indicator
D
Connection compartment
D
C
A
B
Fig.1

You can install automotive poles with an M8 screw, or
use a bolt in case you want to use eyelet connectors.
7
CONNECTION COMPARTMENT
REFERENCE
FUNCTION
E
Green connector (not used)
F
Red connector (not used)
G
ON/OFF Button
H
N-BUS_1 connection for Display
or other N_BUS device
I
N-BUS_2 connection for Display
or other N_BUS device
L
6 channels Dip switch selector
Fig.2
I
H
E
L
G
F

5. INSTALLATION
Use insulated tools, do not place and/or leave metal
objects near the product to avoid contact between the
two poles (positive and negative) of the TEMPRA
Battery.
1. Place the TEMPRA battery on a horizontal surface by
resting it on the base, with the poles facing upwards.
The TEMPRA battery cannot be installed in all
positions or on all sides. See the pictures below.
2. If possible, secure the battery to the floor so as to
avoid unexpected movements during the journey.
3. Connect the negative (Fig.1 - Ref. A) and positive
(Fig.1 - Ref. B) terminals to the system. The terminals
have an M8 screw hole (head 13mm), use M8
Terminals Bolt Hole and cables of suitable cross
section.
4. Once the connections have been made, place the
plastic pole covers on them.
If necessary, customize the shape of the pole covers
to suit your needs and space requirements.
8
CAUTION
•Do not connect any different lithium batteries to the
TEMPRA. Don’t use: different brand, different lithium
technology, different capacity or voltage).
•Do not connect TEMPRA lithium batteries in series.
•Use only NDS TEMPRA batteries for parallel connection, do
not use batteries of other technology Lithium or Lead/Acid
batteries (AGM, Gel, Flooded).

6. TEMPRA BATTERIES
PARALLEL
You can connect up to 4 TEMPRA Lithium Batteries in
parallel, series connection is not allowed.
Follow the instructions for correct installation:
1. Select Master mode on one of the batteries and set
the other Tempra to Slave. Act on Dip Switch No. 4
(Chapter 10).
2. Make the electrical connection in parallel.
3. Create the N-BUS network - connect the data cable
forming a chain from one battery to the next
(connect any other NDS N-BUS devices present).
9
NOTE
•The connection cable between several N-BUS devices is a 6-
pole (straight through) cable with RJ11 6C/6P connectors at
both ends. It is possible to buy a pre-assembled NDS cable
available in different models and lengths BC 03M (3m), BC
06M (6m) and BC 10M (10m).
•The N-BUS cable for DTB01 display is a proprietary NDS cable,
and it is different from BC 03M, BC 06M and BC 10M.
N-BUS

7. WIRING AND FUSES
In order to properly dimension wiring and fuses, an
analysis of distances and loads must be carried out. It is
not possible to provide a unique figure valid for every
installation, the following examples are purely
indicative.
10
MAXIMUM
ESTIMATED
CONSUMPTION
MAXIMUM CABLE SECTION
FUSE
Length
<=2m
Length
da 2m a 4m
Length
>4m
20 A
(refrigerator,
lights, water
pump)
4 mm2
6 mm2
10 mm2
40 A
130 A (inverter
with coffee
machine,
hairdryer)
25 mm2
35 mm2
50 mm2
150 A
200 A (inverter
air conditioner)
35 mm2
50 mm2
70 mm2
200 A

8. N-BUS NETWORK AND
CONTROLLERS
N-BUS devices can be networked for optimal operation
of the entire NDS energy system. To start setting up
your new energy system, simply connect two or more
N-BUS devices with the optional data cable, available in
various lengths (BC03M, BC06M or BC10M).
Furthermore, with N-BUS, you can use a single
controller to monitor and control all NDS devices.
Control TEMPRA and all N-BUS devices with a single
full color touch screen display (DTB01), or with the
mobile app for smartphones, if there’s at least one NDS
device with Bluetooth in the network. They are
Bluetooth e.g. TEMPRA Lithium Battery (all models),
SUNCONTROL2(models with Bluetooth). The mobile
app can also be used to update all connected N-BUS
devices if there is a Master device, such as a TEMPRA
Lithium Battery.
11
DISPLAY
MOBILE APP
Bs
14,2 V ON
80 A
12,5 V
10:30
Bm
80 A
1247 W
CAUTION
The N-BUS cable connecting 2 devices must not exceed 10m.

9. N-BUS / CI-BUS SELECTION
TEMPRA battery supports both the native N-BUS
protocol and the Ci-BUS protocol, shared with other
manufacturers. Act on Dip-Switch No.1 to set the
desired protocol. In the case of Ci-BUS selection, it is
also necessary to move the Dip-Switch No. 4.
10.MASTER AND SLAVE
This setting is mandatory if several Tempra batteries are
connected in parallel in the N-BUS network. Only one
of these batteries must be set as Master, all others as
Slaves. If there is only one Tempra battery and other N-
BUS devices in the network, the network will
automatically configure itself. The default setting for all
batteries is Master.
12
NOTE
Dip switch positions 2 and 3 are not active.
CAUTION
With the Ci-BUS protocol active, the N-BUS network will not be
detected.
Master (default)
Slave
N-BUS setup (default)
Ci-BUS setup

11.BUS POWER SUPPLY
This Dip Switch allows the BUS (N-BUS and Ci-BUS) to
be powered on and off. Switching off the Bus means
switching off all connected devices, such as the DTB01
display.
12.FEEDING TEMPRA
To disconnect the Tempra battery, either the button
located inside the connection compartment can be
used (Fig.2 - Ref. G), or Dip-Switch No.6. Both actions
produce the same effect on the battery, but the Dip-
Switch, being a mechanical switch, provides immediate
visual feedback on the ON or OFF state of the battery.
13
NOTE
Even if the battery is powered off and the connections to its poles
are disconnected, the BUS power line remains powered. To
interrupt power supply to the BUS line, set Dip Switch No.5 to
OFF.
BUS ON (default)
BUS OFF
Alimentazione TEMPRA ON (default)
Alimentazione TEMPRA OFF

13.OPERATION
Charge the battery completely before using it to its full
potential.
ACTIVATION
The default setting of the TEMPRA lithium battery is in
inactive mode: there is no voltage at the poles and to
use it you must activate and switch it on.
To activate it, move upward the No. 6 Dip switch
selector (ON position) (Fig. 2 - Ref. L), and to turn it on,
press and hold the ON/OFF button (Fig. 2 - Ref. G) for at
least 1 second.
The battery will be active when the LED indicator (Fig. 1
- Ref. C) lights up.
SHUTDOWN
The battery can be switched off in 4 different ways
according to requirements:
•ON/OFF Button (Fig.2 - Ref. G).
•Display NDS DTB01 button.
•NDS ENERGY APP Mobile button (per iOS e
Android)
•Dip switch (Fig. 2 - Ref. L) selector No. 6 “ON/OFF”
SWITCH-OFF WITH ON/OFF BUTTON (Fig.2 - Ref. G)
Turning the battery off using the ON/OFF button allows
you to choose whether to leave Bluetooth active or to
proceed to a complete shutdown.
With Bluetooth on, it is possible to turn the battery
back on via the NDS ENERGY APP, without pressing
the ON/OFF button again. In both cases there is no
voltage at the poles.
14

•Switching off battery, leaving Bluetooth on: with
the battery active, press and hold the ON/OFF button
for 4 seconds until the LED (Fig.1 - Ref. C) flashes blue.
Release the button.
The battery will turn off, and Bluetooth will stay
active.
•Switching off the battery: with the battery active,
press and hold the button for 8 seconds until the LED
flashes purple. Release the button. The battery will be
switched off.
SWITCH OFF WITH NDS DTB01 DISPLAY
Press and hold the button on the side of the NDS
DTB01 display until the message "Shutdown..." is
displayed. Release the button. The battery will turn off
after a few seconds, and Bluetooth will stay active with
no voltage at the poles.
15

SWITCH OFF VIA BUTTON ON APP
16
STEP 1
Tap on the Menu icon in the
top right-hand corner.
STEP 2
Tap on the Bluetooth icon.

DIP SWITCH DEACTIVATION (Fig. 2 - Ref. L)
Complete deactivation of the battery by means of a Dip
Switch is recommended in the case of long-term
storage (more than 3 months) or if you do not have a
Bluetooth device connected to the battery.
To switch the battery off and on completely, set Dip
switch selector 6 (Fig.2 - Ref. L) down (OFF).
Bluetooth is deactivated and there is no voltage at the
battery poles.
17
STEP 3
Tap on the Battery icon.
The Tempra battery will switch off
after a few seconds, and
Bluetooth will stay active.

14.CHARGE
For optimal management, it is recommended to use a
charger that performs a CV/CC charging curve and
respects the parameters in the table below
It is also recommended to:
•We recommend the use of a charger suitable for
charging Lithium Iron Phosphate (LiFePO4)
batteries. In any case, the Tempra Lithium battery is
equipped with an integrated charge manager to
regulate charging optimally, so AGM, GEL, Wet
chargers can also be used, even with active
desulphation, without damaging the battery.
•Do not overcharge the battery. We recommend the
use of an automatic charger, which switches off
when the battery is fully charged.
CHARGING AT LOW TEMPERATURES
The TEMPRA battery is available in two versions: a
standard version and a heated version. The heated
version has an "F" at the end of the product code. The
table below shows all the charge values at the lowest
and highest possible temperature for each model.
18
Model
Max voltage
Max Recommended
Current
continuous charge
TLB 100 / TLB 100F
14.4V±0.1V
50A
TLB 120 / TLB 120F
14.4V±0.1V
60A
TLB 150 / TLB 150F
14.4V±0.1V
75A
This manual suits for next models
5
Table of contents
Other NDS Camera Accessories manuals