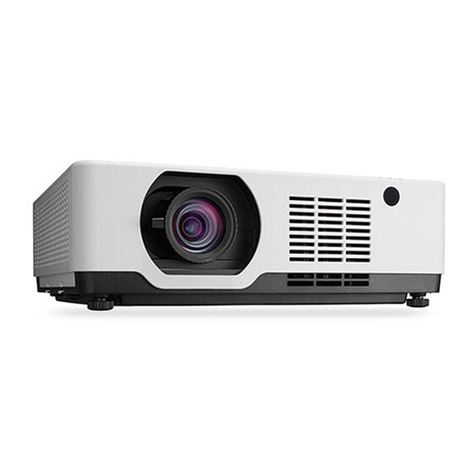
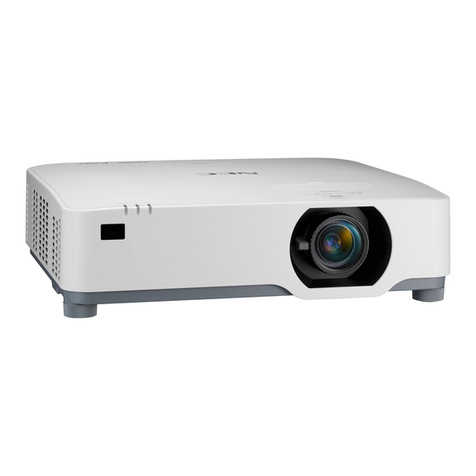
NEC NP-PA600 Series User manual

Multi Screen Tool
User’s Manual
NEC Projector User Supportware

2
Introduction
Thank you for using the Multi Screen Tool.
Please read this User's Manual carefully to aid in the proper use of this product before using the Multi Screen Tool.
The Multi Screen Tool is a software application for easy performing stacked projection using the "Geometric
Correction" function of NEC projectors and tiled projection using the "Edge Blending" function.
This manual mainly describes operations for the NP-PA600 series.
Terminology
In this manual,
•"Stacking correction" refers to all of the processes below using the Multi Screen Tool.
1. Photographing the projected images of multiple projectors with a web camera
2. Perform comparisons and calculations so that the content of the projected images is superimposed, and
create the GEOMETRIC CORRECTION data
3. Send the [GEOMETRIC CORRECTION] data to each projector
•"Tiling correction" refers to all of the processes below using the Multi Screen Tool.
1. Photograph the images projected on multiple projectors using a web camera.
2. Create the GEOMETRIC CORRECTION data for joining the projected images and projecting them within
the screen's frame and the specied range, and create the "Edge Blending" data to adjust the brightness
of the seams.
3. Send the "GEOMETRIC CORRECTION" and "Edge Blending" data to the respective projectors.
About copyrights of projected images
When using this software to project images for commercial purposes or public viewing, reducing the projected area
or reshaping the image with respect to the original may infringe upon the rights of the copyright holder as protected
by copyright laws.
When performing tiled or stack projection, be careful with discrepancies in the aspect ratio and with distortion in the
projected images.
NOTE
(1) Unauthorized reproduction of a part of or all of the content of this manual is prohibited.
(2) The content of this manual is subject to change without notice.
(3) Great care has been given to the creation of the content of this manual; however, should you notice any
questionable points, errors, or omissions, please contact us.
(4) Notwithstanding section (3), NEC will not bear any responsibility for claims due to loss, lost profit, or other
matters for reason of the use of this software.

3
Stacking correction
Create the geometric correction data so that the projected images
of two to four projectors are superimposed on one another.
Stacking lets you achieve high brightness projections.
Tiling correction
Create geometric correction data to project a single image using
two to four projectors.
Also, use the edge blending function to adjust for the difference
in brightness at the seams where the projected images overlap to
achieve a seamless image with a sense of unity.
With a short projection distance, you can achieve high brightness
projections.
Effects of stacking/tiling correction

4
•When performing tiling correction with two projectors,
the images are corrected with respect to the screen's
frame as shown on the diagram at the right, and the
aspect ratio is not maintained.
Reference
•The resolution of the projected image is the same as
the projector's display resolution.
•The geometric correction data is created by using a
web camera to photograph the projected images of
projectors to which the same video signal is input then
zooming in or out and masking the images based on
the images that have been photographed to fit on the
screen (specified projection range).
This is not a function for inputting controlled image
signals to multiple projectors to form a single projected
image.
•When the projector's on-screen menu is used while
projecting in multi screen with tiling correction, the edge
blending function is canceled while the on-screen menu
is displayed, resulting in bands of different brightnesses
at the overlapping parts of the projected images. (The
image returns to as it was before when the on-screen
menu turns off.)
- Similarly, when the input signal is switched and the
signal name is displayed, the edge blending function
is canceled. We recommend using the projector's on-
screen menu to set SETUP →MENU →SOURCE
DISPLAY to [OFF] beforehand.
•The edge blending function is optimized for when the
presetting is set to "Graphic".
If the presetting differs depending on the input signal,
differences in brightness may occur at the parts where
the projected images overlap.
•When using the tiling function with the NP-PA500U/NP-
PX750U/NP-PH1000U, pay attention to the following:
- Only signals with a vertical frequency of 48Hz to 60Hz are supported.
When signals other than the above are input, they are projected with the edge blending function canceled.
(Bands of different brightnesses appear at the overlapping parts of the projected images.)
- The PIP/PBP function and the remote control's sectional zoom function cannot be used.
•When using the NP-PX750 series, unify the color wheel types (6 Segment-White / 6 Segment-Color) included with the
main unit.
•This cannot be used simultaneously with the edge blending function on the projector's on-screen menu.
Turn off the setting on the on-screen menu before performing stacking/tiling correction.
Note
Adjustment of the
projected images'
seams with the edge
blending function

5
Precautions in Projector Installation
•Leave sufcient space to the left and right of the projectors so that there is no obstruction of projector air intake
and exhaust. Obstruction of air intake and exhaust will result in a rise of the internal temperature of the projector
and will cause breakdown.
•Do not physically stack projectors one above the other.
Projectors that are physically stacked could fall causing damage and breakdown of the projectors.
For details on the installation precautions, see the operating instructions of the projector you are using.
The precautions below are for the NP-PA600 series.
Installation Example Using 2 Projectors
In consideration of using this software, we recommend an installation like the following when the installation
combines 2 projectors.
Installation Examples
Warning
•Please request ceiling mount and other special installation at your store of purchase.
Installation should never be undertaken by the customer. Doing so could result in
the projectors falling or in injury. A strong cabinet that will support the weight of the
projectors should be used in this installation. Do not stack the projectors directly one
upon the other.
•Please see the user's manual of the projector for information about the range of projection distance.
Note
RearFront
Exhaust Intake Ventilation inlet Ventilation outlet
Cabinet Cabinet Cabinet
Right side

6
Restrictions on Projectors that Are to Be Installed
•Install all projectors on the same network.
•Use projectors with the same resolution.
•Use the same model to the extent possible.
* When there is a difference in the brightness of the projectors, the web camera might not accurately read the
projection image at the time of calibration.
* Differences in brightness can also be caused by the [ECO MODE] setting. Make the same [ECO MODE]
setting on all the installed projectors.
•Please note that the use of this software for [DESKTOP REAR] and [CEILING REAR] projector projection
methods is not supported.
Application Environment of the Multi Screen Tool
The following personal computer environment is recommended to provide convenient use of web cameras when
calibrating.
Supported operating systems: Windows 7(32-bit/64-bit), Windows Vista(32-bit/64-bit) or Windows XP(32-bit)
Intel Core 2 Duo 2.6 GHz or greater processor
2 GB or more memory capacity
1 GB or more free hard disk space
Use of the Multi Screen Tool should be performed by an "Administrator" for Windows 7/Windows Vista, and
a "Computer Administrator" for Windows XP.
Required Components
.NET Framework 3.5 or later
DirectX 9 (for Windows Vista/XP)
DirectX 10 (Windows 7)
Supported Equipment
Projector*¹
NP-PA600X/NP-PA550W/NP-PA500U*2(rmware version 1.02 or later)
NP-PX750U*2/NP-PX700W/NP-PX800X (rmware version 1.03 or later)
NP-PH1000U*2(rmware version 1.04 or later)
Web camera
Logitech®Webcam Pro 9000
Logitech®HD Pro Webcam C910
Logitech®HD Pro Webcam C920
*1It is not possible to use projectors with different resolutions simultaneously. Use projectors with the same resolution.
*2Restrictions apply when using the tiling function. For details, see page 21.
Supported Screens
Only flat screens are supported. Curved screens are not supported.
Screen widths of up to 10 meters are supported, but it may not be possible to calibrate properly for screens on which
the difference in brightness is great between the center and the edges.
Note

8
Table of Contents
Effects of stacking/tiling correction................................................................. 3
Precautions in Projector Installation ............................................................... 5
Installation Example Using 2 Projectors ................................................................5
Restrictions on Projectors that Are to Be Installed ........................................ 6
Application Environment of the Multi Screen Tool.......................................... 6
Flow through stacking/tiling correction........................................................... 7
1. Installation of the Multi Screen Tool ........................................................... 9
Installing the Multi Screen Tool ..................................................................................9
Uninstallation of the Multi Screen Tool .....................................................................12
Windows 7/Windows Vista...................................................................................12
Windows XP ........................................................................................................12
2. Installation and Connection of Equipment.................................................13
Connections for stacking/tiling correction.................................................................13
Connections for Projecting an Image .......................................................................14
For analog RGB signals ......................................................................................14
For digital RGB signals........................................................................................15
Video signal
.........................................................................................................15
3. Multi Screen Tool Settings ..........................................................................16
Starting the Multi Screen Tool .................................................................................16
Names of the Multi Screen Tool Screen...................................................................16
Multi Screen Tool Menu............................................................................................18
Names of the Calibration Screen .............................................................................19
4. Preparation of the Projectors..................................................................... 21
5. Performing Stacking/Tiling Correction...................................................... 22
6. Calibration .................................................................................................. 25
7. List of Error Messages ............................................................................... 27

9
1. Installation of the Multi Screen Tool
Preparation: Save the downloaded Multi Screen Tool le to the desired location
* The same installation procedure is used for Windows 7/Windows Vista and Windows XP.
1. Double click MSTxxx.exe
The installation screen appears. Click [Next (N)].
.NET Framework 3.5 or later is required to use the Multi Screen Tool.
If this condition is not met, the screen at the right appears when
MSTxxx.exe is launched.
When [Install] is selected, a connection will be made with the Internet
and downloading of the required component les from the distribution
source site will begin.
When the download is completed, the setup program will start
automatically. Follow the instructions on the screen and complete the
setup.
* When making a new installation of .NET Framework 3.5 on
Windows XP (i.e., an older version of .NET Framework has not
been installed), the required component files will have a size of
about 63 MB (and about 20 MB when using Windows Vista). It
could take a considerable time from the start of downloading to the
completion of installation.
Also, if requested to restart Windows after installing .NET
Framework 3.5, please follow the instructions and restart Windows.
The installation of the Multi Screen Tool will continue after
restarting Windows.
* If connection cannot be made with the Internet, use another
computer that can connect with the Internet and access the URL
listed below, then download the required component les and use
them.
[.NET Framework 3.5]
http://msdn.microsoft.com/ja-jp/netframework/default.aspx
.NET Framework 3.5 Installation
Screen
Installing the Multi Screen Tool
This software cannot be used simultaneously with the Stacking Correction Tool. If the Stacking Correction
Tool is already installed, uninstall it.
Note
Note

10
1. Installation of the Multi Screen Tool
2. Select "I accept the terms in the license
agreement" and click [Next].
Please read the content of the END USER LI-
CENSE AGREEMENT carefully.
A screen for verifying the installation location will be dis-
played.
3. Click [Next]
To change the installation location, click [Change] and
specify the installation location.
A screen notifying that the installation preparation has
been completed will be displayed.
4. Click [Install]
The installation will begin.
As the installation proceeds, installation will start for appli-
cations required in the operation of the Multi Screen Tool.
5. Click [OK]
The EasyStack installation screen appears.
If a language selection screen is displayed, select the
language and click [OK].
Note

11
DirectX 9 or later (DirectX 10 for Windows 7) is required to
use this application. If this condition is not met, the screen
at the right appears when MSTxxx.exe is launched.
Follow the instructions on the screen to complete setup of
DirectX 9. DirectX Installation Screen
Note
1. Installation of the Multi Screen Tool
7. Click [Install]
The installation will start.
To change the installation location, click [Browse…] and specify
the installation location.
8. Click [Finish]
Installation of EasyStack is completed and the Multi Screen Tool's
installation completed screen appears.
9. Click [Finish]
This completes the installation of the Multi Screen Tool. Click [Fin-
ish] on the screen and close the setup program.
6. Click [Next (N)].
A screen asking you where to install the software appears.

12
Uninstallation of the Multi Screen Tool
Windows 7/Windows Vista
Select the Multi Screen Tool from [Uninstall a program] under [Control Panel] and uninstall it.
Windows XP
Select the Multi Screen Tool from [Add/Remove Programs] under [Control Panel] and uninstall it.
1. Installation of the Multi Screen Tool

13
2. Installation and Connection of Equipment
Connections for stacking/tiling correction
•Install the web camera facing the projection image.
•The photographic coverage of the web camera is 30˚.
•Connect each of the projectors to the same network.
•Use LAN cable that supports Category 5 or higher for the connection to the network.
•Plug each projector into a power outlet.
See page 6for projectors supporting stacking/tiling correction.
Note
LAN LAN
PA600 series PA600 series PA600 series
Web camera
LAN
To USB port To LAN port
Computer (for correction)

14
2. Installation and Connection of Equipment
Connections for Projecting an Image
For analog RGB signals
•When the projectors are connected with a daisy chain connection, the RGB video signal will be
attenuated and its projection might not be possible. Use an RGB signal divider as illustrated in the
above connection diagram.
Note
Daisy Chain Connection
Reference
• ConnectionscanalsobemadeusingcommerciallyavailableBNCcable.
COMPUTER1 IN COMPUTER1 IN
Computer cable (VGA)
Projector
Projector
COMPUTER1 IN
Projector
Analog RGB signal divider
(Mini D-Sub 15 pin)
Analog RGB output
Analog RGB input
12 3
Computer
To displayed output
connector (Mini D-Sub 15 pin)
COMPUTER1 IN
To Computer 1 input
of the next projector
RGB output
connector of PC
MONITOR OUT MONITOR OUT
COMPUTER1 IN

15
2. Installation and Connection of Equipment
Projector
HDMI cable
HDMI
cable
HDMI
cable
Projector Projector
DVD player
HDMI OUT VIDEO OUT
S-VIDEO VIDEO LR
AUDIO OUT
HDMI
IN
HDMI
IN
HDMI
IN
HDMI signal distributor
12
HDMI Input
HDMI Output
3
Make connections as illustrated in the diagrams below when connecting video equipment other than the computer
(e.g., DVD players etc.).
For digital RGB signals
Video signal
Reference
• ConnectionscanalsobemadevianetworkusingImageExpressUtility2.0.
Audio output Video output
LRVIDEO S-VIDEO
Projector Projector Projector
DVD player / Video deck
Video signal
divider
Video cable Video cable
Video cable
Video cable
1
Video output
Video input
23
VIDEO IN VIDEO IN VIDEO IN

16
3. Multi Screen Tool Settings
Starting the Multi Screen Tool
The same Multi Screen Tool starting method is used for Windows 7/Windows Vista and Windows XP.
Select the Multi Screen Tool from [Start] →[All Programs] →[NEC Projector User Supportware] and start it.
Names of the Multi Screen Tool Screen
Multi Screen Tool Main Screen
❶List of Connected Projectors Displaystheconnectionorder,IPaddress,projectorname,andresolutionforthecurrently
connected projectors.
❷Destination of Geometric
Correction Data
Selectsettings 1to 3oftheprojector's[GEOMETRICCORRECTION]onscreenmenuas
the[GEOMETRICCORRECTION]datastoragelocationafterstackingcorrection.
❶
❷
❸
❹
❺

17
❸ Calibration
Mode
Stacking
Master Projector:
Theprojectorthatwillserveasthemasterisdetermined,andtheprojectionimage
of another projector undergoes stacking correction so that it is in agreement with the
projection image of the master projector.
Inthis instance,the[GEOMETRICCORRECTION]ofthemasterprojectordoesnot
change.
Auto:
When there is a screen frame, the projection image is corrected so as to fit inside that
frame.
When there is no frame, correction is applied so that the area of the rectangle is
maximizedwithinthesuperimposedportionoftheprojectionarea.
Theaspectratiooftheinputsignalisnotmaintainedatthistime.
Tiling
Specify Four Points:
On the web camera's captured images, set points at the four corners of the
image for tiling projection and correct to fit within this range.
Auto:
When the screen has a frame, the projected image is corrected so as to fit inside
that frame.
When there is no frame, correction is applied so that the area of the rectangle is
maximized within the projection range.
The aspect ratio of the input signal is not maintained at this time.
❹[Next] Display the calibration screen. ( Page19)
❺[Exit] ClosestheMultiScreenTool.
3. Multi Screen Tool Settings

18
3. Multi Screen Tool Settings
File
Open
Open the GCXS file (extension .gcxs) saved with the [Save as]command
and send the geometric correction data to all connected projectors.
When using a GCXS file to reproduce projected images to which
stacking/tiling correction has been applied, make sure the installation and
connections of all the projectors are the same as when the GCXS file was
saved.
Projected images to which stacking/tiling correction has been applied
cannot be reproduced if the order in which the projectors are connected,
their position of installation, the projection angle (including tilt feet
adjustment), position of projection (including lens shift adjustment), etc.,
have been changed.
Save as
* This becomes
selectable once
stacking/tiling
correction is
completed.
The geometric correction data of all the connected projectors along with
the order in which the projectors are connected is stored together as the
stacking/tiling correction data (GCXS file).
* For tiling correction, the edge blending data (JPG file) is also stored.
Exit ClosestheMultiScreenTool.
Options
Communication
Settings
At this screen, select the projectors to be used for stacking/tiling
correction.
Selectthetypeofnetwork(typeofNIC:networkinterfacecard)withthetopmost
pull-down menu.
Connect Connects to the projectors for which check marks are
entered.
Update
Updatesthelistdisplaywhentherehasbeenanincreaseor
decrease of the number of network projectors, when there
has been a change in the type of projector, or some other
change.
Input Address
SpeciesandsearchestheIPaddressoftheprojector.
Thesearchmethodcanbeselectedfromthefollowingtwo
types.
• DirectinputandsearchingoftheprojectorIPaddress
• Specificationandsearching ofarangewithstartaddress
and end address
Edit List
Specifies an address and registers on a list the projectors
thathave beensearched.Thisalsopermitspostregistration
editing and deletion, and additions and searches by address
specification.
Mode Changes the projectors' geometric correction and edge blending settings.
Help
Help ThisdisplaysthehelpleoftheMultiScreenTool.
About DisplaystheversionoftheMultiScreenTool.
Multi Screen Tool Menu

19
3. Multi Screen Tool Settings
Calibration Screen
Names of the Calibration Screen
❶Setup Performstheangleofviewcheckandothercamerachecks.
❷Calibrate Starts stacking/tiling correction.
❸Update Calibration
When "Specify Four Points" is selected for tiling correction, the points at the
four corners of the image for tiled projection can be fine-adjusted, updating the
calibration.
When this is done, correction is completed quickly, since no filming with the
camera is performed.
❹About Displays the version of the software that performs calibration (EasyStack ™ ).
❺Quit Closes the calibration screen, returning to the Multi Screen Tool.
❶
❷
❸
❹ ❺

20
3. Multi Screen Tool Settings
Setup Screen
❶ Take Picture
Takes the photo.
If no camera is connected, this button is displayed as "Connect to Camera"
instead of "Photograph". Connect a camera.
When in the continuous capture mode, this changes to the [Start Capture]button.
❷ Camera
Settings
Exposure and
Gain Adjusts the camera's exposure and gain.
❸ Tools
Auto-Tune Adjusts to the optimum picture quality for calibration.
Show Focus
Pattern Displays a focus pattern (15 x15 dots) on the projector.
❹ Options
Continuous
capture mode Displays the web camera's continuous image on the preview screen.
Take picture after
manual adjustment
Automatically takes the picture after manual adjustment.
❺Preview Screen Displays the image photographed by the camera. When "Continuous capture
mode" is checked, displays the web camera's continuous image.
❻ Image Borders
This is only displayed when "Tiling" →"Specify Four Points" is selected on the
Multi Screen Tool's main screen.
Drag the points at the four corners to set the range. After tiling correction, the
input signal is projected within this range.
❼ Fit Image to Window Size/
Display Image with Actual
Resolution/Zoom slider
Fit Image to Window Size:
The projected photograph is fit to the preview screen's window size.
Display Image with Actual Resolution:
The photograph is displayed with the actual resolution (magnification).
Zoom slider:
Zooms the preview screen in and out.
❽ Pan Mode When zooming on the preview screen, the screen can be scrolled horizontally and
vertically.
❾ Help Displays the EasyStack ™ help screen.
❿ Finish Completes the setup.
❽
❻❿
❾
❼
❶
❷
❸
❹
❺
Table of contents
Other NEC Projector manuals

NEC
NEC NP3200 User manual

NEC
NEC VT770 Series User manual

NEC
NEC ME403U User manual

NEC
NEC Nighthawk SX10000D Installation and user guide

NEC
NEC NP-CR5450H User manual

NEC
NEC PA721X User manual

NEC
NEC NP41 - TECHNISCHE DATEN User manual

NEC
NEC VT70S User manual

NEC
NEC UM361XI User manual

NEC
NEC M402H User manual

NEC
NEC U300X Series User manual

NEC
NEC DLP Cinema NC3200S User manual

NEC
NEC MultiSync LT140 User manual

NEC
NEC LT75Z - MultiSync SVGA DLP Projector User manual

NEC
NEC NP-M300X User manual

NEC
NEC P502HL User manual

NEC
NEC LT380 - MultiSync XGA LCD Projector User manual

NEC
NEC NP400 Series User manual

NEC
NEC VT800 Series User manual

NEC
NEC NP600S Series User manual