8
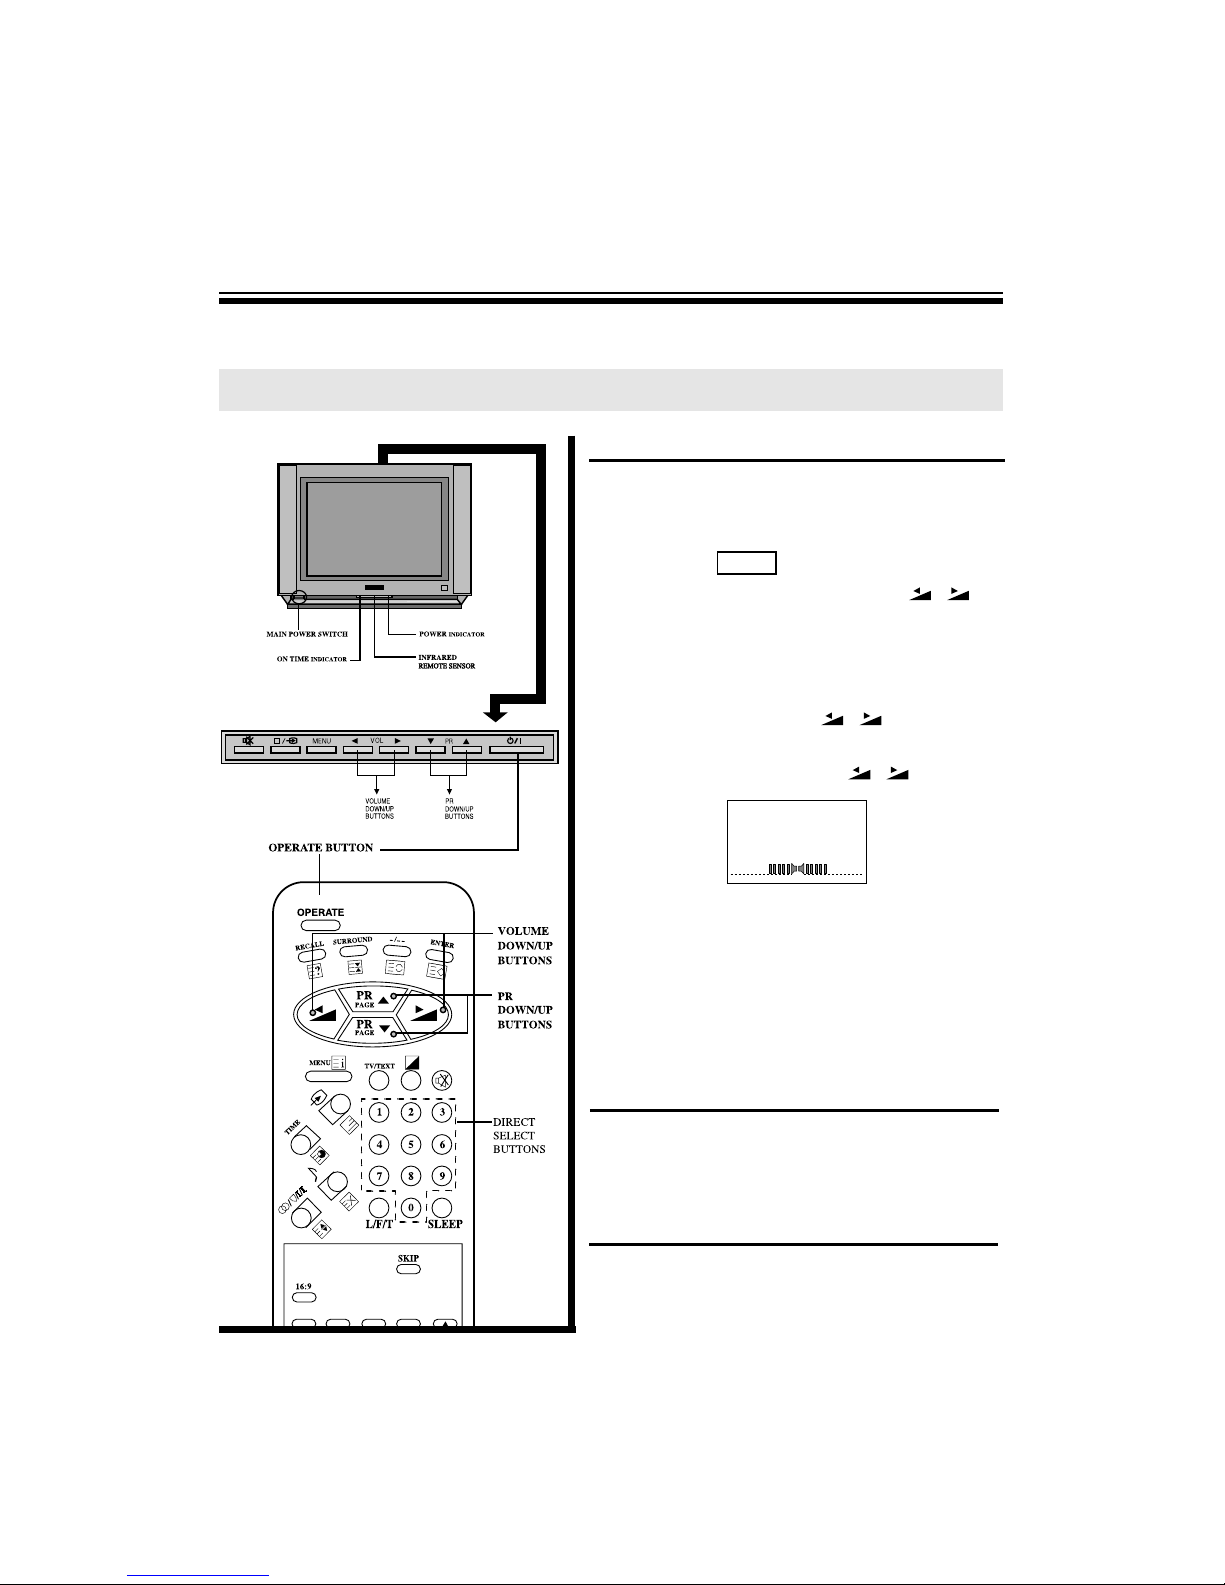
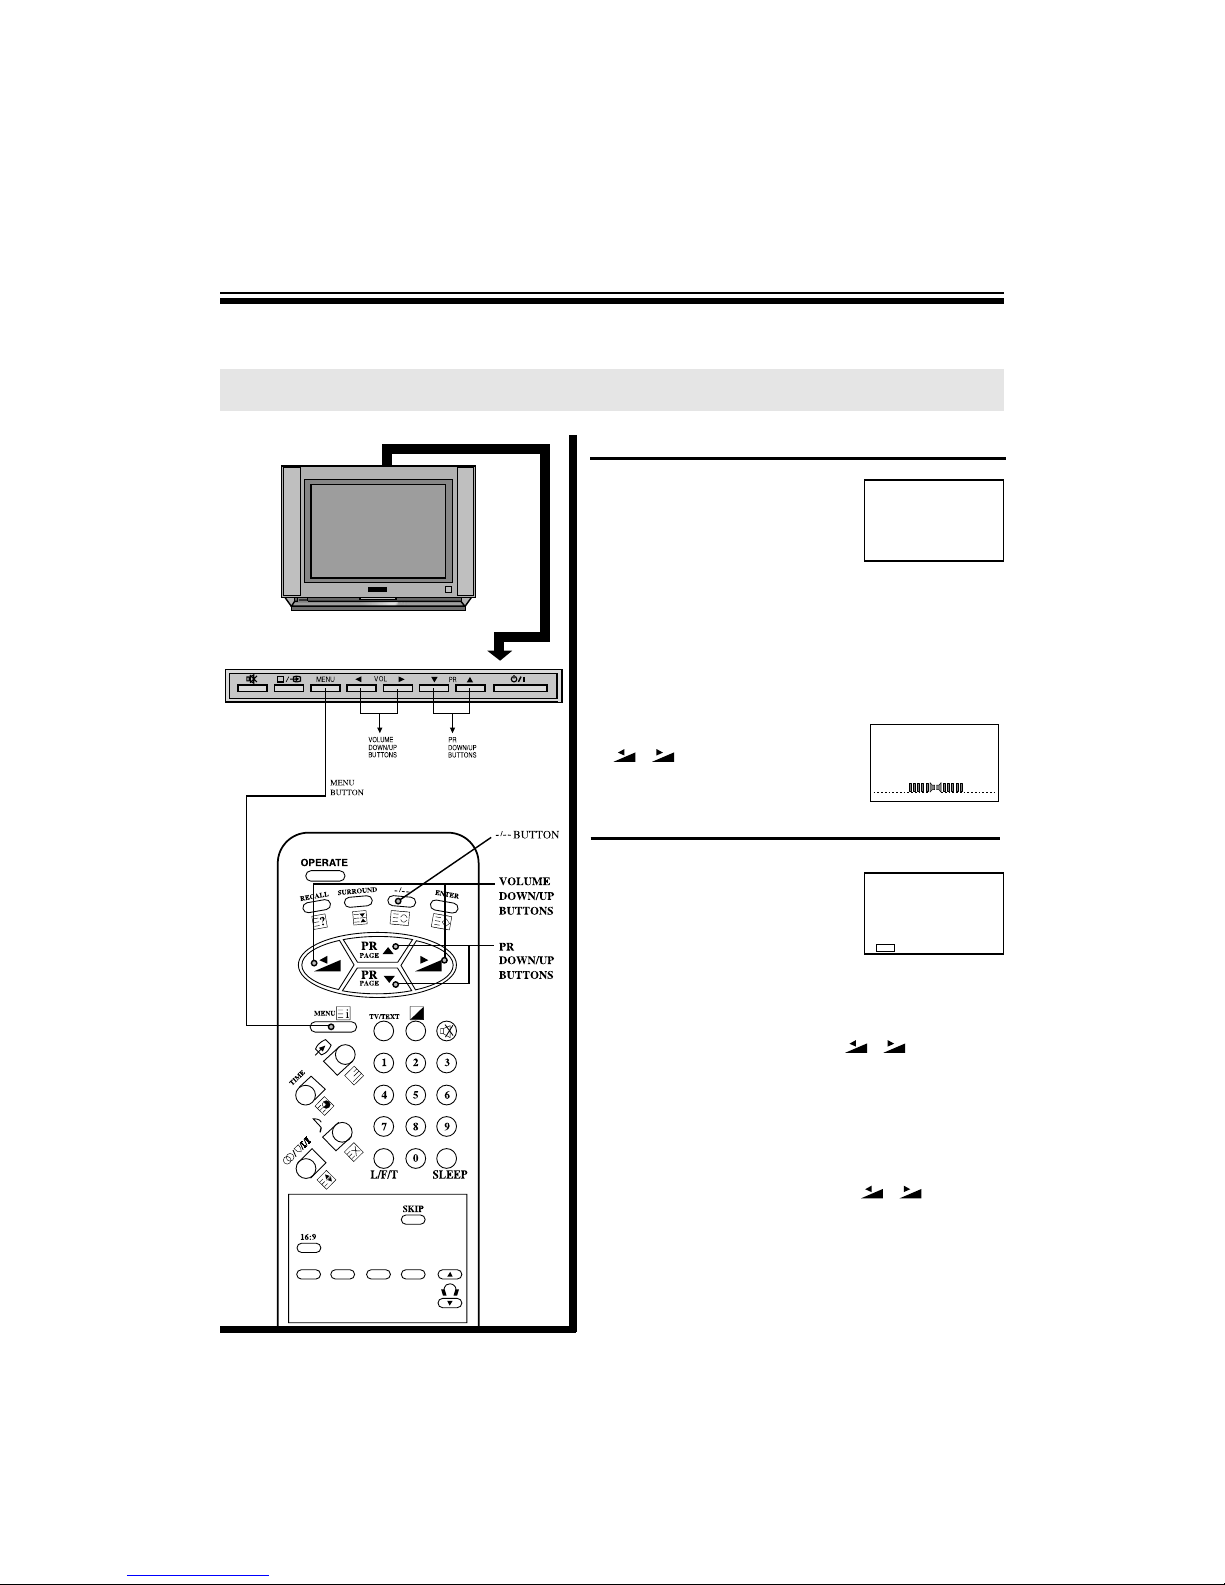
To turn the power on/off
1. Press the main power switch.
The power indicator will light up red or amber.
In standby mode the power indicator will light up red.
2. If no picture appears, press the OPERATE,/,
PR
▼/▲direct select buttons(0~9). By
pressing the
number(one digit only) where the programme you want to
watch is preset, you can turn on the set and select the
programme at the same time. When the TV is on, the power
indicator will light up amber.
* When the remote control is not at hand, you can turn
on the set by pressing the /or the PR▼/▲
buttons on the TV set.
3. Adjust the sound volume with the /buttons
on the receiver or remote control.
4. To switch to the standby mode, press the OPERATE
button. At the same time the power indicator will light up
red.
5. To turn off completely, press the main power switch. At
the same time the power indicator will turn off.
* If you don’t use the TV set for a long time, turn off
completely at the main power switch on the TV set.
This decreases unnecessary power consumption.
* When you turn off completely by using the main power
switch, Sleep Time and Timer setting are cleared.
Auto-power-off
If TV broadcast for a day is finished, the TV will
automatically turn off after about 15 minutes. However, if
the Off -time or Sleep time is operating, it takes precedence.
This Auto-Power-Off feature does not operate in the VIDEO
mode.
Last-Mode-Memory
Settings of picture and sound conditions and preset
programmes are stored in the memory even after turning off
the power, therefore, next time the power is turned on, the
system will function in the last setting modes.