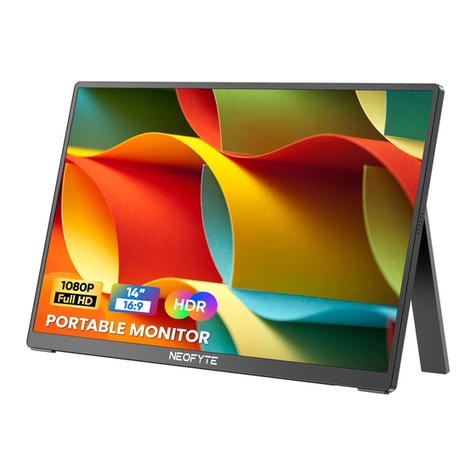
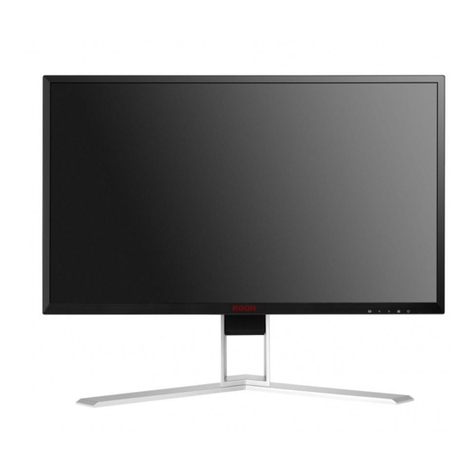
NEOFYTE NEOSCREEN T14S User manual

NEOSCREEN T14S
www.neofyte.com
NEOFYTE
14.0” Portable Monitor
USER GUIDE

Tech Support
Facebook
@neofytetech
Official Website
www.neofyte.com
www
Tech Support
(support@neofyte.com)
24/7 service
@neofyte
If you have any problems with the monitorplease free to contact us
for quick response and professional techs support.

Contents
Package List
Monitor Introduction
Connect Monitor with Devices
Duplicate & Extend Mode Setting
Screen Rotate Setting
Specifications
OSD Function Introduction
Supported Devices & Models
Common Problems and Solutions
Notices
1
1
2
4
4
5
5
7
8
8

Smart Case x 1Monitor x 1
Type-C to Type-C
Cable x 1
Type-C to USB-A
Cable x 1
Charger x 1
Mini HDMl to HDMI
Cable x 1
Package List
Mini HDMI Port : Receive audio/video signals.
USB Type-C Function Port1/Port2 : USB C 3.1 support reversible insertion and reverse charging.
Compatible with USB PD2.0 power supply,supports 5V /9V /12V /15V /20V input .
Mini HDMI Port
USB Type-C Full
Function Port 2
USB Type-C
Full Function Port 1
Turning Button
Power / Return Button
Power/Return Button : Press and hold ~3 seconds to turn on/off the monitor.
Turning Button :
OSD Menu: Press to enter OSD menu.
UP/DOWN turning switch: When in a menu, press Turning Button to select menu item.
Brightness/Volume Adjustment: When not on a menu, push the Turning Button UP once for the
Brightness quick-access. Or push the Turning Button DOWN once for the Volume quick-access.
3.5 mm Audio Out Port :
To connect to 3.5 mm-compatible external audio device.
Monitor Introduction
3.5 mm Audio Out Port
0101

Connect Monitor with Devices
1. Connection Condition
This monitor does not have a built-in battery. Before connecting the monitor, Please make sure
there is enough power(5V/3A OR ABOVE) input.
2. LAPTOP (With Type-C)
Note: If you want to adjust the brightness and volume above 80%, please make sure the external
power supply of 5V/3A or above be connected.
Note: Not all laptops with a Type-C port can work with NEOFYTE monitor. Please check the
Type-C port of your laptop if t supports audio and video signal transmission.
Type-C to Tpye -C
Computer Monitor
3.PC / Laptop (Mit HDMI Anschluss)
OR
Note: HDMI port does not support power transmission. So when you use HDMI connection, you must
connect extra power supply (5V/3A or above).
Computer Monitor
Mini HDMI to
HDMI Cable
Computer Monitor
Mini HDMI to
HDMI Cable
USB-A to Tpye-C
Type-C to
USB-A
External Power
Supply
02

4. PHONE (With Tpye-C)
When there is no external power supply, the cell phone will supply power to the monitor.
(Energy-saving mode is activated, brightness will be automatically adjusted to 15%.)
When the external power supply is connected, the cell phone will also be charged through the
external power supply.
(To ensure the monitor and the phone can get enough working current, please use at least 15W charger or power
bank as the external power supply.)
Note: Only works directly with cell phone through full-featured Type-C port.
For iPhone: need a lightning to HDMI adaptor.
Mobile
Phone Monitor
External Power Supply
Of5v/3A Or Above
Type-C to Tpye -C
Type-C to
USB-A
5. Other Devices
Note: Please connect the power supply cable first and then Mini HDMI to HDMI Cable to ensure the
smooth transmission of signals.
When connecting the Nintendo Switch, 30W or above is required for the power adapte.
Monitor
Mini HDMI to
HDMI Cable
Monitor
Mini HDMI to
HDMI Cable
Type-C to
USB-A
External Power
Supply
Type-C to
USB-A
External Power
Supply
03

Duplicate & Extend Mode Setting
1. Connect your NEOFYTE monitor to a power outlet and an available port on your PC.
2. Right-click the desktop and select either screen resolution(Window7/8) or display settings(Window 10).
3.Click the multiple displays drop-down list, and then select extend these displays, or duplicate these
displays, note if you cannot see the additional monitor(s) listed, click detect. If does not work, try
restarting your computer and do steps again.
Screen Rotate Setting
1. Connect your NEOFYTE monitor to a power outlet and an available port on your PC.
2. Right-click the desktop and select either screen resolution (Windows 7/8) or display setting(Window 10).
3. Click the orientation drop-down list, and then select Landscape or portrait screen.
Note: If you cannot see the option of orientation on your laptop/PC, please check if your laptop/PC has this function.
04

OSD Function Introduction
1. Press the turning button to activate the OSD menu.
2. Scroll the turning button up and down to choose your settings.
3. Press turning button to confirm.
4. Press Power Button to return to the previous previous page.
Specifications
Product Name: NEOFYTE Type-C Portable Monitor
Screen Size: 14.0 Inch
Panel Type: IPS
Aspect Ratio: 16:9
Resolution: 1920*1080
Display Color: 16.7M
Color Temperature: 6800K
Visual Angle: H: 85°/85°Min V: 85°/85°Min
Contrast Ratio: 1200:1
Brightness: 250cd/m2
Color Gamut: 45%
Input Interface: Mini HD(Video Signal), Type-C Full Function(Video Data, Power Supply ISDN),
Output Interface: 3.5mm Headphone Interface
Speaker: Built-in Speakers(1W*2)
Refresh Rate: 60Hz
*Specifications are subject to change without notice.
05

Adjusts the aspect ratio to 4:3/WIDE.
The adjusting range is from 0 to 100.
The adjusting range is from 0 to 100.
Contains seven modes(Standard/Game/Movie/Text/FPS/RTS
/ECMModes).
Select ON or OFF to enable or disable dynamic contrast ratio
function.
The adjusting range is from 0 to 100.
Contains three preset color modes
(Standard,Cool, Warm)
and User Mode.
The adjusting range is from 0 to 100.
Brightness
Aspect
Brightness
Contrast
ECO
DCR
Sharpness
Image
Color Temp
Color Temp
Red
Select OSD language. The selections are: English, French,
German, Simplifed Chinese, Italian, Spanish, Portuguese,
Turkish, Polish, Nederlands, Japanese, Korean.
The adjusting range is from 0 to 100.
The adjusting range is from 0 to 100.
Green
Blue
OSD Setting
The adjusting range is from 10 to 60.
The adjusting range is from 0 to 100.
The adjusting range is from 0 to 100.
The adjusting range is from 0 to 100.
Language
OSD H. POS.
OSD V. POS.
OSD Timer
Transparency
Reset Selects RESET to revert all settings
to the factory default mode.
Select the time for the monitor to turn off automatically.
(10/20/30/40/50/60/120/240 min)
Select ON or OFF to open HDR mode.
Reset
Auto
powerdown
HDR MODE
Misc.
Contains two signal sources
Type-C and HDMI.
The adjusting range is from 0 to 100.
(0/25/50/75/100)
The adjusting range is from 0 to 100.
Signal Source
Low Blue Light
Volume
06

Supported Devices & Models
1. Phone
Razer
OnePlus
Sony
HONOR
NOKIA
OPPO
More
Brand
SAMSUNG
HUAWEI
Model
P20 / P20 RS / P20 Pro / P30 / P30 Pro / Mate 10 / 10 Pro20 / 20 X / 20 Pro
/ 30 / 30 Pro / RS
S8 / S8+ / S9 / S9+ / S10 / S10+ / S20 / Note 8Note 9 / Note 10 / Note 10+
(Connecting Samsung need extra power supply)
Razer Phone / Razer Phone 2
OnePlus 7 / OnePlus 7 Pro / OnePlus 7T
Xperia 1 / Xperia 5 / Xperia XZ3
Note 10, V20 /30
U Ultra
R17 Pro /Reno /Find. LG: G5 /G6 /G7
To be updated
NOKIA 9 Pure / View. ASUS: ROG / ROG2
HTC
2. Laptop
Brand
Apple
HUAWEI
Microsoft
ASUS
Lenovo
DELL
Google
Razer
Nvidia
More
Model
MacBook 12in /2016 /2017 Pro MacBook Air 2018iPad Pro 2018-2020
MateBook D / MateBook E / MateBook X
MateBook X Pro / MateBook 13/MateBook 14 /MagicBook
SurfaceGo / Surface Book 2
ZenBook 3 / ZenBook 3 Pro / ZenBook X / U4100 U4100UN / AU5100UQ /G3 /G5 /G7 /
Inspiron 5000Inspiron 7000 / XPS13 /XPS15
Mi Air 12.5 / Air 13.3 / Pro 15.6 / Pro 15.6 GTX
Y7000 / Y7000P / Y900K / YOGA 6 PRO ThinkPad X1 / Carbon / MIIX 720 /Yoga 5 Pro
G3 / G5 / G7 / Inspiron 5000 / Inspiron 7000 / XPS13XPS15 / Latitude 5285 /Latitude 3520
Pixelbook /PielBook Pen
Blade Stealth / Blade Pro
Geforce RTX 2070 / Geforce RTX 2080 Geforce RTX 2080Ti
To be updated. Compatible with most PCs or Laptops.
07

1. Check if the wires are loose, re-plug them and make sure they are connected correctly.
2. Replace the cable with a new one and see if the same thing happens.
3. If you have tried all of the above and the problem is not resolved, please contact our after-sales
email.
A: The USB-C to USB-C cord is strong enough to communicate power and transmission signal through
one cord . If you can't use the USB-C to USB-C cord, it must to use the HDMI cord along with the USB-A
to USB-C cord, one for transmission and one for power.
A: If you are not using a USB-C cord , make sure your monitor is connected to your laptop with both the
HDMI cord and the USB-A to USB-C. Then, press and hold the on/off button to power up the monitor.
A: Please check if the connection is loose, if there is no problem with the connection, it may be due to
insufficient power supply, please connect the adapter and use it again, or replace the power adapter
or data cable with a new one.
Q1: Shows "no signal" after a certain period of time.
Q2: Why do I have to plug in two cords if I don' t have
a USB-C port on my laptop?
Q3: My monitor won't power on.
Q4: The screen flicker black when displaying content.
Common Problems and Solutions
Notices
Before setting up this Type-C Portable Display, carefully read all the documentation that came with
the package.
To prevent fire or shock hazard, never expose this Type-C Portable Display to rain or moisture.
Never try to open this Type-C Portable Display cabinet.
Before using this Type-C Portable Display, make sure all cables are correctly connected and the
power cables are not damaged.
Avoid dust,humidity,temperature extremes and bumpy places.
Never push objects or spill liquid of any kind into the slots on this Type-C Portable Display cabinet.
If you encounter technical problems with this Type-C Portable Display, contact our tech support
(suppor[email protected])immediately.
08

14.0” Monitor portátil
GUÍA DEL USUARIO
NEOSCREEN T14S
www.neofyte.com
NEOFYTE

Bolsa x 1Monitor x 1
Cable tipo C a
tipo C x 1
Cable tipo C a
USB-A x 1
Cargador x 1
Cable Mini HDML a
HDMI x 1
Lista de paquetes
Puerto Mini HDMI: Recibe señales de audio/video
Función USB tipo C Puerto 1/Puerto 2 : USB C 3.1 admite inserción reversible y carga inversa.
Compatible con fuente de alimentación USB PD2.0, admite entrada de 5V /9V /12V /15V /20V
Mini HDMI Por
Función USB tipo C Puerto 2
Función USB tipo
C Puerto 1
Power / Return Button
Turning Button
Botón de encendido/retorno: mantenga presionado ~3 segundos para encender/apagar el monitor.
Botón giratorio:
Menú OSD: presione para ingresar al menú OSD.
Interruptor giratorio ARRIBA/ABAJO: cuando esté en un menú, presione el botón giratorio para
seleccionar el elemento del menú.
Ajuste de brillo/volumen: cuando no esté en un menú, presione el botón giratorio hacia ARRIBA una
vez para acceder rápidamente al brillo. O presione el botón giratorio hacia ABAJO una vez para
acceder rápidamente al volumen.
Puerto de salida de audio de 3,5 mm:
Para conectar a un dispositivo de audio externo compatible con 3,5 mm.
Introducción al monitor
3.5 mm Audio Out Port
09

Conectar monitor con dispositivos
1. Condición de conexión
Este monitor no tiene una batería incorporada. Antes de conectar el monitor, asegúrese de que
haya suficiente entrada de energía (5V/3A O SUPERIOR).
2. PORTÁTIL (Con Tipo-C)
Nota:Si desea ajustar el brillo y el volumen por encima del 80 %, asegúrese de que la fuente de
alimentación externa de 5 V/3 A o superior esté conectada.
Nota: No todas las computadoras portátiles con puerto tipo C pueden funcionar con el monitor
NEOFYTE. Verifique el puerto Tipo-C de su computadora portátil si es compatible con la
transmisión de señales de audio y video.
Type-C to Tpye -C
Computer Monitor
3.PC/portátil (con puerto HDMI)
OR
Nota: el puerto HDMI no es compatible con la transmisión de energía. Entonces, cuando use una
conexión HDMI, debe conectar una fuente de alimentación adicional (5V/3A o superior).
Computer Monitor
Mini HDMI to
HDMI Cable
Computer Monitor
Mini HDMI to HDMI Cable
USB-A zu Tpye-C
Type-C to
USB-A
External Power
Supply
10

4. TELÉFONO (Con Tipo-C)
Cuando no hay fuente de alimentación externa, el teléfono celular suministrará energía al monitor.
(El modo de ahorro de energía está activado, el brillo se ajustará automáticamente al 15%)
Cuando la fuente de alimentación externa está conectada, el teléfono celular
también se cargará a través de la fuente de alimentación externa.
(Para asegurarse de que el monitor y el teléfono tengan suficiente corriente de trabajo, por favor
use al menos un cargador de 15 W o un banco de energía como fuente de alimentación externa).
Nota: solo funciona directamente con el teléfono celular a través del puerto tipo C con todas las
funciones.
Para iPhone: necesita un adaptador Lightning a HDMI.
Mobile
Phone Monitor
External Power Supply
Of5v/3A Or Above
Type-C to Tpye -C
Type-C to USB-A
5.Otros dispositivos
Nota:conecte primero el cable de alimentación y luego el cable Mini HDMI a HDMI para garantizar
una transmisión fluida de las señales.
Al conectar el interruptor de Nintendo, se requieren 30 W o más para el adaptador de corriente
Monitor
Mini HDMI to HDMI Cable
Monitor
Mini HDMI to HDMI Cable
Type-C to USB-A
External Power
Supply
Type-C to
USB-A
External Power
Supply
11

Configuración del modo Duplicar y extender
1. Conecte su monitor NEOFYTE a una toma de corriente y un puerto disponible en su PC.
2. Haga clic con el botón derecho en el escritorio y seleccione la resolución de pantalla (Ventana 7/8) o
la configuración de pantalla (Ventana 10).
3. Haga clic en la lista desplegable de múltiples pantallas y luego seleccione extender estas pantallas
o duplicar estas pantallas, tenga en cuenta que si no puede ver los monitores adicionales en la lista,
haga clic en detectar. Si no funciona, intente reiniciar su computadora y siga los pasos nuevamente.
Configuración de rotación de pantalla
1. Conecte su monitor NEOFYTE a una toma de corriente y un puerto disponible en su PC.
2. Haga clic con el botón derecho en el escritorio y seleccione la resolución de pantalla (Windows 7/8) o la configura-
ción de pantalla (Ventana 10).
3. Haga clic en la lista desplegable de orientación y luego seleccione Pantalla horizontal o vertical.
Nota: Si no puede ver la opción de orientación en su computadora portátil/PC, verifique si su computadora portátil/PC
tiene esta función
12

Introducción a la función OSD
1. Pulse el botón giratorio para activar el menú OSD
2. Desplace el botón giratorio hacia arriba y hacia abajo para elegir su configuración
3. Presione el botón giratorio para confirmar
4. Presione el botón de encendido para volver a la página anterior
Especificaciones
Nombre del producto: Monitor portátil tipo C NEOFYTE
Tamaño de pantalla: 14.0 pulgadas Tipo de panel: IPS Relación de aspecto: 16:9
Resolución: 1920*1080 Color de pantalla: 16,7 M
Temperatura de color: 6800K
Ángulo visual: H: 85°/85°Min V: 85°/85°Min
Relación de contraste: 1200:1 Brillo: 250 cd/m2 Gama de colores: 45 %
Interfaz de entrada: Mini HD (señal de video),
Función completa tipo C (datos de video, fuente de alimentación ISDN), interfaz de salida: altavoz
de interfaz de auriculares de 3,5 mm: altavoces integrados (1 W * 2)
Frecuencia de actualización: 60Hz
*Specifications are subject to change without notice.
13

Ajusta la relación de aspecto a 4:3/WIDE.
El rango de ajuste es de 0 a 100.
El rango de ajuste es de 0 a 100.
Contiene siete modos (modos estándar/juego/película/texto/F-
PS/RTS/ECM).
Seleccione ON u OFF para habilitar o deshabilitar la función de
relación de contraste dinámico.
El rango de ajuste es de 0 a 4.
Contiene tres modos de color preestablecidos
(estándar, frío, cálido)
y modo de usuario.
Brillo
Aspecto
Brillo
Contraste
ECO
RDC
Nitidez
Imagen
Temperatura
de color
Seleccione elidiomaOSD. Las selecciones son:inglés, francés,
alemán, chinosimplificado, italiano,español,portugués,turco,
polaco,holandés,japonés, coreano.
El rango de ajuste es de 0 a 100.
El rango de ajuste es de 0 a 100.
Verde
Azul
Configuración
OSD El rango de ajuste es de 10 a 60.
El rango de ajuste es de 0 a 100.
El rango de ajuste es de 0 a 100.
El rango de ajuste es de 0 a 100.
Idioma
Temperatura
de color
rojo
OSD V. POS.
OSD V. POS.
Temporizador
OSD
Transparencia
Reiniciar
Selecciona RESET para revertir todas las configuraciones al
modo predeterminado de fábrica.
Seleccione el tiempo para que el monitor se apague automáti-
camente (10/20/30/40/50/60/120/240 min)
Seleccione ON u OFF para abrir el modo HDR.
Reiniciar
Apagado
automático
MODO HDR
Luz azul baja
Volumen
Varios.
Contiene dos fuentes de señal Tipo-C y HDMI.
El rango de ajuste es de 0 a 100. (0/25/50/75/100)
El rango de ajuste es de 0 a 100.
Fuentedeseñal
14

Dispositivos y modelos compatibles
1.Teléfono
Razer
OnePlus
Sony
HONOR
NOKIA
OPPO
Más
Marca
SAMSUNG
HUAWEI
Modelo
P20 / P20 RS / P20 Pro / P30 / P30 Pro / Mate 10 / 10 Pro20 / 20 X / 20 Pro
/ 30 / 30 Pro / RS
S8 / S8+ / S9 / S9+ / S10 / S10+ / S20 / Note 8Note 9 / Note 10 / Note 10+
(La connexion de Samsung nécessite une alimentation supplémentaire)
Razer Phone / Razer Phone 2
OnePlus 7 / OnePlus 7 Pro / OnePlus 7T
Xperia 1 / Xperia 5 / Xperia XZ3
Note 10, V20 /30
U Ultra
R17 Pro /Reno /Find. LG: G5 /G6 /G7
Para actualizarse.
NOKIA 9 Pure / View. ASUS: ROG / ROG2
HTC
2.Computadora portátil
Marca
Apple
HUAWEI
Microsoft
ASUS
Lenovo
DELL
Google
Razer
Nvidia
More
Modelo
MacBook 12in /2016 /2017 Pro MacBook Air 2018 iPad Pro 2018-2020
MateBook D / MateBook E / MateBook X
MateBook X Pro / MateBook 13/MateBook 14 /MagicBook
SurfaceGo / Surface Book 2
ZenBook 3 / ZenBook 3 Pro / ZenBook X / U4100 U4100UN / AU5100UQ /G3 /G5 /G7 /
Inspiron 5000Inspiron 7000 / XPS13 /XPS15
Mi Air 12.5 / Air 13.3 / Pro 15.6 / Pro 15.6 GTX
Y7000 / Y7000P / Y900K / YOGA 6 PRO ThinkPad X1 / Carbon / MIIX 720 /Yoga 5 Pro
G3 / G5 / G7 / Inspiron 5000 / Inspiron 7000 / XPS13XPS15 / Latitude 5285 /Latitude 3520
Pixelbook /PielBook Pen
Blade Stealth / Blade Pro
Geforce RTX 2070 / Geforce RTX 2080 Geforce RTX 2080Ti
To be updated. Compatible with most PCs or Laptops.
15

1. Verifique si los cables están sueltos, vuelva a enchufarlos y asegúrese de que estén conectados
correctamente;
2. Reemplace el cable por uno nuevo y vea si sucede lo mismo
3. Si ha intentado todo lo anterior y el problema no se resuelve, comuníquese con nuestro correo
electrónico de posventa.
R: El cable USB-C a USB-C es lo suficientemente fuerte como para comunicar la potencia y la señal de
transmisión a través de un solo cable. Si no puede usar el cable USB-C a USB-C, debe usar el cable
HDMI junto con el cable USB-A a USB-C, uno para transmisión y otro para alimentación.
R: Si no está usando un cable USB-C, asegúrese de que su monitor esté conectado a su computadora
portátil con el cable HDMI y el USB-A a USB-C. Luego, mantenga presionado el botón de encendido/a-
pagado para encender el monitor.
R: Verifique si la conexión está suelta, si no hay ningún problema con la conexión, puede deberse a
una fuente de alimentación insuficiente, conecte el adaptador y utilícelo nuevamente, o reemplace el
adaptador de corriente o el cable de datos por uno nuevo.
P1: Muestra "sin señal" después de un cierto período de tiempo.
P2: ¿Por qué tengo que enchufar dos cables si no tengo un puerto USB-C
en mi computadora portátil?
P3: Mi monitor no se enciende.
P4: La pantalla parpadea en negro cuando se muestra contenido.
Problemas comunes y soluciones
Avisos
Antes de configurar esta pantalla portátil tipo C, lea detenidamente toda la documentación que se
incluye en el paquete.
Para evitar el riesgo de incendios o descargas eléctricas, nunca exponga esta pantalla portátil tipo
C a la lluvia o la humedad.
Nunca intente abrir esta vitrina portátil tipo C.
Antes de usar esta pantalla portátil tipo C, asegúrese de que todos los cables estén conectados
correctamente y que los cables de alimentación no estén dañados.
Evite el polvo, la humedad, las temperaturas extremas y los lugares con baches.
Nunca introduzca objetos ni derrame líquidos de ningún tipo en las ranuras de esta vitrina portátil
tipo C.
Si encuentra problemas técnicos con esta pantalla portátil tipo C, comuníquese con nuestro
16
Other manuals for NEOSCREEN T14S
2
Table of contents
Languages:
Other NEOFYTE Monitor manuals
