Nexx X. WST 2 User manual

X. WST 2

At NEXX, we do not just engineer helmets, we tech emotions.
We believe in the heat of passion - parts of life getting new blood.
HELMETS FOR LIFE is our motto, beyond the protection, past
excellence, that any motorcyclist regardless of age or style
lives the moment they wear NEXX.

CONTENIDO
CONTEÚDO
CONTENT
CONTENU
INHALT
08
09
10
11
12
15
04
05
06
ERGO PAD DING
INSTRU CTION MANUAL
MAN UEL D´INSTRUCTION
BEDIENUNGSANLEITUNG
MAN UAL DE INSTRU CCIONES
MAN UAL DE INSTRU ÇÕES
07
HOW TO REMOVE THE INNER LINING?
COMMEN T PUIS-JE ENLEVER L'IN TERIEU R?
WIE WIR D DAS FUTTER EN TNOMMEN ?
CÓMO RETIRAR EL FORRO?
COMO RETIRAR O FORRO?
HOW TO PL ACE THE INNER LINING?
COMMEN T REMETTR E L'IN TERIEUR?
WIR WIRD DAS F UTTER EINGESETZT?
CÓMO COLOC AR EL F ORR O?
COMO COLOCAR O FORRO?
HOW TO PL ACE THE VISOR?
COMMEN T REMETTR E L’ÉC RAN?
WIE WIR D DAS VISIER ANGEBRACH T?
CÓMO COLOCAR LA PANTALLA?
COMO COLOC AR A VISEIR A?
HOW TO CLEAN THE VI SOR?
COMMEN T NÉTTOYER VOTRE ÉCR AN ?
WIE WIR D DAS VISIER
¿CÓMO LIMPIAR LA PANTALLA?
COMO LIMPAR A VISEIRA?
HOW TO REMOV E T HE VISOR ?
COMMEN T RETIRER L’ÉCR AN ?
WIE WIR D DAS VISIER EN TFERNT ?
CÓMO QUITAR L A PANTAL LA?
COMO REMOVER A VISEIRA?
17
16
18
20
21
23
HOW TO USE THE IN NER SU N VISOR?
COMMEN T UT ILISER L' ÉCRAN SO LAIRE?
WIE WIR D DIE SONNENB LEN DE B EDI ENT?
USO LAS GAFAS D E SOL INTERIORES?
COMO USAR OS ÓCULOS DE SOL INTERIORES?
PINLOCK
VENTILATIONS
VENTILATION
BELÜFTUNG
VENTILACIONES
VENTILAÇÕES
X-COM
SIZE CHART
SOIN À PRENDRE
GRÖßENTABELLE
CUAD RO D E TALLAS
TABELA D E MEDIDAS
HELMET C ARE
SOIN À PRENDRE
PFLEGE
CUIDADOS QUE SE DEBEN DE TENER
CUIDADOS A TER
HELMET F EATURES
CARACTÉRISTIQUES DU C ASQUE
EIGENSCHAFTEN DES H ELMS
CARACTERÍSTICAS D EL CASC O
CARACTERÍSTICAS D O C APACETE
EMERGENCY SYSTEM
SYSTÈME D'URGENC E
SICHERHEITSSYSTEM
SISTEMA DE EMERGENCIA
SISTEMA DE EMERGÊNCIA
13
14
HOW TO REMOVE DE IN NER SU N VISOR?
COMMEN T RETIRER L'ÉCRAN SOLAIRE?
WIE WIR D DIE SONNENB LEN DE ENTNOMMEN?
CÓMO QUITAR L AS GAFAS DE SOL IN TERIORES?
COMO REMOVER OS ÓCULOS DE SOL INTERIORES?
HOW TO PL ACE THE INNER SUN VISOR?
COMMEN T REMETTR E L'ÉCRAN SOLAIRE?
WIR WIRD D IE SO NNENBLENDE ANGEBR AC HT?
CÓMO COLOCAR LAS GAFAS D E SOL INTERIORES?
COMO COLOCAR OS ÓCULOS DE SOL INTERIORES?
HOW TO REMOVE VENTILATION?
COMMEN T RETIRER LA VENTILATION?
WIE WIR D DIE BELÜFTUNG EINGEBAUT?
CÓMO QUITAR EL VENTILACIÓN?
COMO REMOVER VENTILAÇÃO F RONTAL?
4
INSTRUCTION MANUAL
MANUEL D´INSTRUCTION
BEDIENUNGSANLEITUNG
MANUAL DE INSTRUCCIONES
MANUAL DE INSTRUÇÕES
Please read this manual very carefully before wearing your helm et and keep it in a safe
place. For a correct use and for your safety, please pay attention to following instructions.
The main function of the helmet is to protect your head in case of impact. This helmet is
made to absorb some of the energy of a blow by partial destruction of its component
parts and, even though damage may not be apparent, any helmet which has suffered an
impact in an accident or received a similarly severe blow or other abuse should be
structure of the helmet or it´s component parts.
S´il vous plaît, lire ce manuel très attentivement avant de porter votre casque et
guardez-le dans un endroit sûr. Pour une utilisation correcte et aussi pour votre sécurité,
prêter attention aux instructions suivantes. La principale fonction du casque est de
protéger votre tête en cas d´impact. Ce casque est conçu pour absorber une partie de
l´énergie du choc par destruction partielle des com posants de la calotte. Tout casque
ayant subi un choc consécutif à un accident ou un choc sim ilaire, doit être remplacé,
ce casque ne doit comporter aucune altération de sa structure et de ses composants.
Bitte lesen Sie dieses Handbuch sehr sorgfältig durch, bevor Sie Ihren Helm tragen und
verwahren Sie es an einem sicheren Platz. Zur ordnungsgemä en Verwendung wie auch
zu Ihrer Sicherheit halten Sie sich bitte an die folgenden Anweisungen. Die Hauptfunktion
des Helmes ist es, Ihren Kopf im Falle von Stö en zu schützen. Dieser Helm wurde so
konzipiert, dass er Teile der Schlagenergie absorbiert, durch die eine teilweise Zerstörung
seiner Bestandteile entstehen kann. Selbst wenn der Schaden nicht offensichtlich sein
sollte, sollte jeder Helm, der bei einem Unfall einen sto oder eine ähnlich schwere
Beeinträchtigung erlitten hat ausgetauscht werden.
Lea atentamente este manual antes de usar el casco y guárdelo en un lugar seguro.
Para su seguridad y un uso correcto, respete las siguientes instrucciones. La principal
función del casco es proteger la cabeza en caso de impacto. Este casco está disenädo
para absorber parte de la energía de un impacto por destrucción parcial de algunos
componentes del casco. Cualquier casco que haya sufrido un fuerte impacto en un
accidente o haya recibido un golpe equivalente, deberá sustituirse, incluso si el däno no
alteración de su estructura o de sus componentes.
Por favor, leia este manual cuidadosamente antes de usar o seu capacete e mantenha-o
em local seguro. Para uma correcta utilização e para sua segurança, tenha em atenção
as seguintes instruções. A função principal do capacete é proteger a sua cabeça em
caso de impacto. Este capacete foi concebido para absorver em parte a energia de um
impacto por destruição parcial de alguns dos componentes do casco. Qualquer capacete
que tenha sofrido um forte impacto num acidente ou recebido um choque equivalente,
tem de ser substituído, mesmo que os danos não sejam aparentes. Para preservar toda
seus componentes.
EN
FR
DE
ES
PT

EN
FR
DE
ES
PT
5
ERGO
PADDING
the helmet to the shape of the head;
Tous les casque vont avec un “kit de remplacement de mousses” pour
permettre une parfaite adaptation du casque à la forme de la tête.
Die grö e des helms kann mittels innerer schaumstodffeinsätze geändert
werden, sodass der helm sich optimal an die kopfform anpasst;
Sistema de ajuste de tamanö del casco através de almohadillas interiores
que permiten un mayor relleno de acuerdo con el formato de la cabeza;
O sistema de ajuste de tamanho do capacete através de esponjas
interiores que permitem maior enchim ento de acordo com o formato da cabeça.
A
x2
BB
front
back
A
BB
6
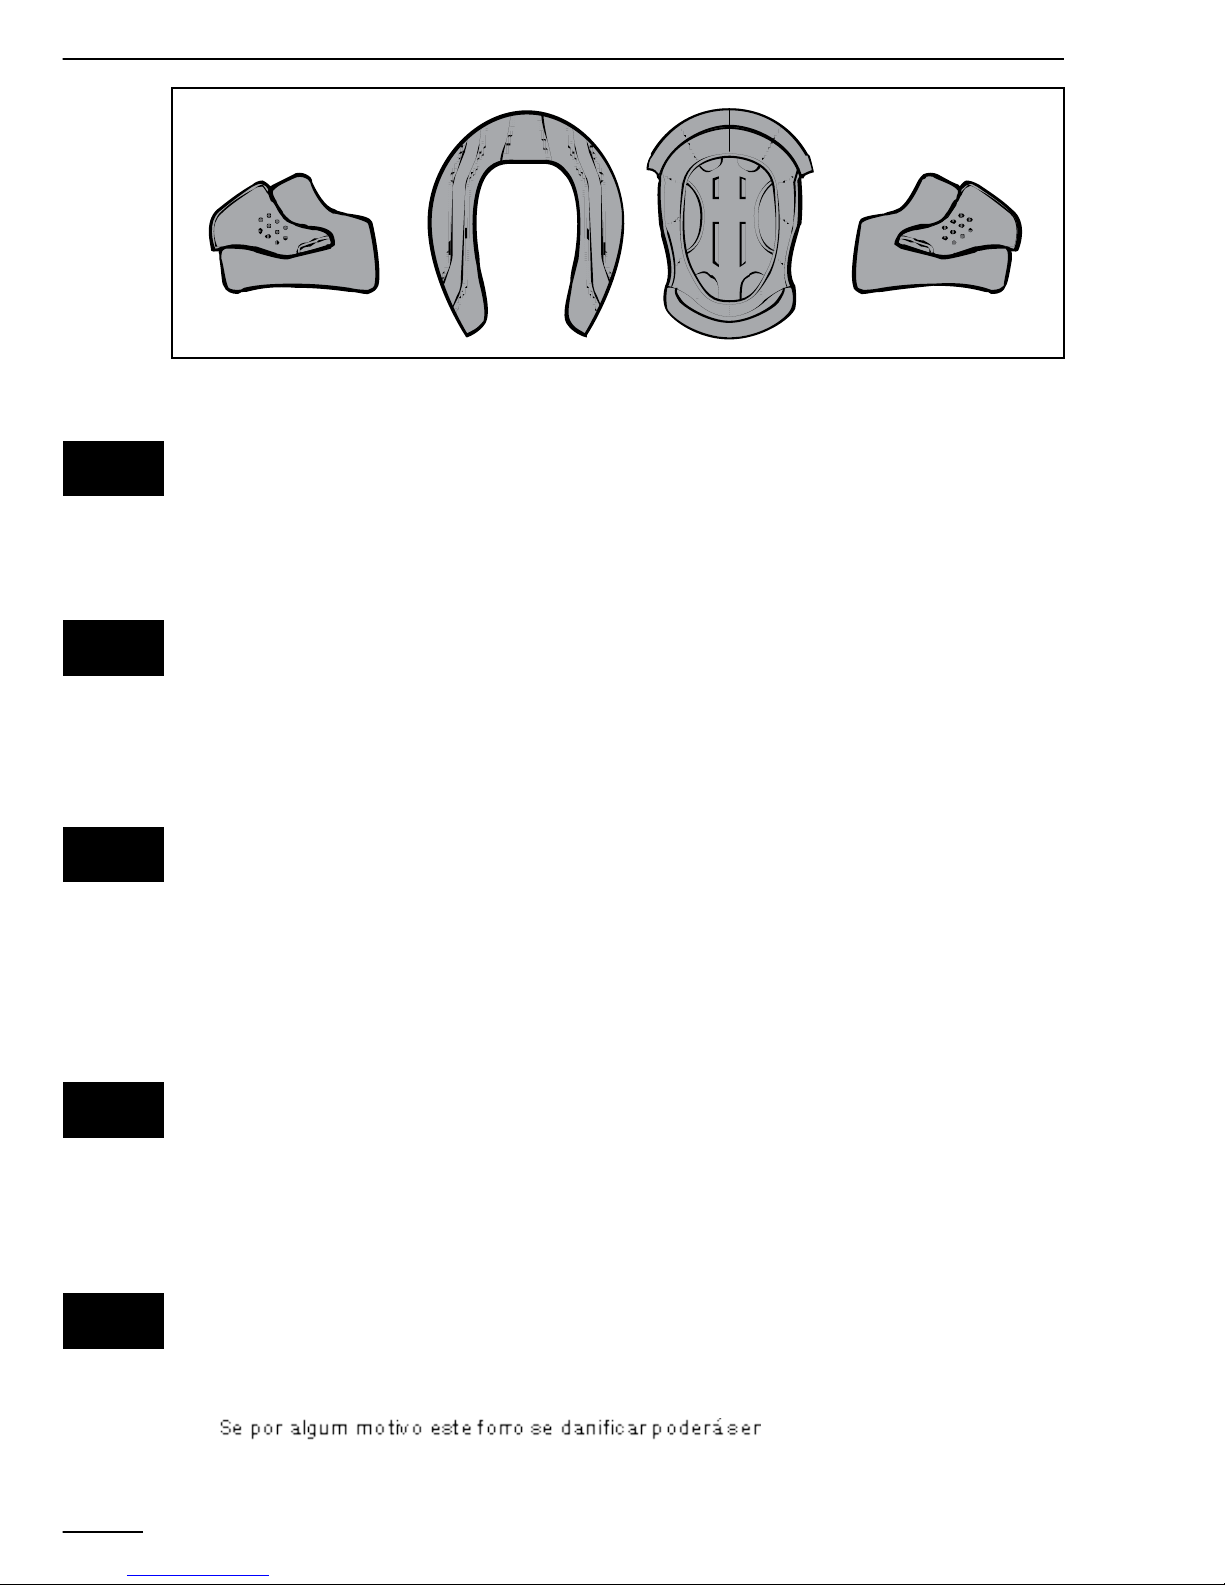
The lining of the helmet has the following characteristics:
- Removable,
- Anti-allergy
- Anti-sweat
This lining can be removed and washable, as shown in the picture.
If for some reason this lining is damage it can be easily replaced.
L’interieur du casque a les caractéristiques suivantes:
- Démontable;
- Anti-allergie
- Anti-transpiration
L’interieur peut être enlevé et lavable, comme indiqué dans l'image.
Si pour une raison quelconque l’interieur est endommagé il peut être
facilement remplacé
Das Innenfutter des Helmes besitzt die folgenden Eigenschaften:
- Austauschbar;
- Anti-allergisch;
- Anti-transpirant;
Die Fütterung kann entnommen werden und ist somit waschbar.
Um die Ausfütterung zu reinigen, nutzen Sie bitte nur Wasser und Seife.
Lassen Sie sie auf natürliche Weise trocknen und wringen Sie die Teile
nicht aus. Wenn aus welchem Grund auch immer diese Ausfütterung
einmal beschädigt sein sollte, kann sie einfach ausgetauscht werden.
El forro de este casco presenta las siguientes características:
- Desmontable,
- Antialergénico,
- Antitranspirante.
Puede quitarse y lavarse, conforme se muestra en el esquema.
Si, por algún motivo, el forro está dañado, podrá reemplazarse
con facilidad.
O forro deste capacete apresenta as seguintes características:
- Amovível,
- Anti-alérgico
- Anti-transpirante.
Este pode ser removido e lavável, conforme apresentado no esquema.
facilmente substituído.
EN
FR
DE
ES
PT

HOW TO REMOVE THE INNER LINING?
COMMENT PUIS-JE ENLEVER L'INTERIEUR?
WIE WIRD DAS FUTTER ENTNOMMEN?
CÓMO RETIRAR EL FORRO?
COMO RETIRAR O FORRO?
7
1_ 2 _
3_ 4 _
5_ 6_

8
HOW TO PLACE THE INNER LINING?
COMMENT REMETTRE L'INTERIEUR?
WIR WIRD DAS FUTTER EINGESETZT?
CÓMO COLOCAR EL FORRO?
COMO COLOCAR O FORRO?
1_ 2 _
5 _
4 _3 _
6 _

HOW TO PLACE THE VISOR?
COMMENT REMETTRE L’ÉCRAN?
WIE WIRD DAS VISIER ANGEBRACHT?
CÓMO COLOCAR LA PANTALLA?
COMO COLOCAR A VISEIRA?
9
2 _1_ VISOR PIN MECHANISM HOLE
4 _
5 _
3 _ ALIGN THE VISOR PIN WITH
THE MECHANISM HOLE

10
HOW TO CLEAN THE VISOR?
COMMENT NÉTTOYER VOTRE ÉCRAN?
WIE WIRD DAS VISIER
¿CÓMO LIMPIAR LA PANTALLA?
COMO LIMPAR A VISEIRA?
To clear the visor without effecting its characteristics should be used only soapy
water (preferably distilled) and a soft cloth. If the helmts is deeply dirty (ex.Insect
remains) can add a little liquid from the dish to water. Remove the visor from the
helmet before carrying a deeper cleaning. Never use objects to clean the helmet
that may damage/scratch the visor. Always store the helmet in a dry place and
protected from light, preferably in the bag provided by NEXX HELMETS.
utilisés que l´eau savonneuse (distillée de préférence)et un chiffon doux. Si le
casque est très sale (ex. Reste insectes) on peut ajouter un peu de liquide de laver
la vaisselle à l´eau. Retirer l´écran du casque avant de procéder à un nettoyage plus
profond. Ne jamais utiliser des objects pour nettoyer le casque pour eviter des
dommages / rayer l´écran. Toujours stocker le casque dans un endroit sec et
protégé de la lumière, de préférence dans le sac fourni par NEXX HELMETS.
Um das visier, ohne debei die eigenschaften zu reinigen, sollten sie nur seifenwasser
(vorzugsweise destilliert) und einem weichen tuch. Sollte der helm sein tief schmutzig
sie das helmvisier, bevor sie eine gründlichere reinigung . Verwenden sie niemals
objekte, um den helm beschädigen / verkratzen das visier zu reinigen. Halten sie
den helm an einem trockenen ort und vor licht geschützt, vorzugsweise in der
tasche durch NEXX HELMETS zur verfügung gestellt.
Para limpiar la visera sin afectar a sus características, deberá utilizar únicamente
agua con jabón (preferentemente destilada) y un paño suave. En caso de que el
casco esté muy sucio ( por ejemplo, con insectos), podrá añadir al agua un poco
de liquido lavavajillas. Retire la visera del casco antes de realizar una limpieza
más profunda. Para limpiar el casco no utilice nunca objectos que puedan dañar
o rayar la visera. Guarde siem pre el casco en un lugar seco y protegido de la luz,
preferentemente en la bolsa suministrada por NEXX HELMETS.
Para limpar a viseira sem afectar as suas características, deverá utilizar apenas água
com sabão (de preferência destilada) e um pano macio. No caso de o capacete estar
profundamente sujo ( ex. Insectos) poderá acrescentar um pouco de liquido da loiça
à àgua. Retire a viseira do capacete antes de efectuar uma limpeza mais profunda.
viseira. Guarde sempre o capacete num local seco e protegido da luz, de preferência
no saco fornecido pela NEXX HELMETS.
EN
FR
DE
ES
PT

11
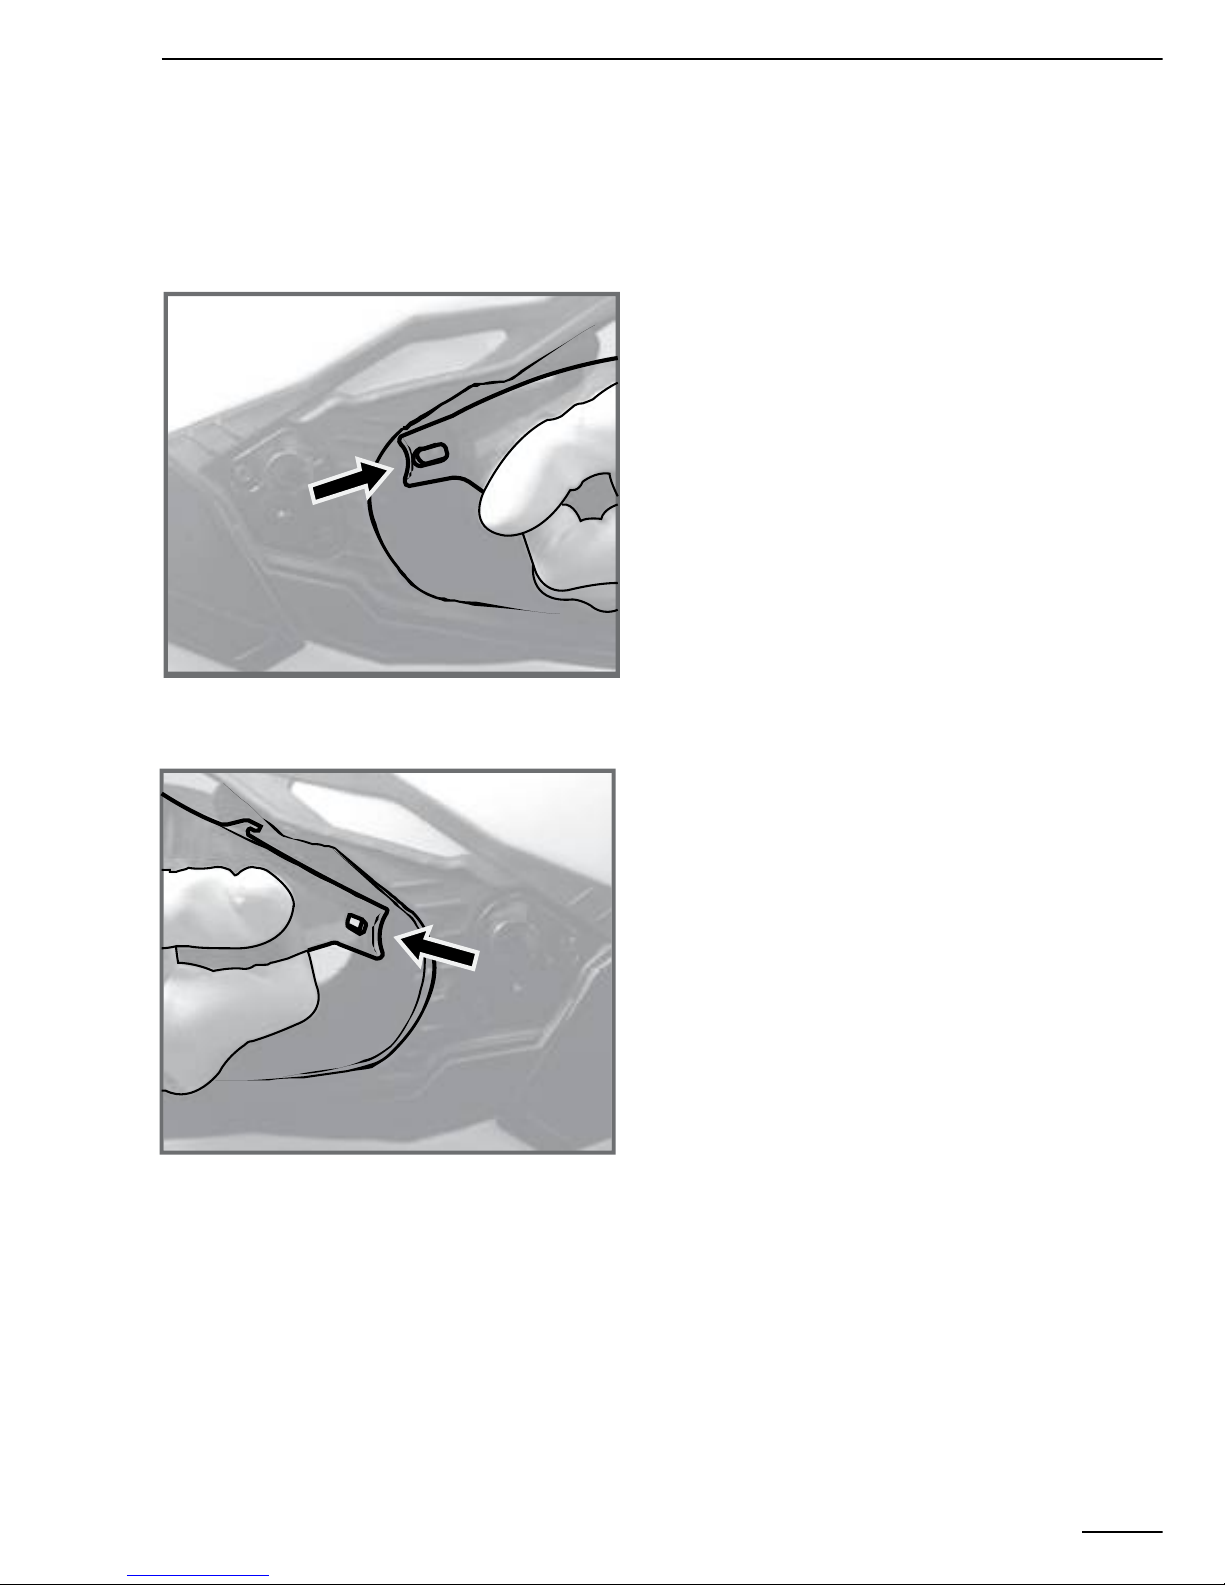
HOW TO REMOVE THE VISOR?
COMMENT RETIRER L’ÉCRAN?
WIE WIRD DAS VISIER ENTFERNT?
CÓMO QUITAR LA PANTALLA?
COMO REMOVER A VISEIRA?
1_ 2 _
3 _ 4 _
5 _
OPEN DE V ISOR ALL
THE WAY TO THE TOP
PU LL T O R EL EASE

12
HOW TO USE THE INNER SUN VISOR?
COMMENT UTILISER L'ÉCRAN SOLAIRE?
WIE WIRD DIE SONNENBLENDE BEDIENT?
USO LAS GAFAS DE SOL INTERIORES?
COMO USAR OS ÓCULOS DE SOL INTERIORES?
1 _ OPEN SUN VISOR 2 _ CLOSE SUN VISOR
HOW TO REMOVE DE INNER SUN VISOR?
COMMENT RETIRER L'ÉCRAN SOLAIRE?
WIE WIRD DIE SONNENBLENDE ENTNOMMEN?
CÓMO QUITAR LAS GAFAS DE SOL INTERIORES?
COMO REMOVER OS ÓCULOS DE SOL INTERIORES?
1 _
2 _
PULL
PULL
13

14
HOW TO PLACE THE INNER SUN VISOR?
COMMENT REMETTRE L'ÉCRAN SOLAIRE?
WIR WIRD DIE SONNENBLENDE ANGEBRACHT?
CÓMO COLOCAR LAS GAFAS DE SOL INTERIORES?
COMO COLOCAR OS ÓCULOS DE SOL INTERIORES?
- PUT THE MECHANISM DOWN
- PLACE AND PUSH THE
SUN VISOR
- PUT THE MECHANISM DOWN
- PLACE AND PUSH THE
SUN VISOR
1 _
2 _
15
EN
FR
DE
ES
PT
PINLOCK
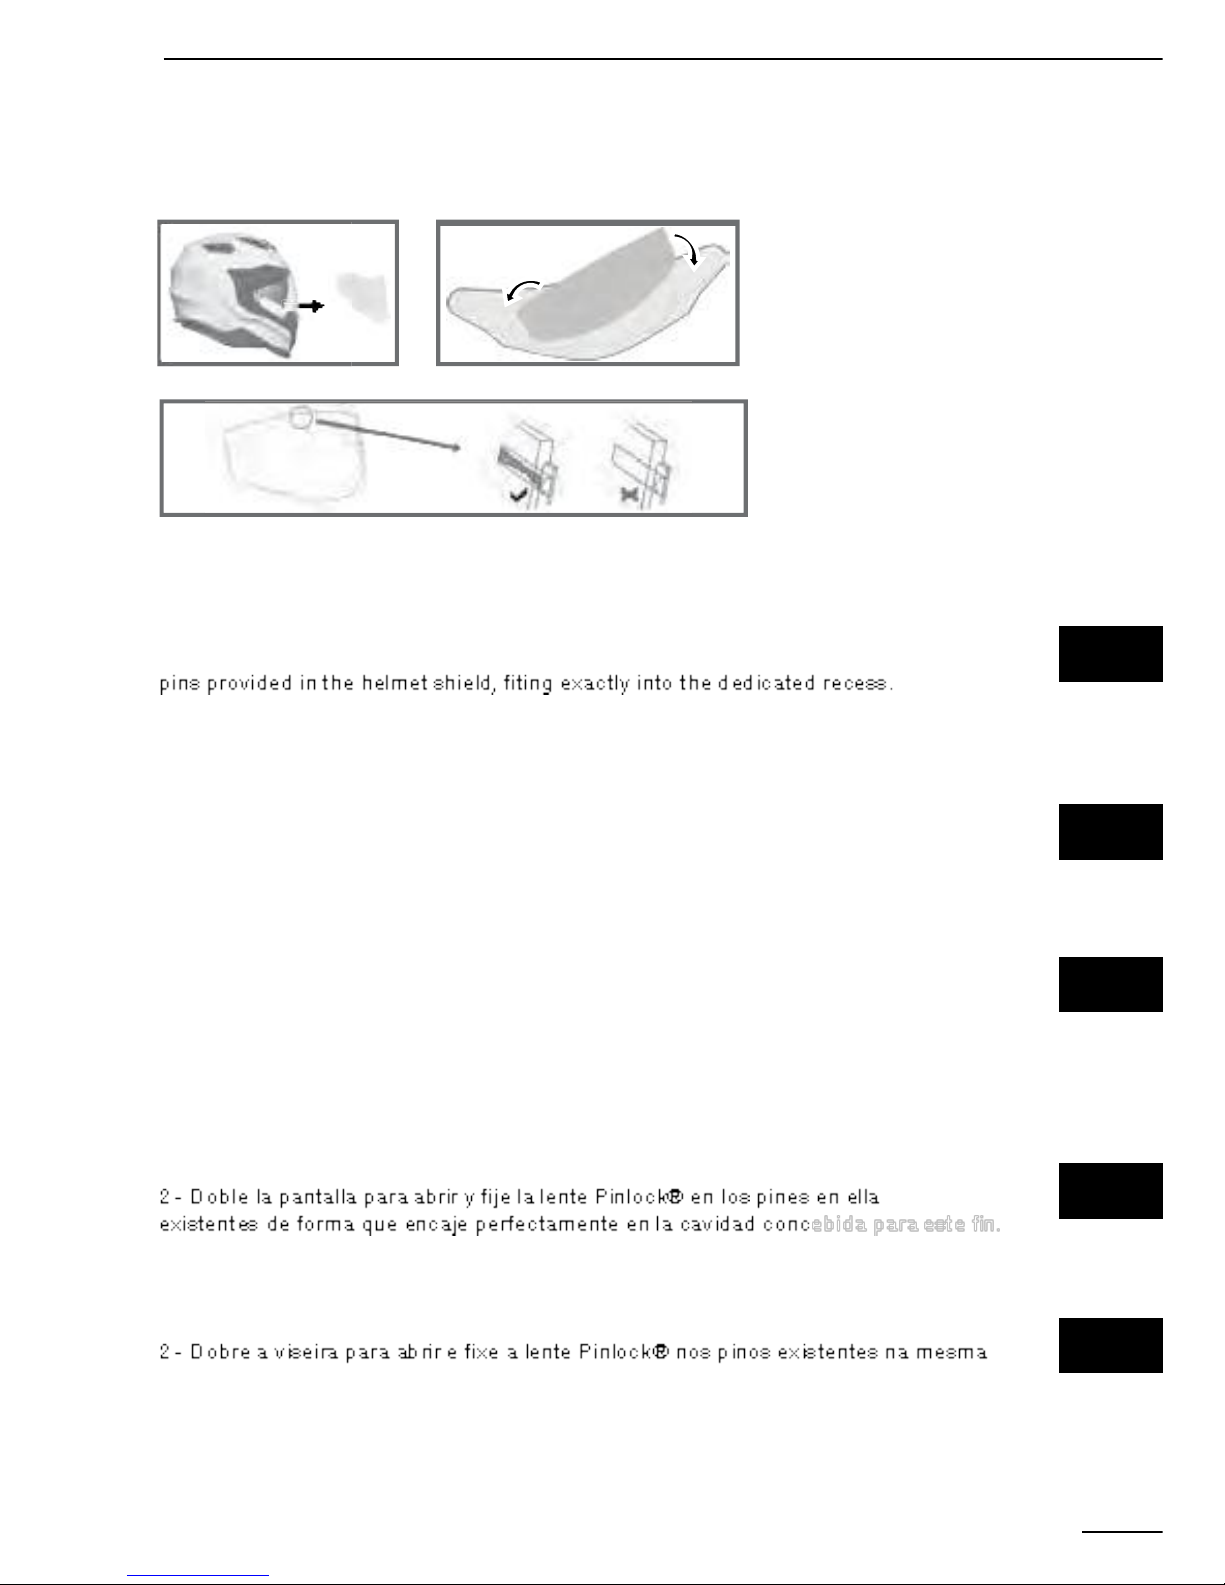
1 - Remove the helmet shield
2 - Bend the helmet shield and place the Pinlock® lens between the two
3 - The silicon seal on the Pinlock® lens must make full contact with the helmet
shield in order to avoid any condensation forming between the helmet shield
and the Pinlock® lens.
1 - Changé l’écran
2 - Fléchir l’écran et placer le Pinlock entre les 2 boutons fournis avec
l’écran, le positionner exactement dans la cavité de l’écran prévus à cette effet.
3 - Le joint en silicone sur le Pinlock doit être totalement en contact avec la
surface interne de l’écran pour éviter toute condensation entre l’écran et le Pinlock
1 - Demontieren Sie das Visier
2 - Spreizen Sie das Visier und platzieren Sie die Pinlock-Scheibe zwischen die
beiden Pins des Außenvisiers. Die Pinlock-Scheibe muss genau in die vorgegebene
Aussparung des Außenvisiers passen.
3 - Der Silikonstreifen am Rand der Pinlock-Scheibe muss im gesamten
Bereich Kontakt zum Außenvisier haben. Dies ist notwendig um jegliche Art
von Kondenswasserbildung zu vermeiden.
1 - Retire al pantalla del casco.
3 - El sellador de silicona en la lente Pinlock® debe estar en contacto con la pantalla
de forma que se evite la condensación entre la lente Pinlock® y la pantalla.
1 - Retire a viseira do capacete
de maneira a que ele encaixe perfeitamente na cavidade dedicada ao mesmo.
3 - O selante de silicone na lente Pinlock® deve estar em contacto com a viseira
de maneira a evitar a condensação entre a lente Pinlock® e a viseira.
1_
3_
2_

16
HOW TO REMOVE VENTILATION?
COMMENT RETIRER LA VENTILATION?
WIE WIRD DIE BELÜFTUNG EINGEBAUT?
CÓMO QUITAR EL VENTILACIÓN?
COMO REMOVER VENTILAÇÃO FRONTAL?
CHIN AIR INTAKE
1 _
REMOVE T HE AIR VENT CAP
2 _1_ OPEN
CLOSE

17
VENTILATIONS
VENTILATION
BELÜFTUNG
VENTILACIONES
VENTILAÇÕES
1 _ CLOSE 2 _ 3 _HALF OPEN FULL OPEN
TOP SHELL AIR INTAKE
CHIN AIR INTAKE
TOP VEN TILATION
1 _ 2 _CLOSE OPEN

18
X-COM
The X.WED 2 model is by Default Equipped to Accommodate the NEXX Helmets
X-COM Communications System.
Le modèle X.WED 2 est préparé pour recevoir le système Intercom Nexx X-Com.
X.WED 2 wird mit NEXX X-COM Interkom-Vorbereitung geliefert.
El modelo X.WED 2 está preparado para la instalación del sistema de
intercomunicación NEXX X-COM
O modelo X.WED 2 está preparado para a instalação do sistema intercom
NEXX X-COM
REMOVE T HE
X-COM COVER
1 _
INSERT X - COM RIM
2 _
INSERT X - COM
3 _
EN
FR
DE
ES
PT

19
5 _
6 _
4 _
MICROPHONE
BATERY
LOUDSPEAKER
X-COM

20
Emergency System to rem ove CheckPads in case of accident, will allow that the helmet
can be removed minimizing the risk of increasing/creating an injurie to the user;
USE THIS SYSTEM ONLY IN CASE OF AN EMERGENCY!
Système pour retirer les latéral de confort en cas d’incident. Ce système permet de
minimiser les risques de créer ou d’augmenter toutes lésions de l’utilisateur;
A UTILISER UNIQUEMENT EN CAS D'URGENCE!
Sicherheitssystem zum Entfernen der Wangenpolster im Falle eine Unfalls. Dieses
System ermöglicht einen sicheren Ausstieg aus dem Helm und vermindert die
Verletzungsgefahr bei der betroffenen Person Benutzen;
SIE DIESES SYSTEM NUR IM NOTFALL!
Sistema de Emergencia para retirar las almohadillas laterales en caso de accidente, que
permite extraer el casco disminuyendo el riesgo de agravar o crear una lesión al usuario;
USE ESTE SISTEMA SOLO EN CASO DE EMERGENCIA!
Sistema de Emergência para remover Pads Laterais em caso de Acidente, vai permitir
que o capacete seja removido diminuindo o risco de agravar/criar lesão ao utilizador;
USAR ESTE SISTEMA SÓ EM CASO DE EMERGÊNCIA!
EN
FR
DE
ES
PT
EMERGENCY SYSTEM
SYSTÈME D'URGENCE
SICHERHEITSSYSTEM
SISTEMA DE EMERGENCIA
SISTEMA DE EMERGÊNCIA
Other Nexx Motorcycle Accessories manuals


Popular Motorcycle Accessories manuals by other brands


MT Helmets
MT Helmets JARAMA user guide

Midland
Midland SIGI user guide

Mastech
Mastech KTM 790 Adventure Assembly instructions

hepco & becker
hepco & becker 6304567 00 01 quick start guide

N-Com
N-Com B901 quick start guide

Wunderkind Custom
Wunderkind Custom 107045-F15 INSTALLATION MANUALS AND SAFETY INFORMATION