manuals.online logo
Brands
  1. Home
  2. •
  3. Brands
  4. •
  5. Nice
  6. •
  7. Accessories
  8. •
  9. Nice elero Aero-868 AC User manual

Nice elero Aero-868 AC User manual

Warning!
General information
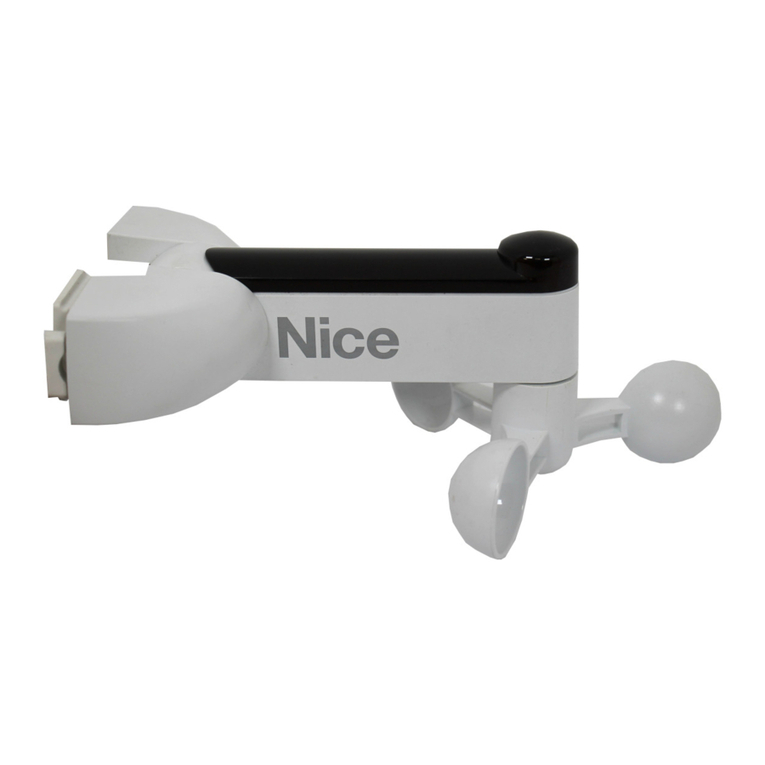
Aero-868/-915 AC is a combined sun/wind/radio control device for
your awning and venetian blinds.
Important!
The Aero-868/-915 AC only operates in combination with radio
receivers from the elero ProLine-868 radio system.
Radio signals (frequency 868.3 MHz) are transmitted between the
Aero-868/-915 AC and the receiver. Power supply is via connec-
tion to the mains network.
Recommendation: Use a LumeroTel or VarioTelPlus manual
transmitter in connection with the Aero-
868/915 AC to deactivate the sun function.
Safety instructions
Intended use
The Aero-868/-915 AC may only be used for control of awnings
and venetian blind installations.
Third-party devices should only be connected after consultation
with your specialised dealer.
• Please ensure that the radio installations are not operated in
areas of heightened possible interference. (e.g. hospitals, air-
ports…).
• The remote control is only approved for devices and systems
for which any malfunction of the manual transmitter or receiver
would not result in a risk for persons, animals or property, or if
such a risk is covered by other safety devices.
• The operator has no protection whatsoever from interferences
by other radio emitters and local terminals (e.g. also from radio
installations), that are normally used on the same frequency
range.
• Only use radio receivers with equipment and units approved by
the manufacturer.
Warning!
Risk of injury due to electrocution.
• Connections
must
be performed by an authori-
sed specialist.
80
200
135
35
66
10
12
14
2
Off
8
4
6
11
1
3
9
5
7
Function
3

yellow LED
(Light value)
red LED
(Wind value)
green LED
(transmit)
DOWN
button
(Sun symbol)
UP button
(Wind symbol)
Function
position
Connection
1. Remove the wall fixing screws (b) of the Aero-868/-915 AC.
2. Remove the cover.
3. Connect the Aero-868/-915 AC.
4. Replace the cover on the device.
5. Screw on the cover again.
b
L
N
Electrical connection of the Aero-868 AC
1. Switch off the mains voltage.
2. Connect the cables to the Aero-868 AC according to colour:
blue = N
black = L
3. Switch on the mains voltage.
The green operating LED indicates readiness for operation.
Connect at least a 2-core cable
(UV resistant 0,75–1,52) to terminals L and N
of your Aero-868 AC.
The connection of the protective earth is not
necessary.
Power consumption: > 2 watt
Advice: Horizontal mounting positi-
on. Light sensor on top.
Wind monitor below.
Important safety instructions!
Observe the following instructions.
• Only use unmodified original
elero
electrical parts.
• Keep persons away from the operating range of
the system.
• Keep children away from the controls.
• Follow the relevant country-specific regulations.
• If one or more devices are used for controlling the
system, the operating range must stay visible duri-
ng operation.
• The device contains swallowable small parts.
• Radio stations transmitting in the same frequency
range may cause reception interference.
• Please note that the operating range of the radio
signal is limited by legislation as well as by the
product design.
181007306_EN_0423
Aero-868/915 AC Operating instructions
28 460 0006
EN | 2
Function for „Manual“ switch setting
(manual transmitter)
The
UP-STOP-DOWN
button on the manual transmitter and the
UP/DOWN
keys at the Aero-868/-915 AC are active.
– Wind monitoring is active
– Sun protection is disabled.
Function in „Auto“ setting (hand transmitter)
UP-STOP-DOWN
button on manual transmitter and
UP/DOWN
buttons on Aero-868/-915 AC are active.
– Wind monitoring is active
– Sun protection is active.
Leave semi-automatic mode:
– If a level falls below and/or rises above a set threshold value
then the system automatically changes to AUTO mode.
The system moves in/out.
or
– Set the sliding switch of your transmitter briefly to
MANUAL mode and then to AUTO mode.
The system moves in.
Semi-automatic mode
Your Aero-868/-915 AC is in AUTO mode.
As soon as you now press a button on your programmed manual
transmitter the receiver switches itself into the semi-automatic
mode.
Device function
Light intensity and wind speed are measured at regular intervals and
compared with the set values.
Brightness above set value
→
Awning moves out after delay time
(Delay time approx. 5 min.) (yellow LED winks).
Brightness below set value
→
Awning retracts after delay time or
(Delay time approx. 15 min.) remains retracted .
Wind value above set value
→
Awning retracts or remains retracted
and is blocked for around 15 min.
(red LED flashes)
The slide switch at the taught manual transmitter can be used to
switch the light function of the Aero-868/-915 AC on or off. The wind
function is always active, irrespective of the light switch setting.
The slide switch has no influence on the function of the travel keys.
However, in the event of a wind alarm, the keys are disabled for
15 minutes.
Awning mode
The awning is automatically retracted when the current measured
sun value changes from 1 to 0 (late evening) or when the current
measured light value changes from 0 to 1 (early morning).
Protection against prying eyes mode.
To keep the blind closed even in the evening, close the blind
manually using your hand-held transmitter or a timer.
The current transitions of the measured light values from 1 to 0
(late in the evening) or from 0 to 1 (early in the morning) will be
ignored.
The blind will remain closed throughout the night.
The switching commands such as tilting position (venetian
blind) or ventilation position (roller shutter) will be executed
automatically the next day.
Setting the mode (awning, protection against prying
eyes, roller shutter)
The Aero-868
/-915
AC can be operated in three different modes.
The modes can be successively switched through.
The current mode of the Aero-868 AC is displayed by means of
the flashing of the green LED.
Roller shutter mode
If the roller shutter is driven manually or by a timer to the lower
end position, the light function (driving according to set light
value) will be switched off.
The current transitions of the measured light values from 1 to 0
(late in the evening) or from 0 to 1 (early in the morning) will be
ignored.
You can switch on the light function again in several different
ways:
– the blind moves to the upper end position by means of a manu-
al UP travel command (button on the Aero-868
/-915
AC).
– the blind moves to the upper end position by means of an
automatic timer command.
– by switching the sliding switch from AUTOMATIC mode to
MANUAL mode and back to AUTOMATIC mode.
A multiple contact switch is provided on the underside of the
Aero-868
/-915
AC.
1. Set the multiple contact switch to Function using a small
screwdriver.
2. Keep the UP and DOWN button pressed for at least 3 seconds.
The current mode of the Aero-868
/-915
AC is displayed by
means of the flashing of the green LED:
The operating mode is indicated by the flashing signal.
Green LED flashes 1x →Awning mode
Green LED flashes 2x →Protection against prying eyes mode.
Green LED flashes 3x →Roller shutter mode
The set mode is displayed at each radio transmission by the flas-
hing of the green LED (LED flashing pattern 1x per minute).
Set the multiple contact switch from Function to a value selected
by yourself.
Change the mode
EN | 3
Programming the Aero-868/-915 AC
Condition:
The end positions of the awing are set, a transmitter is
programmed.
Start teach mode
1. Blind/shutter
runs up and
down for
2 minutes.
min. 3 sec.
elero
2.
3.
STOP
STOP
Press the ”
UP
”
(wind symbol)
button
immedi-
ately
after the
start of inward
travel.
Press the
”
DOWN
” (sun
symbol) button
immediately
after the start of
outward travel.
„Teach-in“ programmed
transmitter.
10
12
14
2
Off
8
4
6
11
1
3
9
5
7
%/
0DÀVWDE
=HLFKQ1U
*HSU
:]J(LQVDW]1U
1DPH
%ODWW
:HUNVWRII
HOHUR*PE+
$QWULHEVWHFKQLN
7HOHIRQ
7HOHID[
=HLFKQXQJVÅQGHUXQJQXUPLW&$'
&$'1U
/LQVHQKRIHU6WU'%HXUHQ
$OOJHPHLQWROHUDQ]HQ
YJO',17P
YJO',175
'DWXP
$(:
.DQWHQJHEURFKHQ 'LHVH0DÀHZHUGHQ
EHVRQGHUVJHSUÜIW
5HJ1U
,QGH[
.XU]EHVFKUHLEXQJ 'DWXP 1DPH
$XIGUXFN$(52GIW
 KXY

$XIGUXFN$(52





















































2II









Check the sun protection function (test mode)
Condition: The blind/shutter is retracted.
The delay times are shortened in the test mode. You can then
test the travel movement of your system on the set light value
being exceeded or undercut.
1. Press the UP button (wind symbol) for at least 3 seconds until
the green LED flashes.
The test mode stays active for 5 minutes but with the LED
extinguished.
2. Shine a torch on the sun sensor.
Set light value is exceede →shutter/blind immediately travels
out/down.
Light value has reached/exceeded the set threshold value →
yellow LED flashes.
Set light value is undercut →shutter/blind travels in/up after
15 seconds.
You can repeat the operation as often as you want within
5 minutes.
In „normal“ operation the LEDs light up every 5 seconds and
show that the threshold values have been reached or exceeded.
Warning!
Injury risk from extending the awning or running
down the venetian blind
The test mode is active for 5 minutes. This time
cannot be shortened.
Keep away from the operating range of the system.
Check the wind function (test mode)
Condition: The blind/shutter is retracted.
The delay times are shortened in the test mode. You can then test
the travel movement of your system on the set wind value being
exceeded or undercut.
During the test phase the set wind value is automatically set to the
lowest value and re-set once the test phase (5 minutes) is over.
1. Press the UP button (wind symbol) for at least 3 seconds until
the green LED flashes.
The test mode stays active for 5 minutes but with the LED
extinguished.
2. Use the hand transmitter to bring the shutter/blind to the centre
position.
3. Turn the wind vane.
The shutter/blind travels in/up immediately.
Set wind value is exceeded/undercut →red LED flashes.
You can repeat the operation as often as you want within
5 minutes.
Note: In the event of a wind alarm, the travel keys are disabled
for 15 seconds.
In „normal“ operation the LEDs light up every 5 seconds and
show that the threshold values have been reached or exceeded.
Warning!
Injury risk from extending the awning or running
down the venetian blind
The test mode is active for 5 minutes. This time
cannot be shortened.
Keep away from the operating range of the system.
Setting the threshold values
Multiple contact switches for wind and sun are located at the
underside of the Aero-868/-915 AC. The switch has several
settings, which can be modified with a small screwdriver.
OFF →Light function is deactivated
Setting 1 →Move out at low light levels
Light Setting 2-14 →Intermediate levels
Setting 7 →Factory setting
Setting 15 →Move out in full sun
Function →Change the mode
Setting 1 →Move out at low light levels
Wind Setting 2-10 →Intermediate levels
Setting 4 →Factory setting
Setting 11 →Move out in full sun
We reserve the right to make technical changes
Maintenance
The Aero-868/-915 AC must be freely accessible and must
not be overgrown by vegetation.
The Aero-868/-915 AC is maintenance-free, however the
cover must be cleaned from time to time using a moist cloth.
Techncal Data
Operating voltage 230 V/50 Hz
Temperature range –25 °C to +60 °C
Detection angel (light sensor) 150°
Protection class IP44
Radio frequency 868 MHz (band)
Transmission power ≤ 500 mW | ≤ 10 dBm
Important!
The Aero-868/-915 AC only operates in combination with radio
receivers from the elero ProLine-868 radio system.
Deleting programmed Aero-868/-915 AC
The Aero-868 AC is deleted from the receiver.
1.
Press the
UP
/ and the
DOWN
buttons
simultane-
ously
.
10
12
14
2
Off
8
4
6
11
1
3
9
5
7
Green LED
(transmit)
goes out
briefly.
min. 3 sec.
Installation
aWall bracket
rotated 180°
Wall bracket
rotated 90°
Mast and corner bracket (Aero,
Aero-868/-915 AC). Optional accessory
(Article No. 24 269.0201)
Advice: The adapter plate supplied
must be used when fixing the
mast and corner bracket.
Caution!
Up- or downwinds blowing against façades may
cause destruction of equipment.
The Aero-868
/-915
AC is not able to recognise these.
Please pay attention to this advice when choosing
your mounting position.
Note: Before installing the unit at the required position, check the
proper function of the Aero-868 AC and the receiver.
The Aero-868 AC must not be mounted under projecting
structures.
Wall bracket
The Aero-868
/-915
AC can be fastened to the upper side of the
roof or to the façade using the tilting wall bracket.
The wall bracket can be swivelled between -5° and 180°.
Secure the required position once it has been set (see screw a).
elero GmbH
Antriebstechnik
Maybachstr. 30
73278 Schlierbach
Fon: +49 7021 9539-0
Fax: +49 7025 9539-212
[email protected]
www.elero.com
Fault Cause Remedy
• Awning automatically
retracts in manual
mode
• Wind alarm
• Poor radio connection
• No power supply to
Aero-868/-915 AC
• Wait for wind interlock
to be deactivated
(15 min.) or briefly
interrupt power supply
• Change the position
of the Aero-868/-915
AC
• Create power supply
• No travel command
can be issued via the
manual transmitter
• Wind alarm is active
• Battery in the manual
transmitter is dead
• Motor has no power
supply or is overhe-
ated
• Wait (15 minutes)
• Change battery
• Check power supply
or allow motor to cool
down
• Awning does not
retract in windy con-
ditions
• Wind threshold value
is set incorrectly
• Wind vane is faulty
• Set correct value
• Replace
• Awning does not
move out in sunny
conditions
• Threshold set incor-
rectly
• Wind alarm is still
active
• Manual mode is set
• Poor radio connection
• Light sensor is dirty
• SUN threshold value
(OFF setting)
• Set correct value
• Wait
• Set automatic mode
• Change the position
of the Aero-868/-915
AC
• Clean light sensor
• Set appropriate set-
ting
• Receiver does not
accept
Aero-868/-915 AC
• Aero-868/-915 AC is
already programmed.
• Delete Aero-868/
-915 AC

This manual suits for next models

1

Other Nice Accessories manuals

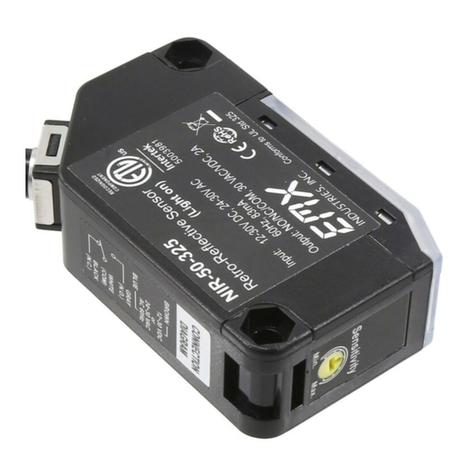
Nice HySecurity EMX NIR-50-325 PhotoEye Technical specifications

Nice

Nice HySecurity EMX NIR-50-325 PhotoEye Technical specifications

Nice AIR 1RW Technical specifications

Nice

Nice AIR 1RW Technical specifications

Nice Volo S Radio Product manual

Nice

Nice Volo S Radio Product manual

Nice EPLB/A Technical specifications

Nice

Nice EPLB/A Technical specifications

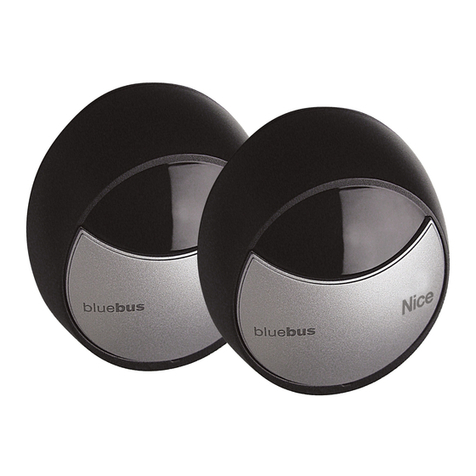
Nice Moonbus Product manual

Nice

Nice Moonbus Product manual

Nice Nemo SRT Technical specifications

Nice

Nice Nemo SRT Technical specifications

Nice Volo S Radio Product manual

Nice

Nice Volo S Radio Product manual

Nice COB Administrator Guide

Nice

Nice COB Administrator Guide

Nice Nemo WSCT Technical specifications

Nice

Nice Nemo WSCT Technical specifications

Nice Era Mat T Series Installation and operating instructions

Nice

Nice Era Mat T Series Installation and operating instructions

Nice Domi WS Technical specifications

Nice

Nice Domi WS Technical specifications

Nice TCB65 Product manual

Nice

Nice TCB65 Product manual

Nice NEMOVIBE Technical specifications

Nice

Nice NEMOVIBE Technical specifications

Nice Moon Series User manual

Nice

Nice Moon Series User manual

Nice TCW1 Technical specifications

Nice

Nice TCW1 Technical specifications

Nice TTDMP Operating instructions

Nice

Nice TTDMP Operating instructions

Nice HubPowerbank Technical specifications

Nice

Nice HubPowerbank Technical specifications

Nice TCW1 User manual

Nice

Nice TCW1 User manual

Nice Volo ST Product manual

Nice

Nice Volo ST Product manual

Nice volo Product manual

Nice

Nice volo Product manual

Nice Nemo SRT Technical specifications

Nice

Nice Nemo SRT Technical specifications

Nice HSDOM21 User manual

Nice

Nice HSDOM21 User manual

Popular Accessories manuals by other brands

Zte ZXSDR BS8800 Technical manual

Zte

Zte ZXSDR BS8800 Technical manual

Siemens SIPART Series Compact operating instructions

Siemens

Siemens SIPART Series Compact operating instructions

Dixon Bayco EZ-CEPT FT390 Series Maintenance & Operating Instructions

Dixon Bayco

Dixon Bayco EZ-CEPT FT390 Series Maintenance & Operating Instructions

Microsonic pms-15/CI/A1 operating instructions

Microsonic

Microsonic pms-15/CI/A1 operating instructions

PCB Piezotronics 137B23B Installation and operating manual

PCB Piezotronics

PCB Piezotronics 137B23B Installation and operating manual

Master Eliptical Master E29 owner's manual

Master

Master Eliptical Master E29 owner's manual

hager tre50 series User instructions

hager

hager tre50 series User instructions

Sonotec SONAPHONE BS20 User documentation

Sonotec

Sonotec SONAPHONE BS20 User documentation

HBM C2A/M1 Series Mounting instructions

HBM

HBM C2A/M1 Series Mounting instructions

ProMinent DULCOTEST CDE 2-mA-0.5 ppm operating instructions

ProMinent

ProMinent DULCOTEST CDE 2-mA-0.5 ppm operating instructions

MTS Sensors Temposonics R Series Operation manual

MTS Sensors

MTS Sensors Temposonics R Series Operation manual

Byron Home Easy HE-303 installation instructions

Byron

Byron Home Easy HE-303 installation instructions

SICK UC40-112 Series operating instructions

SICK

SICK UC40-112 Series operating instructions

DirecTV SWM8 Quick reference guide

DirecTV

DirecTV SWM8 Quick reference guide

Jarv 10000MAH user guide

Jarv

Jarv 10000MAH user guide

Datasensor TL46-W instruction manual

Datasensor

Datasensor TL46-W instruction manual

KERN KFE-TM manual

KERN

KERN KFE-TM manual

ipf electronic UT129023 quick start guide

ipf electronic

ipf electronic UT129023 quick start guide

manuals.online logo
manuals.online logoBrands
  • About & Mission
  • Contact us
  • Privacy Policy
  • Terms and Conditions

Copyright 2025 Manuals.Online. All Rights Reserved.