manuals.online logo
Brands
  1. Home
  2. •
  3. Brands
  4. •
  5. Nice
  6. •
  7. Garage Door Opener
  8. •
  9. Nice SPY650 User manual

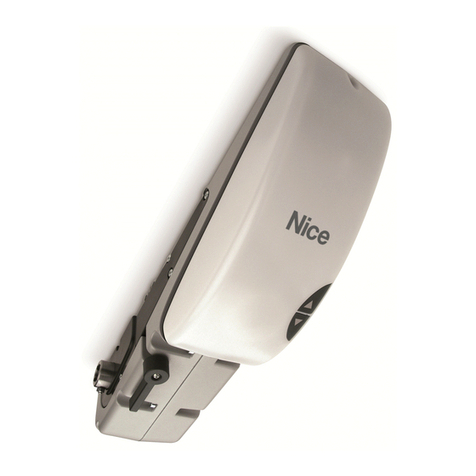
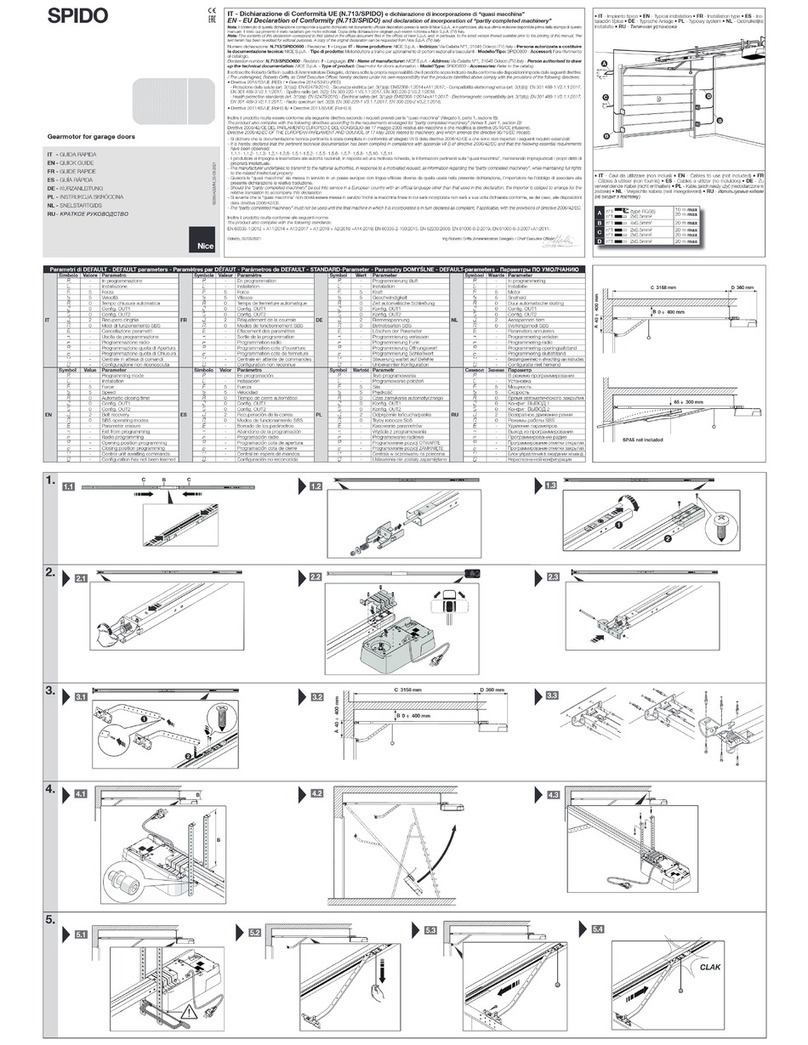
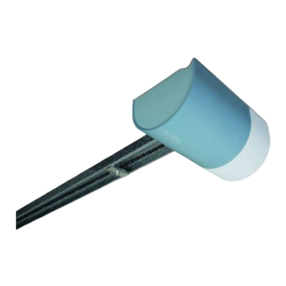
Nice SPY650 User manual

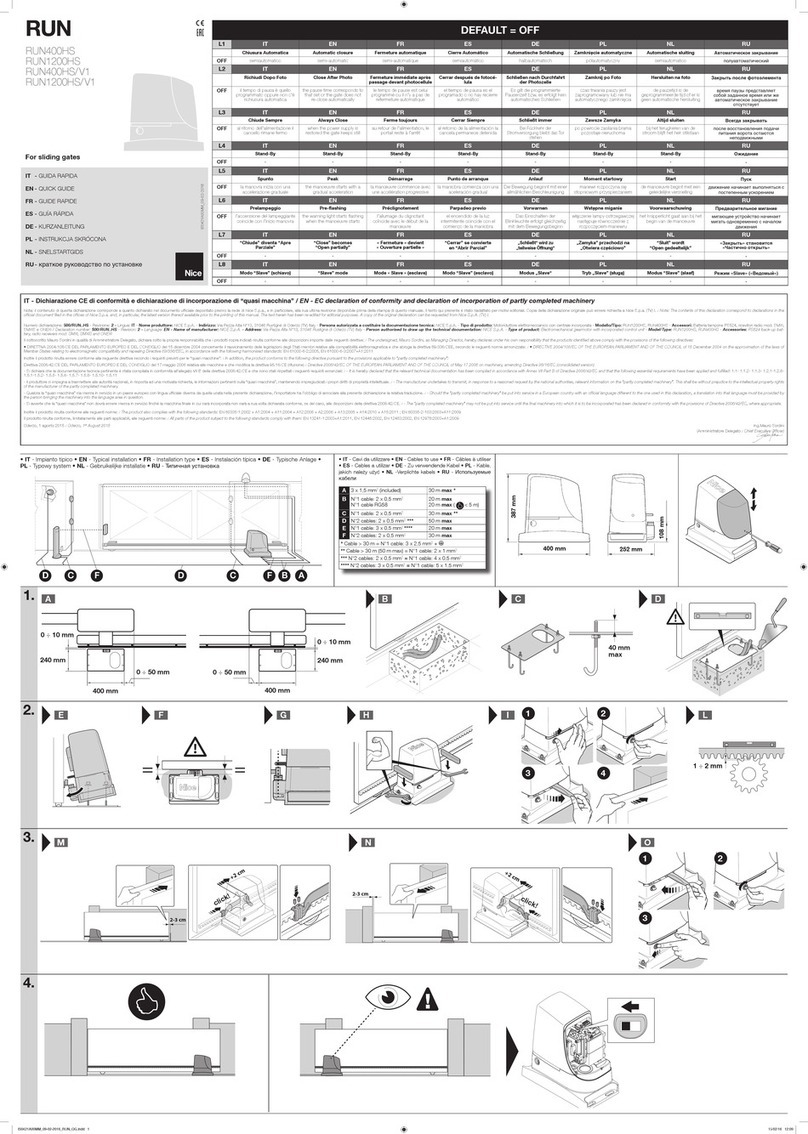
IT - GUIDA RAPIDA
EN - QUICK GUIDE
FR - GUIDE RAPIDE
ES - GUÍA RÁPIDA
DE - KURZANLEITUNG
PL - INSTRUKCJA SKRÓCONA
NL - SNELSTARTGIDS
RU- КРАТКОЕ РУКОВОДСТВО
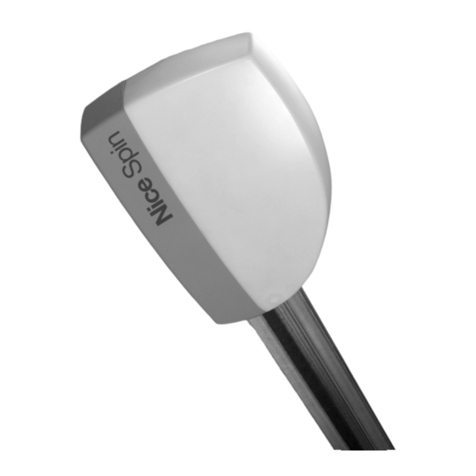
Garage door opener
SPY
SPY550
SPY650
SPY800
IS0385A01MM_01-04-2016
IT - Dichiarazione CE di conformità / EN - EC declaration of conformity
Nota: il contenuto di questa dichiarazione corrisponde a quanto dichiarato nel documento ufciale depositato presso la sede di Nice S.p.a., e in particolare, alla sua ultima revisione disponibile
prima della stampa di questo manuale. Il testo qui presente è stato riadattato per motivi editoriali. Copia della dichiarazione originale può essere richiesta a Nice S.p.a. (TV) I. / Note: The contents
of this declaration correspond to declarations in the ofcial document led in the ofces of Nice S.p.a. and, in particular, the latest version thereof available prior to the printing of this manual.
The text herein has been re-edited for editorial purposes. A copy of the original declaration can be requested from Nice S.p.A. (TV) I.
Numero dichiarazione: 525/SPY - Revisione: 0 - Lingua: IT - Nome produttore: NICE S.p.A. - Indirizzo: Via Pezza Alta N°13, 31046 Rustignè di Oderzo (TV) Italy - Persona autorizzata a
costituire la documentazione tecnica: NICE S.p.A. - Tipo di prodotto: Motoriduttore elettromeccanico con centrale separata per l’automazione di porte sezionali e basculanti - Modello/
Tipo: SPY550, SPY650, SPY800 - Accessori: - / Declaration number: 525/SPY - Revision: 0- Language: EN - Name of manufacturer: NICE S.p.A. - Address: Via Pezza Alta N°13, 31046
Rustignè di Oderzo (TV) Italy - Person authorised to draw up the technical documentation: NICE S.p.A. - Type of product: Electromechanical gearmotor with separate control unit for the
automation of sectional and up-and-over doors - Model/Type: SPY550, SPY650, SPY800 - Accessories: -
Il sottoscritto Mauro Sordini in qualità di Amministratore Delegato, dichiara sotto la propria responsabilità che i prodotti sopra indicati risulta conforme alle disposizioni imposte dalle seguenti
direttive: / The undersigned, Mauro Sordini, as Managing Director, hereby declares under his own responsibility that the products identied above comply with the provisions of the following
directives:
• DIRETTIVA 1999/5/CE DEL PARLAMENTO EUROPEO E DEL CONSIGLIO del 9 marzo 1999 riguardante le apparecchiature radio e le apparecchiature terminali di comunicazione e il reciproco
riconoscimento della loro conformità, secondo le seguenti norme armonizzate: / • DIRECTIVE 1999/5/EC OF THE EUROPEAN PARLIAMENT AND OF THE COUNCIL of 9 March 1999 on radio
equipment and telecommunications terminal equipment and the mutual recognition of their conformity, in accordance with the following harmonised standards:
- Protezione della salute (art. 3(1)(a)): EN62479:2010; - Sicurezza elettrica (art. 3(1)(a)): EN 60950-1:2006+A11:2009+A12:2011+A1:2010+A2:2013; - Compatibilità elettromagnetica (art. 3(1)
(b)): EN 301 489-1 V1.9.2:2011, EN 301 489-3 V1.6.1:2013; - Spettro radio (art. 3(2)): EN 300 220-2 V2.4.1:2012 / Health and safety (Art. 3(1)(a)): EN62479:2010; - Electrical safety (art. 3(1)
(a)): EN 60950-1:2006+A11:2009+A12:2011+A1:2010+A2:2013; - Electromagnetic compatibility (art. 3(1)(b)): EN 301 489-1 V1.9.2:2011, EN 301 489-3 V1.6.1:2013; - Radio spectrum (art.
3(2)): EN 300 220-2 V2.4.1:2012
• DIRETTIVA 2004/108/CE DEL PARLAMENTO EUROPEO E DEL CONSIGLIO del 15 dicembre 2004 concernente il ravvicinamento delle legislazioni degli Stati membri relative alla compatibilità
elettromagnetica e che abroga la direttiva 89/336/CEE, secondo le seguenti norme armonizzate: / • DIRECTIVE 2004/108/EC OF THE EUROPEAN PARLIAMENT AND OF THE COUNCIL of 15
December 2004 on the approximation of the laws of the Member States relating to electromagnetic compatibility and repealing Directive 89/336/EEC, in accordance with following harmonised
standards: / EN 61000-6-2:2005, EN 61000-6-3:2007+A1:2011
Inoltre il prodotto risulta essere conforme alla seguente direttiva secondo i requisiti previsti per le “quasi macchine”: / In addition, the product conforms to the following directive pursuant to the
provisions applicable to “partly completed machinery”:
Direttiva 2006/42/CE (Allegato II, parte 1.B) / Directive 2006/42/EC (Annex II, part 1.B)
- Si dichiara che la documentazione tecnica pertinente è stata compilata in conformità all’allegato VII B della direttiva 2006/42/CE e che sono stati rispettati i seguenti requisiti essenziali: / - It is
hereby declared that the relevant technical documentation has been compiled in accordance with Annex VII Part B of Directive 2006/42/EC and that the following essential requirements have
been applied and fullled: 1.1- 1.1.2- 1.1.3- 1.2.1-1.2.6- 1.5.1-1.5.2- 1.5.5- 1.5.6- 1.5.7- 1.5.8- 1.5.10- 1.5.11
- Il produttore si impegna a trasmettere alle autorità nazionali, in risposta ad una motivata richiesta, le informazioni pertinenti sulla “quasi macchina”, mantenendo impregiudicati i propri diritti di
proprietà intellettuale. / - The manufacturer undertakes to transmit, in response to a reasoned request by the national authorities, relevant information on the “partly completed machinery”. This
shall be without prejudice to the intellectual property rights of the manufacturer of the partly completed machinery.
- Qualora la “quasi macchina” sia messa in servizio in un paese europeo con lingua ufciale diversa da quella usata nella presente dichiarazione, l’importatore ha l’obbligo di associare alla presen-
te dichiarazione la relativa traduzione. / - Should the “partly completed machinery” be put into service in a European country with an ofcial language different to the one used in this declaration,
a translation into that language must be provided by the person bringing the machinery into the language area in question.
- Si avverte che la “quasi macchina” non dovrà essere messa in servizio nché la macchina nale in cui sarà incorporata non sarà a sua volta dichiarata conforme, se del caso, alle disposizioni
della direttiva 2006/42/CE. / - The “partly completed machinery” may not be put into service until the nal machinery into which it is to be incorporated has been declared in conformity with the
provisions of Directive 2006/42/EC, where appropriate.
Inoltre il prodotto risulta conforme alle seguenti norme: / The product also complies with the following standards: EN 60335-1:2012, EN 60335-1:2002 + A1:2004 + A11:2004 + A12:2006 +
A2:2006 + A13:2008+A14:2010+A15:2011
EN 60335-2-95:2003+A11:2009
Il prodotto risulta conforme, limitatamente alle parti applicabili, alle seguenti norme: / All parts of the product subject to the following standards comply with them: EN 13241-1:2003+A1:2011,
EN 12445:2002, EN 12453:2002, EN 12978:2003+A1:2009
Oderzo, 28 aprile 2015 / Oderzo, 28 April 2015 Ing.Mauro Sordini (Amministratore Delegato / Chief Executive Ofcer)
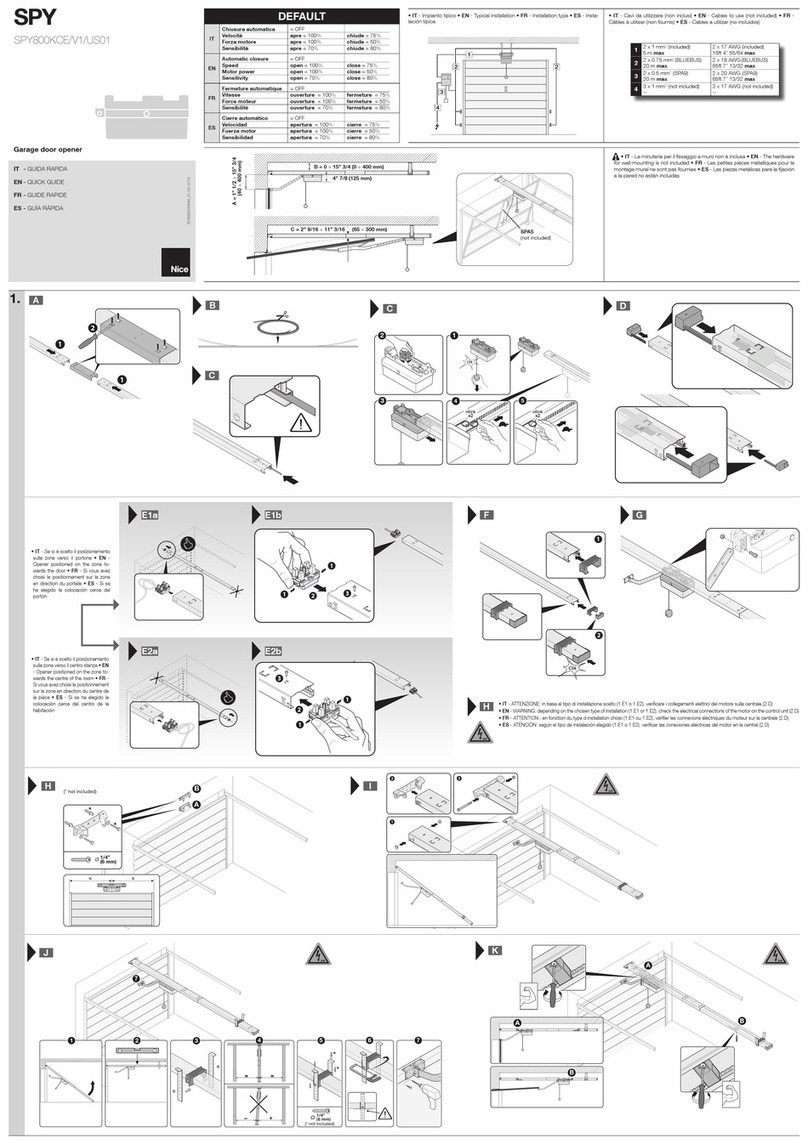
DEFAULT
IT
Chiusura automatica
Velocità
Forza motore
Sensibilità
= OFF
apre = 100%
apre = 100%
apre = 70%
chiude = 75%
chiude = 50%
chiude = 80%
EN
Automatic closure
Speed
Motor power
Sensitivity
= OFF
open = 100%
open = 100%
open = 70%
close = 75%
close = 50%
close = 80%
FR
Fermeture automatique
Vitesse
Force moteur
Sensibilité
= OFF
ouverture = 100%
ouverture = 100%
ouverture = 70%
fermeture = 75%
fermeture = 50%
fermeture = 80%
ES
Cierre automático
Velocidad
Fuerza motor
Sensibilidad
= OFF
apertura = 100%
apertura = 100%
apertura = 70%
cierre = 75%
cierre = 50%
cierre = 80%
DE
Automatisches
Schließen
Geschwindigkeit
Motorleistung
Empndlichkeit
= AUS
Öffnen = 100%
Öffnen = 100%
Öffnen = 70%
Schließen = 75%
Schließen = 50%
Schließen = 80%
PL
Zamykanie
automatyczne
Prędkość
Siła silnika
Czułość
= OFF
otwierania = 100%
otwierania = 100%
otwierania = 70%
zamykania = 75%
zamykania = 50%
zamykania = 80%
NL
Automatische sluiting
Snelheid
Motorkracht
Gevoeligheid
= OFF
opening = 100%
opening = 100%
opening = 70%
sluiting = 75%
sluiting = 50%
sluiting = 80%
RU
Автоматическое
закрывание
Скорость
Сила двигателя
Чувствительность
= ВЫКЛ
открытия = 100%
открытия = 100%
открытия = 70%
закрытия = 75%
закрытия = 50%
закрытия = 80%
1.
34
click
x2
click
x2
1
Clik
2
5
F
Clik
G
E
CB
1
1
2
A
1
3
2
Clik
D
M
A
B
A
B
N
364 7
7
1 2 5
6 mm
Ø
*
*
(* not included)
H I B
A
==
6 mm
Ø
(* not included)
*
*
L
• IT - Impianto tipico • EN - Typical installation • FR - Instal-
lation type • ES - Instalación típica • DE - Typische Anlage •
PL - Typowy system • NL - Gebruikelke installatie • RU - Ти -
пичная установка
1
522
6
3 4
• IT - Cavi da utilizzare (non inclusi) • EN - Cables to use
(not included) • FR - Câbles à utiliser (non fournis) • ES
- Cables a utilizar (no incluidos) • DE - Zu verwendende
Kabel (nicht enthalten) • PL - Kable, jakich należy użyć
(niedostarczone w zestawie) • NL -Verplichte kabels (niet
meegeleverd) • RU - Используемые кабели (не входит
в поставку)
12 x 1 mm2 (included) 5 m max
22 x 0.5 mm2 (ING 2 PHOTO/OPEN)
2 x 0.75 mm2 (BLUEBUS)
20 m max
20 m max
32 x 0.5 mm220 m max
42 x 0.5 mm220 m max
52 x 0.5 mm2 (SPYBOXB / SPYBOX)
RG58 (SPYBOXB)
20 m max
10 m max
63 x 1 mm2 (not included) --
C = 65 ÷300 mm
SPA5
(not included)
B = 0 ÷400 mm
125 mm
A = 40 ÷400 mm
• IT -
Cancellazione memoria totale (parametri e codici radio)
• EN -
Deletion of total
memory (parameters and radio codes)
• FR -
Effacement total de la mémoire (para-
mètres et codes radio)
• ES -
Borrado de la memoria total (parámetros y códigos radio)
• DE -
Löschen des kompletten Speichers (Parameter und Funkcode)
• PL -
Całkowite
kasowanie pamięci (parametry i kody radiowe)
• NL -
Volledig geheugen wissen (para-
meters en radiocodes)
• RU - Полное удаление памяти (параметры и радио-коды)
01. 02. 03. 04.
IO
IO
(OPEN+CLOSE)
10 s L3 =
(OPEN+CLOSE)
I
O
IO
• IT - La minuteria per il ssaggio a muro non è inclusa • EN - The hardware for
wall-mounting is not included • FR - Les petites pièces métalliques pour le montage mu-
ral ne sont pas fournies • ES - Las piezas metálicas para la jación a la pared no están
incluidas • DE - Die Kleinteile zur Aufputzbefestigung sind nicht enthalten • PL - Drobne
elementy mocujące do ściany nie są częścią wyposażenia • NL - De bevestigingsele-
menten voor montage aan de wand zn niet meegeleverd • RU - Фурнитура для на-
стенного крепления не входит в поставку
IT Pericolo da emissione ottica! Guardare la luce a LED da vicino e per un
periodo prolungato può abbagliare la vista. Può ridurre temporaneamente le
facoltà visive e causare incidenti. Non guardare direttamente i LED.
EN
Danger due to optical radiation! Looking into an LED at short range for
an extended period may cause optical glare. This may temporarily reduce
vision. This may cause serious or fatal accidents. Do not look directly into
a LED.
FR Risque d’émission optique! Fixer la lumière LED de près et longtemps peut
éblouir. La faculté visuelle peut être emporairement réduite et cela peut
provoquer des accidents. Ne pas regarder directement les LED.
ES
¡Peligro por emisión óptica! La jación de la vista en la luz LED de cerca
durante un lapso prolongado puede enceguecer. Pueden reducirse
temporalmente las facultades visuales y pueden ocurrir accidentes. No
mirar directamente a los LED.
DE
Gefahr durch Lichtstrahl! Der Blickkontakt mit LED-Leuchten aus direkter
Nähe und über längere Zeit kann das Sehvermögen beeinträchtigen. Das
Sehvermögen kann vorübergehend eingeschränkt sein - dadurch besteht
Unfallgefahr. Einen direkten Blickkontakt mit LED-Leuchten vermeiden.
PL
Zagrożenie związane z emisją świetlną! Spoglądanie z bliska przez dłuższy
okres czasu na źródło światła LED może spowodować oślepienie. Może te
skutkować chwilowym ograniczeniem zdolności widzenia i spowodować
wypadki. Nie należy spoglądać bezpośrednio na diody LED.
NL Gevaar door optische transmissie! Door langere td van dichtb in een LED-
lamp te kken is verblinding mogelk. Dit kan tdelk het gezichtsvermogen
beperken en ongevallen veroorzaken. Kk niet rechtstreeks in LED’s.
RU
Опасность оптического излучения! Смотреть на свет СИДа с близкого
расстояния в течение долгого времени опасно для зрения. Может
временно сократить возможность видеть и привести к авариям. Не
смотрите прямо на СИД.
• IT - Blocco / Sblocco dell’auto-
mazione • EN - Lock / Releasing
the automation • FR - Blocage /
Déblocage de l’automatisme • ES
- Bloqueo / Desbloqueo de la auto-
matización • DE - Sperren / Auto-
matikbetrieb entriegeln • PL - Bloka-
da / Odblokowanie automatu • NL
- Blokkering / Deblokkering van de
automatisering • RU - Блок / Раз-
блокировка автоматики
Clik
IT
ll motore viene alimentato a 24 V tramite la
guida: è obbligatorio che la guida sia isolata
dalla porta da garage o da altri dispositivi po-
sti nelle vicinanze.
EN The motor is powered at 24 V via the guide:
the guide must be isolated from the garage
door or other nearby devices.
FR
Le moteur est alimenté en 24 V par le biais
du rail : le rail doit obligatoirement être
isolé de la porte de garage ou de tout autre
appareil placé à proximité.
ES
El motor se alimenta a 24 V mediante la
guía: la guía debe estar aislada de la puerta
de garaje y demás dispositivos situados en
los alrededores.
DE
Die 24-V-Spannungsversorgung des Motors
erfolgt über die Führungsschiene. Daher
muss die Führungsschiene gegen das
Garagentor und sonstige Geräte in der Nähe
isoliert sein.
PL
Silnik jest zasilany napięciem 24 V za
pośrednictwem prowadnicy: prowadnica
musi być obowiązkowo odizolowana od
bramy garażowej oraz innych urządzeń
umieszczonych w pobliżu.
NL
De motor wordt gevoed met 24 V via de rail:
deze moet beslist geïsoleerd zn van de
garagepoort of van andere inrichtingen die
zich in de buurt bevinden.
RU
Двигатель запитывается 24 В посред-
ством направляющей: направляющая
обязательно должна быть изолирована
от гаражных ворот или других устройств,
расположенных рядом.
Complete manual: www.niceforyou.com SERIAL NUMBER: ..................................................................... DATE: .............................................
• IT - Da consegnare all’utilizzatore • EN - To be given to the user • FR - À remettre à l’utilisateur • ES - Para entregar al usuario • DE - Dem Endnutzer zu übergeben • PL - Do przekazania użytkownikowi • NL - Te overhandigen aan de gebruiker • RU - Передается конечному пользователю
IT
Questo manuale è una sintesi delle fasi d’installazione e della messa in funzione
con i valori di default: il manuale istruzioni completo (installazione, collegamenti, pro-
grammazioni parametri, diagnostica, ecc.) è scaricabile dal sito www.niceforyou.com
EN
This manual is a summary of the installation and commissioning instructions, us-
ing the default values: the complete user manual (installation, connections, program-
ming, diagnostics, etc.) is available for download from www.niceforyou.com
FR
Ce manuel est un résumé des phases d’installation et de mise en service avec les
valeurs par défaut : le mode d’emploi complet (installation, raccordements, program-
mation des paramètres, diagnostic, etc.) peut être téléchargé sur le site Internet www.
niceforyou.com
ES
Este manual es una síntesis de las fases de instalación y de la puesta en funcio-
namiento con los valores predeterminados: el manual de instrucciones completo (ins-
talación, conexiones, programación de parámetros, diagnóstico, etc.) se puede descargar
del sitio www.niceforyou.com
DE
Diese Anleitung gibt einen Überblick über die Einrichtungs- und Inbetriebnahme-
phasen mit den Standardeinstellungen: Die vollständige Anleitung (zu Einrichtung, An-
schlüssen, Programmierung der Parameter, Diagnose, usw.) kann auf der Webseite www.
niceforyou.com heruntergeladen werden
PL
Niniejsza instrukcja jest streszczeniem etapów instalacji i uruchomienia z zasto-
sowaniem wartości domyślnych: pełną instrukcję obsługi (instalacja, podłączenia, pro-
gramowanie parametrów, diagnostyka, itd.) można pobrać ze strony internetowej www.
niceforyou.com
NL
Deze handleiding is een samenvatting van de stadia van installatie en inbedrf-
stelling met de standaard waarden: de complete handleiding (installatie, bedrading, het
programmeren van parameters, diagnostiek etc.) kan worden gedownload van de website
www.niceforyou.com
RU
Данное руководство являет собой синтез фаз монтажа и пуска в работу
согласно стандартно заданным значениям: полное руководство с инструк-
циями (монтаж, подключения, программирование параметров, диагностика и
пр.) может быть загружена с веб-сайта
www.niceforyou.com
Импортер и официальный представитель: ЗАО «Найс Автоматика для Дома»
Российская Федерация, 143000, Московская Область, г. Одинцово, Улица Внуковская дом 9
2.
3.
4. 5.
1
2
Clik
A B
+ -
NC
C
C
NO
RX
TX
FLASH
12V/21W RX
TX
marrone **
blu ***
** EN brown - FR marron - ES marrón - DE braun - PL brązowy - NL bruin - RU коричневый
*** EN blue - FR bleu - ES azul - DE blau - PL granatowy - NL blauw - RU синий
PP
(ING1) Stop
MOT
Bluebus
Open
(ING2)
12Vdc
Flash
(OUT1) Aerial
M
+ +
0V
24Vdc
-
8,2 kΩ (8,2 kΩ e L5 = ON)
marrone **
blu ***
** EN brown - FR marron - ES marrón - DE braun - PL brązowy - NL bruin - RU коричневый
*** EN blue - FR bleu - ES azul - DE blau - PL granatowy - NL blauw - RU синий
FLASH
12V / 21W
SAFETY
EDGE
Photo
(ING2)
+ +
PP
(ING1) Stop
0V24Vdc
12Vdc
24Vdc
MOT
Flash
(OUT1)
NC NO
RX
21 543
TX
1 2
-
M
24Vdc
0V
24Vdc
0V
Out NC
Out NC
8,2 kΩ (8,2 kΩ e L5 = ON)
D
C
31 2 4 5 6
7
4 mm
Ø4 mm
Ø
(* not included) (* not included)
*
*
*
SPYBOX BSPYBOX
• IT - Legenda • EN - Key • FR - Légende • ES - Leyenda • DE - Legende • PL - Legenda • NL - Legenda • RU - условные обозначения
• IT - portare la porta da garage a metà della sua corsa • EN - move the garage door
to the halfway position • FR - amener la porte de garage à mi-course • ES - llevar la
puerta de garaje a la mitad de su recorrido • DE - Das Garagentor in die Mitte seines
Hubwegs bringen • PL - przenieść bramę garażową w połowie skoku • NL - De ga-
ragepoort op de helft van zn traject brengen • RU - доведите гаражные ворота до
середины их хода
IO
IO
• IT - spostare a sinistra selettore PROG = posizione I• EN - move the PROG selector
to the left = position I• FR - déplacer le sélecteur PROG vers la gauche = position I•
ES - desplazar a la izquierda el selector PROG = posición I • DE - Wahlschalter PROG
nach links schieben = Stellung I• PL - przesunąć w lewo przełącznik PROG = pozycja
I• NL - PROG-schakelaar naar links verschuiven = stand I• RU - переведите влево
переключатель ПРОГР = положение 0
• IT - fase di acquisizione quote • EN - level acquisition phase • FR - phase d’acqui-
sition des dispositifs • ES - fase de adquisición de las distancias • DE - Erfassung der
Höhenmaße • PL - faza wyszukiwania położeń • NL - acquisitiefase hoogten • RU -
этап приема отметок
Clik
• IT - bloccare il motoriduttore • EN - lock the gearmotor • FR - bloquer l’opérateur
• ES - bloquear el motorreductor • DE - Den Getriebemotor blockieren • PL - za-
blokować motoreduktor • NL - vergrendel de reductiemotor • RU - заблокировать
электропривод
• IT - lampeggio veloce led • EN - LED fast ashing • FR - clignotement rapide de la
led • ES - parpadeo rápido del led • DE - Schnelles Blinken der LED • PL - szybkie
miganie diody led • NL - led knippert snel • RU - частое мигание индикатора
• IT - fase di acquisizione trasmettitore radio (comando Passo Passo) • EN - radio trans-
mitter acquisition phase (Step-by-Step control) • FR - phase d’acquisition de l’émetteur
radio (commande Pas-à-Pas) • ES - fase de adquisición del transmisor de radio (mando
paso a paso) • DE - Erfassung des Funksenders (Schrittbefehl) • PL - faza wczytywa-
nia nadajnika radiowego (polecenie Krok po Kroku) • NL - acquisitiefase radiozender
(Stap-voor-stap-commando) • RU - этап приема радиопередатчика (пошаговое
управление)
ON
• IT - dare alimentazione elettrica di rete • EN - power the device at the mains power
• FR - fournir le courant électrique • ES - conectar la alimentación eléctrica de red •
DE - Die Netzstromversorgung einschalten • PL - włączyć zasilanie elektryczne • NL -
schakel de netvoeding in • RU - включить питание от электросети
• IT - lampeggio molto veloce led • EN - LED very fast ashing • FR - clignotement très
rapide de la led • ES - parpadeo muy rápido del led • DE - Sehr schnelles Blinken
der LED • PL - bardzo szybkie miganie diody led • NL - led knippert zeer snel • RU -
очень частое мигание индикатора
• IT - mantenere premuto un tasto del trasmettitore • EN - press and hold a transmitter
key • FR - maintenir appuyée une touche de l’émetteur • ES - mantener pulsada la
tecla del transmisor • DE - Eine Taste des Senders gedrückt halten • PL - przytrzymać
wciśnięty przycisk nadajnika • NL - houd een toets van de zender ingedrukt • RU -
держать нажатой кнопку передатчика
• IT - premere e rilasciare il tasto OPEN • EN - press and release the OPEN key • FR
- appuyer et relâcher la touche OPEN • ES - pulsar y soltar la tecla OPEN • DE - Die
Taste OPEN drücken und wieder loslassen • PL - nacisnąć i zwolnić przycisk OPEN
• NL - druk op de toets OPEN en laat hem los • RU - нажать и отпустить кнопку
OPEN
• IT - lampeggio breve led • EN - LED short ashing • FR - Clignotement court de la led
• ES - parpadeo breve del led • DE - Kurzes Blinken der LED • PL - krótkie miganie
diody led • NL - led knippert kort • RU - редкое мигание СИДа
• IT - rilasciare il tasto del trasmettitore • EN - release the transmitter key • FR - relâ-
cher la touche de l’émetteur • ES - soltar la tecla del transmisor • DE - Die Taste des
Senders loslassen • PL - zwolnić przycisk nadajnika • NL - laat de toets van de zender
los • RU - отпустить кнопку передатчика
• IT - mantenere premuto i tasti OPEN + CLOSE • EN - keep the OPEN + CLOSE but-
tons pressed • FR - maintenir enfoncées les touches OPEN + CLOSE • ES - mantener
pulsadas las teclas OPEN + CLOSE • DE - Die Tasten OPEN + CLOSE gedrückt halten
• PL - przytrzymać wciśnięte przyciski OPEN + CLOSE • NL - De toetsen OPEN +
CLOSE ingedrukt houden • RU - Нажмите одновременно и удерживайте кнопки
OPEN + CLOSE
• IT - led acceso • EN - LED on • FR - led allumée • ES - led encendido • DE - Dauer-
leuchten der LED • PL - dioda led zapalona • NL - led brandt • RU - индикатор горит =
• IT - a ne procedura il Led si spegne • EN - the LED turns off at the end of the pro-
cedure • FR - la Led s’éteint à la n de la procédure • ES - al nal del procedimiento
el Led se apaga • DE - Nach dem Vorgang verlöscht die LED • PL - po zakończeniu
procedury dioda led gaśnie • NL - aan het einde van de procedure gaat de led uit •
RU - по завершении процедуры СИД гаснет
I
O
IO
• IT - spostare a destra selettore PROG = posizione 0• EN - move the PROG selector
to the right = position 0 • FR - déplacer le sélecteur PROG vers la droite = position 0 •
ES - desplazar a la derecha el selector PROG = posición 0 • DE - Wahlschalter PROG
nach rechts schieben = Stellung 0 • PL - przesunąć w prawo przełącznik PROG =
pozycja 0 • NL - PROG-schakelaar naar rechts verschuiven = stand 0 • RU - переве-
дите вправо переключатель ПРОГР = положение 0
• IT - fase di acquisizione dispositivi • EN - device acquisition phase • FR - phase d’ac-
quisition des valeurs • ES - fase de adquisición de los dispositivos • DE - Erfassung
der Geräte • PL - faza wczytywania urządzeń • NL - acquisitiefase apparaten • RU
- этап приема устройств
• IT - chiusura-apertura-chiusura • EN - closing-opening-closing • FR - fermeture -
ouverture - fermeture • ES - cierre-apertura-cierre • DE - Schließen - Öffnen - Schlie-
ßen • PL - zamykanie-otwieranie-zamykanie • NL - sluiting-opening-sluiting • RU -
закрытие - открытие - закрытие
21
• IT - Programmazione: QUICK SET UP • EN - Programming: QUICK SET-UP • FR - Programmation: QUICK SET-UP • ES - Programación: QUICK SET-UP • DE - Programmierung: QUICK SET-UP • PL - Programowanie: QUICK SET-UP
• NL - Programmering: QUICK SET-UP • RU - Программирование: QUICK SET-UP
01. 02. 03. 04. 05. 06. 07.
è
08. 09.
L2
÷ 5 s 10 s
=
08. 09.
10 s
=
Clik
ON
L1 + L2 (4-10 s) L3 + L4 =
Led OK L2
green
L2
÷ 5 s
è

This manual suits for next models

2

Other Nice Garage Door Opener manuals

Nice TEN TNKCE User manual

Nice

Nice TEN TNKCE User manual

Nice Spider 6060 User manual

Nice

Nice Spider 6060 User manual

Nice ROBO RO1040 Product manual

Nice

Nice ROBO RO1040 Product manual

Nice OLTRE1824 Technical specifications

Nice

Nice OLTRE1824 Technical specifications

Nice ALTO100C Technical specifications

Nice

Nice ALTO100C Technical specifications

Nice Shel50Kit Technical specifications

Nice

Nice Shel50Kit Technical specifications

Nice SUMO Product manual

Nice

Nice SUMO Product manual

Nice TUB4000 Technical specifications

Nice

Nice TUB4000 Technical specifications

Nice NICEONE OXI SERIES Product manual

Nice

Nice NICEONE OXI SERIES Product manual

Nice TN2010L Technical specifications

Nice

Nice TN2010L Technical specifications

Nice AVIO600 Technical specifications

Nice

Nice AVIO600 Technical specifications

Nice SPA2 Technical specifications

Nice

Nice SPA2 Technical specifications

Nice ROBUS RB250HS User manual

Nice

Nice ROBUS RB250HS User manual

Nice SN6031 Product manual

Nice

Nice SN6031 Product manual

Nice MhouseKit SL1W Installation and operating instructions

Nice

Nice MhouseKit SL1W Installation and operating instructions

Nice RONDO User manual

Nice

Nice RONDO User manual

Nice SPY800KCE/V1 Technical specifications

Nice

Nice SPY800KCE/V1 Technical specifications

Nice TN2020LR10 Technical specifications

Nice

Nice TN2020LR10 Technical specifications

Nice RUN1500 Product manual

Nice

Nice RUN1500 Product manual

Nice Giro GRA01 Series User manual

Nice

Nice Giro GRA01 Series User manual

Nice CLIMBER User manual

Nice

Nice CLIMBER User manual

Nice SO2000 User manual

Nice

Nice SO2000 User manual

Nice Spin10KCE Product manual

Nice

Nice Spin10KCE Product manual

Nice ROBUS RB250HS User manual

Nice

Nice ROBUS RB250HS User manual

Popular Garage Door Opener manuals by other brands

Axess Pro Series 1100 installation instructions

Axess

Axess Pro Series 1100 installation instructions

SOMFY HOME MOTION Dexxo Optimo RTS user manual

SOMFY

SOMFY HOME MOTION Dexxo Optimo RTS user manual

quiko BOXTER QK-B220 Use and maintenance manual

quiko

quiko BOXTER QK-B220 Use and maintenance manual

DH2 Solutions Gilgen FD20 Information

DH2 Solutions

DH2 Solutions Gilgen FD20 Information

Wayne-Dalton 3790 installation instructions

Wayne-Dalton

Wayne-Dalton 3790 installation instructions

Chamberlain 3245C 1/3 HP owner's manual

Chamberlain

Chamberlain 3245C 1/3 HP owner's manual

Beninca BOB5024 manual

Beninca

Beninca BOB5024 manual

Chamberlain Security+ 257856 owner's manual

Chamberlain

Chamberlain Security+ 257856 owner's manual

Chamberlain H owner's manual

Chamberlain

Chamberlain H owner's manual

Portalp ISO 3 manual

Portalp

Portalp ISO 3 manual

Craftsman 139.53990DS owner's manual

Craftsman

Craftsman 139.53990DS owner's manual

Serai MT/71 installation manual

Serai

Serai MT/71 installation manual

CAME v6000 Installation & operation

CAME

CAME v6000 Installation & operation

RIB SUPER 3600 manual

RIB

RIB SUPER 3600 manual

Mission Machines miDoor Quick installation guide

Mission Machines

Mission Machines miDoor Quick installation guide

Genie Wireless Keypad Operationg instructions

Genie

Genie Wireless Keypad Operationg instructions

Henderson Magic 600 operating manual

Henderson

Henderson Magic 600 operating manual

Genie Excelerator manual

Genie

Genie Excelerator manual

manuals.online logo
manuals.online logoBrands
  • About & Mission
  • Contact us
  • Privacy Policy
  • Terms and Conditions

Copyright 2025 Manuals.Online. All Rights Reserved.