manuals.online logo
Brands
  1. Home
  2. •
  3. Brands
  4. •
  5. Nice
  6. •
  7. Gate Opener
  8. •
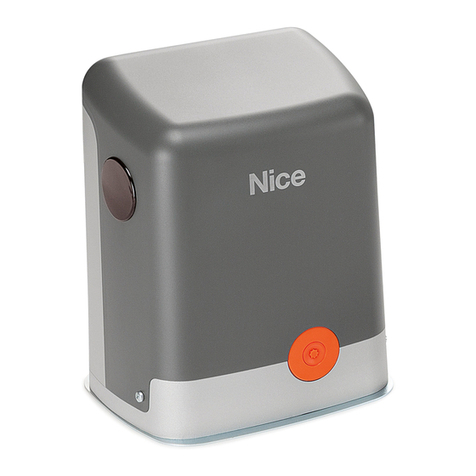
  9. Nice PP7124 User manual

Nice PP7124 User manual

1.
2.
3.
4.
MAX
90°
1
3
2
M6x20
1
2
180°
IT - Dichiarazione CE di conformità e dichiarazione di incorporazione di “quasi macchina” / EN - EC declaration of conformity and declaration of incorporation of partly completed machinery
Nota: il contenuto di questa dichiarazione corrisponde a quanto dichiarato nel documento ufciale depositato presso la sede di Nice S.p.a., e in particolare, alla sua ultima revisione disponibile prima della stampa di questo manuale. Il testo qui presente è stato riadattato per motivi editoriali. Copia della dichiarazione originale può essere richiesta a Nice S.p.a. (TV) I. / Note: The contents of this declaration correspond to declarations in the
ofcial document led in the ofces of Nice S.p.a. and, in particular, the latest version thereof available prior to the printing of this manual. The text herein has been re-edited for editorial purposes. A copy of the original declaration can be requested from Nice S.p.A. (TV) I.
Numero dichiarazione: 338/POP - Revisione: 4 - Lingua: IT - Nome produttore: NICE S.p.A. - Indirizzo: Via Callalta N°1, 31046 Rustignè di Oderzo (TV) Italy - Persona autorizzata a costituire la documentazione tecnica: NICE S.p.A. - Tipo di prodotto: Motoriduttore elettromeccanico con centrale incorporata - Modello/Tipo: PP7124, PP7224 - Accessori: Fare riferimento al catalogo
Declaration number: 338/POP - Revision: 4- Language: EN - Name of manufacturer: NICE S.p.A. - Address: Via Callalta N°1, 31046 Rustignè di Oderzo (TV) Italy - Person authorised to draw up the technical documentation: NICE S.p.A. - Type of product: Electromechanical gear motor with incorporated control unit - Model/Type: PP7124, PP7224 - Accessories: Refer to the catalog.
Il sottoscritto Roberto Griffa in qualità di Amministratore Delegato, dichiara sotto la propria responsabilità che il prodotto sopra indicato risulta conforme alle disposizioni imposte dalle seguenti direttive: / The undersigned Roberto Griffa, in the role of Chief Executive Ofcer, declares under his sole responsibility that the product described above complies with the provisions laid down in the following directives:
• DIRETTIVA 2014/30/UE (EMC) DEL PARLAMENTO EUROPEO E DEL CONSIGLIO del 26 febbraio 2014 concernente l’armonizzazione delle legislazioni degli Stati membri relative alla compatibilità elettromagnetica (rifusione), secondo le seguenti norme armonizzate: / • DIRECTIVE 2014/30/EU (EMC) OF THE EUROPEAN PARLIAMENT AND OF THE COUNCIL of 26 February 2014 on the harmonisation of the laws of the Member States
relating to electromagnetic compatibility (recast), according to the following standards: EN 61000-6-2:2005, EN 61000-6-3:2007+A1:2011
Inoltre il prodotto risulta essere conforme alla seguente direttiva secondo i requisiti previsti per le “quasi macchine”: / In addition, the product conforms to the following directive pursuant to the provisions applicable to “partly completed machinery”:
Direttiva 2006/42/CE DEL PARLAMENTO EUROPEO E DEL CONSIGLIO del 17 maggio 2006 relativa alle macchine e che modica la direttiva 95/16/CE (rifusione) / Directive 2006/42/EC OF THE EUROPEAN PARLIAMENT AND OF THE COUNCIL of May 17 2006 on machinery, amending Directive 95/16/EC (consolidated version)
- Si dichiara che la documentazione tecnica pertinente è stata compilata in conformità all’allegato VII B della direttiva 2006/42/CE e che sono stati rispettati i seguenti requisiti essenziali: / - It is hereby declared that the relevant technical documentation has been compiled in accordance with Annex VII Part B of Directive 2006/42/EC and that the following essential requirements have been applied and fullled: 1.1.1-1.1.2-1.1.3-1.2.1-1.2.6-
1.5.1-1.5.2-1.5.5-1.5.6-1.5.7-1.5.8-1.5.10-1.5.11.
- Il produttore si impegna a trasmettere alle autorità nazionali, in risposta ad una motivata richiesta, le informazioni pertinenti sulla “quasi macchina”, mantenendo impregiudicati i propri diritti di proprietà intellettuale. / - The manufacturer undertakes to transmit, in response to a reasoned request by the national authorities, relevant information on the “partly completed machinery”. This shall be without prejudice to the intellectual property rights
of the manufacturer of the partly completed machinery.
- Qualora la “quasi macchina” sia messa in servizio in un paese europeo con lingua ufciale diversa da quella usata nella presente dichiarazione, l’importatore ha l’obbligo di associare alla presente dichiarazione la relativa traduzione. / - Should the “partly completed machinery” be put into service in a European country with an ofcial language different to the one used in this declaration, a translation into that language must be provided by
the person bringing the machinery into the language area in question.
- Si avverte che la “quasi macchina” non dovrà essere messa in servizio nché la macchina nale in cui sarà incorporata non sarà a sua volta dichiarata conforme, se del caso, alle disposizioni della direttiva 2006/42/CE. / - The “partly completed machinery” may not be put into service until the nal machinery into which it is to be incorporated has been declared in conformity with the provisions of Directive 2006/42/EC, where appropriate.
Inoltre il prodotto risulta conforme alle seguenti norme: / The product also complies with the following standards: EN 60335-1:2012+A11:2014, EN 62233:2008, EN 60335-2-103:2015.
Il prodotto risulta conforme, limitatamente alle parti applicabili, alle seguenti norme: / All parts of the product subject to the following standards comply with them: EN 60335-1:2012+A11:2014, EN 62233:2008, EN 60335-2-103:2015.
Oderzo, 16 Maggio 2018 / Oderzo, 16th May 2018. Ing. Roberto Griffa
(Amministratore Delegato / Chief Executive Ofcer)
IT - GUIDA RAPIDA
EN - QUICK GUIDE
FR - GUIDE RAPIDE
ES - GUÍA RÁPIDA
DE - KURZANLEITUNG
PL - INSTRUKCJA SKRÓCONA
NL - SNELSTARTGIDS
RU- краткое руководство по установке
Swing gate opener
• IT - Impianto tipico • EN - Typical installation • FR - Installation type • ES - Instalación típica • DE - Typische
Anlage • PL - Typowy system • NL - Gebruikelke installatie • RU - Типичная установка
A
B C
D E
D G F D
• IT - Cavi da utilizzare • EN - Cables to use • FR - Câbles à utiliser •
ES - Cables a utilizar • DE - Zu verwendende Kabel • PL - Kable, jakich
należy użyć • NL -Verplichte kabels • RU - Используемые кабели
A3 x 1,5 mm2 (included) 30 m max *
B2 x 1,0 mm220 m max
CN°1 cable RG58 20 m max ( < 5 m)
DN°1 cable: 2 x 0,5 mm220 m max **
EN°2 cables: 2 x 0,5 mm2*** 50 m max
FN°1 cable: 2 x 1,0 mm26 m max
GN°1 cable: 3 x 1,5 mm210 m max
* Cable > 30 m = N°1 cable: 3 x 2,5 mm2 +
** Cable > 20 m (40 m max) = N°1 cable: 2 x 1 mm2
*** N°2 cables: 2 x 0,5 mm2 = N°1 cable: 4 x 0,5 mm2
DEFAULT = OFF
L1 IT EN FR ES DE PL NL RU
Chiusura Automatica Automatic closure Fermeture automatique Cierre Automático Automatische Schließung Zamknięcie automatyczne Automatische sluiting
Автоматическое закрывание
OFF semiautomatico semi-automatic semi-automatique semiautomático halbautomatisch półautomatyczny semiautomatico полуавтоматический
L2 IT EN FR ES DE PL NL RU
Richiudi Dopo Foto Close After Photo Fermeture immédiate après
passage devant photocellule Cerrar después de fotocé-
lula Schließen nach Durchfahrt
der Photozelle Zamknij po Foto Hersluiten na foto Закрыть после фотоэлемента
OFF il tempo di pausa è quello
programmato oppure non c’è
richiusura automatica
the pause time corresponds to
that set or the gate does not
re-close automatically
le temps de pause est celui
programmé ou il n’y a pas de
refermeture automatique
el tiempo de pausa es el
programado o no hay recierre
automático
Es gilt die programmierte
Pausenzeit bzw. es erfolgt kein
automatisches Schließen
czas trwania pauzy jest
zaprogramowany lub nie ma
automatycznego zamknięcia
de pauzetijd is de
geprogrammeerde tijd of er is
geen automatische hersluiting
время паузы представляет собой
заданное время или же автоматическое
закрывание отсутствует
L3 IT EN FR ES DE PL NL RU
Chiude Sempre Always Close Ferme toujours Cerrar Siempre Schließt immer Zawsze Zamyka Altijd sluiten Всегда закрывать
OFF al ritorno dell’alimentazione il
cancello rimane fermo when the power supply is
restored the gate keeps still au retour de l’alimentation, le
portail reste à l’arrêt al retorno de la alimentación la
cancela permanece detenida
Bei Rückkehr der
Stromversorgung bleibt das Tor
stehen
po powrocie zasilania brama
pozostaje nieruchoma bij het terugkeren van de
stroom blijft het hek stilstaan после восстановления подачи
питания ворота остаются
неподвижными
L4 IT EN FR ES DE PL NL RU
Stand-By Stand-By Stand-By Stand-By Stand-By Stand-By Stand-By Ожидание
OFF non c’è riduzione dei consumi there will be no reduction in
consumption il n’y aura pas de réduction des
consommations no habrá reducción del con-
sumo
es erfolgt keine Reduzierung des
Stromverbrauchs.
nie będzie ograniczenia zużycia er is geen vermindering van het
stroomverbruik снижение потребления не
происходит
L5 IT EN FR ES DE PL NL RU
Elettroserratura / Luce di
cortesia Electric lock / Courtesy light Serrure électrique / Éclai-
rage automatique Electrocerradura / Luz de
cortesía
Elektroschloss / Zusatzlicht Elektrozamek / Światło
pomocnicze
Elektrisch slot/gebruikers-
licht Электрозамок / Подсветка
OFF l’uscita funziona come elettro-
serratura
the output functions as an
electric lock
la sortie fonctionne comme
serrure électrique
la salida funciona como
electrocerradura
Der Ausgang hat die Funktion
Elektroschloss wyjście działa jako elektrozamek de uitgang werkt als elektrisch
slot
выход работает как электрозамок
L6 IT EN FR ES DE PL NL RU
Prelampeggio Pre-flashing Préclignotement Parpadeo previo Vorwarnen Wstępne miganie Voorwaarschuwing Предварительное мигание
OFF l’accensione del lampeggiante
coincide con l’inizio manovra the warning light starts flashing
when the manoeuvre starts l’allumage du clignotant
coïncide avec le début de la
manœuvre
el encendido de la luz
intermitente coincide con el
comienzo de la maniobra
Das Einschalten der
Blinkleuchte erfolgt gleichzeitig
mit dem Bewegungsbeginn
włączenie lampy ostrzegawczej
następuje równocześnie z
rozpoczęciem manewru
het knipperlicht gaat aan bij het
begin van de manoeuvre
мигающее устройство начинает
мигать одновременно с началом
движения
L7 IT EN FR ES DE PL NL RU
“Sbs” diventa “Apre” e
“Open” diventa “Chiude” “SbS” turns into “Open” and
“Open” into “Close”
«Sbs» devient «Ouverture» et
«Open» devient «Fermeture»
“Sbs” pasa a “Abre” y
“Open” pasa a “Cierra”
„Sbs“ wird zu „Öffnen“ und
„Open“ wird zu „Schließen“
„Sbs” przechodzi na „Otwiera” i
„Open” przechodzi na „Zamyka”
“Sbs” wordt “Open” en
“Open” wordt “Sluit” «Sbs» становится «Открыть», а
«Open» становится «Закрыть»
OFF i due ingressi “Sbs” e “Open”
hanno la funzione di “Passo
passo” e “Apre parziale 1”
the “SbS” and “Open” inputs
of the control unit function as
“ Step-by-Step” and
“Partial open 1” commands
les deux entrées «Sbs» et
«Open» de la centrale ont la
fonction «Pas-à-pas» et «Ou-
verture partielle 1»
las dos entradas “Sbs” y
“Open” de la central tienen la
función de “Paso paso” y “Abre
parcial 1”
Die beiden Eingänge „Sbs“ und
„Open“ der Steuerung haben
die Funktion von „Schrittbe-
trieb“ und „Teilöffnung 1“
dwa wejścia „Sbs” i „Open”
centrali, mają przypisaną fun-
kcję „Krok po Kroku” i „Otwiera
częściowo 1”
de twee ingangen “Sbs” en
“Open” op de besturingse-
enheid hebben de functie
“Stap-voor-stap” en “Open
gedeeltelijk 1”
два входа блока управления «Sbs»
и «Открыть» работают как «Пошаго-
вый режим» и «Частичное открытие
1»
L8 IT EN FR ES DE PL NL RU
“Flash” oppure “Spia cancel-
lo aperto” “Flash” or “Open gate indi-
cator” «Flash» ou «Voyant portail
ouvert» “Flash” o “Testigo cancela
abierta”
„Flash“ oder „Kontrollleuch-
te Tor geöffnet“
„Flash” lub „Kontrolka
otwartej bramy”
“Flash” of “Lampje poort
open” «Flash» или «Индикатор открытых
ворот»
OFF l’uscita “Flash” della centrale
esegue la funzione “Lampeg-
giante”.
the “Flash” output of the control
unit performs the “Warning
light” function.
la sortie «Flash» de la centrale
exécute la fonction «Cligno-
tant»
la salida “Flash” de la central
ejecuta la función “Intermitente” Der Ausgang „Flash“ der
Steuerung hat die Funktion
„Blinkleuchte“
wyjście „Flash” centrali wyko-
nuje funkcję „Lampa ostrze-
gawcza”
de uitgang “Flash” op de bestu-
ringseenheid voert de functie
“Knipperlicht” uit
выход «Flash» блока управления
выполняет функцию «Мигающего
устройства»
IS0668A00MM_31-01-2019
Nice
PP7124
315 mm
167 mm 254 mm
H
M ON P Q
MIN 400 mm
90°-95°
95°-100°
100°-105°
105°-110°
300250220200170150130110
0
50
100
A
B
150
200
250
B
A B C
A
B
1
2
3x 4
4
5
6
D FE G
LI
90°
1
OK
OK 90°
2
3
3
4
5
6
1
M8x55
2
Complete manual: www.niceforyou.com SERIAL NUMBER: ..................................................................... DATE: .............................................
• IT - Da consegnare all’utilizzatore • EN - To be given to the user • FR - À remettre à l’utilisateur • ES - Para entregar al usuario • DE - Dem Endnutzer zu übergeben • PL - Do przekazania użytkownikowi • NL - Te overhandigen aan de gebruiker • RU - Передается конечному пользователю
IT Questo manuale è una sintesi delle fasi d’installazione e della messa in funzione con i valori di default: il manuale istruzioni
completo (installazione, collegamenti, programmazioni parametri, diagnostica, ecc.) è scaricabile dal sito www.niceforyou.com
EN This manual is a summary of the installation and commissioning instructions, using the default values: the complete user
manual (installation, connections, programming, diagnostics, etc.) is available for download from www.niceforyou.com
FR Ce manuel est un résumé des phases d’installation et de mise en service avec les valeurs par défaut: le mode d’emploi
complet (installation, raccordements, programmation des paramètres, diagnostic, etc.) peut être téléchargé sur le site Internet www.
niceforyou.com
ES Este manual es una síntesis de las fases de instalación y de la puesta en funcionamiento con los valores predeterminados:
el manual de instrucciones completo (instalación, conexiones, programación de parámetros, diagnóstico, etc.) se puede descargar del
sitio www.niceforyou.com
DE Diese Anleitung gibt einen Überblick über die Einrichtungs- und Inbetriebnahmephasen mit den Standardeinstellungen:
Die vollständige Anleitung (zu Einrichtung, Anschlüssen, Programmierung der Parameter, Diagnose, usw.) kann auf der Webseite www.
niceforyou.com heruntergeladen werden
PL Niniejsza instrukcja jest streszczeniem etapów instalacji i uruchomienia z zastosowaniem wartości domyślnych: pełną
instrukcję obsługi (instalacja, podłączenia, programowanie parametrów, diagnostyka, itd.) można pobrać ze strony internetowej www.
niceforyou.com
NL Deze handleiding is een samenvatting van de stadia van installatie en inbedrfstelling met de standaard waarden: de
complete handleiding (installatie, bedrading, het programmeren van parameters, diagnostiek etc.) kan worden gedownload van de
website www.niceforyou.com
RU
Данное руководство являет собой синтез фаз монтажа ипуска вработу согласно стандартно заданным зна-
чениям: полное руководство с инструкциями (монтаж, подключения, программирование параметров, диагностика и пр.)
может быть загружена с веб-сайта www.niceforyou.ru
5. 6.
7.
• IT -LEGENDA • EN -KEY • FR - LÉGENDE • ES - LEYENDA • DE - LEGENDE • PL - LEGENDA • NL - LEGENDA • RU -
УСЛОВНЫЕ ОБОЗНАЧЕНИЯ
ON
• IT - dare alimentazione elettrica di rete • EN - sup-
ply mains power • FR - activer l’alimentation élec-
trique du réseau • ES - conectar la alimentación eléc-
trica de red • DE - mit dem Stromnetz verbinden •
PL - włączyć zasilanie elektryczne • NL - netvoeding
inschakelen • RU - включить питание
• IT - led spento • EN - led off • FR - led éteinte •
ES - led apagado • DE - led Aus • PL - dioda led
zgaszona • NL - Led is uit • RU - СИД выключен
OFF
• IT - togliere alimentazione elettrica di rete • EN -
shut off mains power • FR - couper l’alimentation
électrique du réseau • ES - desconectar la alimenta-
ción eléctrica de red • DE - Die Netzstromversorgung
ausschalten • PL - odłączyć zasilanie elektryczne •
NL - Netvoeding uitschakelen • RU - отключите се-
тевое электропитание
=
• IT - attendere la ne dell’acquisizione dispositivi •
EN - wait for the device acquisition phase to end • FR
- attendre la n de l’acquisition des dispositifs • ES -
esperar que termine la adquisición de los dispositivos
• DE - Ende der Geräteerkennung abwarten • PL
- poczekać na zakończenie wczytywania urządzeń
• NL - wacht op het einde van het aanleren van
de inrichtingen • RU - дождитесь конца опроса
устройств
• IT - osservare • EN - observe • FR - observer •
ES - observar • DE - beobachten • PL - obserwuj •
NL - observeren • RU - осмотреть
• IT - attendere • EN - wait • FR - attendre • ES - es-
perar • DE - Warten • PL - zaczekać • NL - wachten
• RU - ожидайте
• IT - Corretto • EN - Correct • FR - Correct • ES
- Correcto • DE - Richtig • PL - Prawidłowo • NL -
Correct • RU - Правильно
• IT - mantenere premuti i tasti • EN - keep the but-
tons pressed • FR - maintenir enfoncées les touches
• ES - mantener pulsadas las teclas • DE - Die Tas-
ten gedrückt halten • PL - przytrzymać wciśnięte
przyciski • NL - De toetsen ingedrukt houden • RU
- Нажмите одновременно и удерживайте кнопки
• IT - Non corretto • EN - Incorrect • FR - Incorrect
• ES - No correcto • DE - Nicht richtig • PL - Nie-
prawidłowo • NL - Niet correct • RU - Неправильно
• IT - rilasciare i tasti • EN - release the buttons •
FR - relâcher les touches • ES - soltar las teclas •
DE - Die Tasten gedrückt halten • PL - przytrzymać
wciśnięte przyciski • NL - De toetsen ingedrukt hou-
den • RU - отпустить кнопки
• IT - lampeggio molto veloce led • EN - LED very fast
ashing • FR - clignotement très rapide de la led • ES
- parpadeo muy rápido del led • DE - Sehr schnelles
Blinken der LED • PL - bardzo szybkie miganie diody
led • NL - led knippert zeer snel • RU - очень частое
мигание индикатора
• IT - premere e rilasciare il tasto • EN - press and
release the key • FR - enfoncer et relâcher la touche
• ES - pulsar y soltar la tecla • DE - Taste drücken
und loslassen • PL - nacisnąć i zwolnić przycisk • NL
- de toets indrukken en weer loslaten • RU - нажать
и отпустить кнопку
• IT - lampeggio led • EN - ashing LED • FR -
clignotement de la led • ES - led intermitente • DE
- Blinken der LED • PL - miganie diody led • NL - led
knippert • RU - мигание светодиода
• IT - apertura • EN - opening • FR - ouverture •
ES - apertura • DE - Öffnen • PL - otwieranie • NL -
opening • RU - открытие
• IT - led acceso • EN - led on • FR - led allumée •
ES - led encendido • DE - Dauerleuchten der LED •
PL - dioda led zapalona • NL - led brandt • RU - ин-
дикатор горит
• IT - chiusura • EN - closing • FR - fermeture • ES
- cierre • DE - Schließen • PL - zamykanie • NL -
sluiting • RU - закрытие
8. • IT - fase acquisizione dispositivi • EN - device acquisition phase • FR - phase d’acquisition des dispositifs •
ES - fase de adquisición de los dispositivos • DE - Geräteerkennungsphase • PL - faza wczytywania urządzeń
• NL - faza wczytywania urządzeń • RU - этап опроса устройств
01. 02. 03. 04. 05.
L1 + L2
3s
L1+L2
=
Led STOP
+
L1 + L2 ( )
L3 + L4
9. • IT - apprendimento posizioni di apertura e chiusura • EN - recognition of opening and closing positions•
FR - reconnaissance positions d’ouverture et fermeture • ES - aprendizaje posiciones de apertura y cierre
• DE - Einlernung der Öffnungs- und Schließpositionen • PL - wczytywanie pozycji otwarcia i zamknięcia •
NL - de openings- en sluitposities aanleren • RU - считывание положений открытия и закрытия
01. 02. 03. 04. 05.
3s
L3+L4
ON
OFF
FLASH EL STOP SBS OPEN
BLUEBUS
M M M
1 2
TX RX
FLASH
OFF
=
IT controllare: collegamenti elettrici, allineamenti fotocellule e fusibili.
EN check: electrical connections, alignment of photocells, and fuses.
FR contrôler: raccordements électriques, alignements des photocellules et fusibles.
ES controlar: conexiones eléctricas, alineación fotocélulas y fusibles.
DE Überprüfen Sie Folgendes: elektrische Anschlüsse, Ausrichtung von Photozellen und Sicherungen.
PL sprawdzić: połączenia elektryczne, ustawienie fotokomórek i bezpieczniki.
NL controleren: elektrische aansluitingen, uitlning fotocellen en zekeringen.
RU проверить: электрические подключения, юстировку фотоэлементов и плавкие предохранители.
• IT - Sblocco dell’automazione • EN - Releasing the automation • FR - Déblocage de l’automatisme • ES - Desbloqueo de la automatización
• DE - Automatikbetrieb entriegeln • PL - Odblokowanie automatu • NL - Deblokkering van de automatisering • RU - Разблокировка привода
90°
2
1
• IT - Blocco dell’automazione • EN - Locking the automation • FR - Blocage de l’automatisme • ES - Bloqueo de la automatización • DE -
Automatikbetrieb sperren • PL - Zablokowanie automatu • NL - Blokkering van de automatisering • RU - Блокирование привода
OFF
FLASH
FLASH
PP\7124PP7224
EL STOP SBSOPEN
BLUEBUS
MMMM
EL
Bluebus Bluebus
TX RX STOP SBS
NO
NC
8K2 NO
OPEN
NO
12
12
KEYS
AERIAL
LED
FUSE
RECEIVER
B
A
IT EN FR ES
KEYS TASTI PROGRAMMAZIONE E
COMANDO PROGRAMMING AND CONTROL
KEYS TOUCHES DE PROGRAMMATION
ET COMMANDE TECLAS DE PROGRAMACIÓN Y
MANDO
LED LED FUNZIONI FUNCTION LEDS LED DE FONCTIONS LED FUNCIONES
RECEIVER RICEVITORE RADIO RADIO RECEIVER RÉCEPTEUR RADIO RADIORRECEPTOR
AERIAL ANTENNA AERIAL ANTENNE ANTENA
EL
USCITA PER ELETTROSERRATURA
DA 12 VA OUTPUT FOR 12 VA ELECTRIC
LOCK SORTIE POUR SERRURE
ÉLECTRIQUE DE 12 VA SALIDA PARA
ELECTROCERRADURA DE 12 VA
FUSE FUSIBILE FUSE FUSIBLE FUSIBLE
FLASH LAMPEGGIANTE FLASHING LIGHT CLIGNOTANT INTERMITENTE
TX - RX FOTOCELLULE PHOTOCELLS PHOTOCELLULES FOTOCÉLULAS
STOP
NO-NC-8K2 STOP
BORDO SENSIBILE STOP
SENSITIVE EDGE STOP
BARRE PALPEUSE STOP
BANDA SENSIBLE
SBS PASSO-PASSO STEP BY STEP PAS À PAS PASO A PASO
OPEN OPEN OPEN OPEN OPEN
M1 USCITA PER MOTORIDUTTORE
SENZA CENTRALE
(PP7224)
OUTPUT FOR GEARMOTOR
WITHOUT CONTROL UNIT
(PP7224)
SORTIE POUR MOTORÉDUCTEUR
SANS CENTRALE (PP7224)SALIDA PARA MOTORREDUCTOR
SIN CENTRAL (PP7224)
M2 USCITA PER MOTORIDUTTORE
CON CENTRALE
(PP7124)OUTPUT FOR GEARMOTOR WITH
CONTROL UNIT (PP7124)SORTIE POUR MOTORÉDUCTEUR
AVEC CENTRALE (PP7124)SALIDA PARA MOTORREDUCTOR
CON CENTRAL (PP7124)
Open ▲ Tasto "APRE" "OPEN" Button Touche "OUVERTURE" Botón "ABRE"
Close ▼ Tasto "CHIUDE" "CLOSE" Button Touche "FERMETURE" Botón "CIERRA"
Stop/Set Tasto "STOP/SET" "STOP/SET" Button Touche "STOP/SET" Botón "STOP/SET"
DE PL NL RU
KEYS PROGRAMMIER- UND
BEFEHLSTASTEN PRZYCISKI PROGRAMUJĄCE I
STEROWNICZE PROGRAMMERINGS- EN
BEDIENINGSTOETSEN КЛАВИШИ ПРОГРАММИРОВАНИЯ
И УПРАВЛЕНИЯ
LED FUNKTIONSANZEIGE-LED DIODY LED FUNKCJI FUNCTIELEDS СВЕТОДИОДЫ ФУНКЦИЙ
RECEIVER FUNKEMPFÄNGER ODBIORNIK RADIOWY SIGNAALONTVANGER РАДИОПРИЕМНИК
AERIAL ANTENNE ANTENA ANTENNE АНТЕННА
EL
AUSGANG FÜR
ELEKTROSCHLOSS ZU 12 VA WYJŚCIE DO ELEKTROZAMKA 12
VA UITGANG VOOR ELEKTRISCH SLOT
VAN 12 VA
ВЫХОД ДЛЯ ПОДКЛЮЧЕНИЯ
ЭЛЕКТРОЗАМКА С НАПРЯЖЕНИЕМ
12 В
FUSE SICHERUNG BEZPIECZNIK ZEKERING ПРЕДОХРАНИТЕЛЬ
FLASH BLINKLEUCHTE LAMPA OSTRZEGAWCZA KNIPPERLICHT ПРОБЛЕСКОВАЯ ЛАМПА
TX - RX FOTOZELLEN FOTOKOMÓRKI FOTOCELLEN ФОТОЭЛЕМЕНТЫ
STOP
NO-NC-8K2 STOP
SCHALTLEISTE STOP
LISTWA KRAWĘDZIOWA STOP
CONTACTLIJST STOP
ЧУВСТВИТЕЛЬНАЯ КРОМКА
SBS SCHRITTBETRIEB KROK PO KROKU STAP-VOOR-STAP ПОШАГОВО
OPEN OPEN OPEN OPEN OPEN
M1
AUSGANG FÜR GETRIEBEMOTOR
OHNE STEUERUNG (PP7224)WYJŚCIE DLA MOTOREDUKTORA
BEZ CENTRALI (PP7224)
UITGANG VOOR REDUCTIEMOTOR
ZONDER BESTURINGSEENHEID
(PP7224)
ВЫХОД ДЛЯ ЭЛЕКТРОПРИВОДА
БЕЗ БЛОКА УПРАВЛЕНИЯ (PP7224)
M2
AUSGANG FÜR GETRIEBEMOTOR
MIT STEUERUNG (PP7124)WYJŚCIE DLA MOTOREDUKTORA
Z CENTRALĄ (PP7124)
UITGANG VOOR REDUCTIEMOTOR
MET BESTURINGSEENHEID
(PP7124)
ВЫХОД ДЛЯ ЭЛЕКТРОПРИВОДА С
БЛОКОМ УПРАВЛЕНИЯ (PP7124)
Open ▲ Taste "ÖFFNET" Przycisk "OTWIERA" Toets "OPENEN" Кнопка "ОТКРЫТЬ"
Close ▼ Taste "SCHLIESST" Przycisk "ZAMYKA" Toets "SLUITEN" Кнопка "ЗАКРЫТЬ"
Stop/Set Taste "STOP/SET" Przycisk "STOP/SET" Toets "STOP/SET" Кнопка "STOP/SET"
90°
1
2

Other manuals for PP7124

1

Other Nice Gate Opener manuals

Nice DBM5 Product manual

Nice

Nice DBM5 Product manual

Nice Neo Product manual

Nice

Nice Neo Product manual

Nice Naked Sliding NKSL400 Technical specifications

Nice

Nice Naked Sliding NKSL400 Technical specifications

Nice 5024 Kit Technical specifications

Nice

Nice 5024 Kit Technical specifications

Nice BFAB5024 Technical specifications

Nice

Nice BFAB5024 Technical specifications

Nice TTN3724RHS User manual

Nice

Nice TTN3724RHS User manual

Nice ARIA Technical specifications

Nice

Nice ARIA Technical specifications

Nice Pop Series Product manual

Nice

Nice Pop Series Product manual

Nice Moby Series Product manual

Nice

Nice Moby Series Product manual

Nice MIGHTY MULE R4222 User manual

Nice

Nice MIGHTY MULE R4222 User manual

Nice hyke HK7224 Technical specifications

Nice

Nice hyke HK7224 Technical specifications

Nice Wingo4024 Technical specifications

Nice

Nice Wingo4024 Technical specifications

Nice Toona TO5024 User manual

Nice

Nice Toona TO5024 User manual

Nice MhouseKit WG20S Technical specifications

Nice

Nice MhouseKit WG20S Technical specifications

Nice PP7124 Technical specifications

Nice

Nice PP7124 Technical specifications

Nice POP PP7124 Technical specifications

Nice

Nice POP PP7124 Technical specifications

Nice Toona TO4005 Technical specifications

Nice

Nice Toona TO4005 Technical specifications

Nice 4024 Technical specifications

Nice

Nice 4024 Technical specifications

Nice 7251 Assembly instructions

Nice

Nice 7251 Assembly instructions

Nice RS 500 AC User manual

Nice

Nice RS 500 AC User manual

Nice MFAB3000 Technical specifications

Nice

Nice MFAB3000 Technical specifications

Nice ROX Series Technical specifications

Nice

Nice ROX Series Technical specifications

Nice RONDO User manual

Nice

Nice RONDO User manual

Nice MhouseKit WG2W Technical specifications

Nice

Nice MhouseKit WG2W Technical specifications

Popular Gate Opener manuals by other brands

GiBiDi PASS 1200 Instructions for installations

GiBiDi

GiBiDi PASS 1200 Instructions for installations

SEA LYRA manual

SEA

SEA LYRA manual

GDS GDS 4 Installation and maintenance manual

GDS

GDS GDS 4 Installation and maintenance manual

Proteco leader ta Installation and use manual

Proteco

Proteco leader ta Installation and use manual

CAME G4000 installation manual

CAME

CAME G4000 installation manual

O&O BTX Installation and use instructions

O&O

O&O BTX Installation and use instructions

Viking Access Systems I-770 Installation instructions and safety information

Viking Access Systems

Viking Access Systems I-770 Installation instructions and safety information

MFZ Ovitor MDF Series operating instructions

MFZ Ovitor

MFZ Ovitor MDF Series operating instructions

Beninca RI.6K Operating instructions and spare parts catalogue

Beninca

Beninca RI.6K Operating instructions and spare parts catalogue

CENTURION SYSTEMS V400 Mechanical Installation Manual

CENTURION SYSTEMS

CENTURION SYSTEMS V400 Mechanical Installation Manual

LOCKEY USA TB200 installation instructions

LOCKEY USA

LOCKEY USA TB200 installation instructions

Allmatic HYPER 400 manual

Allmatic

Allmatic HYPER 400 manual

Beninca PREMIER operating instructions

Beninca

Beninca PREMIER operating instructions

Genius MILORD5 manual

Genius

Genius MILORD5 manual

CAME FROG installation manual

CAME

CAME FROG installation manual

vds PHV 240 instruction manual

vds

vds PHV 240 instruction manual

Centurion D3 installation manual

Centurion

Centurion D3 installation manual

CAME 806SL-0010 manual

CAME

CAME 806SL-0010 manual

manuals.online logo
manuals.online logoBrands
  • About & Mission
  • Contact us
  • Privacy Policy
  • Terms and Conditions

Copyright 2025 Manuals.Online. All Rights Reserved.