manuals.online logo
Brands
  1. Home
  2. •
  3. Brands
  4. •
  5. Nice
  6. •
  7. Security Sensor
  8. •
  9. Nice LP22 Operating instructions

Nice LP22 Operating instructions

User, installation and
safety instructions
Nice
LP22
EN
5 - OUTPUTS AND LED INDICATORS
5.1 - Operating principle of the relays
The factory setting establishes that both relays function according to the principle of standby current. The
operation principle of the relay can be set according to the following table by using jumpers, if tted on the
card. In this regard, the housing of the detector must be opened carefully (see table 7).
- Warning! On the card there are components which are sensitive to static energy. When
working with the device open, appropriate precautions are required. Do not touch the compo-
nents or conductors! The warranty will be nullied for damages caused by improper handling!
Relais
JP1
JP2
3 2 1
JP3
JP4
Platine
32 1 3 2 1
321
Table 7
Detector status Relay operating principle
1*) 2 3 4
Tension is off
Free loop
Output
Loop fault
✱) Factory setting
Relay Jumper Position Relay function
1
JP1 1-2 • • Normally open contact
2-3 • • Normally closed contact
JP3 1-2 • • Working current principle
2-3 • • Quiescent current principle
2
JP2 1-2 • • Normally open contact
2-3 • • Normally closed contact
JP4 1-2 • • Working current principle
2-3 • • Quiescent current principle
5.2 - LED indicators
The green LED indicates that the detector is ready for operation. The red LED, depending on the occupa-
tion status of the loop, indicates the activation of the relay output (see table 8).
Table 8
Green LED loop control Red LED loop status Detector status
Off Off No power voltage
Flashing light Off Frequency indication or adjustment
On Off The detector is ready, free loop
On On The detector is ready, occupied loop
Off On Loop fault
5.3 - Loop frequency indication
About 1 s after the adjustment of the detector, the loop frequency is indicated by ashing signals on the
green LED. First of all, the 10 kHz location of the frequency value will be displayed. For each frequency
value of 10 kHz, the green LED of the detector channel will ash once. After 1 sec. the 1 kHz position will
be displayed in the same manner. If the value at the position of 1 kHz is ‘0’ the LED will ash 10 times.
The 1 kHz position ashes are slightly shorter than the 10 kHz position ashes.
Example of 57 kHz loop frequency: Tens Units
1 s
5x 10 kHz 7x 1 kHz
6 - ELECTRICAL CONNECTIONS
- Warning!
– Incorrect connections can cause faults or hazards; therefore ensure that the specied con-
nections are strictly observed and performed by experienced and qualied personnel.
– Hook up the unit with the electrical power shut off.
Table 9
Description Connection
Power input 0 V 24 V
Relay 1 1a 1b
Relay 2 2a 2b
Loop 1 and Loop 2 Connector block with 4 - poles
Installation examples
Roadway
2m
1m
1
Roadway
0,8m
0,8m
2m
2m
2
Roadway
Gate
1m 1m
1m >1m
3
Roadway
BA
CD
4
5-8mm
A
B
D
C
30-50mm
5
Fig. 1 - Recommended for cars,
lorries, buses
Fig. 2 - Recommended for motor-
bikes and bicycles
Fig. 3 - Applications requiring low
sensitivity at the side
Fig. 4 - (A) Floor (B) Twisted wire
(C) Groove (D) Loops
Fig. 5 - (A) Sealant (B) Groove
(C) Twine (D) Loops
7 - DISPOSAL OF THE PRODUCT
This product constitutes an integral part of the automation system, therefore it must be dis-
posed of together with it. As in installation, also at the end of product lifetime, the disassembly and
scrapping operations must be performed by qualied personnel. This product is made up of different types
of material, some of which can be recycled while others must be disposed of. Seek information on the
recycling and disposal systems envisaged by the local regulations in your area for this product category.
– Some parts of the product may contain polluting or hazardous substances which, if disposed
of into the environment, constitute serious environmental and health risks.
As indicated by the symbol, the product may not be disposed of as domestic waste. Sort the
materials for disposal, according to the methods envisaged by current legislation in your area,
or return the product to the retailer when purchasing an equivalent product. - Local legisla-
tion may include the application of serious nes in the event of improper disposal of
this product.
8 - TECHNICAL SPECIFICATIONS
Note: • All technical specifications stated herein refer to an ambient temperature of 20° C (± 5° C). • Nice S.p.A.
reserves the right to apply modifications to products at any time when deemed necessary, maintaining the same
intended use and functionality.
• Dimensions: 79 x 22.5 x 90 mm (H x W x L without plug) • Protection type: IP40 • Power supply: 24
V / ±10 % max. 2.0 W • Operation temperature: -20°C to +70°C • Air humidity: max 95% with
no condensation • Loop inductivity: 25-800 μH, recommended 100-300 uH • Frequency range: 30-
130 kHz in 2 steps • Sensitivity: from 0.01% to 0.64 % (Δf/f) in 4 levels - from 0.02% to 1.3% (ΔL/L) •
Delay: 5 min or uninterrupted • Electric power line of the loop: max. 250 m • Loop resistance: max.
20 Ohm (including power line) • Relay: 250 mA / 24 V / (min.1 mA/5 V) • Energise delay: normally
100 ms • Signal duration: > 200 ms • De-energise delay: normally 50 ms • Connection: Screw ter-
minals (power supply, relay) – Snap-on terminal clamps (loops connection)
www.niceforyou.com
Nice S.p.A.
Via Pezza Alta, 13
31046 Oderzo TV Italy
[email protected]
IS0426A00MM_04-11-2016
1 - GENERAL WARNINGS: SAFETY - INSTALLATION - USE
(Instructions translated from Italian)
CAUTION Important safety instructions. Follow all instructions as improper installation
may cause serious damage
CAUTION Important safety instructions. It is important for you to comply with these in-
structions for your own and other people’s safety. Keep these instructions
•Before commencing the installation, check the “Product technical specications”, in particular whether
this product is suitable for automating your guided part. If it is not suitable, DO NOT continue with the
installation
•Before proceeding with the installation of the product, check that all materials are in good working order
and suited to the intended applications
•The product is not intended for use by persons (including children) with reduced physical, sensory or
mental capacities, nor by anyone with insufcient experience or familiarity
•Children must not play with the appliance
•Do not allow children to play with the control devices of the product
CAUTION In order to avoid any danger from inadvertent resetting of the thermal cut-off device,
this appliance must not be powered through an external switching device, such as a
timer, or connected to a supply that is regularly powered or switched off by the circuit
•Provide a disconnection device (not supplied) in the plant’s mains power supply, with a contact opening
distance that permits complete disconnection under the conditions dictated by overvoltage category III
•Handle the product with care during installation, taking care to avoid crushing, denting or dropping it,
or allowing contact with liquids of any kind. Keep the product away from sources of heat and naked
ames. Failure to observe the above can damage the product, and increase the risk of danger or mal-
function. If this should happen, stop installation immediately and contact Customer Service
•The manufacturer assumes no liability for damage to property, items or persons resulting from non-
compliance with the assembly instructions. In such cases the warranty for material defects is excluded
•Before working on the system (maintenance, cleaning), always disconnect the product from the mains
power supply
•The packing materials of the product must be disposed of in compliance with local regulations
•If the product is damaged do not try to x it and please contact the Service Centre
2 - PRODUCT DESCRIPTION AND INTENDED USE
• Barrier controls
• Gate and door controls
• Parking and trafc managing
- Warning! All uses other than the described use and use in environmental conditions other
than those indicated in this manual should be considered improper and forbidden!
3 - FUNCTIONAL SPECIFICATIONS
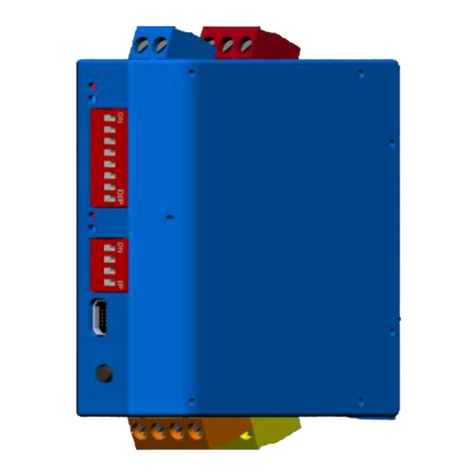
The inductive loops detector LP22 is a system used for detecting vehicles by
means of inductive loops with the following characteristics:
• Evaluation of two loops
• Presence detection or directional detection
• Galvanic isolation between loop and electronic parts of the detector
• Automatic adjustment of the system after power up
• Continuous balancing of frequency drift
• Suitable for monitoring individual parking spaces
• No interference between loop 1 and 2 due to multiplexing.
• Sensitivity can be set regardless of the loop inductivity
• Occupied loop message reported by the LED indicator
• 0V Relay contacts which serve as outputs
• Operating principle of the 2-channel relay with switchable jumper
• Indication of the loop frequency via LED
• Loop connection available for Diagnostics
In the design and installation of inductive loops, you
should take into consideration the table opposite.
A normal insulated copper wire, preferably with a
cross-section of 1.5 mm2, can be used to create the
loop.
Lay the cable,with the number of windings indicated
in the table. The two cable ends must be intertwined
(at least 20 times per meter) from the loop to the
detector.
Table
Loop perimeter number of windings
less than 3 m.
6
from 3 to 4 m. 5
from 4 to 6 m. 4
from 6 to 12 m. 3
over 12 m.
2
4 - PROGRAMMING
4.1 - Sensitivity
The sensitivity setting determines for each channel the change in inductivity that a vehicle must cause in
order to use the output of the detector.
The sensitivity setting is performed separately for each channel using the 2 DIP Switches (see table 1).
Table 1
Sensitivity level Channel 1: DIP Switch 1 and 2
Channel 2: DIP Switch 3 and 4
1 low (0.64 % Δf/f)
2 (0.16 % Δf/f)
3 (0.04 % Δf/f)
4 high (0.01 %
Δ
f/f)
4.2 - Frequency setting
The operating frequency of the detector can be adjusted in 2 levels by using the DIP Switch 5 (see table 2).
Table 2
Frequency DIP Switch 5
Low
High
The permitted frequency range is between 30 kHz and 130 kHz. The frequency depends on the chosen
frequency level, and the inductivity resulting from the geometry of the loop, the number of loops and the
power supply line of the loop.
4.3 - Wait time and new adjustment
The hold time can be adjusted with DIP-switch 6. At the completion of hold time it will be displayed “free
loop” and the detector calibrates automatically. The hold time starts with the occupation of the loop.
Table 3
Delay DIP Switch 6
5 minutes
5
'
5
'/
Uninterrupted
5
'
5
'/
A new adjustment can be activated manually by changing the delay time.
When switching on the power supply voltage, the detector will adjust the loop frequency. If there are brief
outages in voltage (< 0.1 s), no new adjustment will take place.
4.4 - Output function
• Presence detection
For presence detection, the DIP Switch 7 must be positioned to the left. In this position, by means of
the relay 1 the presence on loop 1 is reported. With the DIP Switch 8, the output signal for the relay 2 is
determined (see table 4).
Table 4
Output function DIP Switch 7 - DIP Switch 8
Both channels perform presence detection
Channel 1 presence det.
Channel 2 output pulse
• Directional detection
If DIP Switch 7 is in the right position, two directional logics will be supported depending on the DIP Switch
8 (see table 5).
Table 5
Output function DIP Switch 7 - DIP Switch 8
Direction presence signal
Direction pulse output
The directional pulse is mainly used for counting systems, while the presence direction signal is used for
door and barrier control systems.
The examples in table 6 explain the operation modes of the direction logics. The direction signal is sent
via the relay of the rst loop to be crossed, i.e. in the driving direction 1➟ 2 the signalling is done via the
relay 1.
Table 6
DIP Switch 8
Single vehicle
12
1 2
12
1 2
1 2
Relay 1 Signal “on” Relay 1
Pulse
Relay 1 Signal
“remains”
Relay 1 Signal “off”
Trafc column
12
1 2
12
1 2
12
1 2
12
1 2
1 2
Relay 1 Signal “on” Relay 1
Pulse
Relay 1 Signal
“remains”
Relay 1 Signal
“remains”
Relay 1 Signal “off”
Relay 1 Signal “on” Relay 1
Pulse
Relay 1 Signal
“remains”
Relay 1 Signal “off”
Vehicle manoeuvring
12
1 2
12
1 2
1 2
Relay 1 Signal “on” Relay 1
Pulse
Relay 1 Signal “off”
Relay 2
Pulse
The direction signal in the opposite direction is generated in the
same way.
In case of breakage or closure of a loop the operation switches to
the “Presence detection” mode, until the fault has been xed.
Through the relay of the loop channel without faults, the signal of
presence is now emitted if the loop is occupied.


Other Nice Security Sensor manuals

Nice Silentron Sil Bus 4081 Technical specifications

Nice

Nice Silentron Sil Bus 4081 Technical specifications

Nice LP21 User manual

Nice

Nice LP21 User manual

Nice Silentron Sil Bus 4080 Technical specifications

Nice

Nice Silentron Sil Bus 4080 Technical specifications

Nice HSDIM11 User manual

Nice

Nice HSDIM11 User manual

Nice LP21 User manual

Nice

Nice LP21 User manual

Nice HSDIM10 User manual

Nice

Nice HSDIM10 User manual

Nice MOONBUS MOFOB Technical specifications

Nice

Nice MOONBUS MOFOB Technical specifications

Nice LP21 Operating instructions

Nice

Nice LP21 Operating instructions

Nice HSDIM12 User manual

Nice

Nice HSDIM12 User manual

Nice F210 User manual

Nice

Nice F210 User manual

Nice CO Alarm-Control Technical specifications

Nice

Nice CO Alarm-Control Technical specifications

Nice HySecurity Hy5B User manual

Nice

Nice HySecurity Hy5B User manual

Nice MOONBUS MOFB Product manual

Nice

Nice MOONBUS MOFB Product manual

Nice HSDIM23 Technical specifications

Nice

Nice HSDIM23 Technical specifications

Nice EPMORB User manual

Nice

Nice EPMORB User manual

Nice Silentron Sil Bus Product manual

Nice

Nice Silentron Sil Bus Product manual

Nice HSDID11 User manual

Nice

Nice HSDID11 User manual

Nice F210B Product manual

Nice

Nice F210B Product manual

Nice 2GIG e Series User manual

Nice

Nice 2GIG e Series User manual

Nice HSDIM24 Technical specifications

Nice

Nice HSDIM24 Technical specifications

Nice Flood-Control Technical specifications

Nice

Nice Flood-Control Technical specifications

Nice Mhouse MAD3 Guide

Nice

Nice Mhouse MAD3 Guide

Nice Mhouse MAD6 User manual

Nice

Nice Mhouse MAD6 User manual

Popular Security Sensor manuals by other brands

Bosch DMF 10 Zoom operating instructions

Bosch

Bosch DMF 10 Zoom operating instructions

VOLTCRAFT LSG-10 operating instructions

VOLTCRAFT

VOLTCRAFT LSG-10 operating instructions

Bosch CS LD 1.0 Operator's manual

Bosch

Bosch CS LD 1.0 Operator's manual

STEINEL professional HPD2 KNX quick start guide

STEINEL

STEINEL professional HPD2 KNX quick start guide

REV Ritter LED GIGA SENSOR Assembly and operating instructions

REV Ritter

REV Ritter LED GIGA SENSOR Assembly and operating instructions

Kanlux SENZO manual

Kanlux

Kanlux SENZO manual

INIM Vega V200 Installation

INIM

INIM Vega V200 Installation

BEMKO SES05WH user manual

BEMKO

BEMKO SES05WH user manual

IMI SENSORS 682B05 operating guide

IMI SENSORS

IMI SENSORS 682B05 operating guide

Riken Keiki SD-1DOX-AS operating manual

Riken Keiki

Riken Keiki SD-1DOX-AS operating manual

Argus PiCUS TMS 3 Applications manual

Argus

Argus PiCUS TMS 3 Applications manual

Stanley IntelliLaser Pro user manual

Stanley

Stanley IntelliLaser Pro user manual

Optex AX-330PLUS installation instructions

Optex

Optex AX-330PLUS installation instructions

Retlux RDT 100 user manual

Retlux

Retlux RDT 100 user manual

Bahco BELMS12OBDL Original instructions

Bahco

Bahco BELMS12OBDL Original instructions

Aritech ShatterPro 3 installation instructions

Aritech

Aritech ShatterPro 3 installation instructions

DSC MAXSYS PC4400 installation guide

DSC

DSC MAXSYS PC4400 installation guide

LUXOMAT PD2N-LTMS-RR Installation and operating instruction

LUXOMAT

LUXOMAT PD2N-LTMS-RR Installation and operating instruction

manuals.online logo
manuals.online logoBrands
  • About & Mission
  • Contact us
  • Privacy Policy
  • Terms and Conditions

Copyright 2025 Manuals.Online. All Rights Reserved.