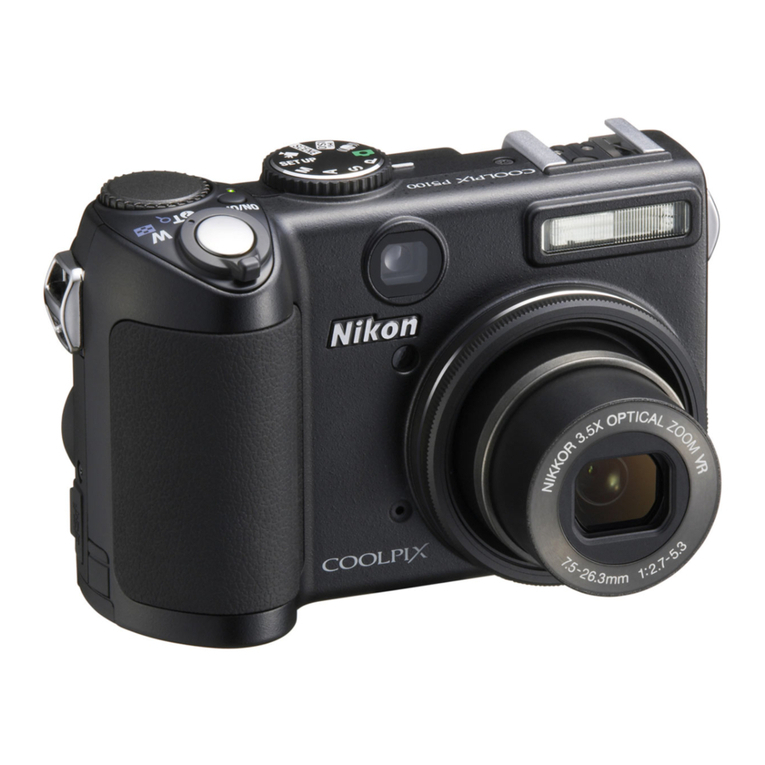
Nikon Coolpix 950 User manual

Nikon
DIGITAL
CAMERA
COOLPIX
950
Reference Manual
Contents
Overview
First
Steps
Putting Batteries in Your
Camera
lnserting
and
Removing
Memory
Cards
Choosing a
Language
for the Menus
Setting
the
lime
and
Date
laking
Your
Fi
rst
Photograph
Using the But
to
ns (A-REC,
M-REC)
Flash Settings
FocusSettings
Us
ing the Self-limer
Ima
ge
Quality
and
Size
Sensitivity
Exposure
Mode
Using
the
Buttons
(PLAY)

- 2 -
The Camera Menus
The A-REC Menu
Using Folders (A-REC, M-REC)
LCD Brightness
Sound Settings
Auto Off
Formatting Memory Cards
The M-REC Menu
Digital Zoom (DIGITAL TELE)
Black-and-White Photography
Lens Converter Settings (LENS)
Making a Panorama—Tips (AE-LOCK)
User Settings
Restoring Default Settings
LCD On/Off
The Controls Menu (M-REC)
SEQ.XFER
The Playback Menu
Deleting Multiple Photographs
Using Folders (Playback)
Slideshow
Protecting Photographs from Deletion
Hiding Photographs During Playback
Preparing Photographs for Printing
The Controls Menu (PLAY)
Connections
Connecting to a Television or VCR
Viewing Photos on a Computer
Caring for Your Camera
Cleaning
Storage
Accessories
What’s in the Box
Optional Accessories
Troubleshooting
General Problems
Error Messages
Specifications
Contents
app-phot-col.com

Overview
Th
ank you
for
buy
in
g a
COOL
PIX
950. This
Reference
Manual
exp
iains how
to
useand
care
foryo
ur
COO
LPI
X950. ltis int
ended
as
a
supp
l
ement
to
the
Fast
T
rack
Guide
and
Pocket
Guide
,to w
hi
ch
you
ca
n
referfor
gu
id
ance
on
topics not
covere
d
he
re. This manual
is co
mp
osed
of
the
follow
in
g chapters:
First
Steps
li
sts
the
steps
in
vo
lved
in
setting
up
your
ca
me
ra
and taking
photographs
Using
the
Buttons
(A-REC, M-REC)
covers
the
sett
in
gs
th
at
ca
n
be
changed using
the
ca
mera
's
co
ntr
ol
buttons
and
dial
s:
fl
ash, sens
iti
vi
ty
, f
oc
us
,
exposure
co
mpen
sa
tion,
exposure
mode
, and
im
age qua
li
ty
and s
iz
e
Using
the
Buttons
(PLA
Y)
outlines basic playback func
ti
ons: vi
ew
in
g photographs and
de
l
et
in
g s
in
gle
im
ages
The
Camera
Menus
describes
ca
mera
se
tti
ng
sth
at
ca
n
be
accessedfrom
th
e A-REC,
M-RE
C, and
PLAY
menus
Connections
describes
ho
w
to
u
se
the
ca
mera
with a
compute
r or
tele
vision
Caring
for
Y
our
Camera
exp
la
in
s
the
pr
oced
uresforclea
ni
ng
and
stor
in
gyo
ur
COO
LPI
X
950
Accessories
id
ent
ifi
es
it
ems
provi
ded
with
the
ca
mera
and ava
il
able
sepa
-
rately
T
roubleshooting
out
lin
es
steps
to take when things
go
wro
ng
Ple
ase
read a
li
in
struct
ions
care
full
y
to
get
the
m
ost
from yo
ur
ca
me
ra.
Notes
on
illustrations
~-------------------------------------------------
The
illustrations
in
this manual
are
composites. Photographstakenwith
the
COOLPIX 950 may differ from
those
shown here.
The
illustrations
in
this manual
show
the
LCD monitor used
in
the
NTSC-
compatible model
of
the
COOLPIX 950. Owing
to
differences
in
video
standards,
the
PAL-compatible model
will
display items
in
positionsslightly
different from
those
shown here.

First
Steps
This cha
pter
gu
id
es
you
thr
o
ugh
the
steps you w
ill
take
after
remov
in
g
the
ca
mera
from
the
box
,from
in
se
rting
the
batteriesto
making yourfirst photographs and play
in
g
them
back. Bef
ore
you
w
ill
be
ab
le
to
u
se
your
ca
me
ra, you w
ill
need
to
co
mplete
the
follow
in
g steps:
• a
tta
ch
the
ca
mera
strap
(see
For
Your
Sa(ety
)
•
in
sert
batteries
or
co
nnect
the
AC
adapter
(sold separatel
y;
f
or
inf
ormat
ion
on
using
the
AC
a
dapter
,
see
the
d
oc
umen-
tat
i
on
provi
ded
with
the
adapter)
•
in
sert
the
co
mp
act
fla
sh
memory
card
• ch
oose
the
language
to
be
used
in
the
sett
in
g and playback
menus
•
set
the
ca
me
ra's clock-
ca
l
endarto
the
c
urrent
date
and
ti
me
Hav
in
g completed
the
se
steps, you w
ill
be
ready to take
photo
-
graphs as
descr
i
bed
at
the
end
of this ch
ap
ter.
Jt.
Important! Before inserting
batteries
or
handling
~
memory
cards,
be
sure
to
read
the
warnings
and
cautions
in
For
Your
Sa(ety.
Putting
Batteries
inYour
Camera
1
Turn
the
camera
off
T
um
the
mode
dial
to
OF
F(
if
the
ca
me
ra
is on a trip
od,
deta
ch
the
tripod before
in
se
rting batteries).
2
Open
the
battery
cover
T
um
the
ca
mera
upside d
ow
n and open
the
batterycham
ber
bys
li
di
ng
the
latchto
the
open position, s
li
pp
in
g
the
cover
out
from
the
ca
mera
, and
then
open
in
g
the
lid
.
3
lnsert
batteries
ln
sert
the
batteries with
the
po
s
iti
ve
(+)
and negative (-) pol
es
a
li
gned
as
s
ho
wn
in
the
diagram
at
the
entrance
to
the
battery
chamber.
4
Close
the
battery
cover
Close
the
cover
and s
lid
e it back into
p
os
iti
on
,
then
si
id
e
the
latch
button
back
to latch
the
cove
r.
Thecamera'sclock-calendar
is
powered byaseparaterechargable battery.
When
you put batteries
in
your camera for
the
first time
or
after a long
period
of
storage,waitafew hoursforthe
dock
batteryto
rechargebefore
removing
the
main
batteries. The
dock
battery
will
remain charged for
sorne time after
the
main
batteries have been removed.
Photographs
stored
on the
flash
memory card
are
not
affected when the
batteries
are
removed.
Ali
manual-mode settings, with
the
exceptions
of
the
date and language,
will
however be reset.

lnserting and Removing
Memory
Cards
1
Turn
the
camera
off
T
um
th
e mode dial to O
FF
.
2
Open
the
card
slot
T
um
th
e
camera
upsi
de
d
ow
n (
if
th
e
ca
m
era
is on a trip
od
,
de
tach it from
th
e
tri
pod
fi
rst)
,
th
en
ope
n
th
e cardslot cover.
3
lnsert
the
memory
card,
or
...
ln
se
rt
th
e
cardas
sh
ow
n at
ri
ght, s
lidin
g it
in
until it is
firml
y
in
pl
ace
at
th
e back of
th
e
slot and
th
e
car
d-
re
l
ease
b
utt
on
po
ps u
p.
N
ext
, fold
th
e
car
d-
re
l
ease
b
utt
on
ove
r.
...
remove
the
memory
card
Flip
th
e card
-r
el
ease
b
utt
on up and push
it
dow
n until
th
e
car
d
ca
n
be
rem
oved
by
han
d.
4
Close
the
card
slot
cover
-
M
..
œJ
@Aoc@
Memo
ry
cards c
an
be removed from thecamera
without
loss
of
datawhen
the camerais off.
Once
removed
fr
om
the
camera, cards
can
be read
by
a computer equipped with a CompactFiash card reader
and
photographs
printed
on
suitably-equipped printers. Cards c
an
also be inserted
in
a
PC
card adapter (sold separately) to be read
by
any c
omputer
with a Type
Il
PC-
card slot.
Wh
ile
your
camera co
rnes
with
an
eight-megabytecard,additional cards
of
up
to
sixty-fo
ur
megabytes c
an
be purc
hased
separately.
Choosing a Language
for
the
Menus
The
ca
meras menus and messages
ca
n
be
di
s
pl
ayed
in
En
g
li
sh,
Ge
rman, F
re
nch,
or
Japanese. To
se
l
ec
t a langu
age
f
or
th
e di
sp
lay,
fo
ll
ow
th
ese
steps:
1 T
um
th
e m
ode
di
al to
PLA
Y.
2 Press
th
e MENU b
utt
on to
di
s
pl
ay
th
e
pl
ayback menu.
3 Us
in
g
th
e z
oom
bu
tto
ns,
hi
g
hli
g
ht
th
e l
ast
item
(S
ET
UP
) in
th
e menu and press
th
e
s
hutt
er
-
re
le
as
e
butt
on (
th
e exact a
pp
ear
-
an
ce
of
the
menu w
ill
depend on
th
e
language currently
se
l
ecte
d;
th
e
illu
stra-
ti
on
s at
ri
g
ht
sh
ows
th
e
En
g
li
sh menus).
4
Use
th
e z
oo
m
butt
onsto hig
hl
ig
ht
th
e l
ast
item
in
th
e S
ET
UP menu,
th
en
pr
ess
th
e
s
hutt
e
r-r
el
ease
butt
o
nt
o
di
s
pl
ay
th
e LAN-
GU
AG
E menu.
5
Se
l
ect
th
e d
es
i
red
se
tting from
th
e LAN-
GU
AG
E menu.
Using
the
menus
PLAY
BACK
DELETE
SLIDESHOW
PROTE
CT
HIDE
IMAGE
PRINT
SET
AUTO
OFF
CARDFORMAT
DATE
l
ANGUAGE
<) BK
LANGUAGE
D
DEUTSCH
E
ENGLISH
F
FRANÇA
I S
J B:$11!
SET-+
S
HU
T T
ER~
If
the
menu do
es
not
appear when you press the
MENU
butten, press the
MONITOR
butt
en until
the
LCD
mo
nitor
co
rnes
on. Items c
an
be
highlighted
using
the zoom
butt
o
ns
and
selected
using
the
shutter-release
butten.
To
clear a menu from the screen, highlight
BK
and
press the
shutter-release butten, or press the
MENU
butt
en until
the
menu disap-
pears.

Setting
the
Ti
me
and
Date
When
you
tum
on
yo
ur
ca
me
ra
for
the
fi
rstti
me
,
you
wi
Il
need
to
set
the
time
and
date
as follows:
1T
um
the
mode
di
al
to
PLA
Y.
2 Press
the
MENU
button
to di
sp
lay
the
playback
menu
.
3 Usi
ng
the
z
oo
m
buttons,
highlightS
ET
UP
and
press
the
shutter
-
re
l
ease
button.
4
ln
the
S
ET
UP
menu
,
use
the
z
oo
m
buttons
to highlight DATE
and
press
the
shutter-rele
ase
buttonto displ
ay
the
DA
TE
menu.
Using
the
menus
PLAY
BACK
DELETE
FOLDERS
SLIDESHOW
PROTE
CT
HIDE
IMAGE
SET
U P
LCD
BRIGHT
SOUND
lfthe
menu does
not
appear when you
press
the
MENU
button,
press
the
MONITOR
button until the
LCD
monitor comes on. Items
can
be
highlighted
using
thezoom buttons
and
selected
using
the shutter-release
button.
To
clear a menu from the screen, highlight
BK
and
press
the
shutter-release button,
or
press
the
MENU
button until the menu disap-
5
Rotate
the
co
mmand
dial
to
se
l
ect
the
it
em
you w ish to change,
then
ed
it
the
it
em
us
in
g
the
zoom-in
button
(T/
• ) to
in
c
re
ase
it
sva
lue
orthe
z
oo
m-o
ut
button
(:NIT ) to
decrease
i
ts
va
lu
e.
After
ed
it-
in
g,
rotate
the
co
mmand
dial
to
m
ove
to
the
next
it
em
or
press
the
shutter
-r
el
ease
button.
Highlight Y M D and u
se
the
z
oo
m
buttons
to
change
the
order
in
w
hi
ch
the
year
, month,
an
d d
ay
are
dis-
played.
Pr
ess
ing
the
s
hutter-relea
se
but
-
to n w
he
n
th
is it
em
is highlighted
sets
the
time
and
da
te
to
the
spec
ifi
ed
va
lues.
If
th
e
date
has not
be
en
set, a
fl
as
hing clock
i
co
n w
ill
appear
at
upper
right
in
the
LCD
mon
it
orwhen
the
m
ode
di
alis
se
t to A-REC
or
M-REC. Pho
tog
rap
hs taken w
hen
this
i
co
n
appears
w
ill
ha
ve
a
ti
me
sta
mp
of
"99/
0 1
/0
1 00:00";
set
the
ti
me
and
date
as
de
scribed
above
before
shooting.
1
999
.
03
.
20
\1
2 3 : 0 5
AD
J.
+Z
OOM
SW
SET +
SHU
T
TER
~
The
clock-calendar
is
powered bya separate, rechargeable battery, which
is
charged
as
necessarywhen themain batteries
are
installed.
lfthe
camera
has
been stored with the
main
batteries removed fora long period
of
time,
the
dock
may need
to
be reset.
Once
the main batteries
have
been
reinserted, the clock batterywill recharge
in
several hours, during which
time the batteries should be left
in
the camera.

TakingY
our
First
Photograph
Thi
ssection o
utli
ne
sthe basicsteps
in
volved
in
tak
in
ga photograph
in
A-REC
mode.
Ste
p
1-Remove
the
lens
cap
Remove
the
lens cap
as
shown below.
Sleepmode
The LCD monitor turns offautomatically
if
no operations
are
performed
for a certain period
oftime
(the length
oftime
before the camera enters
sleep mode can be
set
using the AUTO OFF item
in
the
setup menu;
see
"
The
Camera Menus:
The
A-REC Menu," below). To turn
the
monitoron
again, half-press
the
shutter-re
le
ase butten.
Ste
p
2-
Turn
the
mode
dial
to
A-REC
To enterautomaticrecordi
ng
mode,tumthe
sel
ector
dialto
A-R
E
C.
After a short pause
wh
il
e thecamera
initi
a
li
zes,a beepw
ill
sound
a
nd
current sett
in
gs
w
ill
be displayed
in
the
LCD monit
or
and
the
control panel.
:.~
·
....
;
!'~
~~
;;
-
AUTO~
16)
:
·
:
·
P
~
1
N
2
S
.t
F
4o'""
•
~
-
[
18
-
PlAY • e
EiJ
1!9Œe0
The MONITORbutten controls
the
LCD monitor. Press
the
MONITOR
butten
once
to
hi
de settings, a second
ti
me
to
tum
the monitoroff, and a
third
ti
me
to
turn
the
monitor
on
with settings showing.

Ste
p
3-Ch
ec
k
the
number
of
exposures
remaining
Th
e
con
trol
pane
l and L
CD
mon
it
or
s
ho
w
the
number
of
expo
-
sures
rema
ining
at
the
c
urrent
im
age
qua
li
ty
sett
in
g.
-
AUTO
~
16)
When
th
is
number
reaches
zero
, you w
ill
need
to
in
se
rt
a
ne
w
memory
card
or
de
l
ete
it
ems
already
in
memory
before you w
ill
be
able
to
take
more
photographs. lt may
be
possible to record
more
photographs
at
a d
if
ferent
im
age
qua
li
ty
sett
in
g.
Ste
p
4-Adjust
camera
settings
ln
automatic m
ode,
the
user
ca
n adju
st
fl
ash, focu
s,
exposure
compe
nsation, and
im
age
qua
li
ty
and size.
Th
e default
sett
in
gs
,
w
hi
ch
produce
the
best
resul
ts
in
m
ost
circumstances,
are
a
ut
o-
matie
fl
as
h,autofocus, no
exposure
compen
sat
i
on
,an
im
age
qua
lit
y
of
"normal," and an
im
age s
iz
e
of
"
full
" (1,600 x 1,
200
pi
xe
ls).
-
AUTO~
r
Flash
(a
ut
o)
P
'!.
l
161
Th
ese
set
tings a
ll
ow
the
ca
mera
to
set
fo
cus
automat
i
ca
ll
y at any
di
stance
grea
ter
th
an 30cm
(one
foot
).
Th
e
ca
mera
me
asures
the
ava
il
ab
le
li
ght
and
ad
justs
shutter
speed
and
ape
rture
accord
in
gly,
firing
the
fl
ash to provi
de
add
iti
ona
l
li
ght
as
nece
ssary.
Ste
p
5-Com
p
ose
a p
hotogra
ph
In
formati
on
on com
pos
ing photographs may
be
found
on
pages 2-
4
of
the
Pock
et
Guide.

Ste
p
6-Half-
p
ress
the
shutter-release
button
When
the
shutter
-rel
ease
button
is pressed half
way
,
the
camera
w
ill
automat
i
ca
ll
y adjust focus accord
in
g
to
the
distance
to
the
subject.
If
the
focus
operat
i
on
is successful,
the
green
autofocus
lamp
next
to
the
viewfi
nderwi
Il
glow.
Th
e focus
sett
in
gwi
Il
re
main
unchanged as long as
the
shutter
button is half-pressed
(see
the
sect
i
on
"Focus Lock"
in
the
Fast
Track
Guide
).
Th
e
zoom
ratio
cannot
be
changed
wh
il
e focus l
ock
is
in
effect.
If
the
camera
is unable
to
determ
in
e
the
distance
to
the
subject,
the
autofocus l
amp
w
ill
b
lin
k rap
idl
y.
ln
this
case
you
canuse
fo
cus l
ock
to
focus
on
another
ob
j
ect
at
the
same
distance,
th
en
re
co
mpose
your
photograph
(see
the
Pocket
Guide
,page 4,
for
more
in
forma-
ti
on on
autofocus).
Note
When using
the
viewfinder
at
ranges
of
less than 90cm (one 1
yard), frame your photographs using the smaller of
the
two
frames
in
the
viewfinder display (thearea shaded
in
purple
in
the
1
illustration on the right).
When
li
ght
in
g is
poor
,
the
flash l
amp
next
to
the
viewfinderw
ill
gl
ow
red.
If
the
flash
is
off
,
set
the
flash
to
"Auto"
for
a
photo
in
wh
ich
ob
jectsw
ithi
n
the
range
of
the
flash
are
full
y
exposed.
If
the
red
fl
ash l
amp
blinks,
the
flash
is charg
in
g,andyou w
ill
need
to
take
your
finger off
the
shutter
-
re
l
ease
button
and
wa
it a
few
seconds
before
tak
in
g a photograph.
Ste
p
7-T
ake
a p
hotogra
ph
To takea
photograph
, press
the
shutter
-
re
l
ease
button
al
i
the
way
down.
Note
lfthe
LCD monitor
is
off,
you
will
n
ot
be able
to
take photographs when
the
autofocus lamp
is
flashing. When
the
monitor
is
on, however,
photographs can be taken even
if
the
camera
is
not
properly focused.
Check focus
in
the LCD monitor before pressing the shutter-release
butten
ali
the
way down.

Ste
p
8-Check
the
results
After a photograph has
been
taken,
the
autofocus l
amp
w
ill
b
lin
k and an hourglass
icon (i)w
ill
be
di
sp
layed
in
the
L
CD
monitor
wh
il
e
the
photograph is recorded. Before
the
photograph istransferred
to
the
memory
card, it w
ill
be
displayed briefly
in
the
L
CD
monitor.
If
the
photo
was
taken
at
an
im
age-s
iz
e
sett
in
g
of
"
fu
ll
," you can
press
the
833
button
to
pause
the
display
forten
seconds; shooting
can
be
resumedbypressing
the
button
aga
in
.
If
you
are
not
pleased
with
the
photograph, you can delete it before it is transferred
to
memory
by pressing
the
iiii1
button. The
dialog
at
right w
ill
be
displayed; using
the
zoom
buttons,
se
l
ect
YES
and press
the
shutter
-r
el
ease
button
to
erase
the
photo-
graph. To
cont
inue shooting w
ith
out
de
l
et
-
DEL
ETE
1
IMAGE
Y
ES
in
g
the
photograph,
se
l
ect
NO
and press
the
SET-+SH
uTT
E R
~
shutter
-r
el
ease
button. The
photo
w
ill
then
be
saved
to
the
memory
card and
the
camera
w
ill
retum
to
shoot
in
g mode.
Notes
Do
not
remove
the
batteries while photos
are
being recorded to,
or
deleted from, memory.
The pause and delete functions described above
are
only available when
photos
are
taken
at
an image size
of
''full" (1,600 x 1,200 pixels).
The delete dialog disappears
if
no action
is
taken for ten seconds.
ln
this
case
the
image
will
be saved and
the
camera
will
return
to
shootingmode.
First Steps: Taking Y
our
First Photograph
Ste
p
9-Turn
the
camera
off
When
you have finished using
the
camera
,
be
sure
to
tum
the
mode
dial
to
OF
F.
To avo
id
wast
in
g
batter
ies, check
that
the
camera
is off
before
putting it away.
Ste
p 1
O-R
ep
lace
the
lens
cap
Replace
the
lens
cap
as shown
be
low.
Note
The camera may become warm during use, but this does
not
indicate a
malfunction.

Using the Buttons (A-REC,M-REC)
This ch
ap
ter d
eta
ils
so
me of
th
e
ca
m
era
se
tt
ings
th
at
ca
n
be
cessed wi
th
o
ut
using
th
e
ca
m
era
menu
s:
fl
ash, f
oc
us, image
ac
qu
co
ali
ty
, image size,
se
nsitivity, and
expos
u
re
mode. E
xpos
u
re
m
pe
nsation is
covere
d in
th
e
Fast
T
rack
Guide
.
Flash
Settings
The fo
ll
ow
ing
fl
as
h
se
tt
ings
are
ava
il
ab
le:
Setting
How
it
works
Auto
Camera
fires flash
whenever
lighting
is
poor.
AUTO
~
Flash Cancel (off)
éi)
Flash
will
not
fire
even
when
lighting
is
po
or.
A
uto
with red-eye Pre-flash lamp
fi
res
before
the
main flash
to
minimize
reduction
@
the
If
red-eye
If
effects a flash can
sometimes
cause.
AU
T
O
~
Anytime
Flash
(forced
on)
Flash
fires
wh
e
ne
v
er
photo
is
taken.
~
Slow synchroniz
ed
A
uto
flash combined with low
shutter
speed.
SLOW
~
When
to
use
it
B
est
for
general use.
Use
where
flash
is
prohibited
or
to
capture
natural
lighting un
der
dim light. lt
is
a
good
idea
to
use a
tripod
wh
en
lighting
is
poor,
as
shutter
speed
will
be
slowed.
Use
for
portraits(works
best
if
subjects
are
weilwithin
range
of
flash and
are
looking directly
at
the
camera).
Use
to
"fill-in" (illuminate) a back-lit subject.
Use
to
capture
poorly-lit backgrounds; ideal
for
night-
ti
me
photography. Use
of
a
tripod
is
advised.
Lh
Important!
Be
fore using the
fl
as
h,
be
s
ur
e
to
read th
war
nin
gs
in
For
You
r
Safe
ty. e

When
the m
ode
dial
is set to
A-REC
or
M-RE
C,
the current
fl
as
h
setting can be changed
using
the
button nextto
the
control panel. Thesetting changes each
ti
methe button
is
pressed,
cycl
ing
through
the
different
fl
as
h modes
in
the
following
order:
AUTO
/
~
S
L
OW
~
ti)
/
@
AUTO~
Tips
When
lighting
is
poor
and
the
flash
is
set
to
"
Off"(
®)
or
"Slow Synchro"
(so.ow
~).
shutter
speed
is
slowedand photos may beblurred.
If
possible, use
a tripod when lighting
is
poor.
The built-in flash
will
automatically be
set
to
"Off'
when:
•you use autofocus with a setting
of
"lnfinity"
(~)
•you choose a multi-shot setting
of
"Continuous," "16-shots"
or
"VGA
sequence" (an extemal
flash
can still be used with these settings)
•you use best-shot selection
(BSS)
•you use lens converter
(LENS)
settings
•
the
AE
LOCK option
in
the
M-REC
menu
is
on
When
using
the
flash, be
sure
the
flash window
is
unobstructed.
Fl
as
hstatus is
indi
ca
ted
by
the red
fl
as
hlamp nextto thev
iewfi
nd
er.
Flash
lamp glows red: The camera is ready
to
fi
re
the
fl
as
h
w
hen
the shutter-release button is
full
y pressed.
Flash
lamp
blinks:
Using
an
Extemal Fias
The
fl
as
h is c
hargin
g.
Wait
until
the
lamp
glows
stead
il
y before
taking
a
picture.
A flash bracket (the SK-E900 Multi-Fiash Bracket Unit)
is
available sepa-
ratelyforconnect
ing
external
flash
units
to
the
COOLPIX950.
When
the
bracket
is
connected
to
the
camera'ssynchro-flash terminal, external flash
units moun
ted
on
the
bracket
are
synchronized with
the
camera's built-in
fla
sh, increasing
the
size
of
the
area illuminated and allowing sophisticated
flash techniques such as bounce-flash photography.
You
can use flash
settings such as "Auto," "SlowSynchro," and
"O
n" with both
the
external
and built-in (internai) flash units,
or
you can turn
the
built-in
flash
offand
use
the
extemal
flash
only
(to
tum
off
the
built-in flash, use
the
CON-
TROLS item
in
the
M-REC
setup menu).
When
the
flash
is
fired,
the
brightness
of
the
external and built-in flash units
is
controlled by
the
camera.
Instructions for attaching
the
optional SK-E900 flash bracketand connect-
ing
external flash units may be found
in
the
SK-E900 instruction manual.
When
the
SK-E900
is
in
place,
the
following Nikon
flash
units (available
separately) can be used: SB-28, SB-26, SB-25, SB-24,
SB-22S,
and SB-22.
The use
of
non-Nikon
flash
units
is
not
recommended.
Once
the
extemalflash unit has been mounted
on
the
flash
bracketand
the
bracket's lead connected
to
the
camera's synchro-flash terminal, you
are
ready
to
use
the
external
flash
for synchro-flash photography. Turn
the
flash unit
on
(do
not
set
the
flash
to
"sta
nd-by"
-S
TBY-as
the
flash
may
turn
off unexpectedly),
set
the
metering mode
to
TTL
and
choose
an
illuminating angle
of
less than 28mm.
The
intensity
of
the
light produced
by
the
flash
will
be controlled by
the
camera's built-in photocell.

Focus
Settings
W
ith
the
mode
dial
set
to
A
-RE
C, a choi
ce
of
three
autofocus
modes
is ava
il
ab
le.
ln
add
iti
on
, M-REC
mode
offers a
se
lection
of
manual focus
sett
in
gs.
Autofocus
settings
Th
e following autofocus
sett
in
gs
are
ava
il
ab
le
in
M-RECand A-REC
modes:
Setting
How
it
works
When
to
use
it
Autofocus
NOI
CO
N
Camera
automatically adjusts focus according
to
dis- Use
when
subject
is
30cm (1ft)
or
more
from lens.
tance
to
subject
lnfinity
~
Focus
is
fixed
at
infinity.
Flash
is
disabled. Use for photographing distant
scenes
in
daylight (a
manual focus setting
of"lnf'
is
available
forwhen
you
want
to
use
the
flash)
Macro Close-up Focusadjustedautomaticallyforsubjects 2cm (0.8in.)
or
more
from lens. Use for close-up photography.
~
When
the
mode
dial
is
set
to
A-REC
or
M-REC,
the
autofocus
mode
can
be
changed using
the
button.
Th
e
setting changeseach
ti
me
the
button
is pressed,c
ycl
ing
th
rough
the
focus
modes
in
the
following order:
/
NO
ICON
(AUTO)
&
When
using
macro close-up,
it
is
recommended
that
you frame photo-
graphs
in
the
LCD
monit
or.
Ma
cro
close-up can be
used
at
ranges
as
short
as
2cm (O.Sin.) when the
cameraiszoomed
to
the middle optical
zoom
position.
When
the
ca
mera
is
zoomed
to
a position suited
to
such
close-range photography,
the
macro
i
co
n
(~)
in
the
LCD
monitor
will
turn
yellow.
While
the
flash
can
beused
with
a
focus
m
ode
of"
Ma
cro
Close-up,"
it
may
sometimes be unable
to
light
the
entire subject.
When
using
the
flash
,take
a test picture and verify
the
results
in
the
LCD
monitor.

Ma
nu
al
fo
cus
ln M-REC mode, focus distance
ca
n be
se
-
lectedma
nu
a
ll
yfrom a
li
stof preset distan
ces
ranging from
0.
1m (4in
.)
to infinit
y.
To
se
t
focus distance ma
nu
a
ll
y:
1 M
eas
ur
e the distan
ce
to your subject.
2T
um
the mode dial to M-
RE
C.
3 T
um
the command dial wh
il
e holding
dow
n the b
utt
on to
se
-
l
ec
t a focus distan
ce.
Not
es
itAl~/~
~
SZ
M·FOCUS
+
Ata manualfocus settingofO.Im (4in.),
the
cameramay no
tfo
c
us
proper
ly
when
zoomed
out.
Wh
en manuaifoc
us
is usedwith
the
lensconvertersavailabie separately
for
the
COOLP
IX
950
,
the
actual focus distance may differ
fr
om the setting
chosen.
Check
foc
us
in
the
LCD
monitor
when using a lens c
onverter.
Focusdistan
ce
is displayed in
th
e LCD monit
or
,wh
il
e the co
nt
rol
panel shows the focus distan
ce
together wi
th
a
fl
as
hing
~~
icon.
A sho
rt
focusdistan
ce ca
n be u
se
d to focusthe
ca
mera on
ab
jects
at thesp
ec
i
fi
ed distan
cew
h
il
e bl
urr
ing b
ac
kground deta
il
s.
Choose
a
se
tt
ing of
lnf
f
or
af
oc
usdistan
ce
of i
nfi
nit
y.
Uniikethe a
ut
ofocus
se
tt
ing of lnfinity, ma
nu
al infinity a
ll
ows u
se
of the
fl
as
h. Ma
nu
al
focus
ca
n be
ca
nce
ll
ed by
pr
ess
ing the
butt
on.
Foc
us
distance
is
measured
from
the
cover
that
pr
otects the lens.
Foc
us
distance c
an
be
shown
in
either
meters or feet.
To
change
the
units
used,
se
l
ect
CONTROLS
from
the
M
-REC
menu. To displ
ay
distanc
es
in
feet
, check
the
DI
ST
FT
item and press
the
shutter-release
butten.
If this
item
is
not
checked, distances
are
displayed
in
meters.

Using
the
Self-
Ti
mer
T
he
COO
L
PIX
950
is
equ
ipped with an
automat
ic ti
mer
with t
wo
settings:
three
seco
nd
s,
use
fu
lwhen maki
ng
group photograph
s,
a
nd
ten
seconds, i
dea
l for self-portrai
ts
. To use
the
self-ti
mer
,
fo
ll
ow
these
steps:
1 For self-portraits, mount
the
camera
on
a trip
od
(recom-
mended)
or
rest it
on
a flat, stable surface.
2 Press
the
button unt
il
the~
icon a
ppe
ars in
the
co
ntr
ol panel
or
L
CD
monitor.
3
Co
mp
ose
the
photograph.
4
Fu
ll
y depress
the
s
hutter
-release button
to
act
iva
te
the
timer.
Press
the
s
hutter
-release button on
ce
for a
ten
-second
de
l
ay.
For a
three
-second
de
l
ay,
press
the
shutter
-release button
tw
ice.
T
he
red-eye reduction la
mp
next
to
the
viewfinder w
ill
start to
b
li
nk
one
second before
the
pic
ture
is taken.
Tips
To
stop the automatic timer before a photograph
is
taken, tu
rn
the mode
dial
to a different setting.
The
timer will stop
and
the indicator will
disappear from the control
panel
and
LCD
monitor.
Using
the
Buttons
(A-REC,
M-REC):
Using
the
Self-Timer

Image
Quality
and Size
The image qua
li
ty/
image si
ze
setti
ng
determi
nes
how
many
photo
-
graphs
can
be stored on a si
ng
le
memory
card. The fo
ll
ow
i
ng
combinations
of
image qua
li
ty
and si
ze
are
ava
il
ab
l
e:
Size
Quality
Full
BASIC
NORMAL
(1,600 x 1,200 FINE
pixels) Hl (M-REC only)
XGA
BASIC
(1
,024 x 768
NORMAL
pixels) FINE
VGA
BASIC
(640 x 480
NORMAL
pixels) FINE
To choose a combination
of
image qua
li
ty
and si
ze
, hold the • · button and
tum
the
command dial (note
that
an
image qua
li
ty
of
Hl
isonly
ava
il
ablewhen the
mode
dial isset
to
M-REC). Image qua
li
ty
and size are
di
sp
layed in
the
control panel and L
CD
moni
tor
(no icon
for
image size indicates a
setting
of
1,600 x 1,200).
Approx.
No.
Photos/card
(8MB)
32
16
8
1
78
39
19
200
100
50
+
Image
Quality
At
setti
ngs
of
BASIC,
NORMAL,
and
FI
NE,
the
camera
uses
JP
EG
compression
to
reduce the
amount
of
memory
required
to
store
photographs.
JP
EG compression
resu
l
ts
in a s
li
ght l
oss
in image
qua
li
ty
,
wh
i
ch
grows
more
not
iceable
at
highercompression ratios.
The difference in qua
li
ty
is
ill
ustrated below:
BA
SIC
(high compression) NORMAL
(medium compression)
\ \ \ \
FINE
(l
ow
compression)
Wh
il
e a setti
ng
of
NORMAL
represents the best trade-
off
be-
tween
memory
and image quaii
ty
in
most
cases
,a setti
ng
of
BASIC
can
be
used
to
save
memory. A setti
ng
of
FI
NE is
su
itable
for
photographs
that
w
ill
be enlarged
or
printed
at
hi
gh
resolution.
-

Photographs taken
at
an image
qua
li
ty
sett
ing
of
Hl
are
stored
in
uncompressed
TIF
F
format
and
show
no
loss in
qua
li
ty. An 8MB
memory
card is
however
suffici
ent
to
store
on
ly
one
such
photo
-
graph
at
atime. To take photographs
at
an image i
ty
of
H1,
tum
the
mode
di
al
to
M-
REC.
then
ho
ld
down
the
button
and
tum
the
command
dial until
Hl
is di
sp
layed in
the
contro
l panel.
Image
Size
Use
the
image si
ze
sett
ing
to
adjust
the
si
ze
of
photographs
to
suit
your
purposes. The default si
ze
of
1,
600
x 1,
200
pi
xe
ls is sui
tab
le
for
pri
nting images
at
high resol
ut
i
ons
or
forv
i
ew
ing fine
deta
il
s
on
a computer.
Sma
ll
er
sizes can
be
used
to
save
space
on
the
memory
card
orto
shoot
photos
dest
ined
for
di
sp
lay
on
web
pages
or
on
sma
ll
er
computer
mon
itors.
Not
e
Hl
image
qua
l
ity
is
not
avai
l
ab
le ata
mu
lti-shot(CONTINUOUS) setting
of
"16-shots" orwhen
BSS
is
on(see the
Pock.etGuide,
"Taking
Photographs").
EiihJID~mu.,;tJMI;t
!•i•am•;M#
•l!mMI'"·fifa
Sensitivity
ln A-REC
mode
,
automat
ic
ga
in
contro
l is used
to
produce
sensitivi
ty
roughly
equ
ival
ent
to
ISO
80
fi
l
m.
ln
M-
REC
mode
,you
can
choose
a fixed
va
l
ue
for
sens
itivi
ty
equ
ival
ent
to
an ISO
rat
ing
of
1
00
,
or
increase sensitivi
ty
further
by a factor
of
+1.0
or
+2.0.
lncreasi
ng
sensitivi
ty
reduces
the
ti
me
needed
to
make an
expo
-
sure,a
ll
ow
ing increased
shutterspeed.
This can
be
used
to
reduce
biurring caused
camera
mot
i
on
when
li
ght
i
ng
is
po
or
,
orto
"freeze"
mov
ing objects. To increase sensitivity:
1 T
um
the mode di
al
to M-RE
C.
-
PLAY
• •
ED
~Œl
2 Hold
down
the
button
and
tum
the
command
di
al
to
se
l
ect
the
de
-
sired sensitivity.
Choos
i
ng
a
va
l
ue
of
dEF
+
restores
norma
lsensitivi
ty
,roughly
equ
iva-
l
entto
ISO 80. T
he
chosen
settingw
ill
be
di
sp
layed in
the
contro
l
pane
l
wh
il
e
the
button
is
he
ld down.
At
sett
ings
otherthan
dEF
,
a~
i
con
appears
in
the
contro
l
pane
l
and L
CD
mon
itor.
No
te
A sl
ight
amou
nt
of
noise
may
appear
in
photostaken at setti
ngs
ether
than
"
dEF
."

Exposure
Mode
When
the
mode
dialis
set
to
M-REC,you can choosean exposure
mode
from
the
fo
ll
ow
i
ng
opt
ions:
Setting
Program
p
How
it works
Camera
automatically sets shutter
speed
and aper-
ture
to
produce
the
best exposure.
Y
ou
choose
the
aperture (f-number) using
the
cam-
Aperture Priority mand
dial.
Shutter speed
is
set
automatically by
the
A
Shutter Priority
5
camera.
Choose
the
shutter speed using
the
command
dial.
Aperture
is
set
automatically by
the
camera.
When
to
use
it
Best
for
general use.
A wide aperture (low f-number) can
be
used
to
blu
details
of
the
background. A sm
ali
aperture (high
f-
number
) brings
both
your
subject and
the
back-
ground into focus.
Use a
high
shutter
speed
to
freeze a fast-moving
subject. Lower shutter speeds can be used
to
blu
moving objects, suggesting motion.
ln A-REC
mode
,
the
camera is
automat
ica
ll
y
set
to
Program.
sel
ect
another
exposure mode:
1Tum
the
mode
dial
to
M-RE
C.
To 2 Hold
down
the
•· buttonand
tum
the
commanddial
to
sel
ect
an exposuremode.
The chosen
mode
w
ill
be indicated by
an
icon in
the
control paneland L
CD
mon
i-
tor. +
EiihJID~mu.,;tJMI;t!•i•aw
a&a+H!'éir!
-

Aperture
Priority
An exposure
mode
of
Aperture Priority a
ll
ows you
to
choose
an
aperture
sett
i
ng
from
three
pre
-
determ
ined f-
va
lues. To
choose
a
va
lue
for
aperture:
1
Set
the
exposure
mode
to
Aperture
Pri
-R
or
i
ty.
2Tum
the
command dial
to
choose an
aperture
sett
i
ng
(if
the
aperture
sett
i
ng
does
not
change when you rotate
the
command dial, press
the
button
and
then
turn
the
command dialagai
n).
T
he
chosen f-
numberw
ill
be
shown in
the
controlpaneland L
CD
monitor.
Note
that
in addition
to
increasi
ng
focus
depth
,
small
apertures
(h
igh f-numbers)
produce
l
ower
shutter
speeds. Larger
apertures (low f-numbers) can
be
used
to
bl
ur
background details
and also increase
the
effecti
ve
range
of
the
flash.
EiihJID~mu.,;tJMI;t!•i•aw
a&a+H!'éir!
-
Shutter
Priority
Wh
en
the
exposure
mode
is
Shutter
Priority,
shutter
speed can
be
chosen from
sett
i
ngs
rangi
ng
from 1
/500 sec.
to
Bsec.
To
set
the
shutter
speed:
1
Set
the
exposure
mode
to
Shutter Pri
or
-5
ity.
2 Turn
the
command dial
to
choose
a
shutter
speed (if
the
shutter
speed
does
not
change when you rotate
the
com
-
mand di
al
, press
the
button and
then
tum
the
command di
al
again).
T
he
s
hutter
speed
w
ill
be
shown in
the
control panel and L
CD
monitor. ln
the
control panel, fractions
of
a second are shown
wi
thout
a numerator, wi
th
the
result
that
a speed
of
1
/2 sec. is
shown as 2, a
speed
of
1
/4 sec. as 4, etc.
Note
that
hi
gh
shutter
speeds result in large apertures.

Using
the
Buttons (PLAY)
This ch
ap
ter
describes
the
fo
ll
ow
in
g playback func
ti
o
ns
:
• vi
ew
in
g photographs
•
de
l
et
in
g
un
wa
nted photographs
indi
vi
dua
ll
y
Th
ese
functions
ca
n
be
accessed us
in
g
the
z
oo
m
(YW!T
..â.
)
buttons
,
the
co
mmand dial, and
the
three
buttons
be
l
ow
the
control panel. The
opt
ions ava
il
ab
le
in
the
playback
menu
are
described
in
the
fo
ll
ow
in
g c
hapter
.
Fo
ll
ow
these
steps
to
vi
ew
or
de
l
ete
photographs stored on
the
mem
ory
card:
By
default, onlyphotographs
in
the
current
folder
are
displayed
in
playback
mode. To select
another
fol
der
for
viewi
ng,
or
to
viewphotos
in
ali
folders,
use
the
FOLDERS item
in
the
playbackmenu (see
"The
Camera
Menu
s:
The
Playback Menu," below).
If
there
are
no
photographs
in
the
current
folder,
the
message, "card
contains
no
image data"
will
be displayed. Select
another
fol
der u
si
ng
the
FOLDERS
item
in
the
playback menu.
If
there
are
no photographs
in
any
folder, you
will
beable
to
use
the
playback menu (see below).
but
you
will
not
be able
to
play images back.
Photographs selected
for
full-size display
are
shown briefly
at
low
resolu-
tion while they
are
being read from memory. This feature allows you
to
page rapid
ly
th
rough
the
photographs
in
memory
without
waiting
for
every
item
to
be displayed
at
full
resolution. Before
the
image is displayed
at
full
resolution,
the
screen
will
briefly go black.
The
first and last photographs
in
memory
are
linked. Pressing
the
T/Jt.
butten when
the
last
photo
in
memory
is
selected takes you
to
the
first
photo
;pressing
the
W
fT
buttenwh
en
the
first
photo
is
selectedtakesy
ou
to
the
last photo.
Using
the
Buttons (PLAY)
1 T
um
the
mode
dial to
PLA
Y.
Th
e m
ost
A
recent
ly
recorded
im
agewi
Il
be
di
sp
layed -
in
the
LCD monitor.
PVoV
. ~®
·m
2 Vi
ew
the
other
photos
in
memory
one
at
a t
im
e,
or
se
l
ect
the
photo
you
wa
nt
to vi
ew
from a
menu
of
previ
ew
im
ages.
• To
view
photos
one
at
a
ti
me:
Use
the
zoom (
""f
W!T
..â.
) buttons
to
vi
ew
photos
one
at
a
time
. Press
the
z
oo
m-o
ut
(W/
""f
)
button
to
vi
ew
photo
-
graphs
recorded
before
the
c
urrent
photo
,
or
press
the
zoom
-in
(T/
..â.
)
button
to vi
ew
im
ages
recorded
after
the
c
urrent
photo. Hold e
ith
erbutton
down
to
scro
ll
qu
ic
kl
y
to
a
part
icular fra
me
number
w
ith
out
vi
ew
in
g interven
in
g
photos.
Th
e photograph di
sp
layed w
ill
not
change,
but
the
frame
number
at
the
bottom
ri
g
ht
comer
of
the
LCD
mo
nit
orw
i
Il
increase
or
decrease
rap
idl
y.
Relea
se
the
z
oo
m
button
when
the
des
ired fra
me
num
ber
is reached to di
sp
lay
the
photo.
The
MONITOR
butten
controls
the
LCD monitor. Press
the
MONITOR
butten
once
to
hide
photo
information,a second
ti
me
to
turn
the
monitor
off,
and a third time
to
tu
rn
the
monitor
on
with information showing.
Other manuals for Coolpix 950
3
Table of contents
Other Nikon Digital Camera manuals

Nikon
Nikon Coolpix S3000 User manual

Nikon
Nikon 26221 User manual

Nikon
Nikon Coolpix L30 User manual

Nikon
Nikon Coolpix 880 User manual

Nikon
Nikon Coolpix S220 User guide

Nikon
Nikon COOLPIX AW110 User manual
Nikon
Nikon D50 User manual

Nikon
Nikon D700 User manual

Nikon
Nikon Z50 User manual

Nikon
Nikon CoolPix S610c User guide

Nikon
Nikon CoolPix S570 User manual

Nikon
Nikon Coolpix S230 User manual

Nikon
Nikon D70 Use and care manual

Nikon
Nikon Coolpix 5600 User manual

Nikon
Nikon Coolpix S6100 User manual

Nikon
Nikon D60 User manual

Nikon
Nikon D5300 User manual

Nikon
Nikon Coolpix S640 User manual

Nikon
Nikon COOLPIX L110 User manual

Nikon
Nikon COOLPIX P100 User guide