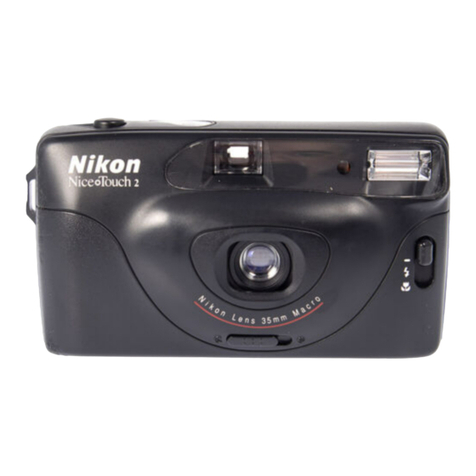
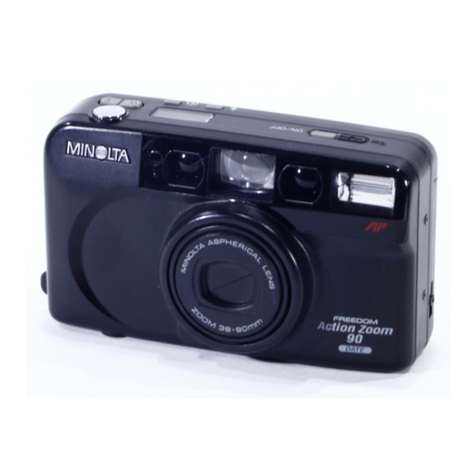
Nikon Fun >Touch 5 User manual

Nikon Fun>Tbuch
5
InstructionManual
Manualdeinstrucciones


Contents
English
1-11
Espanol
13-24
Fig.
C,D,E,
F,
G,H,l&J25-31

Fig.
A

English
Foreword
ThankyouforpurchasingtheNikonFunTouch5/FunTouch5QD.
Itisa veryenjoyable,easy-to-usecamera.However,inordertoobtainthebest
results,besuretoreadthisinstructionmanualthoroughlybeforeyoubegin.
Cameraparts
(Fig.
A)
©Filmframecounter
©Shutterreleasebutton
©Red-eyereductionlamp
©Autoexposuremetering
window
©Lens
©Lenscover
©Strapeyelet
©Viewfinderwindow
©Flash
©Autofocuswindows
©Flashcancelbutton
©Anytimeflashbutton
©Power(lenscover)switch
(Fig.
B)
©Filmtake-upspool
©FlashreadyLED(green)
©Viewfindereyepiece
©Filmrewindfork
©Camerabacklock-release
lever
©Filmchamber
©Filmcartridge
confirmationwindow
©Cameraback
©Filmguides
©Batterychamber
lid
©Filmrewindswitch
(Viewfinder)
©Pictureframe
©Autofocusframemarks

Precautions
•
Please
ensurethatyouarefullyconversantwiththeoperationsandfeaturesof
yournewcamerabyreadingtheseinstructionsbeforeusingitforspecial
occasions(holidays,wedding,etc.)
•Donotleaveyourcamerainanexcessivelyhotplace;storeitina
cool,
dry
place.
Batterypowerweakensinextremelylowtemperatures.
•Whennotinuse,besuretoclosethecamera'slenscovertoturnOFFthepower
andkeepthecameraina safeplace.
•Intheeventofcamerafailure,donotattempttodisassembleorrepairthe
camerayourself.First,replacethebatteries.Ifthatdoesnotwork,takethe
cameratoyournearestauthorizedNikonservicecenter.
—
2
—

Attachingthestrap(SeeFig.
C
— page25.)
Threadthewriststrapthroughtheeyelet,thenpasstheotherendthroughthe
loopandpullittight.
Installingbatteries(SeeFig.
D
—page25.)
1.
Pullthebatterychamberlidinthedirectionofthearrowtoopen.
2.
InstalltwoAA-sizebatteries,withthe+ and- polesorientedasshowninside
thebatterychamber.
3.Pushthebatterychamberlidbackintoplaceuntilitclicksshut.
Notes
•DonotuseNiCdbatteries.
•Removebatteriesfromthecamerawhennotinusefora longtime.
•Donotbreakopenortrytorechargebatteries.
•Donotthrowbatteriesintoafire.
•Keepbatteriesoutofthereachofchildren.
—
3
—

Filmspeedsetting
ThecameraisdesignedtouseDX-codedISO100to400films,andcorrectfilm
speedisautomaticallyset.IfnonDX-codedorDX-codedISO200filmisloaded,
filmspeedisautomaticallysettoISO100.
Loadingfilm(SeeFig.
E —
page26.)
1.
Slidethecamerabacklock-releaseleverdownwardtoopen.
2.
Positiontheholeinthebottomofthefilmcartridgeoverthefilmrewindforkand
slipthefilmcartridgeintothefilmchamber.
3.Pullthefilmleaderacrosstothefilmleaderpositionindex.
4.
Makesurethefilmliesflatbetweenthefilmguides.
5.Closethecameraback.Presstheshutterreleasebuttonrepeatedlytoadvance
thefilmuntilthenumber
"1"
appearsintheframecounterwindow.
•
To
confirmthatfilmisloadedinthecamera,glanceatthefilmcartridge
confirmationwindow.
—4 —

Takingpictures(See
Fig.
F —
page27.)
1.
TurnthepowerONandopenthelenscoverbyslidingthepowerswitchinthe
directionofthearrow.
2.
Holdthecamerasteadywithbothhands.Becarefulnottoblocktheflash,
autofocuswindoworlenswithyourfingers.
3.Toensuresharppictures,makesureyoursubjectisatleast1.3m(4.3ft)away
fromthecamera*
4.
Lookthroughtheviewfinderandpositiontheautofocusframemarksonthe
mainsubject.
5.Presstheshutterreleasebuttonlightlytofocusthesubject.
*Note:
Ifthecamera-to-subjectdistanceiscloserthan1.3m(4.3ft),anout-of-
focuspicturemayresult.
6.Fullydepresstheshutterreleasebuttontotakethepicture.
•Thelenscoverisinterlockedwiththecamera'ssafetymechanism.Youcantake
picturesonlywhenthelenscoverisopenalltheway.
—5 —

Flashphotography(SeeFig.G — page28.)
Autoflashmode(default)
Thecameradetermineswhenflash
is
neededandfirestheflashautomatically.
Recommendedflashshootingrangeisasfollows:
Flashshootingdistancerange
Filmspeed
ISO100
ISO200
ISO400
Flashshootingrange
1.3to2.4m
(4.3
to
7.9
ft)
1.3to3.3m(4.3to
10.8
ft)
1.3to4.8m
(4.3
to
15.7
ft)
Assoonastheflashisfullycharged,theflash-readyLEDlightsup;
the
LEDauto-
maticallygoesoutafterapprox.120seconds;
it
lightsupagainwhenyoupress
theshutterreleasebuttonlightly.Totake
a
picturewithflash,fullydepress
the
shutterreleasebutton.Rechargingtakesapprox.
6
seconds.
—
6
—

Flashcancelmode(SeeFig.G-2— page28.)
Whenyoudon'twishtouseflashtoachievea morenaturallightingeffect,press
theflashcancelbuttonwhileshooting.
Anytimeflashmode(SeeFig.G-3— page28.)
Wheneveryouwanttousefill-flashforbacklitsituations,presstheanytimeflash
buttonwhileshooting.
Red-eyereduction
Inflashphotography,thesubject'seyessometimesappearbrightredincolor
pictures(whiteinb/wones)duetoa phenomenonknownas"red-eye."To
counteractthiseffect,yourcameracomeswitha red-eyereductionlamp.When
theshutterreleasebuttonispressedlightly,thered-eyereductionlamplightsup,
causingthesizeofthesubject'spupiltogrowsmaller,thusreducingthepossibility
ofred-eyeeffect.
Holddowntheshutterreleasebuttonhalfwayfora fewsecondsbeforepressing
thebuttonallthewaytofiretheflash.
—7 —

Howtousefocuslock(SeeFig.H — page29.)
1.
Centertheautofocusframemarksonthesubject.
2.
Lightlypresstheshutterreleasebuttontolockfocusonthesubject.Atthistime
theflashreadyLED(green)goesout.
3.Keepingtheshutterreleasebuttonlightlypressed,recomposethescene.Then
fullydepresstheshutterreleasebutton.
Note:
Tocancelfocuslock,simplyremoveyourfingerfromtheshutter
releasebutton.
Specialfocusingsituations(SeeFig.I— page30.)
Thefollowingsubjectsmaybetoodifficulttofocus:
a.Subjectstoosmalltofullycovertheautofocusframemarks
b.Subjectsbehindglass
c.Darksubjectswithnoreflection
d.
Glossy,light-reflectingsurfaces,suchasshinycarsorwater
e.Subjectswithoutsolidcontent
(i.e.
candleflame,fireworks,etc.)
In the above
cases,
use focus
lock.
—
8
—

Rewindingthefilm(SeeFig.J —page31.)
1.
Attheendofthe
roll,
thefilmadvancemotorstopsandtheshutterislocked.
2.
Torewindthe
film,
slidethefilmrewindswitchinthedirectionofthearrow,and
thefilmrewindsautomatically.
3.Checktoseeiftheframecounterhasreturnedto"S".
4.
Openthecamerabackandremovethefilmforprocessingwithoutdelay.Open
thecamerabacktoreleasethefilmrewindswitch.
To
rewind the filmin mid
roll,
alsoslide the film rewind
switch
inthe direction of
the
arrow.
—9 —

Specifications
Type:
Filmformat:
Lens:
Focusing:
Shootingdistance:
Shutter:
Viewfinder:
Framecounter:
Filmspeed:
Filmtransport:
Flash:
35mmlensshuttercamerawithbuilt-inflash
24mmx 36mm(standard35mmformat)
29mmf/4.5lens(3elementsin3 groups)
Activeautofocussystemwithfocuslock
1.3m(4.3ft.)toinfinity
Mechanicallensshutter,fixedshutterspeedof1/125sec.
Albada-brightframetype(Magnification:
0.45x;
field
coverageover80%)
Additivetype,automaticresettingto"S"whenthe
camerabackisopened.
AutosettingtoISO100or400forDX-codedfilm(ISO
100forDX-codedISO200 filmandnon-DX-codedfilm)
Automaticadvancing,rewindingviafilmrewindswitch,
mid-rollrewindpossible.
Built-inautoflashwithrecyclingtimeofapprox.6 sec.
GuideNo.8 (ISO100andmeters)
—10—

Flashshootingdistance
range:
Batterylife:
Red-eyereduction:
Autopoweroff:
Powersource:
1.3
—
2.4m(4.3-
7.9
ft)atISO100,1.3- 3.3m(4.3-
10.8
ft)atISO
200,
and1.3
—
4.8m(4.3
— 15.7
ft)atISO
400
Approx.30rollsof24-exposure
film
(20rollsof36-exposure
film)withflashforhalfofallexposures
Red-eyereductionlamplightsupwhentheshutter
releasebuttonispressedlightly.Holddowntheshutter
releasebuttonhalfwayfora fewsecondsbeforepressing
thebuttonallthewaytofiretheflash.
WiththepowerswitchON,camerapowerautomatically
turnsOFFafterapprox.120secondswhenthecamerais
notinuse.
To
turnthepowerONagain,lightlypressthe
shutterreleasebuttonorturnthepowerswitchON.
Two1.5VAA-size(R6,LR6)batteries,NiCdbatterynot
usable
—11—

Dimensions(Wx H x D):Approx.118x65x42mm[4.6x2.6x 1.7in.](FunTouch5)
Approx.118x 65x 47mm[4.6x 2.6x 1.9in.]
(FunTouch5 QD)
Weight(withoutApprox.165g (5.8oz)(FunTouch5)
batteries):Approx.175g (6.2oz)(FunTouch5 QD)
Specifications
and design are subject to change without
notice.
—12—

Espanol
Prefacio
MuchasgraciasporsucompradelaNikonFunTouch
5/Fun
Touch5 QD.
Esunacamarafacildeusarqueleayudaraa conservarsusmomentosmas
felices.Sinembargo,paraquepuedadisfrutaralmaximodeestacamara,lea
todaslasinstruccionesdeestemanualhastaentenderlasperfectamente.
Nomenclature
(FigurasA)
©Contadordefotogramas
©Disparador
©Luzdereducciondeojosrojos
©Ventanillademediciondeexposicionautomatica
©Objetivo
©Tapadelobjetivo
©Argolladelacorrea
©Ocular
©Flash
©Ventanillasdeenfoqueautomatico
©Botondecancelacidndelflash
®
Boton
deflashentodomomento
©Interruptorprincipal(tapadelobjetivo)
(FigurasB)
©Bobinadelapeh'cula
©LEDdeflashlisto(verde)
©Oculardelvisor
©Horquilladerebobinadodepeh'cula
©Palancadeaperturadelrespaldotrasero
©Compartimientodelrollo
©Ventanilladeconfirmaciondelcartuchodelapelicula
©RespaldodelaCctmara
©Gufasdepelicula
©Tapadelcompartimientodelaspilas
©Interruptorpararebobinadodepelicula
(Visor)
©Marcodelaimagen
©Marcasdelencuadredeenfoqueautomatico
—13—

Precauciones
•Aseguresedequeentiendeperfectamenteelfuncionamientoy las
caracten'sticasdesunuevacamaraleyendoestasinstruccionesantesde
utilizarlaparaunaocasionespecial(parasusvacaciones,parauncasamiento,
etc.)
•Nodejelacamaraenunlugarmuycaliente;guardelasiempreenunlugarseco
ya lasombra.Lacorrientedelapilasedebilitaa temperaturasmuybajas.
•Cuandonoseesteutilizando,cierrelatapadelobjetivodelacamarapara
desconectarlacorrientey guardelacamaraenunlugarseguro.
•Enelcasodequelacamaranofuncione,notratededesarmarlao repararla
camaraporsucuenta.Pruebea cambiarprimerolaspilas.Sinosesolucionael
problema,llevelacamara
al
centradeservicioautorizadodeNikonmascercano.
—14—

Fijaciondelacorrea(VealafiguraC-pagina25.)
Paselacorreamunequeraporlaargollay paselaotrapuntaporelbucle,
apretandofirmementeelnudo.
Instalaciondelaspilas(VealafiguraD-pagina25.)
1.
Abralatapadelcompartimientodelaspilasenelsentidodelaflecha.
2.
InstaledospilasdetamarioAAconlospolos+ y - enelsentidoindicadopor
eldibujodentrodelcompartimientodelaspilas.
3.Vuelvaa cerrarlatapadelcompartimientodelaspilashastaqueseasegureen
sulugar.
Notas:
•Noutilicepilasdeniquel-cadmio.
•Saquelaspilasdelacamarasinoselavaa utilizardurantemuchotiempo.
•Notratededesarmaro derecargarlaspilas.
•Notirelaspilasalfuego.
•Guardelaspilapenunlugarfueradelalcancedelosninos.
—15—

Ajustedesensibilidaddelapelicula
LacamarafuedisenadaparautilizarpeliculasconcddigoDXconISO100a 400
paraunajusteautomaticodelasensibilidaddelapelicula.Sisecolocauna
peliculasincodigoDXo unapeliculaconcodigoDXISO200,seajustara
automaticamentelasensibilidaddelapeliculaa ISO100.
Cargadelapelicula(Vealafigura
E-pagina
26.)
1.
Muevalapalancadeaperturadelrespaldotraserohaciaabajqparaabrir.
2.
Instaleelorificioenlaparteinferiordelcartuchodepeliculasobrelahorquilla
derebobinadodelapeliculae introduzcaelcartuchodepeliculaenel
compartimientodelrollo.
3.Tiredelapuntadelapeliculahastaelindicedeposiciondepuntadelapelicula.
4.
Verifiquequelapeliculaestaapoyadacontralasguiasdepelicula.
5.Cierreelrespaldodelacamara.Presionevariasveceselobturadorparaquela
peliculaavancehastaqueelnumero
"1"
aparezcaenlaventanilladelcontador
defotogramas.
•Paraconfirmarquelapeliculaestacargadaenlacamara,mireporlaventanilla
deconfirmaciondelcartuchodepelicula.
—16—
This manual suits for next models
1
Table of contents
Languages:
Other Nikon Film Camera manuals
Nikon
Nikon Lite Touch Zoom 70 W QD User manual
Nikon
Nikon F3 User manual
Nikon
Nikon F55 - F55 35mm SLR Camera User manual
Nikon
Nikon F80 User manual
Nikon
Nikon N2000 User manual
Nikon
Nikon D850 Service manual
Nikon
Nikon 2170749 - Pronea S APS Camera User manual
Nikon
Nikon ZoomTouch 500S User manual
Nikon
Nikon Lite Touch Zoom 100ED User manual

Nikon
Nikon 110i - Nuvis APS Camera User manual


