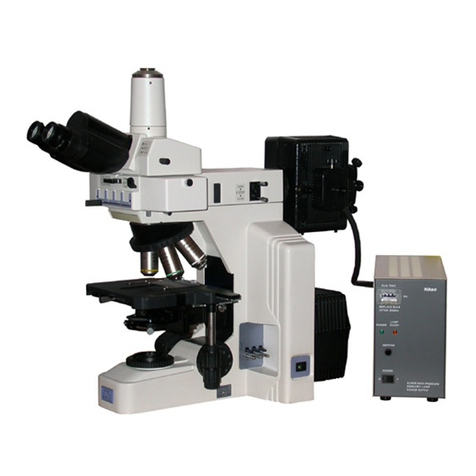
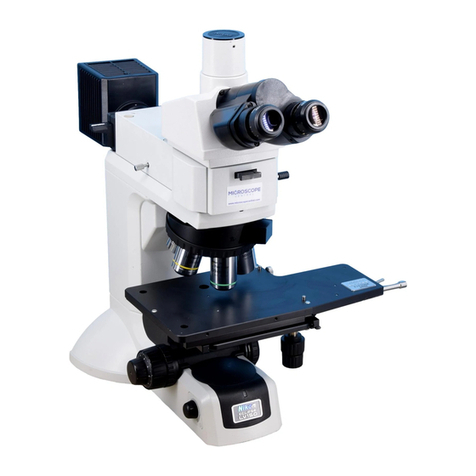
Nikon LABOPHOT-2 User manual

Nikon
INSIRUCIIONS
Advanced Test Equipment Rentals
www.atecorp.com 800-404-ATEC (2832)
®
E
s
t
a
b
l
i
s
h
e
d
1
9
8
1

Thank
youvery
muchfor purchasing
aNikonlMicroscope.
Thismicroscope
isa high
precision
instrument
with a
verydelicatestructure
andvaried
functions.Please
thoroughly
readthis
manualfirstto usethe microscope
correctly.
CAUTIONS
I Avoid
StrongShocksl
ll
afdethemicroscope
genrly,
tsking
care10avoidstrons shocks
E When
CarryingtheMicroscope
Whencarryngth€microscope.
s!pporl
thebouomofth-cmcroscopebase The
nsrr!mentwe
ghs
.bout 7 9kg Donot
ltsl!l!9!!9rl4sl!s fthebcse-
E Place
of Use
Avodthe
lseoftlr€mcros.opcnad!sry
prace,
orwferc l marne
slolecllo
Vbratontor clposedrol.
gr
lemper.r!rcs mn
sir.e,.r o r.c:
4 Power
Source
Voltage
andFuse
a'...
-'... ...,..,'.. . :age.nd
fuse
-: :..
-t :-i. -..),'.... Q
n
a Lrght
Source
Thehagqen
b! brobe
used
is
6V 30
I r _:' ..:. ... .: r:re. :.anrlr-.
one
:.:.'.. ". :i ..ci..a
f ab! b oi T..: i.a. .e slqgested
wattage
s
Lrsed,lfe !f: adlusting
crcut
ma!oeoamageo
6 Turning
ontheLamp
Tskecafenottotouch
thelampnousing
whenit s it,
anddon'1brqginflammable
s!bstancessuchas
gas. n-..thinner
and
lrlcoho
n€arn..s some
pa.ts
ofthe amp
holsngmay
b€conreleryhoLwh ethe
Z Changing
theBulbandFuse
Beforerep
ac.9 thebLrb or
luse.
tufi
OFFthemanswtclrand
disconnectthe
power
source
plua.
Repac€thehalogei
amp
16V
30W).maklngs!fetlratt s
cooenough.Donoltouchthe
qlasspart
with Vour
barehands.
B Dirton the Lens
wattage
s
Lrsed,ll'e
!f: adlusting
crcut
Donoileave
dust.dirt.orfin
thelens
orbub surfaces
Theyw I prevent
youfrom cearly
obsetuiigth€specim€n
-91
FocusKnobs
N.!cr att.nprro!dlustthet.Jht.essot
th€ rght !nd €ti
fr!fd ro.!s k.oi,s
!Y
turninoone,whiie
holdinar
theother. r
nr! ca!s. pfoliems D! .ot tLrr.the
idrse locls kr
..ib:p.st
the imit A!. d
trrr.ng t i.r. h
!, be..!:e t na,r'cause

CAREANDMAINTENANCE
A Cleaningthe
Lenses
To
cleafthe ensslrfaces.remove
dlst
Lrsing
asoftbrushorgauze
Onlywhen
removing
fingermarks
orgrease.
usea
soltcoltoncoth, enstissle,
ofgauze
ghtymoistenedwith
pure
alcohol
lmethy acoholor ethylalcoho
) IESL
sE4lra!|i s!i9!lry9! 9i "91
Lr onlyxylene.Do nol usexylen€for
cleain9thesu.face
oflheentrancelens
ofthe eyepiece
lLrbeortheprsm sLrface
ofthe Ult.a Wide EyepieceTube UW"
Observe
sufficentcauton n handlng
acoholandxylene
lthey
.re n
fammable).
andtheONOFFofrh€
powef
sourceswitch.
Z Cleaning
thePaintedSurfaces
Avoidthe useof anvorqanic
solvent
(for
examp€, thinn€r.
-"ther.acoho
)lor
cear ngthe
pa
nted
sl|faces.rd plastc
parts
ofthe nstr!m-.nl
W€reconrmend
yo! !s€ tlre
si cof cloth.
g NeverAttemptto Dismantlel
Never
attemptto dismantlethe
instrument
beca!se
you
maymparthe
@
When
Notin Use
WhennotinLrse.
coveftheinstrument
wlfrthe accessoryvny cover.andqlel9
it in a place
freefrom moisture
and
funqus.t isespecaly recommended
thatthe objectves
and eyepecesbe kept
ii anai.t
ght
contanercontaining
El renoorc Lnecttncl
To mainlain
the b€st
pe.formance
of the
instftrmeni.
wer€commend
thatthe
instr!m€nl
be
pefodlca
lychecked
(For
detas ofths check,contact
your
au-
thorizedNikondistrbutor.
)
*Ple.se nole.rs
pe.you. Nkonwarcntv,
''Anydefectsor damagedircctlyor indi
rectlycausedby the useof unauthorized
replacement
partsand,/orperformed
by
unautho zed personnel"
wil vod the
CONIENTS
r.Nol\,lENCLATURE
......
.....
3
TT.ASSEMBLY..
...... . ... ..5
rn.
N4lcRoscopy
...-........
12
V.MANIPULATION
OFEACH
ELEtvtENT
....................
16
1)Useoffocusinsdevice.
. ....16
2)Optica
path
changeoverinthe
trnoculareyepecetulre
3) D
opter
adlustmenr
. .......
4) nterpupillarydstance
1f
18
adjustment
. . .,..,.,..,.,. J8
5)
Centerngthe
condenserens T9
6)Useoffeddiaphragm
... 20
7)Useofcondenserapenure
daphrasm...
.......20
8)Useoffiters
-----.-.--21
9)O immersionmanipLr
alon..
..23
V
,TROUBLESHOOTING ."',..,.24
ELECTRICAL
SPECIFICATIONS.29
INOMENCLATU
RE
Specm€n
(glass
srdel
S!bstage
Condenser
centerlng
screw
Y axsslagemolioncontro
X axlsstale
motonconiro
Fed diaphragir
rng
LrnF
io tage .d cadln p dre
LrnF
!oltaqesecLtorsw
1.h
Eyepece
1!beclamp
screw
Lamphousingcovef
\
Frg.
r-|

NOI\4ENCLATURE
B
noulareyepec€
tube
Dopter
rng
Revolvngnosepece
dlaphragm
ring
Condenser
campscrew
Cofdenserfocusknob
Fig.l 2

il. ASSEM B
LY r'o""r,ns
anddismantrins)
Toassemblethemicroscope,followtheproceduresgiven
fromOto(?
Fordelails,read
p.6
top.
1'1.
1u
r@
@
@
Tools: hexagonwrench (accessory),
plusscrewdriver,minusscrewdriver
Fig.2

N.ASSEI\4BLY
O Checkthe
PowerSourceVoltageandFuse
oDlsconnect
the
power
cordfromtheACinputconnector.
(Make
surethatt rs
disconnected.)
. Make
surethatthelinevoltageindication
plate
attherearofthebase
indicatesthe
correct
inevo
tageto beused
(1OO-120V
or
22O-24OV)
\Fis.21).
Whent indicatesLncorreclvoliage,rerriovethe nevoltage
indicationplate
byunscrewingthetwoscrewsusinga plus
screw
driver.
. Mount
the inevoltagendication
p
ateafterswltchnglhe
input
votagechange
over
swtchto lndlcatecorrectvotage.
aRemove
thefuseholderattheboitomofthe
baseusnga
plus
screw
driver
(Fig.2
2)andnrakesurethatthemetal
part
ofthe
fuse
ndcales
"250V1A' for10O 120Vor
"250V
T1
A' tot224 244V.
When ncorrecifusetypes
to be nserted,
please
contact
your
aulhorizedNikondisirbulor.
.Insert
ihefuseintothefuseholderandiightlyscrew
itintothe
origina
positon
usinga plus
screwdriver.
O Leveling
FootScrew
. Forstableinstallationofthemicroscope,man
pulatetheadjustment
screwatlherear-righi
ofthebase
(F
g. 2 3).
F
g. 2-1 Fis.2
2
Fig.2-3

N.ASSEMBLY
a3)
Mounting
LampandLampHousing
Keepthecoveron
oruse
qloves
whenmountinqtheampbulb
so
asnotto touchth9!!r[q!g dilcq!]yt{llluyelrillgels-Lf i.rc9l!]4!!
ordirtonthebulb
surface,wipethemoffwithlenstissue.
J\4ake
5!l€ te removethe coveraftermountinqthe lam
.F-.movc
lhe amp hoLrsngcoler pressIg thecoverderachfg
buttons(Fg241
a nsen the arnpintothe sockel
pI ho es Llrt t feachesthe rntt
(Fs
2
5)
. Reattachthc covcr
Fig24
Cautions
whendismantling
.Tuff olithe
power
sr,!tclr
lMak-osLrreirai
i soff.)Donottouch
thebulbimmediatelvafterturninqitoif
becausen
sveryhot.Make
surethar
lhebub hascoolod
enouil
i \ryhenfeplacrngt
tr-ts
_^4
[fr
t

II,ASSEIVIBLY
G)
lVountingand
Dismantling
theObjectives
al'4ountthe
oblectves
ntothehoes
olthe revolvlng
nosepece
n
such
posil
onsthat,when
viewedfromabove,
their
magnfving
power
ncreasesas
thenoseplece
isrevovedcockwise
(Flg 2 6)
Cautions
whendismantling
. RemovetheNDf lercassette
iialtached
andlower
thestage
by
turfingthecoafse
tocusknob.
aRemove
anyspecimen
f t isonthestage
. Hod lheoblective
withbothhands
soasnot
1c)drop1
when
removngltfromtherevo
vingnosepiece.
Ftg27
Fig.2
6
O l\/lountingtheStage
aLowerlhesLrbstage
bytLrrnng
thecoarse
focusknob
aLoosenthestagecampscrew
suffcient
y.
aInsertthestage
Lntothecrcuardovelall
oflhestage
rnount
olthe
substage,
ll and
E. Fasten
thestagewrlh
thestagecamp
screw
3(Fs.2
7).
Specimen Holder
aThe
specmenhodershoLr
d belasiened
tothe
mo!ntngnoeon
therightsldefora
eftknobslageandonthe
eflsdeforarght
knob
stage 8e'novethespeclmen
holderwhen
observng
a arge
@lVlountingand
Dismantling
theCondenser
Lens
. Raisethesubstage
bytLrnnglhecoarse
focus
knob
aLowerthe
condenser
carrler
11]tslimt by
turnngthe
condenser
.lnsertthecondenserens ntothecondenser
carrler
Ewth the
numercal
aperture
p
ate
facngtowardthe
user Fasten
t wlthlrre
condensercamp
screw
2 (F
g 2-8).
. RaLsethecondensercarrierto
ts imtbyturningihecondensef
focus

N,ASSEI\1BLY
Cautions
whenDismantling
.q- oeLe\Df r" enetdd"neo
. Lowefthecondenser
carrerto Lsimilbyturnn! the
fccLrsknob.
Removethecondenserlensbyre
easing
the
Fis.2I Fis.2 I
_ Vounling
theBrnocuarEvepieceTube
o Lo.sef ihe er'cp..e tubec nrrp scfevrs|rllcreni
! usrfg the
h.ria!oflref.h lSee,?
l
. nsertrhe c f.! ardoietir of t retf n.rc! if efepecetlrbc f10thc
c r.Lraf doveia ci th. .ry-!pc.e Lrbero!fl Fasi,.
I i {,th the
ey-apecel|rbec anrpscrc\\ iF
!r 2 9)
Cautionwhen
clamping
. Do fot hod th. pasic p.ft ofthe hexa!.rna ,.,/fench,,vhEn
l giricn
fq Lheelepecetubc . a.np
:.rew Ho
a Lhelte n ol the
\\refch f ovefl
alhtefed,
optc: path
.hang.i ov.r of the
eyepecetLrb.ma\rbe na iLrfrcioned
I l\.4ounting
theEyepiece
. Useihe sam. mngnI catof eyepeceslof bothrhc I ghi afd
. nserttirccy-ap
eces fto ihesee!.s oithe b llo.iLrlarey-ape.-.Lub-.
A'
pr.nrtrsrolls
olthesleeve
1F
g 2 10)
o\'Vhcn
Lrsrng
eyegrardrLrbbefs,nsertth.mnt.lheeyepeces
(Fq
2 11).
-<(d::
/#l}lrm--
I / -<?):. -
\./ |
rq,
/ 1l--J'--r--
,/
i.--,-=-,.r,!4

N.ASSEIV]BLY
@ Placingthe Filteron
Pacerhe
rr45mm
filteron
Fig.2-13
rho Fi116r e6^ahi..16
thef herreceptacle
of thefie
d lens
part.
Fig.2-12
@
Mounting
and
Dismantling
theNDFilterCassette
(optional)
aPush
do!!ntheNDfiter
cassettefromthetop
so
thetwo
protrus
ons
oiilrelower
pan
oftheNDf rer
cassettefitwlththetwomounring
gfooves
ontherm ofthefeld ens
part
ofthemrcroscope
base
lFis.2
13).
aWhen
freqlenty
lowerngthemcroscopestage,mounttheND
{iter
cassetteinthe
drectionasshowninFig.2 14.
.When dismanding.
push
lhecassetteeitheriothe eftorright
and
rasethe
opposteside
Fis.2-14
10

X.ASSEIV]BLY
O Connecting
thePower
Cord
a nsenthesocket
of
the
power
cordtotheAC npul
connectorand
plug
itinto
aAClinereceptacle
(Fig215).
oWhen
thereceptac
e
is
notadouble-poe
ground
type,
useaplug
convenngadapter
(Fig.2
16).
Fig.
2 16
@Hexagon
Wrench
.The hexagonwrench
Take
t outasshownsstoredintheback
ofthe
r Fig2 11.
--=l
Fis.2 17
11
Fis.215

N. MICROSCOPY
1)PuttheNCB11
filler
(or
necessaryf ter)on
thefilter
recepiac
eof
ihef eld ens
part
(Fig.
3 1).
2)MounttheND
fllter
cassefte,
i{used
{Fig.
3 2).
(Befer
to [.ASSEIV]BLY
@p.10)
3)Turnon
themainswitchto ightlhe
lamp.
Sidethebr
ghtness
adjuster
tomeetwiththe3rd ine
fromtheright.
(Fig.
3 3).
4)Sidethe
f lerinsertion/removalknobsof
theND
filter
cassene
tothe imittoplace
theentireNDfiter
intheoptical
path
(Fig.
3 4).
5) Bevovethe revovingnosepieceto pulthe TOX
objectiventotheoplcal
path.
Properlyturn
the
revovingnosepiecesoitftslnto
position
(F
q. 3 5).
6)Pacethespecinren
(g
asss
ide)onthestage
withts
cover
glassfacing
upandfastenitwith
thespecmen
holder
(F
s. 3 6).
Fis.31
F€.3-3
Fis.3-4
Fi9.36
12

rn.MrcRoscoPY
7)R.
seth€coidenser
ensLrsnglhecondenserloc!sknob
!nt ithtsth€lmt
(Fig
3 7).Wlrenlsinganachromatc
aplanatcondenser.
addo iakngcar€iot toalow
bubblesto
exstb€rweenthetopofthe
condenser
lens
and
(See
p 23. Maf p! aron
ofEach
Eement9) )
daphrasms
(Fis
3 8)
Fis.31
Fis.3I
!l M.n pu.te th-"Y axisafd X ar s stag-"
motor cortrol
knobsto
pltthespec mlr fiolrreoptic. pair iFg. 3 !).
(P
acethe ipe.rm-.. .bo!. llrc.oridenser eis l
I0)When ire tr io.! ar!,.epe.e t!be s !sed, cfraf!le
ihe o.t.a ..tf, ol : reer'.pc.c 1!be
to ent-erlOlllli
01thc !tht fto t.-. b n..! er pa.l
'll.
1
1)N.4an
puLate
thecoafscl nelocus
kiob ardTocLrson
thespeclmelr
wh e ookingI theey€p
ecE
lF
g. 3 1O)
2)Adlusl
rhediopter
(Fig.
3 'l
I
)
(See
p 18. N.4an
pu
atonof EachE
ement3).
)
13)Adjusl
the nterpuparydstance
(F
g 3 12)
(See
p. 18.Man
pulaton
ofEachEement4)
Fig.31O
I(Bm)
w
L-
Fig.3-12 13

In.
tvltcRoscoPY
14)Focusard centerthecondenser
ens
(Fig.
3 l3).
{See
p.19, ManlpulatonofEachElement5).)
15)
Bevovetherevovingnosepiecelotheoblectve
to be
usedand
locus
on
thespecimenbymanrpuanng
lhe
finefocus
orcoarse
locusknob.
(See
Note:
2.)
WhenusinganolL
immersionobiective,addoI
tak
ng
carenotto alow bubbles
to existbetlveenthetop otthe
oblectv€andthespeclmen
(See
p. 23, lvlan
pulation
ofEachElementS).)
16)
WhentheNDfltercasseltelsused,Adtustthebnghtness
bysidlngtheflternsearon,/
removaknoboftheND
(See
p 21, ManipulalionofEach
ELemenr
8).)
Whenthe NDfiter cass€tteis not used. adjust
the
br
ghtness
ofthe ampby manpuatingthebrightness
I7) Adlu$ the ve\44eldd aphragmandthe apenure
diaphragm
bymanipualingtheirconlrol
rings.
{See
p 20, Manipuatonof EachElem€nt6)and 7).}
Fig.313
14

III.
I\4ICROSCOPY
Note1: Manipulate
the
centering
screws
ofthe
isdark.
lfthis
doesn't
help,
checkthe
. nse(on
,/ femova
oftheND
.Turn
ngthe
revolv
n!
nosep
ece(clck
stop
posrtion)
. Pos
tron
ofthe
cofdensertens
.Viewf
eldand
aperrure
daphragms
. Change
overofthe
opticat
path
of
the
eyeptece
tube
'Mounting
thelarn
p
. Mouni
ngthe
condenser
' Placifg
the
fiter
ontheliter
condenser
lensifpart
oftheviewfield
following
items:
nr.
N4tcFoscoPY
4)
trI N,4CROSCOPY
5)
IN.
MICROSCOPY
7)
III I\4
CROSCOPY
8)
lur
MtcRoscoPY
10)
IL ASSEMBLY
O Mount
ngrhe
ampand
lhe amphous
ng
II ASSEMBLY
i0 Mounting
the
rL ASSEMBLY
(t Pacng
ihefilter
Note2: Check
theJollowing
items
whentne
. Mount
ngthe
spec|rren
.Thickness
ofrhe
covef
glass(standafd=0.
1Tmml
specrmen
cannot
be
focused.
III M CROSCOPY
6)
15

N.
MANIPULATION
OF
EACHELEMENT
1
) Use
of FocusingDevice
The
turnngdreci
onof
theknob
andthedirectlonof
vert
cal
movement
ofthestageareshownn Fig.4.
Onerotaton
ofthefne
focus
knobmovesthestage0.1mmand
the
graduation
onthefinefocusknobs I micron.Onerolationofthe
coafsefocls knobmoves
thestage12mm.The
range
ofcoarse
andf nemotionis2mm up and
28mmdown
fromrhestandard
Thecoarsetocusknobtightens
byturnlngthe
torque
adjustment
rng
counrercocKWrse.
Neverturn the riqhtor left knobwhile holdinqthe other. lt mav
cause
prootems.
Donot turn the coarsefocus knobIurtherthan the limit.
Ftg.4
I
16

Y, IV]ANIPULATION
OF
EACH
ELEIV]ENT
2)0ptical
Path
Change-0ver
intheTrinocularEyepiece
Tube
Note)Binocular
eyepiecetube B"doesnothaverhe
optical
path
change
-over
function.
10O%
ofthelightentefsthe
observation
(1
)When
usingthe
trinocular
eyepiecetube
"F"
Assho\/n
n Fig.5 I. whentheobservarionrube
isturned
toward
theLrser,
100%
ofthelighrenters
theobsetuatontube.
Asshown
nFig5 2,whentheobservatonrube
srevolved60'left,
100%ofthelighlentersrheverticaphototube.
1neirhefcase.turn
thetube
to thelimit.
Fis.51 Fts.52
(2)
When
usingthetrinocular
eyepiecetube 'T"
Asshownn Fg.6. when
lhechange
over
knobis
pushed
unt t
reachesthe imit
llt, 1O0%
ofthe ightenterstheobservarionrube
Whenthechange
overknobfeaches
the nlermediatecick
E, rhe
propon
onolI
ght
efteringtheobservarionrube
and
photo
tubew l
be 14r86 Whenthe
changeoverknobis
pu ed
rorhe mllEl .
000; rato -.
a t6p oo L o
Observaronruba1O0%
Fig.6
17

N, I\,IANIPULATION
OFEACHELEI\IENT
3) Diopter
Adjustment
(Before
adjustn.rthe
diopter,mpemenl1"4CROSCOPY
pfocedures
I
I
to 11)afd focusonthespecimenwih lhe10Xoblectve
)
N/or6
o oo,.t do . ---r-.
tq
lo, I o -, g
' '''pdop o'loo dL
n1 qoEo,6bpE6 hE6o
surface
oftherngconcdeswiththe
engraved
ne
lTh
s sthc
pos
tonof0 doptc compensaton.
)
(F
g 71)
(21
SwiS the40Xobjectivebytlrrnngtherevovngnosepeceand
brngthespecinrenmage
ntofocusbyturnngthefnefocLrsknob
(or
thecoarsetocLrsknobJ
(3)Swing
the
4Xor10Xoblectventoposton.WthoLrtmanipulatinq
the{ineand
coarsg-focusknobs,turnthediopler
r
ngsonlhe
eyepecessothatthespecmenimagesintherlght
and
left
eyep
ecesarefocusedndvidualy
(F
g. 7 2).
aRepeattheabove
procedure
twot mes,to adjustthedlopter
. o
4bo
o
adju
r-
-n onpa o g drop
". o .,.. o- -..
theLrsersrighl
and efteyes,wi keepthetubeengthofthe
mcroscope
correctThisenabesthe
Lrser
totakefLradvantageof
theh
gh quaiity
objectives,ncLrdngtheI parfocalty.
4) Interpupillary
Distance
Adjustment
(Before
adlustngthe nterp!p arydslance,
irnplemenlMcroscopy
procedlrre
1
)
to 12)andfocusonthespecimenwththe10X
objectve
)
Adluslthe nlerpup
arydslance,sothatboththeflghtandleft
v
e$4iedsbecomeone
(Fig 8)
Thsadlustmenlw I
enabletheusertoobservewth botheyes
Flg.11 Fig.l-2
Fig.8
1B

Ni,
MIANIPULATION
OFEACHELEIV]ENT
5)Centeringthe
Condenser
Lens
lBefore
focLrsing
nndcenterngthe
condenserers, rmplemenr
Mrcfoscopyproced!fefrom
l)to l3)andtocusonrhespec
menwrh
theI0Xobjecrive.l
(1
IC
oseihefed d
aphragl.fto irssrnal
eslsizebyman
pu
arngrhe
ie d di;phragm
controI nq. Rotatetheco|lder]serfocLrs
knobto
movethe
ccndenserverticaly
soihatasharp.iage
ol
thef
ed
djaphragrn
sformed
onthespecmensLrrface
(F
g 9 I ,2 afd 3)
Fg.g1 Fig.g2 Ftg.g
3
(2) fthe nragedecenters
iromtheve',,,.f-.ld
of
the
eyepiece,bringi
roughlytothecenier
ol
lhe! e\,!iied byrneans
olrhe
condensef
cenierng
screu,s
iFg I
0 I and2).
13)
Ch:ngetothe
40Xobjectv,.
FocLrsoI LhespecmenbytLrfnng
theflre
foclrsknob
afd
form
an m:geofthefeddaphragmon
thespecmen
sLrdacebynran
pLr
atifgthecondenserfocuskn
ob.
rlw- p ,o .ho.^a
1lot-recenter
of
the! ev\4edbymeans
ofthecondensercefterng
scr-.\",'s
Atthrstme,the
centerifgwit befac rared
byadj!sIfg
thesze
olthelmageofrhef
elddaphragmtobestghrysma
er
llianthevewf
ccjoftheeyep-.ce
by
manipu
aingthevewfed
daphragnr
controrng
lFiS.
I0 3).
li
,h
I
!'
Eyepece vle!{.fieldstop
i,1..;
Fig.g2
Fig.101 Fig.I02 91O-3 19
Table of contents
Other Nikon Microscope manuals

Nikon
Nikon A1R User manual

Nikon
Nikon Eclipse Series User manual

Nikon
Nikon SMZ-1 User manual

Nikon
Nikon Ee1078 User manual

Nikon
Nikon ECLIPSE E200 MV Series User manual

Nikon
Nikon Multizoom AZ100 Release Note

Nikon
Nikon Eclipse E1000M User manual

Nikon
Nikon Multizoom AZ100 User manual

Nikon
Nikon E800 User manual

Nikon
Nikon Eclipse Ti TIFT 1454 User manual

Nikon
Nikon eclipse Ci-S User manual

Nikon
Nikon Eclipse E600 User manual

Nikon
Nikon Optiphot User manual

Nikon
Nikon coolscope User manual

Nikon
Nikon SMZ800N User manual

Nikon
Nikon Alphapot2 Manual

Nikon
Nikon OPTIPHOT-POL User manual

Nikon
Nikon Eclipse Ni-U User manual

Nikon
Nikon SMZ-U User manual

Nikon
Nikon eclipse Ci-S User manual