IBExU: pending ●drc3612a0600h_05 ●2/3
2.3 DIMENSIONS
DC―3―
pN≤60 bar
pN≥100 bar
3. INSTALLATION
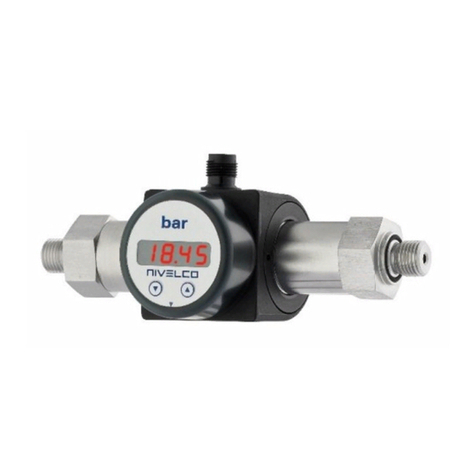
Due to its small size and weight NIPRESS D-300 can be directly installed on
tanks, pipes, machines, etc. without mounting device.
To provide a chance for replacement of the instrument during operation the use
of closing armature is recommended. A simple ball valve will be suitable for
lower pressure and for higher pressure (above 6 bar g) a three-way blow-off
needle-valve can be suggested. With pressure measurements of medium with
temperature over 75 °C (167 °F), the application of condensing device would
protect the instrument against overheating and extends its lifetime.
The temperature of the condensation in the condensing devices (in the water
lodge) is practically only 10 … 20 °C (18 … 36 °F) higher than the ambient
temperature.
Using longer impulse tube its proper sloping for the necessary de-aerating and
emptying has to be ensured.
Measuring low pressure values in systems with substantial height difference
between the transmitter and place of measurement the hydrostatic pressure of
the medium in the impulse pipe should be taken into consideration. In case of
outside installation, the unit should be protected against rain or splash water,
because malfunction may occur if the connector’s screw is not tightened
properly (i.e. not appropriate sealing).
Installation position: The pressure transmitter has been calibrated in a vertical
position with the pressure port facing down. If this position changes during
installation, a slight deviation from the zero point may occur in the measured
value.
3.1 INSTALLATION INSTRUCTION
For mounting and dismantling SW27 open-end torque wrench should be used.
The cylindrical housing of the transmitter should not be gripped and
tightened with a pipe wrench!
The plug-in electric connector can be unplugged after releasing and removing
its fastening screw. The connection insert can be pushed out by a screw driver
from the direction of the screw.
Pushing the electric cable through the cable gland it can be connected to the
relevant points of the connector. Make sure that the cable gland and sealing
plate of the connector is tightened properly.
For the sake of noise suppression, the transmitter housing is grounded. If the
grounding of the appliance with the pressure transmitter is appropriate, no
further action will be needed, else, the grounding should be performed.
Installation steps:
The specified tightening torques must not be exceeded!
Tightening torques:
1/4” BSP: max. 5 Nm; 1/2” BSP: max. 10 Nm; 3/4” BSP: max. 15 Nm;
1” BSP: max. 20 Nm; 1 1/2" BSP: max. 25 Nm.
Mounting steps for BSP thread connections according to DIN 3852:
Do not use any additional sealing material such as teflon tape! Check if the
O-ring is undamaged, it has a flawless and clean surface and seated in the
designated groove. Screw the device into the corresponding thread by hand,
and tighten the parts with a suitable torque wrench.
If your device can be secured with a knurled ring, the pressure transmitter
should only be tightened by hand.
Mounting steps for NPT thread connections:
Use a suitable sealant (e.g. PTFE tape). Turn the device by hand to the correct
thread and tighten it with an open-end torque wrench.
4. WIRING
Shielded and twisted multicore cable is recommended for the electrical
connection. For devices with cable gland, you have to make sure that the
external diameter of the used cable is within the allowed clamping range. After
you have connected the wires, tighten the gland screw firmly until proper
sealing.
For the installation of a device with integral cable, following bending radiuses
have to be complied with:
Cable without ventilation tube:
-static installation: 5-fold cable diameter
-dynamic application: 10-fold cable diameter
Cable with ventilation tube:
-static installation: 10-fold cable diameter
-dynamic application: 20-fold cable diameter
In case of devices with integral cable and integrated ventillation tube, the PTFE
filter located at the cable end on the air tube must neither be removed nor
damaged.
2-WIRE CURRENT OUTPUT
3-WIRE VOLTAGE OUTPUT
12
3
+
+ Out
+
1:2:
3: Out
+
4:
CONNECTION OF INTEGRAL
CABLE
CONNECTION OF
ISO 4400 PLUG
CONNECTION OF M12 X
1/4PIN PLUG
4.1 EXAMPLES OF ARRANGEMENTS
WIRING OF 2-WIRE Ex ia PRESSURE TRANSMITTERS
P
I
Current controlled
switch
PKK-312
~230V
Pressure transmitter
PLK-501
display
P
I
Panel instrument
PMM-300
PMM-500
~230V
Pressure transmitter
Power supply
PPK-331
P
I
Current loop indicator
PDF-401
~230V
Pressure transmitter
WIRING OF 3-WIRE PRESSURE TRANSMITTERS
Power supply
PPK-331
P
U
Panel instrument
PMG-411
+
Out
~230V
~230V
Pressure
transmitter
