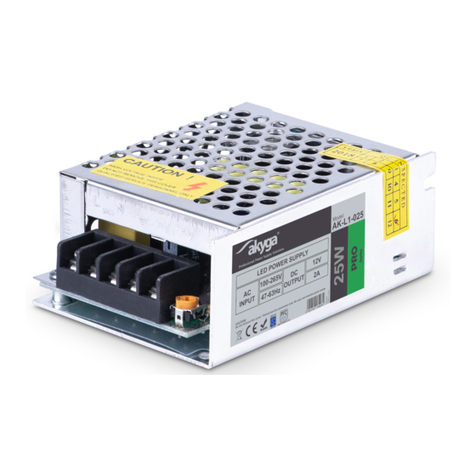
Njoy PSAD-12CB21X-CK01B User manual

02 03
Thank you for purchasing our products!
Please read this manual before using the product.
The power supply has a battery backup function that
protects the CCTV system from unexpected blackouts or
other electrical problems (surges, spikes, brownouts).
Switches between AC mode and battery mode without
interruptions or slowing down the system. Even more, the
ACinputis stabilizedinordertoshieldsensitiveequipment.
Focusing on quality at competitive prices, nJoy
designs consumer products for a better and
enjoyable way into the digital world.
Features
1
Universal AC input 100-240VAC, 50-60Hz.
Regulated 12Vdc low voltage output (adjustable
from 12-15V via PSU trimmer).
Individually PTC fused terminals.
LED indicator per output.
With back-up battery function.
Short circuit protection, high voltage protection,
over current protection.
Warning2
PSU should be powered by the source indicated on the
rating label.
Do not place the power supply in a high humidity or
temperature environment.
Do not unplug the AC power cord when the power
supply is in use.
Do not open the power supply case unless you are an
authorized service technician.
English
Română

04 05
Details3
1. AC Input: 3 pins IEC socket.
2. Cable threading
prefabricated holes.
3. LED indicator:
A. Red LED for AC
B. Green LED for DC.
C. Yellow LED for battery.
4. Lock of the case.
5. Wall-mounting holes.
6. Air vents for heat radiation.
Side / Front / Back view
321 4 5
A
B
C
6
7. Individual PTC fused and LED
for each DC output.
8. Low Voltage Outputs
Accessed via terminal blocks.
Marked (+)=+12Vdc, Marked
(-)=0Vdc.
9. Battery fixing mount.
10.Battery charging cable.
11. Voltage-adjust trimmer
from 12-15V.
Interior view
7 8 119 10
English
Română

06 07
Accessories4
NOTE: If any of the above package content is missing or is
damaged please contact the shop where you have bought the
product from.
1 2 3
1. Keys for door lock.
2. Screws and raw plugs for
wall-mounting.
3. Small screws for locking case
lid.
Installation5
ATENŢIE!
Before starting the installation please make sure
your system is turned off and disconnected from the
AC power supply.
Use only the original cable. Using a different cable
may lead to major defects!
Step 1. Mount the enclosure in a preselected location
that is not in direct sunlight and is protected from
moisture.
Step 2. Knock out the appropriate prefabricated 22mm
conduit holes for your input & output cables.
Step 3. Turn the internal power switch to the “OFF”
position.
Step 4. Connect all of your camera cables to the
individually protected 12Vdc outputs,accessed via
the terminal block marked “(+)” & “(-)”.
Step 5. Connect battery with Battery charging cables,
make sure “(+)” & “(-)” of battery connected
correctly.
Step 6. Fix the battery via battery fixing mount.
Step 7. Connect AC 100-240Vac mains voltage to the AC
input 3 pins IEC socket.
Step 8. Turn the internal power switch to the “ON”
position. The green LED located on the front of the
unit should now be illuminated.
Step 9. Close the cover and secure it with the door lock
and provided screws.
English
Română

08 09
Disposal of Old Electrical & Electronic Equipment
(Applicable in the European Union and other European countries with
separate collection systems)
This symbol on the product or on its packaging indicates that this product shall not be
treated as household waste.
Instead it shall be handed over to the applicable collection point for the recycling of
electrical and electronic equipment.
By ensuring this product is disposed of correctly, you will help prevent potential negative
consequences for the environment and human health, which could otherwise be caused
by inappropriate waste handling of this product.
The recycling of materials will help to conserve natural resources.
Frequently asked questions6
Q: How can I solve an output fault?
A: Identify which channel has no output and replace its
corresponding fuse.
Q: What to do if the LED on the front of the power supply is
OFF?
A: Please check the AC input (cable, wires) to be plugged in
correctly.
Q: What it means when the LED on the power supply is
flashing along with the LEDs for individual channels?
A: An overload or short circuit occured. After removing
the fault the LEDs should stop flashing.
Q: Why is the quality of the image recorded so low?
A: Cause 1: EMI interference. Remove the wiring that is too
close to the transformer.
Cause 2: Exceeded distance specification. Please check
the DC output and measure is the distance is exceeded.
If so, reduce the cable length or simplify the circuit by
removing high energy consuming components.
English
Română

10 11
Vă mulţumim că aţi ales produsele noastre!
Citiţi acest manual cu atenţie înainte de a folosi produsul.
Concentrându-nepecalitatelapreţuricompetitive,
construim produse pentru consumatori în ideea
uneiinteracţiunicâtmaiplăcuteculumeadigitală.
Această sursă neîntreruptibilă de tensiune cu baterie de
rezervă protejează sistemul CCTV de căderile neașteptate
ale energiei electrice. Nu produce întreruperi sau încetiniri
ale sistemului CCTV atunci când tensiunea de la rețea
lipsește și comută automat pe modul baterie. Mai mult,
curentul de la priză este stabilizat pentru a nu afecta
echipamentele sensibile.
Caracteristici
1
Tensiune de intrare AC: 100-240VAC.
Frecvență: 50-60Hz.
Tensiune de ieșire DC: 12V. Poate fi ajustat între
12-15V.
Siguranțe PTC fuzibile individuale.
Indicator LED pentru curentul de ieșire DC.
Baterie de rezervă opțională pentru funcționare
prelungită.
Protecție pentru scurtcircuit, supratensiune și
suprasolicitare.
Atenţie2
Sursa trebuie să fie alimentată la parametrii indicaţi
pe eticheta afişată pe produs.
Nu depozitaţi sursa într-un mediu cu temperatură
sau umiditate ridicată.
Nu deconectaţi cablul de alimentare atunci când
sursa este în uz.
Nu deschideţi sursa de alimentare. Mergeţi la un
service autorizat.
English
Română

12 13
Detalii produs3
1. Intrare curent AC: priză IEC
cu 3 pini.
2. Locașe predefinite pentru
ieșire cabluri.
3. Indicatori LED:
A. LED roșu pentru AC
B. LED verde pentru DC.
C. LED galben pentru
funcționarea pe baterie.
4. Încuietoare cu cheie.
5. Elemente de fixare a sursei în
perete.
6. Grilă de ventilație pentru
aerisire.
Vedere din lateral / față / spate
321 4 5
A
B
C
6
7. Siguranțe individuale fuzibile
PTC cu LED pentru fiecare
ieșire a curentului DC.
8. Ieșiri pentru curent accesibil
prin conectare la blocul
terminal marcate (+)=+12Vdc
și (-)=0Vdc.
9. Suport fixare baterie.
10.Cablu de alimentare baterie.
11. Potențiometru ce permite
ajustarea voltajului la ieșire
între 12V și 15V.
Vedere la interior
7 8 119 10
English
Română

14 15
Accesorii4
NOTĂ: În situația în care oricare din articolele incluse în cutie
lipsesc sau sunt deteriorate vă rugăm să contactați unitatea de
unde ați achiziționat produsul.
1 2 3
1. Set de chei pentru încuietoare.
2. Șuruburi cu diblu din plastic
pentru montarea în perete.
3. Șuruburi mici metalice
pentru fixarea capacului.
Instalare5
ATENŢIE!
Înainte de a începe instalarea asigura-te că sistemul
este oprit şi deconectat de la sursa de curent.
Folosește doar cablul original din pachet. Dacă se
utilizează alt cablu, acesta poate defecta sursa grav.
Pasul 1. Montați echipamentul într-un loc ferit de lumina
directă a soarelui și de umezeala excesivă.
Pasul 2. Perforează locurile predefinite de 22 mm pentru
cablurile de intrare/ieșire.
Pasul 3. Pune întrerupătorul care alimentează sursa în
poziția Oprit.
Pasul 4. Conectează cablurile camerelor de supraveghere
laieșirileindividualede12Vdc(dotatecuprotecție)
din blocul terminal marcate cu “(+)” și “(-)”.
Pasul 5. Conectează bateria la cablurile de încărcare
aferente respectând “(+)” și “(-)” pentru o instalare
corectă.
Pasul 6. Fixează bateria pe elementul de fixare.
Pasul 7. Conectează cablul de alimentare la rețea prin
priza IEC cu 3 pini.
Pasul 8. Pune întrerupătorul în poziția Pornit. LED-ul de
culoare verde de pe partea frontală a sursei va
lumina.
Pasul 9. Închide și securizează capacul sursei cu cheile și
șuruburile primite în pachet.
English
Română

16 17
Dezafectarea echipamentelor electrice și electronice vechi
(Se aplică pentru ţările membre ale Uniunii Europene și pentru alte țări
europene cu sisteme de colectare separată.
Acest simbol aplicat pe produs sau pe ambalajul acestuia indică faptul că acest produs nu
trebuie tratat ca un deșeu menajer.
El trebuie predat punctelor de reciclare a echipamentelor electrice și electronice.
Asigurându-vă că acest produs este dezafectat în mod corect, veţi ajuta la prevenirea
posibilelor consecințe negative asupra mediului și a sănătății umane, care ar fi putut
surveni dacă produsul ar fi fost dezafectat în mod necorespunzător.
Reciclarea materialelor va ajuta la conservarea resurselor naturale.
Întrebări frecvente6
I: Cum pot rezolva o eroare la una din ieșirile sursei?
R: Identifică care ieșire nu funcționează și schimbă
siguranța aferentă.
I: De ce este oprit LED-ul de pe cutia sursei?
R: Verifică dacă sursa este conectată la priză.
Alte sugestii: cablul e deteriorat sau nu e corect
conectat.
I: Ce semnificație are LED-ul luminos intermitent de pe
capacul sursei împreună cu cele de pe fiecare ieșire?
R: Acest lucru semnifică supraîncărcarea sursei sau un
scurtcircuit. După remedierea problemei LED-urile se
vor stinge.
I: De ce e calitatea imaginii foarte slabă?
R: Cauza 1: Interferențele electromagnetice. Verifică ce
produce acest electromagnetism și înlătură cauza.
Cauza 2: Distanța maximă admisă între sursa de
alimentare și camere să fie depășită.
English
Română

18 19
EU Declaration of Conformity
We, manufacturer / importer
declare that the products
CCTV Power Supplies:
PSAD-12CB21X-CK01B, PSAD-12EB21X-CK01B,
PSAD-12FC21X-CK01B
are in conformity with
DAI-TECH SRL
28 Popa Șapcă
300057, Timișoara
Romania
Tested with the listed standards, the above mentioned products were found
in compliance with 2014/30/EU EMC Directive and with 2014/35/EU LVD
Directive.
EN 55032: 2015
EN 55024: 2010+A1: 2015
EN 61000-3-2: 2014
EN: 61000-3-3: 2013
EN 60950: 2016/A2: 2013
and in conformity with
(RoHS conformity marking) in accordance with 2002/95 EC-RoHS Directive
May 20, 2018
Timișoara Mai 20, 2018
Timișoara
Stamp Date and location Signature and name
(EC conformity marking)
Declarație UE de conformitate
Noi, în calitate de producător / importator
declarăm că următoarele produse
CCTV Power Supplies:
PSAD-12CB21X-CK01B, PSAD-12EB21X-CK01B,
PSAD-12FC21X-CK01B
sunt conforme cu
DAI-TECH SRL
28 Popa Șapcă
300057, Timișoara
Romania
Testate în standardele acceptate, produsele menționate sunt conforme cu
directiva 2014/30/EU EMC și cu directiva 2014/35/EU LVD.
EN 55032: 2015
EN 55024: 2010+A1: 2015
EN 61000-3-2: 2014
EN: 61000-3-3: 2013
EN 60950: 2016/A2: 2013
și în conformitate cu
(simbolul de conformitate RoHS ) în acord cu directiva 2002/95 EC-RoHS.
Ștampila Data și locația Semnătura și nume
(simbolul de conformitate europeană)
Tommy Lee Tommy Lee

This manual suits for next models
2
Table of contents
Languages:
Other Njoy Power Supply manuals

Njoy
Njoy Storm Series User manual
Njoy
Njoy Freya Series User manual

Njoy
Njoy Garun Series User manual

Njoy
Njoy cStation 600 User manual
Njoy
Njoy Garun Series User manual

Njoy
Njoy Legion 600 User manual
Njoy
Njoy TC2421IX User manual

Njoy
Njoy PWPS-065A04W-BU01B User manual
Njoy
Njoy Titan Series User manual
Njoy
Njoy Royer 16A User manual

