Fig.1
Fig.2Fig.3
Fig.4Fig.5
Fig.6
Fig.9Fig.10
Fig.7Fig.8
ASSEMBLY INSTRUCTIONS
Thank you for choosing a NORDRIVE® product.
For proper use, carefully read assembly instructions and verify that all necessary
components are present.
• In order to avoid damaging the vehicle roof, it is suggested that assembly and
disassembly should be done by 2 persons.
• The person in charge of mounting this item on the longitudinal original bars is also
responsible for controlling that all instructions have been followed scrupulously.
ASSEMBLY
• Before mounting, clean with a damp cloth the longitudinal original bars.
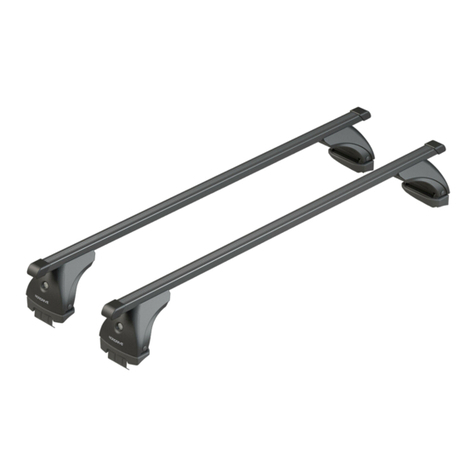
• The roof bars must be xed to the longitudinal original bars by using the screws and the
xing plates provided ( g.1).
Use only the provided trims between the xing element and the original bars. Do not
use any other extra trim (rubber, plastic, or any other).
1. Unscrew the screws and remove the lower plates (g.2).
2. Position the bars on the longitudinal original ones (g.3A / g . 3B), keeping the 2
xing screws externally ( g.4).
3. Verify the distance between the 2 bars (g.5), lateral centring (g.6) and their
alignment (g.7). If necessary, use a meter for exact measures.
4. Reposition the lower plates with the rubber facing upwards and screw on the bolts,
without tightening them (g.8).
5. Adjust the width between the 2 screws keeping them as close as possible to the
longitudinal original bar (g.9- ).
6. With the provided wrench tighten 5Nm the bolts ( g.9- ).
7. Repeat the same procedure with the other ttings brackets.
8. The lower slots can be covered using the supplied rubber prole. Cut prole to size
and insert into the slots (g.10).
• Upon each assembly operation, check that the loading bars and locking feet are tightly
xed to the longitudinal original bars. To check, push and pull bars and the tting
brackets to make sure that everything has been tightly locked in place (we recommend
carrying out this test at regular intervals and before loading the vehicle).
• Modifying any part of this product is strictly prohibited.
• For any particular instruction or restriction on the application of the carrier bars,
refer to the “Use and maintenance manual” of the vehicle. If any, carefully follow the
instructions in the manual.
• Any time the vehicle does not provide for assembly positions, maintain a distance of at
least 70 cm between loading bars.
• When transporting long loads, the distance between loading bars should never be less
than 60 cm.
• If the bar is equipped with a lock, it must be closed before driving.
• Some sunroofs may not open with bars installed, or else they may only open partially.
• Loads which are too large or long may hinder the complete opening of the rear vehicle
door.
SECURING LOADS
• Never exceed the maximum load indicated in assembly instructions. This limit is
however subject to the maximum load illustrated in the vehicle user and maintenance
manual. Always follow instructions for the lowest maximum load.
• Maximum load is intended as: bar weight + weight of any applicable accessories +
weight of load.
• Locking accessories applied to bars (Roof boxes, ski racks, bike racks, hooks...etc.) must
be the appropriate type for the model of bar being utilised.
• Always arrange the load crosswise with respect to the load carrier bars and in such a
way that the centre of gravity is always as low as possible.
• Load dimensions cannot be much larger than the width of the bars or than the length
of the vehicle. Over owing loads must comply with applicable laws.
• Position the load setting it as uniformly as possible.
• When carrying long objects, they must be tightly fastened to the vehicle both on the
rear and on the front.
• All untied and removable objects being transported must be removed before loading,
while mobile parts must be fastened down.
• Loads must be tightly fastened to bars with the use of appropriate tie belts or cords. Do
not use elastic ropes.
CAUTION
• These roof racks are specially designed for vehicles with OEM longitudinal tradition
bars.
• After having driven for a short journey and, later, at regular intervals, stop the vehicle
and check that the load is still safely set. If necessary, tighten the tie belts or the
attachment straps.
• Maximum load capacity: 100 kg.
RULES FOR SAFE DRIVING
• Roof racks must not jut out over the sides of the vehicle.
• Ensure that the load does not come into contact with the roof during travel.
• Surf boards and canoes must be tightly attached to the front and rear ends of the
vehicle with a non-elastic tie-strap.
• Drive at a speed appropriate for the load that is being transported, according to driving
conditions and the type of road, trac and speed limits.
• Driving and braking characteristics and sensitivity to lateral wind are aff ected by the
load being transported.
• Remember that, with the bars installed, the height of the vehicle increases.
• When transporting vertical loads like bicycles, height can increase up to 130 cm. The
maximum height allowed is 400 cm from the ground.
• LAMPA S.p.A. is not responsible for damages to objects or people due to high speed,
incorrect driving or incorrect load positioning and fastening.
• The drives is totally responsible for its own and other other people security.
• This manual must be kept for future consultations.
• To know more about applications and accessories (box, ski-carriers, bicycle carrieres...)
that can be used on these bars, visit www.nordrive.it.
CARE AND MAINTENANCE
• For safety and fuel effi ciency reasons, we recommend removing the roof racks when not
carrying loads.
• When not being used, dismantle, clean and store the bars in a dry place.
• Screws, bolts and locking devices (if present) must be greased at regular intervals.
• If damaged or worn parts are detected, replace immediately or contact a retailer.
CAUTION
• It is important to take note of the serial number shown on the key or lock (if available).
In the event of loss, you can request a duplicate at the retailer where you made your
purchase.
ISTRUZIONI DI MONTAGGIO
Vi ringraziamo per aver scelto un prodotto NORDRIVE®.
Per un utilizzo corretto, consigliamo di leggere attentamente le istruzioni di montaggio e
vericare che siano presenti tutti i componenti necessari.
• Seguire scrupolosamente le istruzioni di montaggio e tutte le raccomandazioni.
• Per evitare di danneggiare il tetto del veicolo, è consigliabile che il montaggio e lo
smontaggio delle barre siano eseguiti da due persone.
• Chi esegue il montaggio di questo prodotto sulle barre longitudinali originali è anche
responsabile per la veri ca che tutte le indicazioni ed istruzioni riportate su questo
manuale siano state eseguite scrupolosamente.
MONTAGGIO
• Prima del montaggio, con un panno umido, pulire i railing originali.
• Le barre porta tutto devono essere ssate sulle barre longitudinali utilizzando le viti e le
piastre di ssaggio in dotazione (g.1).
Non inserire alcuna guarnizione supplementare (gomma, plastica o altro) tra gli
elementi di ssaggio e le barre longitudinali originali, se non quelle contenute nel kit di
montaggio.
1. Svitare le viti e rimuovere le piastre inferiori ( g.2).
2. Appoggiare le barre portatutto sulle barre longitudinali originali (g.3A / g . 3B),
posizionando le 2 viti di ssaggio all’esterno (g.4).
3. Vericare la distanza tra le due barre (g.5), il centraggio laterale (g.6) e
l’allineamento delle stesse (g.7). Se necessario, utilizzare un metro per accertarsi
delle corrette misure.
4. Riposizionare le piastre inferiori con la gomma rivolta verso l’alto ed avvitare i
bulloni, senza stringerli (g.8).
5. Fare scorrere le viti ed avvicinarle il più possibile alla barra longitudinale originale
( g . 9- ).
6. Con la chiave in dotazione, serrare i bulloni con una coppia pari a 5Nm ( g.9- ).
7. Ripetere la stessa procedura per tutte le altre staff e di ssaggio.
8. A montaggio terminato, utilizzare il prolo in gomma per chiudere le fessure sotto
alle barre. Tagliare il prolo a misura ed inserirlo nella fessura facendo una lieve
pressione (g.10).
• Ogni qualvolta si eff ettua il montaggio, controllare che le barre di carico ed i piedi di
ssaggio siano saldamente ssate alle barre longitudinali originali. Per questa veri ca,
tirare e spingere le barre e le staff e di ssaggio per accertarsi che il tutto sia saldamente
bloccato in posizione (si consiglia di eff ettuare questa prova ad intervalli regolari e
prima di caricare il veicolo).
• È severamente vietato apportare modi che di alcun genere al prodotto.
• Consultare il manuale “Uso e manutenzione del veicolo“ per veri care eventuali
istruzioni o limitazioni in merito all’applicazione delle barre porta tutto. Se presenti,
seguire attentamente le istruzioni riportate sul manuale.
• Qualora il veicolo non prevedesse apposite posizioni di montaggio, mantenere una
distanza tra le barre di carico di almeno 70cm.
• Quando si trasportano carichi lunghi, la distanza tra le barre di carico non deve essere
inferiore a 60cm.
• Se la barra è dotata di serratura, questa deve essere chiusa prima di mettersi alla guida.
• Quando le barre sono installate, alcuni tetti apribili non possono essere aperti, oppure
possono essere aperti ma solo parzialmente.
• Carichi troppo ingombranti o lunghi possono impedire la completa apertura del
portellone posteriore del veicolo.
FISSAGGIO DEL CARICO
• Non superare mai il carico massimo indicato nelle istruzioni di montaggio. Questo limite
è tuttavia subordinato al carico massimo riportato nel libretto uso e manutenzione del
veicolo. Seguire sempre le indicazioni di carico massimo più basso.
• Con carico massimo si intende: peso delle barre + peso degli eventuali accessori
applicati + peso del carico previsto.
• Gli accessori di ssaggio applicati alle barre (box da tetto, portasci, portabici, ganci...)
devono essere del tipo specico per il modello di barra utilizzato.
• Sistemare il carico sempre trasversalmente rispetto alle barre porta carico ed in modo
che il centro di gravità sia sempre il più in basso possibile.
• Le dimensioni del carico non possono essere molto superiori alla larghezza delle barre
o alla lunghezza del veicolo. Il carico debordante deve essere conforme alle norme
vigenti.
• Posizionare il carico disponendolo il più uniformemente possibile.
• Quando si trasportano oggetti lunghi, questi devono essere saldamente ssati al
veicolo sia posteriormente che anteriormente.
• Tutte le parti sciolte o rimuovibili dell’oggetto trasportato devono essere rimosse prima
del carico, mentre le parti mobili devono essere ssate.
• Il carico deve essere saldamente ssato alle barre con appositi nastri tensori o corde.
Non devono essere assolutamente utilizzate corde elastiche.
ATTENZIONE
• Queste barre portatutto sono indicate solo per i veicoli equipaggiati all’origine con barre
longitudinali del tipo tradizionale.
• Dopo avere percorso un breve tragitto e successivamente ad intervalli regolari, fermare
il veicolo e controllare che il carico sia sempre in sicurezza. Se necessario, tendere i nastri
tensori o le cinghie di ssaggio.
• La portata massima di queste barre è di 100 Kg.
NORME PER UNA GUIDA SICURA
• Le barre portatutto non devono sporgere oltre i anchi della vettura.
• Controllare che il carico non venga a contatto con il tetto durante il viaggio.
• Tavole da surf e canoe devono essere saldamente ssate all’estremità anteriore e
posteriore del veicolo con un tirante non elastico.
• La velocità deve essere sempre adeguata al carico che si sta trasportando, alle condizioni
di guida, al tipo di fondo stradale, al traco ed ai limiti di velocità.
• Le caratteristiche di guida, di frenata e la sensibilità al vento laterale risentono della
presenza del carico che si sta trasportando.
• Ricordarsi che con le barre installate, l’altezza totale del veicolo è maggiore.
• Quando si trasportano carichi verticali come biciclette, l’altezza può aumentare no a
130cm. L’altezza massima consentita è di 400cm da terra.
• LAMPAS.p.A.nonsiassumeresponsabilitàper dannia coseopersone derivatidall’alta
velocità del veicolo, da una guida non corretta, o da un carico non ben posizionato o
ssato.
• Durante il trasporto, chi guida il veicolo è totalmente responsabile per la propria
sicurezza e per la sicurezza altrui.
• Rispettare sempre le norme e il codice della strada in vigore nella nazione di utilizzo.
• Questo manuale deve essere conservato per eventuali successive consultazioni.
• Per conoscere le applicazioni e gli accessori (box, portasci, portabiciclette...) che
possono essere utilizzati su queste barre, consultare il sito www.nordrive.it.
CURA E MANUTENZIONE
• Per ragioni di sicurezza e di risparmio di carburante si consiglia di rimuovere le barre
porta tutto quando non si trasportano carichi.
• Quando non si utilizzano, smontare, pulire e riporre le barre porta tutto in un luogo
asciutto.
• Viti, bulloni e dispositivi di bloccaggio (se presenti) devono essere lubri cati ad
intervalli regolari.
• Nel caso si riscontrassero parti danneggiate e molto usurate sostituirle immediatamente
o rivolgersi al rivenditore.
ATTENZIONE
• È importante annotare il numero di serie riportato sulla chiave o sulla serratura
(se presente). In caso di smarrimento è possibile richiedere un duplicato presso il
rivenditore dove e’ stato eff ettuato l’acquisto.


