Normfest SL 550 User manual

NORMFEST SL 550
NORMFEST SL 550
Bedienungsanleitung
Operating instructions Instrucciones de uso FMode d‘emploi
Gebruiksaanwijzing Instrukcja Obsługl Návod k Obsluze

NORMFEST SL 550
DBedienungsanleitung
Herzlichen Dank, dass Sie sich für ein Produkt von
NORMFEST entschieden haben. Mit der folgenden
Anleitung wollen wir Ihnen helfen, die Funktionen
Ihrer neuen Leuchte optimal zu nutzen.
FUNKTIONSÜBERSICHT
• Professionelle Werkstattleuchte mit COB LED-
Technologie
• Zusatzleuchte am Lampenkopf
• Robustes und spritzwassergeschütztes Kunststoff-
gehäuse mit gummierter Grifffläche
• Um 120° drehbarer, in 5 Stufen arretierbarer
Lampengriff für flexible Lichtausrichtung
• Haltemagnet an der Unterseite des Griffs
• Hauptleuchte mit zwei Lichtfunktionen (50% |
100% Lichtleistung)
• Festverbauter Li-Ion-Akkupack (3.7V | 2600mA)
• Lademöglichkeit über Micro USB-Buchse
• Ladekontrollanzeige über 3 grüne LEDs
• Restkapazitätsanzeige über 3 grüne LEDs
• Schalter am Griffteil
• Ladebuchse am unteren Griffteil
TECHNISCHE DATEN
Hauptlicht: 5W COB LED
Zusatzlicht: 3W SMD LED
Beleuchtungsstärke: 785 Lux (0,5m Abstand)
Lichtstrom: 550 Lumen 100% |
260 Lumen 50%
Leuchtdauer: Hauptlicht 100% 2.5h |
50% 5.5h
Zusatzlicht 10h
INBETRIEBNAHME
Der Ein-/Ausschalter der Werkstattleuchte befindet
sich auf der Rückseite des Gehäuses:
1x drücken: Die Zusatzleuchte am Lampenkopf wird
eingeschaltet.
2x drücken: Die Zusatzleuchte am Lampenkopf wird
ausgeschaltet. Zeitgleich wird das Hauptlicht im 50%
Modus eingeschaltet.
3x drücken: Die Hauptleuchte leuchtet mit 100%
Modus.
4x drücken: Beide Leuchten sind aus.
LADEVORGANG
Vor der ersten Inbetriebnahme die Werkstattleuchte
vollständig laden. Bei Lagerung über einen längeren
Zeitraum die Werkstattleuchte ebenfalls vorher laden.
Folgende Ladeoptionen stehen zu Verfügung:
• Über USB-Netzteil an der Steckdose
• Über USB-Kfz-Adapter im Zigarettenanzünder
des KFZ
• Über USB-Kabel an Drittgeräten mit USB-Aus-
gang (z.B. PC, Laptop)
Zum Laden der Werkstattleuchte die Verschlusskappe
von der Micro-USB-Buchse auf der Rückseite der
Leuchte abziehen. Verbinden Sie das USB-Kabel mit
einen der oben aufgelisteten Ladeoptionen und der
Lampe. Danach das USB-Netzteil / USB-Kfz-Adapter
in eine Steckdose / einen Zigarettenanzünder stecken.
LADESTANDANZEIGE
Die Werkstattleuchte verfügt über eine professionelle
LED-Statusanzeige auf der Rückseite der Leuchte. Mit
dieser kann der aktuelle Ladezustand sowie die Rest-
kapazität des verbauten Akkus abgelesen werden.
Anzeige des Ladezustandes des Akkus wäh-
rend des Ladevorgangs:
• Drei LEDs leuchten grün: Akku ist vollgeladen.
• Drei LEDs blinken grün: Ladezustand zwischen
60 und 99%
• Zwei LEDs blinken grün: Ladezustand zwischen
30 und 59%
• Eine LED blinkt grün: Ladezustand zwischen 0
und 29%
Anzeige der Restkapazitätsanzeige des
Akkus während des Betriebs:
• Drei LEDs leuchten grün: Restkapazität zwischen
100 und 67%
• Zwei LEDs leuchten grün: Restkapazität zwischen
66 und 34%
• Eine LED leuchtet grün: Restkapazität zwischen
33 und 10%
• Eine LED blinkt grün: Restkapazität unter 10%
Die Werkstattleuchte ist gegen Überladung geschützt.
Daher kann sie auch bei vollem Akku weiterhin am
Stromnetz angeschlossen bleiben.
UMWELTHINWEISE
Werfen Sie das Gerät keinesfalls in den normalen
Hausmüll. Entsorgen Sie das Gerät über einen
zugelassenen Entsorgungsbetrieb oder über Ihre
kommunale Entsorgungseinrichtung. Beachten Sie
die aktuell geltenden Vorschriften. Setzen Sie sich
im Zweifelsfall mit Ihrer Entsorgungseinrichtung in
Verbindung. Führen Sie alle Verpackungsmaterialien
einer umweltgerechten Entsorgung zu. Verbrauchte
Batterien und Akkus sind Sondermüll und müssen ge-
mäß der nationalen Gesetzgebung entsorgt werden.
SICHERHEITSHINWEISE
• Vor Inbetriebnahme Bedienungsanleitung sorgfäl-
tig lesen und Sicherheitshinweise beachten!
• Bei Beschädigungen am Gehäuse, Stecker oder
Kabel das Gerät nicht in Betrieb nehmen. Wenden
Sie sich an den autorisierten Fachhandel!
• Das Produkt darf nur in geschlossenen, trockenen
Räumen geladen und betrieben werden!
• Reinigungsarbeiten nur bei gezogenem Netzste-
cker durchführen!
• Reinigung des Netzteiles nur mit einem trockenen
Tuch durchführen!
• Produkt nicht öffnen oder modifizieren! Instand-
setzungsarbeiten sowie Akkupackwechsel dürfen
nur vom Hersteller oder einem von ihm beauf-
tragten Servicetechniker oder einer vergleichbar
qualifizierten Person durchgeführt werden!
• Halten Sie Kinder vom Produkt und der Verpa-
ckung fern. Das Produkt ist kein Spielzeug. Kinder
sollten beaufsichtigt werden, um sicherzustellen,
dass sie nicht mit dem Produkt spielen!
• Dieses Produkt ist nicht zur Verwendung durch
Personen (Kinder mit eingeschlossen) bestimmt,
welche eingeschränkte körperliche, sensori-
sche oder geistige Fähigkeiten aufweisen bzw.
fehlende Erfahrung und Kenntnis im Umgang mit
diesem Gerät haben. Solche Personen müssen
von einer für ihre Sicherheit verantwortlichen Auf-
sichtsperson zuerst instruiert oder während der
Gerätebedienung beaufsichtigt werden!
• Nichtbeachtung der Sicherheitshinweise kann zu
Schäden am Produkt oder zu gefährlichen Verlet-
zungen von Personen führen!
Augenverletzungen vermeiden - Nie direkt in den
Lichtstrahl schauen oder anderen Personen ins
Gesicht leuchten. Geschieht dies zu lange, kann durch
Blaulichtanteile eine Netzhautgefährdung auftreten.
Falls ein Lichtstrahl in die Augen trifft, sind die Augen
zu schließen und der Kopf sollte von dem Lichtstrahl
abgewendet werden. Halten Sie Kinder vom Produkt
und der Verpackung fern. Das Produkt ist kein Spiel-
zeug. Reinigung des Gerätes nur mit einem trockenen
Tuch durchführen.
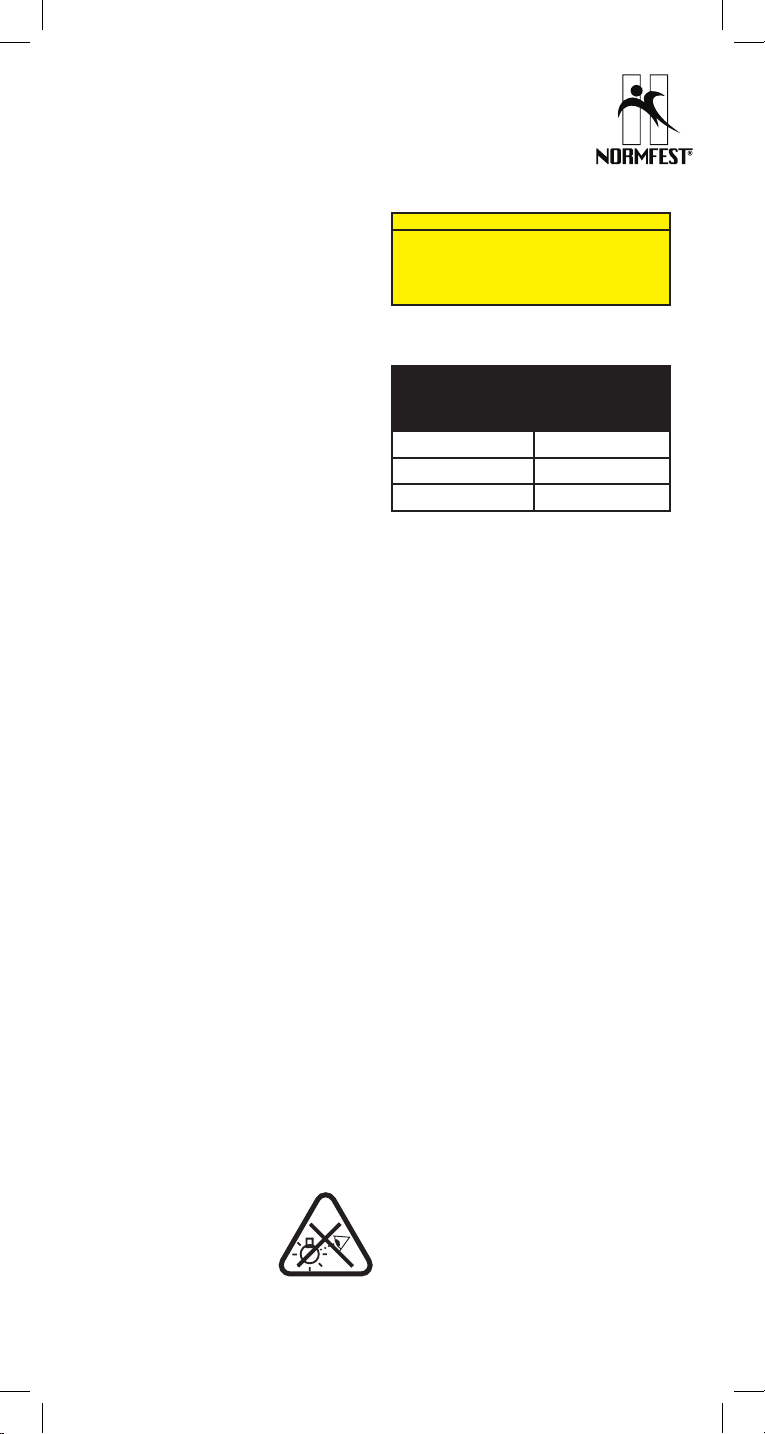
Diese Lampe überschreitet die
Bedingungen der risikofreien
Nutzung. Das Risiko bei der Ver-
wendung hängt davon ab, wie der
Nutzer mit der Lampe umgeht.
RISIKOGRUPPE 2
ACHTUNG Möglicherweise kann gefährliche opti-
sche Strahlung von diesem Produkt ausgehen. Bei
Betrieb nicht für längere Zeit in die Lampe blicken.
Kann für die Augen schädlich sein.
Gefahrenwert der Exposition / Exposure Hazard Value
(EHV)(1): 220.
Risikogruppe
Gefährdungsabstand
/ Hazard Distance
(HD)(2)
20m bis 0,53m
10,53m bis 5,3m
Freie Gruppe > 5,3m
Dieser Wert gibt den Faktor an, um wieviel der Risiko-
gruppengrenzwert zu der nächst niedrigeren Gruppe
überschritten wird. Der Grenzwert liegt bei 1.
Abstand von Auge zur Lampe, bei welchem die
entsprechende Risikogruppe zutreffend ist.
HAFTUNGSAUSSCHLÜSSE
Die in dieser Bedienungsanleitung enthaltenen In-
formationen können ohne Vorankündigung geändert
werden. NORMFEST übernimmt keine Haftung für di-
rekte, indirekte, zufällige oder sonstige Schäden oder
Folgeschäden, die durch unsachgemäße Handhabung
oder durch Missachtung der in dieser Bedienungsan-
leitung enthaltenen Informationen entstehen.
GARANTIE
Auf das Gerät bieten wir eine zweijährige Garantie.
Bei Schäden am Gerät, die infolge Nichtbeachtung
der Bedienungsanleitung entstehen, kann keine
Garantie gewährt werden.
Technische Änderungen vorbehalten. Für Druckfehler übernehmen wir keine
Haftung. 01/2018

NORMFEST SL 550
Operating Instructions
Many thanks for choosing a product from NORMFEST.
With the following instructions we would like to
help you to get the best from the functions of your
new light.
FUNCTIONAL OVERVIEW
• Professional workshop lamp with COB LED
technology
• Auxiliary light at the head of the lamp
• Robust, splash-proof plastic housing with rubber-
coated grip
• Can be swivelled through 120°, lamp grip can
be locked in 5 positions for flexible direction of
the light
• Mounting magnet on the underside of the grip
• Main light with two light functions (50% | 100%
light power)
• Permanently installed Li-ion rechargeable battery
pack (3.7V | 2600mA)
• Can be charged via micro-USB port
• Charge monitoring via 3 green LEDs
• Remaining capacity indication via 3 green LEDs
• Switch on the grip
• Charge socket on lower grip
TECHNICAL DATA
Main light: 5W COB LED
Auxiliary light: 3W SMD LED
Lighting intensity: 785 Lux (0.5m distance)
Luminous flux: 550 lumen 100% |
260 lumen 50%
Battery life: Main light 100% 2.5h |
50% 5.5h
Auxiliary light 10h
FIRST USE
The on/off switch for the workshop light can be found
on the rear of the housing:
Press 1x: The auxiliary light on the head of the lamp
will be switched on.
Press 2x: The auxiliary light on the head of the lamp
will be switched off.
At the same time, the main light will be switched on
at the 50% setting.
Press 3x: The main light illuminates at the 100%
setting.
Press 4x: Both lights are off.
CHARGING
Charge the workshop lamp fully before using for the
first time.
If the workshop lamp has been stored for an exten-
ded period of time it should likewise be fully charged
again before first use.
The following charging options are available:
• Via USB mains adapter plugged into the mains
outlet
• Via USB car adapter connected to the cigarette
lighter of the vehicle
• Via USB cable connected to a third party device
with a USB output port (e.g. PC, laptop)
To charge the workshop light, pull the sealing cap
off the micro-USB socket on the rear of the lamp.
Connect the USB cable with one of the charge
options listed above and the lamp. Then plug the USB
mains adapter / USB vehicle adapter into a socket /
cigarette lighter.
CHARGE STATUS INDICATOR
The workshop lamp has a professional LED status
display on the rear of the lamp. This can be used
to display the current charge status as well as the
remaining capacity of the integrated battery pack.
Display of the charge status of the battery
pack during the charge procedure:
• Three LEDs illuminate green: Rechargeable batte-
ry is fully charged.
• Three LEDs flash green: Charge status between
60 and 99%
• Two LEDs flash green: Charge status between 30
and 59%
• One LED flashes green: Charge status between 0
and 29%
Display of the remaining capacity during
operation:
• Three LEDs illuminate green: Remaining charge
between 100 and 67%
• Two LEDs illuminate green: Remaining charge
between 66 and 34%
• One LED illuminates green: Remaining charge
between 33 and 10%
• One LED flashes green: Remaining charge below
10%
The workshop lamp is protected against over-char-
ging. This means that you can leave the workshop
lamp connected to the charging power after its
rechargeable battery pack has been fully charged.
ENVIRONMENTAL INFORMATION
The device should not be discarded in the normal
household waste under any circumstances. Dispose of
the device via an authorised disposal centre or your
communal waste disposal facility. Observe the current
applicable regulations. Contact your waste disposal
facility in the event of any doubt. Dispose of all
packaging materials via an environmentally friendly
disposal facility. Used batteries and rechargeable
batteries are special waste and must be disposed of
in accordance with national regulations.
SAFETY INSTRUCTIONS
• Read the operating instructions carefully before
using and observe the safety instructions!
• Do not use the device if there is damage to the
housing, plug or cable. Consult your local autho-
rised specialist!
• The product may only be charged and operated in
closed, dry rooms!
• Carry out cleaning tasks only when the mains
plug is removed from the mains power!
• Clean the mains adapter only with a dry cloth!
• Do not open or modify the product! Repair work
and replacement of the rechargeable battery pack
shall only be carried out by the manufacturer or
by a service technician appointed by the manu-
facturer or by a similarly qualified person!
• Keep the product and the packaging away from
children. This product is not a toy. Children should
be supervised in order to ensure that they do not
play with the product.
• This product is not to be used by persons (in-
cluding children) who have restricted physical,
sensory or mental capabilities or who do not have
adequate experience and knowledge in handling
this device. Such persons must be instructed
beforehand by a supervisory person who is
responsible for their safety or must be supervised
during the use of the device!
• Failure to observe the safety instructions can
result in dangerous injuries to persons or damage
to the product!
Avoid eye injuries - Never look directly into the
beam of light or shine it into other
people‘s faces. If this occurs for too
long, the blue light portion of the
beam can cause retinal damage. If
the light beam shines into the eyes,
close the eyes and turn the head away from the light
beam. Keep the product and the packaging away
from children. This product is not a toy. Clean the
device only with a dry cloth.
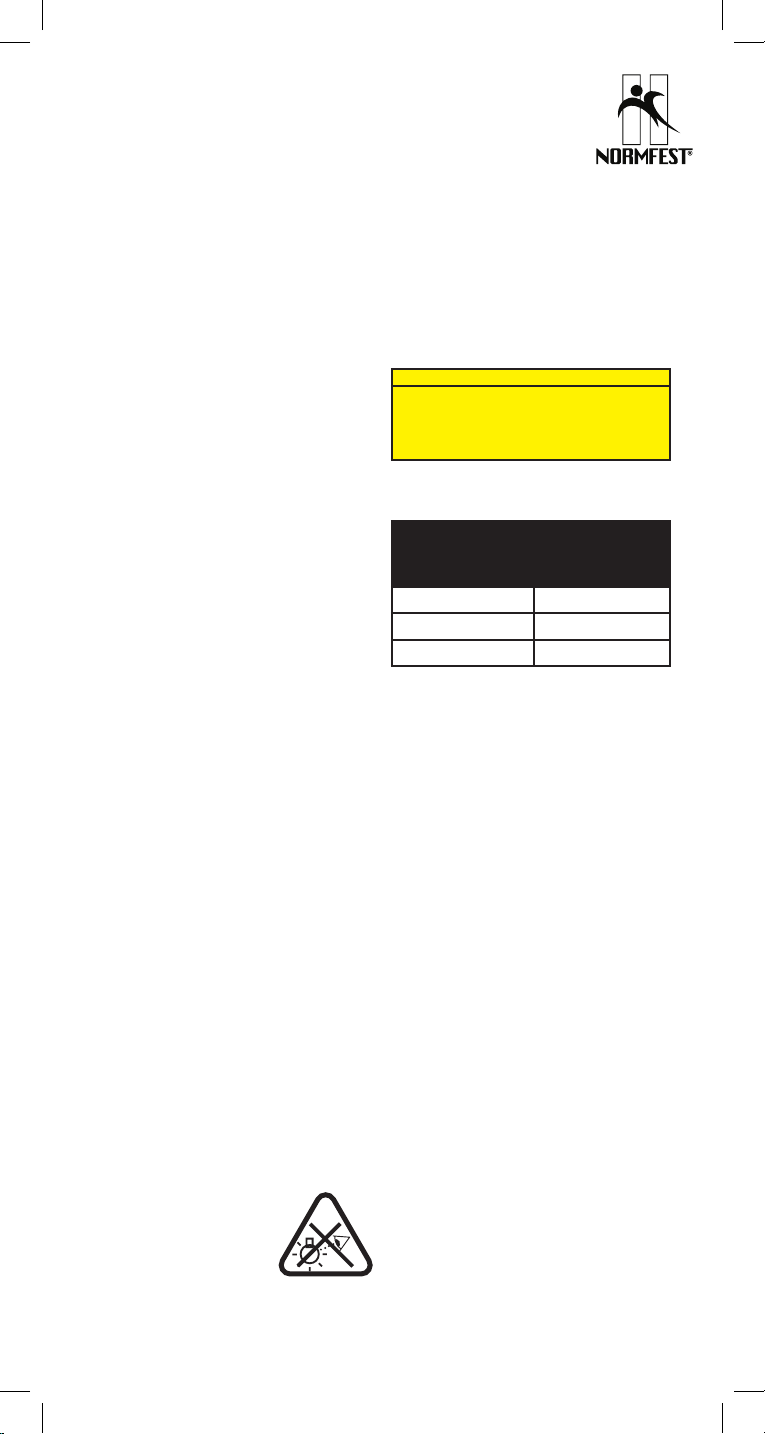
This lamp exceeds the conditions for risk-free use.The
risk when using it depends on how the user handles
the lamp.
RISK GROUP 2
NOTE: Hazardous optical radiation may be emitted
by this product. When operating, do not look into
the lamp for an extended period of time. Can be
hazardous to the eyes.
Gefahrenwert der Exposition / Exposure Hazard Value
(EHV)(1): 220.
Risk group
Gefährdungsabstand
/ Hazard Distance
(HD)(2)
20m to 0.53m
10.53m to 5.3m
Free group > 5.3m
This value indicates the factor by which the risk
group limit value to the next lowest group has been
exceeded. The limit value is 1.
Distance from eyes to the lamp at which the respecti-
ve risk group is applicable.
LIMITATION OF LIABILITY
The information contained within these operating
instructions can be changed without prior notifi-
cation. NORMFEST accepts no liability for direct,
indirect, incidental or other damage or consequential
damage arising though improper handling or through
disregard of the information contained within these
operating instructions.
GUARANTEE
The device has a two year guarantee. The guarantee
does not apply to damage to the device arising
through a failure to comply with the operating
instructions.
Subject to technical changes.We assume no liability for printing errors. 01/2018

NORMFEST SL 550
Instrucciones de uso
Muchas gracias por haberse decidido por un producto
de NORMFEST. En las siguientes instrucciones desea-
mos ayudarle a emplear idealmente las funciones de
su nueva linterna.
VISTA SINÓPTICA DE LAS FUNCIONES
• Lampara profesional de taller con tecnología de
LEDs COB.
• Pequeña lámpara adicional en el cabezal de la
lámpara
• Carcasa de material sintético robusta y resistente a
las salpicaduras de agua con superficie engomada
• Asa de lámpara giratoria en 120° y con bloqueo en
5 niveles para una orientación flexible de la luz
• Imán de sujeción en la parte inferior del asa
• Lámpara principal con dos funciones de ilu-
minación (del 50% | 100% de la potencia de
iluminación)
• Conjunto de pilas de iones de litio fijamente integ-
rado (3.7V | 2600mAh)
• Posibilidad de carga por medio de toma micro USB
• Señalización del control de carga a través de 3
LEDs verdes
• Señalización de energía restante a través de 3
LEDs verdes
• Asa delgada
• Hembrilla de carga en la parte inferior del asa
DATOS TÉCNICOS
Luz principal: LEDs COB de 5W
Luz adicional: LEDs SMD de 3W
Potencia de la
iluminación
(iluminancia): 785 lux (a 0,5m de distancia)
Flujo luminoso: 550 lúmenes al 100% |
260 lúmenes al 50%
Duración de la
iluminación: Luz principal 100% 2.5h |
50% 5.5h
luz adicional 10h
PUESTA EN SERVICIO
El interruptor de conexión y desconexión de la lámpara
de taller se encuentra en la parte posterior de la
carcasa:
Pulsar una vez: La luz adicional del cabezal de la
lámpara se conecta.
Pulsar dos veces: La luz adicional del cabezal de la
lámpara se desconecta.
La luz principal se conecta simultáneamente en el
modo del 50%.
Pulsar tres veces: La lámpara principal se ilumina en
el modo del 100%.
Pulsar cuatro veces: Ambas luces se desconectan.
CARGA
La lámpara de taller debe cargarse completamente
antes de la primera puesta en servicio.
La lámpara de taller también debe cargarse completa-
mente antes de guardarse por un espacio prolongado
de tiempo.
Se dispone de las siguientes opciones de
carga:
• a través de un bloque de alimentación USB en la
toma de corriente normal
• a través de un adaptador USB a conectar en el
encendedor del automóvil
• a través de un cable USB a conectar en otro apa-
rato con salida USB (por ejemplo el ordenador o el
ordenador portátil)
Para cargar la lámpara de taller WL200R debe retirarse
la tapa de cierre de la hembrilla micro USB de la parte
trasera. Conecte el cable USB y la lámpara con una
de las opciones de carga arriba referidas. Despúes se
inserta el bloque de alimentación USB/adaptador USB
de automóvil en la toma/encendedor.
SEÑALIZACIÓN DEL ESTADO DE CARGA
La lámpara de taller R350 dispone de una señalización
profesional de estado LED en la parte trasera. Con
ésta se puede conocer el estado de carga actual y la
capacidad restante del acumulador integrado.
Señalización del estado de carga del acumu-
lador durante el proceso de carga:
• Tres LEDs se iluminan con luz verde: el acumulador
o conjunto de pilas se ha cargado completamente
• Tres LEDs parpadean con luz verde: Estado de
carga entre el 60 % y el 99%
• Dos LEDs parpadean con luz verde: Estado de
carga entre el 30 % y el 59%
• Un LED parpadea con luz verde: Estado de carga
entre el 0 % y el 29%
Señalización de la capacidad restante de la
pila durante el servicio:
• Tres LEDs se iluminan con luz verde: Energía res-
tante entre el 100 % y el 67%
• Dos LEDs se iluminan con luz verde: Energía res-
tante entre el 66 % y el 34%
• Un LED se ilumina con luz verde: Energía restante
entre el 33 % y el 10%
• Un LED parpadea con luz verde: Energía restante
inferior al 10 %
La lámpara de taller está protegida contra las sobrecar-
gas. Por este motivo puede permanecer conectada a la
red incluso al encontrarse el acumulador completa-
mente cargado
INSTRUCCIONES MEDIOAMBIENTALES
No tire el dispositivo a la basura normal bajo ninguna
circunstancia. Elimine el dispositivo como residuo por
medio de una empresa de eliminación de residuos
autorizada o a través de su empresa municipal de
residuos. Respete las normas actualmente vigentes. En
caso de duda, póngase en contacto con su centro de
eliminación de residuos. Deseche todos los materiales
de embalaje de forma respetuosa con el medio
ambiente. Las pilas y los acumuladores gastados son
desechos especiales que deben eliminarse según la
legislación nacional.
INDICACIÓN RELATIVA A LA SEGU-
RIDAD
• Antes de la puesta en funcionamiento, ¡lea cuida-
dosamente las instrucciones de uso y respete las
instrucciones de seguridad!
• En caso de daños en la carcasa, el conector o el
cable, no ponga en funcionamiento el dispositivo.
¡Diríjase al comercio autorizado!
• ¡El producto solo debe cargarse y emplearse en
espacios cerrados y secos!
• ¡Realice los trabajos de limpieza sólo con el conec-
tor de alimentación desenchufado!
• ¡Realice la limpieza del bloque de alimentación
sólo con un paño seco!
• ¡No abrir ni modificar el dispositivo! ¡Las repara-
ciones y el cambio de acumulador solo deben ser
llevados a cabo por el fabricante o por un técnico
de servicio por él encargado o por una persona
cualificada de modo semejante!
• Mantenga a los niños alejados del producto y de
su embalaje. El producto no es un juguete. ¡Ls
niños deben estar vigilados para garantizarse que
no jueguen con el dispositivo!
• Este dispositivo no está destinado a ser utilizado
por personas (incluidos niños) que presenten facul-
tades físicas, sensoriales o mentales disminuidas o
que tengan poca experiencia y poco conocimiento
en el manejo del dispositivo. ¡Estas personas
deben haber sido instruidas primero por una
persona que las supervise y sea responsable de su
seguridad o tienen que ser supervisadas durante al
manejo del dispositivo!
• ¡No respetar las instrucciones de seguridad puede
producir daños en el producto o lesiones peligrosas
en las personas!
Evitar las heridas de los ojos; no mirar directamente en
el haz de luz ni alumbrar el rostro de otras personas.
Si esto sucediera prolongadamente, podría ponerse
en peligro la retina por causa de la porción de luz
azul. Caso que un haz de luz incida en los ojos, deben
cerrarse los ojos y apartarse la cabeza del haz de luz.
Mantenga a los niños lejos del producto y del paquete.
El producto no es un juguete. Realice la limpieza del
dispositivo sólo con un paño seco.
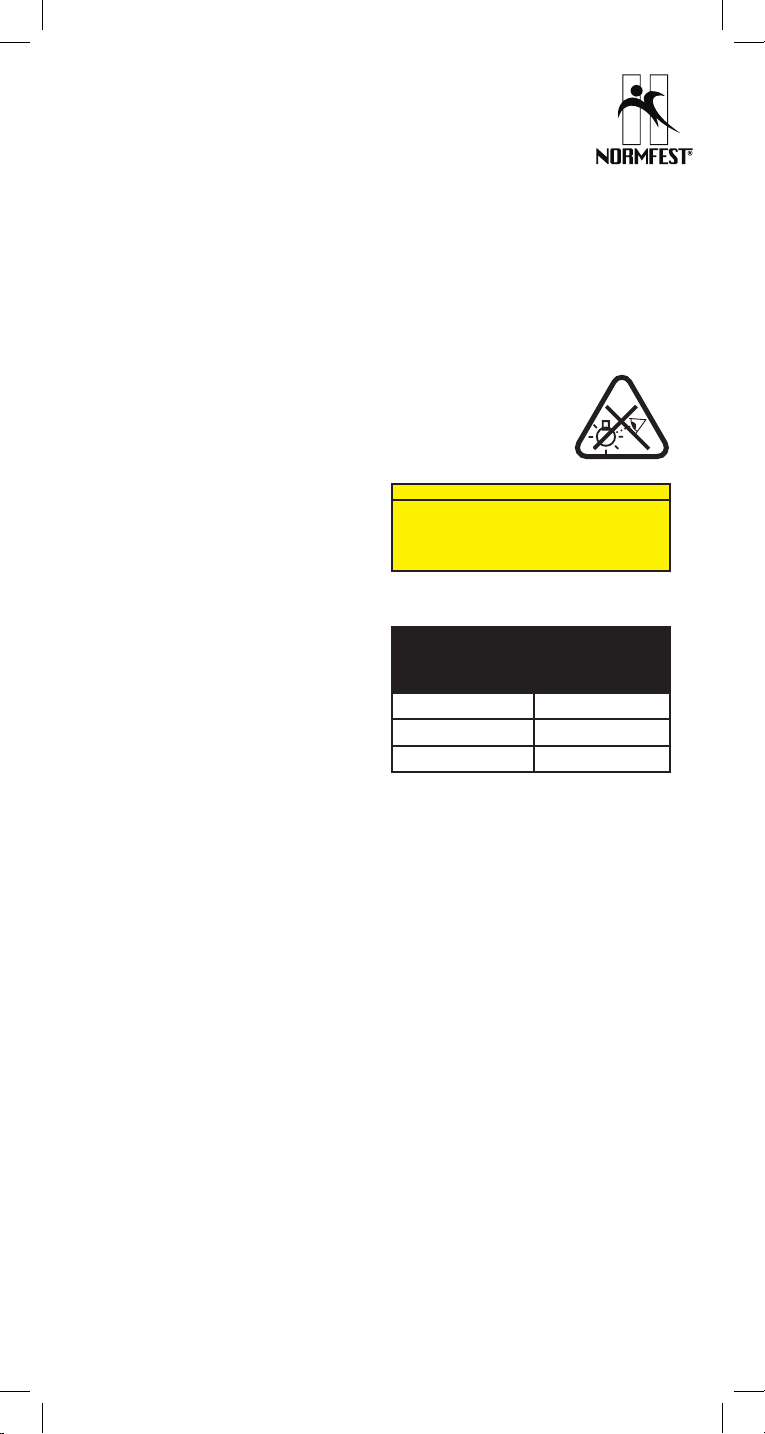
Esta lámpara sobrepasa las
condiciones para el empleo sin
riesgos. El riesgo en el uso depende
del modo en que el usuario maneje
la linterna.
GRUPO DE RIESGOS 2
CUIDADO Posiblemente este producto puede emitir
radiaciones ópticas peligrosas. Durante el servicio
no debe mirarse prolongadamente la lámpara.
Puede dañar los ojos.
Valor de peligrosidad en la exposición / Exposure
Hazard Value (EHV)(1): 220.
Grupo de riesgo
Distancia de peligrosi-
dad / Hazard Distance
(HD)(2)
2de 0 m a 0,53m
1de 0,53m a 5,3m
Grupo libre > 5,3m
Este valor indica el factor en el que el valor límite del
grupo de riesgos se sobrepasa respecto del siguiente
grupo inferior. El valor límite es de 1.
La distancia del ojo respecto de la linterna a la cual se
da el grupo de riesgo correspondiente.
EXCLUSIONES DE RESPONSABILIDAD
Las informaciones contenidas en este manual de
instrucciones se pueden modificar sin aviso previo.
NORMFEST no acepta ninguna responsabilidad por
los daños directos, indirectos, casuales o de otro tipo,
ni por los daños resultantes que se originen por una
manipulación inapropiada o por no tener en cuenta
las informaciones contenidas en estas instrucciones
de uso.
GARANTÍA
Concedemos una garantía de dos años por el dispositi-
vo. En caso de daños en el dispositivo que se originen
por no respetar las instrucciones de uso no se puede
hacer efectiva ninguna garantía.
Reservado el derecho a introducir cambios técnicos. No aceptamos ninguna
responsabilidad por errores de impresión. 01/2018

NORMFEST SL 550
F Mode d‘emploi
Nous vous remercions d‘avoir choisi un produit
NORMFEST. Le présent mode d‘emploi vous aidera
à utiliser de manière optimale les fonctions de votre
nouvelle lampe.
VUE D‘ENSEMBLE DES FONCTIONS
• Lampe d‘atelier professionnelle avec technologie
à technologie LED COB
• Lampe auxiliaire sur la tête de lampe
• Boîtier en plastique robuste et protégé contre les
éclaboussures d‘eau avec surface de préhension
caoutchoutée
• Poignée de lampe rotative sur 120°, arrêtable
sur 5 positions, pour une orientation flexible de
la lumière
• Aimant de maintien sur le côté inférieur de la
poignée
• Lampe principale avec deux fonctions d‘éclairage
(puissance lumineuse 50% | 100%)
• Bloc d‘accus aux ions de lithium intégré (3,7V |
2200mAh)
• Rechargement possible via prise micro USB
• Affichage de contrôle de la charge via 3 LED
vertes
• Affichage de la capacité restante via 3 LED vertes
• Interrupteur sur la poignée
• Douille de chargement sur la partie inférieure de
la poignée
CARACTÉRISTIQUES TECHNIQUES
Lumière principale: LED COB 5W
Lumière auxiliaire: LED SMD 3W
Intensité lumineuse: 785 lux (0,5m de distance)
Flux lumineux: 550 lumen 100% |
260 lumen 50%
Autonomie: lampe principale 100% 2,5h |
50% 5,5h
lampe auxiliaire 10h
MISE EN SERVICE
L‘interrupteur de marche / arrêt de la lampe d‘atelier
se trouve à l‘arrière du boîtier:
1x appui: la lampe auxiliaire sur la tête de lampe
est allumée.
2x appui: la lampe auxiliaire sur la tête de lampe
est éteinte.
Parallèlement, la lampe principale est allumée en
mode 50%.
3x appui: la lampe principale est allumée en mode
100%.
4x appui: les deux lampes sont éteintes.
PROCESSUS DE CHARGEMENT
Charger complètement la lampe d‘atelier avant la
première mise en service.
En cas d‘entreposage pendant une longue durée,
charger également et au préalable la lampe d‘atelier.
Vous disposez des options de chargement
suivantes:
• via alimentation USB sur la prise
• via adaptateur automobile USB sur l‘allume-
cigare du véhicule
• via câble USB sur d‘autres appareils avec sortie
USB (par ex. PC, ordinateur portable)
Pour charger la lampe d‘atelier, retirez le capuchon
de la prise micro-USB à l‘arrière de la lampe. Reliez le
câble USB avec l‘une des options de chargement sus-
mentionnées et la lampe. Puis, insérez l‘alimentation
USB / l‘adaptateur automobile USB dans une prise /
un allume-cigare.
AFFICHAGE DE L‘ÉTAT DE CHARGE
La lampe d‘atelier possède un affichage professionnel
de l‘état de la LED à l‘arrière de la lampe. Cet afficha-
ge permet de consulter l‘état de charge actuel ainsi
que la capacité restante de l‘accu installé.
Affichage de l‘état de charge pendant le
processus de chargement:
• Trois LED allumées en vert: accu entièrement
chargé
• Trois LED clignotantes en vert: état de charge
entre 60 et 99%
• Deux LED clignotantes en vert: état de charge
entre 30 et 59%
• Une LED clignotante en vert: état de charge entre
0 et 29%
Affichage de la capacité restante de l‘accu
pendant le fonctionnement:
• Trois LED allumées en vert: capacité restante
entre 100 et 67%
• Deux LED allumées en vert: capacité restante
entre 66 et 34%
• Une LED allumée en vert: capacité restante entre
33 et 10%
• Une LED clignotante en vert: capacité restante
sous 10%
La lampe d‘atelier est protégée contre la surcharge.
Elle peut donc rester raccordée au secteur même si
l‘accu est entièrement chargé.

REMARQUES CONCERNANT
L‘ENVIRONNEMENT
Ne jetez en aucun cas l‘appareil avec les déchets
ménagers normaux. Éliminez l‘appareil par le biais
d‘une entreprise de traitement certifiée ou de votre
déchetterie communale. Respectez les prescriptions
actuellement en vigueur. En cas de doute, contactez
votre déchetterie locale. Recyclez tous les matériels
d‘emballage selon les règles de protection de
l’environnement en vigueur. Les piles vides et les
accus dont des déchets spéciaux et doivent être éli-
minés conformément aux lois nationales en vigueur.
CONSIGNES DE SÉCURITÉ
• Avant la mise en service, lire soigneusement le
mode d‘emploi et respecter les consignes de
sécurité!
• En cas de dommages sur le boîtier, le connecteur
ou le câble, ne pas mettre en marche l‘appareil.
Adressez-vous à un magasin spécialisé autorisé!
• Le produit ne doit être chargé et utilisé que dans
des pièces fermées et sèches!
• Les travaux de nettoyage ne doivent être effec-
tués que si la fiche secteur est débranchée!
• Le nettoyage du bloc d‘alimentation doit unique-
ment être effectué avec un chiffon sec!
• Ne pas ouvrir ou modifier le produit! Les travaux
de réparation et le changement du bloc d‘accu
ne doivent être effectués que par le fabricant ou
par un technicien de service chargé de ce travail
par le fabricant ou par une personne qualifiée de
manière similaire!
• Tenez les enfants éloignés du produit et de
l‘emballage. Le produit n‘est pas un jouet. Les
enfants doivent être surveillés afin de s‘assurer
qu‘ils ne jouent pas avec le produit!
• Ce produit n‘est pas conçu pour une utilisation
par des personnes (y compris par des enfants)
avec des capacités corporelles, sensorielles ou
intellectuelles limitées ou avec une absence
d‘expérience et de connaissances concernant
la manipulation de cet appareil. Ces personnes
doivent être préalablement instruites par une per-
sonne de surveillance responsable de leur sécurité
ou doivent être surveillées pendant l‘utilisation
de l‘appareil!
• Le non respect des consignes de sécurité peut
causer des dommages sur le produit ou entraîner
des blessures graves!
Évitez les lésions oculaires - Ne jamais regarder
directement dans le faisceau lumineux ou ne jamais
éclairer des personnes dans le visage. Se cela se
produit et de manière prolongée, la part de lumière
bleue peut causer un risque pour la rétine. Si un fais-
ceau lumineux rencontre les yeux, fermez les yeux et
tournez la tête pour éviter le faisceau lumineux. Tenez
les enfants éloignés du produit et de l‘emballage. Le
produit n‘est pas un jouet. Le nettoyage de l‘appareil
doit uniquement être effectué avec un chiffon sec.
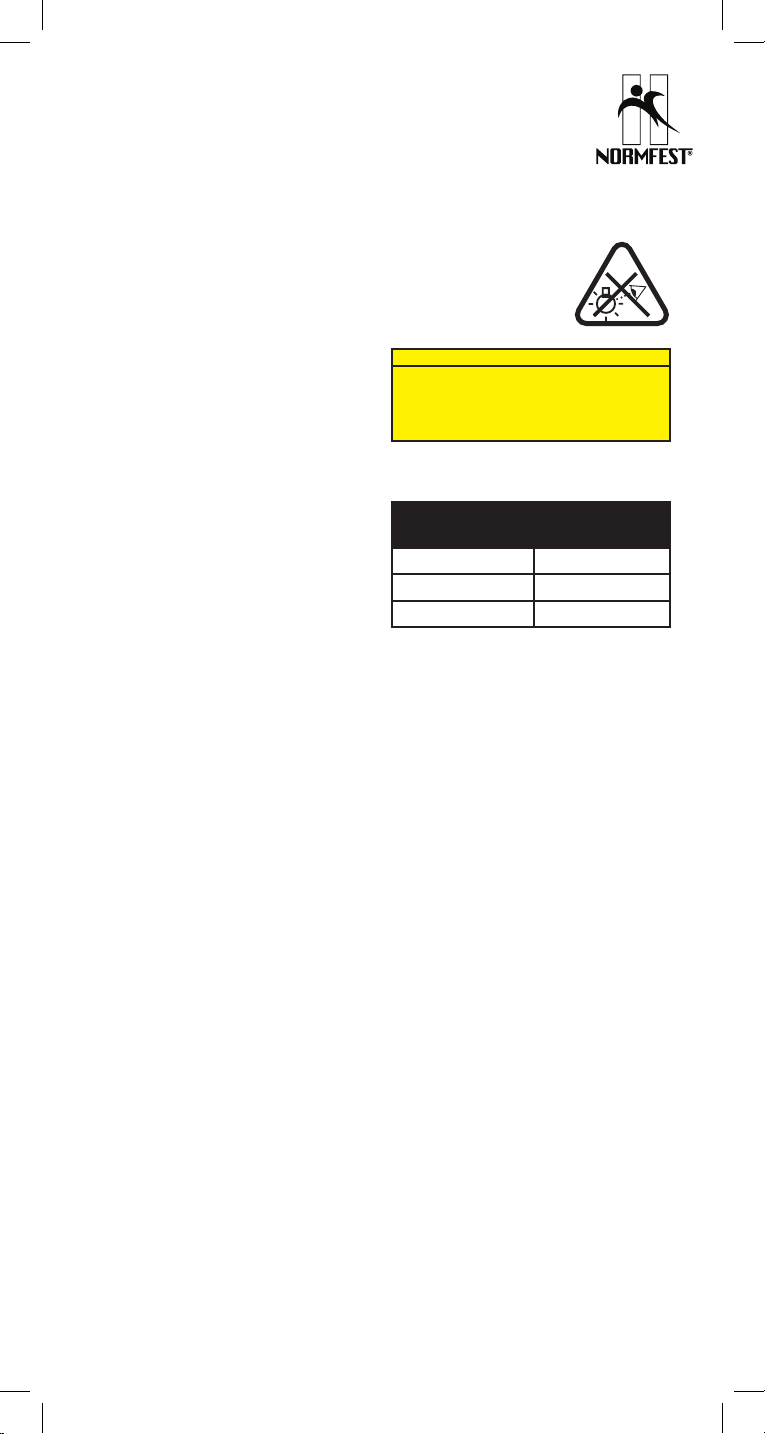
Cette lampe dépasse les conditions
d‘une utilisation sans risque. Lors
de l‘utilisation, le risque dépend
de la manipulation de la lampe par
l‘utilisateur.
GROUPE DE RISQUE 2
ATTENTION Ce produit peut émettre un faisceau
optique éventuellement dangereux. Ne pas regarder
vers la lampe de manière prolongée pendant
l‘utilisation. Peut être dangereux pour les yeux.
Valeur risque de l‘exposition / Exposure Hazard Value
(EHV)(1): 220.
Groupe de risque
Distance de danger
/ Hazard Distance
(HD)(2)
20m à 0,53m
10,53m à 5,3m
Groupe libre > 5,3m
Cette valeur indique le facteur par lequel la valeur
seuil du groupe de risque passe au groupe inférieur
suivant. La valeur seuil est de 1.
Distance des yeux à la lampe qui correspond au
groupe de risque.
CLAUSE DE NON-RESPONSABILITÉ
Les informations fournies dans ce mode d‘emploi
peuvent être modifiées sans notification préalable.
NORMFEST n‘endosse aucune responsabilité pour les
dommages ou dommages conséquents directs, indi-
rects, accidentels ou autre causés par la manipulation
inappropriée ou par le non respect des informations
fournies dans ce mode d‘emploi.
GARANTIE
Nous offrons une garantie de deux ans sur l‘appareil.
Aucune garantie n‘est accordée en cas de dommages
sur l‘appareil causés par le non respect du mode
d‘emploi.
Sous réserve de modifications techniques. Nous n‘endossons aucune responsa-
bilité pour les erreurs d‘impression. 01/2018

NORMFEST SL 550
Gebruiksaanwijzing
Hartelijk dank dat u voor een product van NORMFEST
gekozen hebt. Met de volgende handleiding willen
wij u helpen om de functies van uw nieuwe lamp
optimaal te benutten.
FUNCTIEOVERZICHT
• Professionele werkplaatslamp met COB-ledtech-
nologie
• Extra lamp op de lampkop
• Robuuste en spatwaterbestendige kunststof
behuizing met rubberen greepvlak
• 120° draaibaar, in 5 niveaus vergrendelbaar lam-
phandvat voor flexibele lichtafstelling
• Bevestigingsmagneet aan de onderkant van de
greep
• Hoofdlamp met twee lichtfuncties (50% | 100%
lichtcapaciteit)
• Vast ingebouwde Li-ion-accupack (3.7V |
2600mA)
• Oplaadmogelijkheid via micro-USB-bus
• Laadindicatie via 3 groene leds
• Restcapaciteitsweergave via 3 groene leds
• Schakelaar op de greep
• Laadaansluiting op het onderste greepstuk
TECHNISCHE GEGEVENS
Hoofdlicht: 5W COB LED
Extra licht: 3W SMD LED
Verlichtingssterkte: 785 lux (0,5 m afstand)
Lichtstroom: 550 lumen 100% |
260 lumen 50%
Brandtijd: hoofdlicht 100% 2,5 h |
50% 5,5 h
extra licht 10 h
INGEBRUIKNAME
De aan-uitschakelaar van de werkplaatslamp bevindt
zich op de achterkant van de behuizing:
1x drukken: De extra lamp op de lampkop wordt
ingeschakeld.
2x drukken: De extra lamp op de lampkop wordt
uitgeschakeld.
Op hetzelfde moment wordt het hoofdlicht in de
50%-modus ingeschakeld.
3x drukken: De hoofdlamp brandt in de 100%-mo-
dus.
4x drukken: Beide lampen zijn uit.
OPLAADPROCEDURE
Vóór de eerste ingebruikname de werkplaatslamp
volledig opladen. Bij opslag gedurende een langere
periode de werkplaatslamp ook van tevoren opladen.
De volgende laadopties staan ter beschikking:
• via USB-netadapter aan het stopcontact
• via USB-auto-adapter in de sigarettenaansteker
van de auto
• via USB-kabel aan derde apparaten met USB-
uitgang (bv. pc, laptop)
Om de werkplaatslamp op te laden de afsluitkap
van de micro-USB-bus op de achterkant van de
lamp verwijderen. Verbind de USB-kabel met een
van bovenstaande laadopties en de lamp. Daarna de
USB-netadapter/USB-auto-adapter in een stopcontact
/ een sigarettenaansteker steken.
LAADINDICATIE
De werkplaatslamp beschikt over een professionele
led-statusweergave op de achterkant van de lamp.
Hiermee kan de actuele laadtoestand en de restcapa-
citeit van de ingebouwde accu worden afgelezen.
Weergave van de laadtoestand van de accu
tijdens de oplaadprocedure:
• Drie leds branden groen: accu is volledig geladen.
• Drie leds knipperen groen: laadtoestand tussen
60 en 99%
• Twee leds knipperen groen: laadtoestand tussen
30 en 59%
• Eén led knippert groen: laadtoestand tussen 0
en 29%
Weergave van de restcapaciteit van de accu
tijdens de werking:
• Drie leds branden groen: restcapaciteit tussen
100% en 67%
• Twee leds branden groen: restcapaciteit tussen
66% en 34%
• Eén led brandt groen: restcapaciteit tussen 33%
en 10%
• Eén led knippert groen: restcapaciteit minder
dan 10%
De werkplaatslamp is tegen overbelasting beschermd.
Daarom kan hij ook bij volle accu verder op het
elektriciteitsnet aangesloten blijven.
INSTRUCTIES VOOR HET MILIEU
Gooi het apparaat in geen enkel geval weg met het
normale huisvuil. Verwijder het apparaat via een
erkend afvalverwerkingsbedrijf of via het afvalbedrijf
van uw gemeente. Neem de op dit moment geldende
voorschriften in acht. Neem in geval van twijfel
contact op met uw afvalbedrijf. Zorg voor een
milieuvriendelijke afvoer van alle verpakkingsmate-
rialen. Lege batterijen en accu’s zijn speciaal afval
en moeten conform de nationale wetgeving worden
afgevoerd.
VEILIGHEIDSINSTRUCTIES
• Vóór de ingebruikname zorgvuldig de gebruik-
saanwijzing lezen en de veiligheidsinstructies in
acht nemen!
• Bij beschadigingen aan de behuizing, stekkers of
kabels het apparaat niet in werking stellen. Neem
contact op met de geautoriseerde vakhandel!
• Het product mag alleen in gesloten, droge ruim-
tes opgeladen en gebruikt worden!
• Reinigingswerkzaamheden alleen uitvoeren als de
stekker uitgetrokken is!
• Reiniging van de netadapter alleen met een dro-
ge doek uitvoeren!
• Product niet openen of modificeren! Reparatie-
werkzaamheden en vervanging van de accupack
mogen alleen door de producent of een daardoor
aangewezen servicemonteur of een vergelijkbaar
gekwalificeerde persoon worden uitgevoerd!
• Houd kinderen uit de buurt van het product en
de verpakking. Het product is geen speelgoed. Bij
kinderen moet erop worden gelet dat ze niet met
het product kunnen spelen!
• Dit product is niet geschikt voor gebruik door per-
sonen (met inbegrip van kinderen) met beperkte
lichamelijke, zintuiglijke of mentale vermogens
of die te weinig ervaring en kennis hebben wat
betreft de omgang met dit apparaat. Dergelijke
personen moeten door een voor hun veiligheid
verantwoordelijke toezichthoudende persoon
eerst geïnstrueerd of tijdens de bediening van het
apparaat in de gaten gehouden worden!
• De niet-naleving van de veiligheidsinstructies kan
leiden tot schade aan het product of tot gevaarli-
jk letsel van personen!
Oogletsel voorkomen - Nooit direct in de lichtstraal
kijken of andere personen in het gezicht schijnen.
Als dit te lang gebeurt, kan door blauwlichtaandelen
gevaar voor het netvlies ontstaan. Als een lichtstraal
het oog treft, moeten de ogen worden gesloten en
moet het hoofd van de lichtstraal worden afgewend.
Houd kinderen uit de buurt van het product en de
verpakking. Het product is geen speelgoed. Reiniging
van het apparaat met een droge doek uitvoeren.
Deze lamp overschrijdt de voor-
waarden van risicoloos gebruik.
Het risico tijdens het gebruik hangt
af van de manier waarop de gebru-
iker met de lamp omgaat.
RISICOGROEP 2
LET OP Er kan mogelijkerwijs gevaarlijke optische
straling van dit product uitgaan. Bij werking niet
langere tijd in de lamp kijken. Kan schadelijk zijn
voor de ogen.
Gevarenwaarde van de blootstelling / Exposure
Hazard Value (EHV)(1): 220.
Risicogroep Gevarenafstand / Ha-
zard Distance (HD)(2)
20 m tot 0,53 m
10,53 m tot 5,3 m
Vrije groep > 5,3 m
Deze waarde geeft de factor aan waarmee de grens-
waarde voor de risicogroep t.o.v. de volgende lagere
groep wordt overschreden. De grenswaarde ligt bij 1.
Afstand van oog tot de lamp, waarbij de desbetref-
fende risicogroep van toepassing is.
UITSLUITING VAN
AANSPRAKELIJKHEID
De in deze gebruiksaanwijzing aanwezige informatie
kan zonder aankondiging vooraf gewijzigd worden.
NORMFEST aanvaardt geen aansprakelijkheid voor
directe, indirecte, toevallige of overige schade of
volgschade, die door onvakkundig gebruik of door
niet-naleving van de in deze gebruiksaanwijzing
aanwezige informatie ontstaat.
GARANTIE
Wij bieden 2 jaar garantie op het apparaat. Bij
schade aan het apparaat, die ten gevolge van niet-
naleving van de gebruiksaanwijzing ontstaat, kan
geen garantie verleend worden.
Technische wijzigingen voorbehouden. Voor drukfouten zijn wij niet aanspra-
kelijk. 01/2018

NORMFEST SL 550
Instrukcja Obsługi
Dziękujemy za okazane nam zaufanie i wybór produktu
rmy NORMFEST. Niniejsza instrukcja obsługi została
opracowana, aby pomóc optymalnie wykorzystać
funkcje nowej lampy.
ZESTAWIENIE FUNKCJI
• Profesjonalna lampa warsztatowa z technologią
COB LED
• Dodatkowa lampa na głowicy
• Solidna, bryzgoszczelna obudowa z tworzywa sztucz-
nego z gumowanym uchwytem
• Obrotowy uchwyt lampy (120°) z 5-stopniową
regulacją i blokadą umożliwia ustawianie światła w
dowolnym kierunku
• Magnes mocujący na spodzie uchwytu
• 2 stopnie jasności świecenia lampy głównej (50% |
100% wydajności świetlnej)
• Zintegrowany akumulator Li-Ion (3,7 V | 2600 mA)
• Możliwość ładowania przez gniazdo Micro USB
• Kontrolka ładowania z trzema zielonym LED
• Wskaźnik pozostałej mocy z trzema zielonymi LED
• Przełącznik na uchwycie
• Gniazdo ładowania w dolnej części uchwytu
DANE TECHNICZNE
Lampa główna:
COB LED 5 W
Lampa dodatkowa:
SMD LED 3 W
Natężenie oświetlenia:
785 luksów (odległość 0,5 m)
Strumień świetlny:
100% 550 lumenów |
50% 260 lumenów
Czas świecenia:
Lampa główna 100%
2,5 godz. | 50% 5,5 godz.
Lampa dodatkowa 10 godz.
URUCHOMIENIE
Włącznik/wyłącznik lampy warsztatowej znajduje się z
tyłu obudowy:
Nacisnąć 1x: włącza się lampa dodatkowa na głowicy.
Nacisnąć 2x: wyłącza się lampa dodatkowa na głowicy.
W tym samym czasie lampa główna włącza się w trybie
50% wydajności świetlnej.
Nacisnąć 3x: lampa główna świeci w trybie 100%
wydajności świetlnej.
Nacisnąć 4x: obie lampy gasną.
ŁADOWANIE
Przed pierwszym uruchomieniem całkowicie naładować
lampę warsztatową.
Przed dłuższym przechowywaniem lampę warsztatową
również uprzednio naładować.
Dostępne możliwości ładowania:
• przez zasilacz USB w gniazdku elektrycznym
• przez samochodowy adapter USB w gnieździe zapal-
niczki samochodowej
• przez kabel USB w urządzeniach z wyjściem USB (np.
PC, laptop)
Przed rozpoczęciem ładowania lampy warsztatowej
zdjąć kapturek ochronny z gniazda USB micro z tyłu lam-
py. Kablem USB połączyć lampę warsztatową z jednym z
wymienionych wyżej źródeł prądu. Następnie wetknąć
zasilacz USB / samochodowy adapter USB do gniazdka
elektrycznego / gniazda zapalniczki samochodowej.
WSKAŹNIK STANU NAŁADOWANIA
Lampa warsztatowa jest wyposażona w profesjonalny
diodowy wskaźnik stanu naładowania znajdujący się
z tyłu lampy. Można na nim odczytać aktualny stan
naładowania oraz pozostałą moc akumulatora.
Wskaźnik stanu naładowania akumulatora podczas
ładowania:
• Trzy LED świecą na zielono: akumulator jest
całkowicie naładowany.
• Trzy LED migają na zielono: stan naładowania aku-
mulatora w przedziale od 60 do 99%
• Dwie LED migają na zielono: stan naładowania aku-
mulatora w przedziale od 30 do 59%
• Jedna LED miga na zielono: stan naładowania aku-
mulatora w przedziale od 0 do 29%
Wskaźnik pozostałej mocy akumulatora podczas
pracy:
• Trzy LED świecą na zielono: pozostała moc akumula-
tora w przedziale od 100 do 67%
• Dwie LED świecą na zielono: pozostała moc akumu-
latora w przedziale od 66 do 34%
• Jedna LED świeci na zielono: pozostała moc akumu-
latora w przedziale od 33 do 10%
• Jedna LED miga na zielono: pozostała moc akumula-
tora poniżej 10%
Lampa warsztatowa jest zabezpieczona przed
przeładowaniem. Dlatego może pozostać podłączona
do zasilania, nawet gdy akumulator jest całkowicie
naładowany.

WSKAZÓWKI DOTYCZĄCE OCHRO�
NY ŚRODOWISKA
Nigdy nie wyrzucać urządzenia ze zwykłymi odpadami
komunalnymi. W celu utylizacji przekazać urządzenie do
specjalistycznego przedsiębiorstwa gospodarki odpa-
dami lub komunalnego zakładu utylizacji. Przestrzegać
aktualnie obowiązujących przepisów. W przypadku
wątpliwości skontaktować się z zakładem utylizacji
odpadów. Wszystkie materiały, z których wykonano
opakowanie, przekazać do ekologicznej utylizacji.
Zużyte baterie i akumulatory są odpadami specjalnymi,
dlatego trzeba je utylizować zgodnie z przepisami
obowiązującymi w danym kraju.
UWAGI DOTYCZĄCE
BEZPIECZEŃSTWA
• Przed uruchomieniem dokładnie przeczytać
instrukcję obsługi i przestrzegać uwag dotyczących
bezpieczeństwa!
• W przypadku uszkodzenia obudowy, wtyczki lub
kabla nie wolno uruchamiać urządzenia. Zwrócić się
do autoryzowanego sprzedawcy!
• Urządzenie wolno ładować i użytkować wyłącznie w
zamkniętych, suchych pomieszczeniach!
• Urządzenie czyścić wyłącznie po wyjęciu wtyczki
sieciowej z gniazdka elektrycznego!
• Zasilacz czyścić wyłącznie suchą ściereczką!
• Nie otwierać produktu i nie dokonywać jego mody-
kacji! Naprawy urządzenia i wymianę akumulatora
wolno przeprowadzać wyłącznie producentowi lub
autoryzowanym przez niego serwisantom wzgl.
innym osobom o porównywalnych kwalikacjach!
• Produkt oraz opakowanie przechowywać poza
zasięgiem dzieci. Produkt nie służy do zabawy.
Dopilnować, aby dzieci nie bawiły się produktem!
• Produkt nie jest przeznaczony do użytkowania przez
osoby (również dzieci) o ograniczonej sprawności
zycznej, sensorycznej lub umysłowej ani przez
osoby nieposiadające dostatecznego doświadczenia
i umiejętności w obchodzeniu się z urządzeniem.
Osoby takie muszą najpierw zostać poinstruowane
przez osobę odpowiedzialną za ich bezpieczeństwo
lub musi je ona bezpośrednio nadzorować podczas
obsługi urządzenia!
• Nieprzestrzeganie niniejszych uwag dotyczących
bezpieczeństwa może skutkować uszkodzeniem
produktu lub poważnymi obrażeniami ciała!
Zapobieganie uszkodzeniu wzroku – nigdy nie spoglądać
bezpośrednio w wiązkę światła i nie kierować jej w
kierunku twarzy innej osoby. W przypadku zbyt długiego
patrzenia niebieskie światło może spowodować
uszkodzenia siatkówki. W razie skierowania wiązki prosto
w twarz zamknąć oczy i odwrócić głowę. Produkt oraz
opakowanie przechowywać poza zasięgiem dzieci. Pro-
dukt nie służy do zabawy. Czyścić urządzenie wyłącznie
suchą ściereczką.
Ta lampa nie spełnia wymogów
zastosowania całkowicie wolnego od
zagrożeń. Ryzyko podczas stosowania
zależy od zachowania użytkownika.
GRUPA RYZYKA 2
WAŻNE: ten produkt może emitować światło o
niebezpiecznym natężeniu. Podczas użytkowania nie
spoglądać przez dłuższy czas bezpośrednio w lampę.
Możliwe uszkodzenie wzroku.
Wartość ryzyka ekspozycji / Exposure Hazard Value (EHV)
(1): 220.
Grupa ryzyka
Odległość od zagrożenia
/ Hazard Distance
(HD)(2)
2od 0 m do 0,53 m
1od 0,53 m do 5,3 m
Bezpieczny odstęp > 5,3 m
Ta wartość określa, o ile została przekroczona granica
do następnej niższej grupy ryzyka. Wartość graniczna
wynosi 1.
Odstęp lampy od oczu odpowiedni dla danej grupy
ryzyka.
WYKLUCZENIE
ODPOWIEDZIALNOŚCI
Informacje zawarte w niniejszej instrukcji obsługi mogą
być zmieniane bez wcześniejszego powiadamiania.
Firma ANSMANN nie ponosi odpowiedzialności za
bezpośrednie, pośrednie, przypadkowe ani inne szkody
oraz szkody następcze będące skutkiem niewłaściwego
użytkowania lub nieprzestrzegania informacji zawartych
w niniejszej instrukcji obsługi.
GWARANCJA
Udzielamy dwuletniej gwarancji na urządzenie. Gwa-
rancja nie obejmuje uszkodzeń urządzenia powstałych
wskutek nieprzestrzegania instrukcji obsługi.
Zmiany techniczne zastrzeżone. Odpowiedzialność z tytułu błędów drukarskich
wykluczona. 01/2018

NORMFEST SL 550
Návod k Obsluze
Děkujeme, že jste se rozhodli zakoupit výrobek rmy
NORMFEST. Tento návod k obsluze vám pomůže
opmálně využívat funkci vašeho nového svídla.
PŘEHLED FUNKCÍ
• Profesionální dílenské svídlo s technologií COB LED
• Přídavné svídlo na hlavě lampy
• Robustní plastový kryt s ochranou pro stříkající
vodě a pogumovanou plochou rukoje
• Rukojeť svídla lze otočit o 120°, zablokovat na 5
úrovních pro exibilní nasměrování světla
• Přídržný magnet na spodní straně rukoje
• Hlavní svídlo se dvěma světelnými funkcemi (výkon
světla 50 % | 100 %)
• Pevně zabudovaná sada lithium-iontových
akumulátorů (3,7 V | 2600 mA)
• Možnost nabíjení pomocí zdířky micro USB
• Kontrolka nabíjení formou 3 zelených LED diod
• Indikátor zbývající kapacity pomocí 3 zelených LED
diod
• Spínač na rukoje
• Nabíjecí zdířka na spodní čás rukoje
TECHNICKÉ ÚDAJE
Hlavní svídlo:
5 W COB LED
Přídavné svídlo:
3 W SMD LED
Intenzita osvětlení:
785 lx (0,5 m odstup)
Světelný tok:
550 lm 100 % |
260 lm 50 %
Doba svícení:
hlavní svídlo 100 % 2,5 h |
50 % 5,5 h
přídavné svídlo 10 h
UVEDENÍ DO PROVOZU
Spínač ZAP/VYP dílenského svídla se nachází na zadní
straně krytu:
1 x sskněte: Přídavné svídlo na hlavě lampy se zapne.
2 x sskněte: Přídavné svídlo na hlavě lampy se vypne.
Zároveň se zapne hlavní svídlo v režimu 50 % výkonu.
3 x sskněte: Hlavní svídlo sví v režimu 100 % výkonu.
4 x sskněte: Obě svídla jsou vypnutá.
POSTUP NABÍJENÍ
Před prvním uvedením dílenského svídla do provozu
svídlo kompletně nabijte.
V případě uskladnění svídla na delší dobu nejdříve
svídlo rovněž předm nabijte.
K dispozici jsou následující možnos nabíjení:
• přes USB síťový díl pomocí zásuvky
• přes USB vozidlový adaptér v zapalovači cigaret ve
vozidle
• přes USB kabel na třech přístrojích pomocí USB
výstupu (např. PC, laptop)
Za účelem nabíjení dílenského svídla sejměte krytku
z micro USB zdířky na zadní straně svídla. Spojte USB
kabel s jednou z výše uvedených možnos nabíjení a
lampou. Potom USB síťový díl/USB vozidlový adaptér
zasuňte do zásuvky/zapalovače na cigarety.
INDIKÁTOR STAVU NABITÍ
Dílenské svídlo je vybaveno profesionálním LED
indikátorem stavu nabi na zadní straně svídla. Pomocí
něho lze zjist aktuální stav nabi, příp. zbývající kapacitu
zabudovaného akumulátoru.
Zobrazení stavu nabi akumulátoru během procesu
nabíjení:
• LED diody sví zeleně: Akumulátor je zcela nabitý.
• Tři LED diody blikají zeleně: Stav nabi je v rozmezí
60 - 99 %.
• Dvě LED diody blikají zeleně: Stav nabi je v rozmezí
30 - 59 %.
• Jedna LED dioda bliká zeleně: Stav nabi je v rozmezí
0 - 29%.
Zobrazení zbývající kapacity akumulátoru během
provozu:
• LED diody sví zeleně: Zbývající kapacita je v rozmezí
100 - 67 %.
• Dvě LED diody sví zeleně: Zbývající kapacita je v
rozmezí 66 - 34%.
• Jedna LED dioda sví zeleně: Zbývající kapacita je v
rozmezí 33 - 10%.
• Jedna LED dioda bliká zeleně: Zbývající kapacita je
méně než 10 %.
Dílenské svídlo je chráněné pro nadměrnému nabi.
Proto může zůstat i při zcela nabitém akumulátoru
nadále připojené k sí.
POKYNY NA OCHRANU ŽIVOTNÍHO
PROSTŘEDÍ
Přístroj v žádném případě nelikvidujte společně
s běžným domácím odpadem. Přístroj likvidujte
prostřednictvím schváleného podniku na likvidaci
nebo prostřednictvím komunálního orgánu na likvidaci
odpadu. Dodržujte aktuálně platné předpisy. V případě
pochybnos se spojte s podnikem na likvidaci odpadu.

Veškerý obalový materiál zlikvidujte ekologicky. Použité
baterie a akumulátory jsou speciální odpad a musejí se
likvidovat dle vnitrostátních zákonů.
BEZPEČNOSTNÍ UPOZORNĚNÍ
• Před uvedením do provozu si pozorně přečtěte ná-
vod k obsluze a dodržujte bezpečnostní upozornění!
• V případě poškození krytu, konektorů nebo kabelu
přístroj už nepoužívejte. Obraťte se na autorizova-
nou prodejnu!
• Výrobek se smí nabíjet a provozovat pouze v
uzavřených, suchých prostorech!
• Čiscí práce provádějte pouze po vytažení zástrčky
ze síťové zásuvky!!
• Na čištění napájecího zdroje používejte jen suchou
utěrku!
• Výrobek neotvírejte ani nemodikujte! Opravářské
práce, jakož i výměnu sady akumulátorů může
realizovat jen výrobce nebo ním pověřený servisní
technik nebo porovnatelně kvalikovaná osoba!
• Výrobek a obal ukládejte mimo dosah dě.. Výrobek
není hračka. Dě by měly být pod dohledem, aby se
zajislo, že si s výrobkem nebudou hrát!
• Tento výrobek není určený k používání osobami
(včetně dě), které vykazují omezené tělesné, smys-
lové nebo duševní schopnos, příp. které nemají
dostatečné zkušenos a znalos pro zacházení s
mto výrobkem. Takové osoby musí pro jejich vlastní
bezpečnost nejdříve instruovat zodpovědná osoba
dozoru nebo musejí být při obsluze výrobku pod
dozorem!
• Nedodržení bezpečnostních upozornění může vést
k poškození výrobku nebo nebezpečným zraněním
osob!
Oogletsel voorkomen - Nooit direct in de lichtstraal
kijken of andere personen in het gezicht schijnen.
Als dit te lang gebeurt, kan door blauwlichtaandelen
gevaar voor het netvlies ontstaan. Als een lichtstraal
het oog treft, moeten de ogen worden gesloten en
moet het hoofd van de lichtstraal worden afgewend.
Houd kinderen uit de buurt van het product en de
verpakking. Het product is geen speelgoed. Reiniging
van het apparaat met een droge doek uitvoeren.
Deze lamp overschrijdt de voorwaarden van risicoloos
gebruik. Het risico tijdens het
gebruik hangt af van de manier
waarop de gebruiker met de lamp
omgaat.
RIZIKOVÁ SKUPINA 2
POZOR Výrobek může případně vytvářet nebezpečné
opcké záření. Během provozu se nedívejte delší dobu
do svídla. Může být škodlivé pro oči.
Hodnota nebezpečí pči expozici / Exposure Hazard
Value (EHV)(1): 220.
Riziková skupina Vzdálenost ohrožení /
Hazard Distance (HD)(2)
20 m až 0,53 m
10,53 m až 5,3 m
Volná skupina > 5,3 m
Tato hodnota uvádí faktor, o kolik je překročena mezní
hodnota rizikové skupiny v porovnání s nejbližší nižší
skupinou. Mezní hodnota je 1.
Vzdálenost od oka ke svídlu, u něhož je použitelná
příslušná riziková skupina.
VÝLUKY Z RUČENÍ
Informace uvedené v tomto návodu k obsluze se mohou
změnit bez předcházejícího upozornění. ANSMANN
nepřebírá ručení za přímé, nepřímé, náhodné nebo jiné
škody nebo následné škody, které vzniknou neodbornou
manipulací nebo nedodržením pokynů a upozornění
uvedených v tomto návodu k obsluze.
ZÁRUKA
Na tento přístroj nabízíme dvouletou záruku. V
případě poškození přístroje, která vzniknou v důsledku
nedodržení návodu k obsluze, nelze záruku poskytnout.
Technické změny vyhrazeny. Za skové chyby neručíme. 01/2018

NORMFEST SL 550
NORMFEST GmbH
Siemensstraße 23
D-42551 Velbert
Germany
www.normfest.com
www.normfest-shop.com
Table of contents
Languages:
Other Normfest Work Light manuals


Popular Work Light manuals by other brands


Spectro-UV
Spectro-UV Spectroline uVision Series manual

NightSearcher
NightSearcher Pocket Pro user manual

Gardner Bender
Gardner Bender GWL-40 operating instructions

Kartell
Kartell Taj Mini manual

Parkside
Parkside PLLA 12-Li A1 Translation of the original instructions

Flex
Flex TL 4000 18.0/230 Original operating instructions


