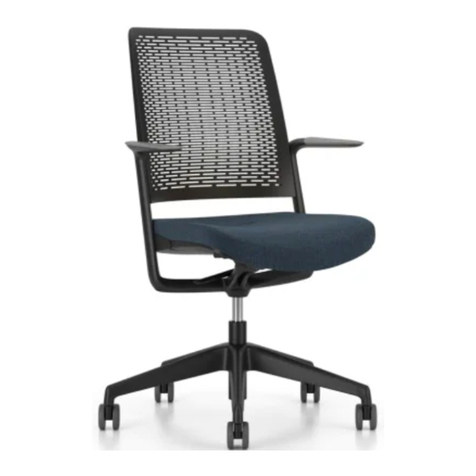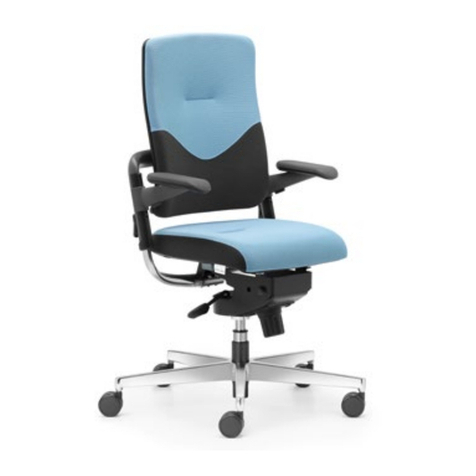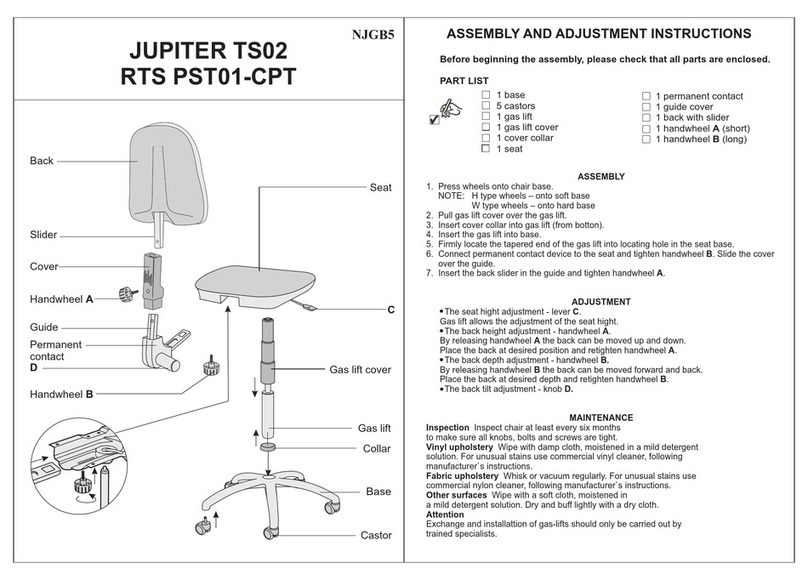
A1 - Gas height adjustmentB2 - Free floatingB3 - Mechanism in locked positionC4 - Tension adjustment knobD5 - Seat depth adjustment
LU2LN2
IJIJ I - Lumbar cushion air pumpJ - Drain valveWe remind you that the chair should be used for its intended purpose.The chair is designed for one person.You must not stand on the chair or use it to transport heavy objects.You should not leave the chair in places with high humidity or next to heat sources.The proper use will ensure long-lasting and failure-free operation of the chair.It is recommended to check the fastenings, such as knobs and screws, periodically.To clean the dirty upholstery cover, use the cleaning agents designed for upholstered furniture.Plastic parts should be cleaned with widely available non-scratching cleaning agents.NOTE!The maximum chair load is 110 kg.Disassembly of any chair components may result in a loss of warranty.The pneumatic lift cannot be heated or dismantled. Replace it as a whole if necessary.The chair can be repaired or the chair components can be replaced only by trained staff.More information related to our products can be found at our websites.NUNI430Nous rappelons que le siège doit être utilisé conformément à są destination.Le siège est conçu pour une seule personne.Il ne faut pas poser d'objets lourds dessus ou les transporter à l'aide du siège.Il est déconseillé de laisser le siège dans un environnement humide ou trop près d'une source de chaleur.Une utilisation appropriée assurera la longévité du produit et son bon état.Il est conseillé de vérifier régulièrement les fixations, telles que les vis, les poignées.Afin de nettoyer le tissu recouvrant le siège, utiliser des produits de nettoyage pour mobilier tapissé. Afin de nettoyer les éléments en plastique, utiliser des produits de nettoyage non-abrasifs, disponibles dans le commerce.ATTENTION !La charge maximale pour le siège est de 110 kg.Le démontage de pièces du siège par l'utilisateur peut entraîner la perte de la garantie.Ne pas chauffer ou démonter le vérin. En cas de besoin, le remplacer entièrement.La chaise peut être réparée ou les composants de la chaise peuvent être remplacés seulment par du personnel qualifié.Plus d'informations sur nos produits vous pouvez trouver sur nos sites web.Przypominamy, że krzesło należy użytkować zgodnie z przeznaczeniem.Krzesło przeznaczone jest dla jednej osoby.Nie wolno na nim stawiać ani przewozić ciężkich przedmiotów.Nie należy pozostawiać krzesła w miejscach o dużej wilgotności powietrza czy też w bezpośrednim sąsiedztwie źródełciepła.Właściwe użytkowanie zapewni Państwu długą i bezawaryjną eksploatację.Zaleca się okresowe sprawdzanie mocowań typu pokrętła, śruby.Do czyszczenia zabrudzonego pokrycia tapicerskiego należy używać środków czyszczących przewidzianych dla mebli tapicerowanych.Części z tworzyw sztucznych czyścić przy pomocy ogólnie dostępnych, nierysujących środków czystości.UWAGA!Maksymalne obciążenie krzesła masą wynosi 110 kg.Demontaż jakichkolwiek elementów krzesła może spowodować utratę gwarancji.Podnośnika pneumatycznego nie podgrzewać i nie rozbierać. W razie potrzeby wymienić w całości.Naprawa krzesła lub wymiana podzespołów może być dokonana jedynie przez przeszkolony personellub w autoryzowanym serwisie firmy Nowy Styl.Informacje na temat serwisu gwarancyjnego, pogwarancyjnego oraz produktów firmy Nowy Styl, mogą Państwo uzyskać na stronie www.nowystyl.pl.Centrum Informacjitel. 801 177 291 (połączenie płatne jak za jeden impuls)czynne w godz. 8:00 – 16:00 od poniedziałku do piątkuBeachten Sie bitte, dass der Stuhl nur zweckgemäß benutzt werden soll.Das Produkt ist für eine Person geeignet.Bitte nicht auf dem Produkt stehen oder schwere Gewichte transportieren.Das Produkt nicht in den Räumen mit hoher Luftfeuchtigkeit bzw. in direkter Nachbarschaft zur Wärmequelle halten.Eine sachgemäße Handhabung ist Grundlage für langen und störungsfreien Betrieb.Es wird empfohlen, Drehräder und Schrauben regelmäßig zu kontrollieren.Die Polsterung nur mit speziellen Reinigungsmitteln für Polstermöbeln putzen.Kunststoffteile mit herkömmlichen, nicht abrasiven Reninigungsmitteln reinigen.ACHTUNG!Maximales Lastgewicht beträgt 110 kg.Demontage von Produktteilen kann zum Verlust der Garantie führen.Gasfeder weder erhitzen noch auseinanderbauen. Bei Bedarf den ganzen Teil austauschen.Austausch und Reparaturen dürfen nur von einem Fachmann durchgeführt werden.Näheres zu unseren Produkten erfahren Sie auf unseren Webseiten.Im Falle von Beanstandungen finden Sie die Kontaktdaten von Nowy Styl Deutschland unterservice@nowystyl.comPLENDEFR I - Pompka poduszki lędźwiowejJ - Zawór zwolnienia powietrza I - Gonglage par pressions repetees du coussin lombaireJ - Valve de degonflage I - Lumbalstuetze PumpeJ - Das Luftfreilassungventil PLENDEFRFS/FSTSFT1/SFB1A1 - Réglage de la hauteur d'assiseDéblocage du dossierB2 - Blocage du dossierB3 - Volant de réglage de la tension du dossierC4 - D5 - Réglage de la profondeur de l'assiseA1 - Zmiana wysokości siedziskaB2 - Swobodne bujanie fotelaB3 - Blokada siedziska w wybranym położeniuC4 - Siła wychylenia siedziskaD5 - Zmiana głębokości siedziskaA1 - SitzhöhenverstellungB2 - Freie Sitz- und LehnenneigungB3 - Arretierung Sitz und Rückenlehne in gewünschter PositionC4 - SitzneigeverstellungD5 - SitztiefenverstellungDEFRPLENDEFRA1 - Réglage de la hauteur d'assiseDéblocage du dossierB2 - Blocage du dossierB3 - C4 - Réglage de la profondeur de l'assiseA1- Zmiana wysokości siedziskaB2 - Swobodne bujanie fotelaB3 - Blokada siedziska w wybranym położeniuC4 - Regulacja głębokości siedziskaA1 - Gas height adjustmentB2 - Free floatingB3 - Mechanism in locked positionC4 - Seat depth adjustmentA1- HöhenverstellungB2 - Freies Synchron - SchaukelnB3 - Blockierte Synchron - PositionC4 - Sitzflächeverstellung
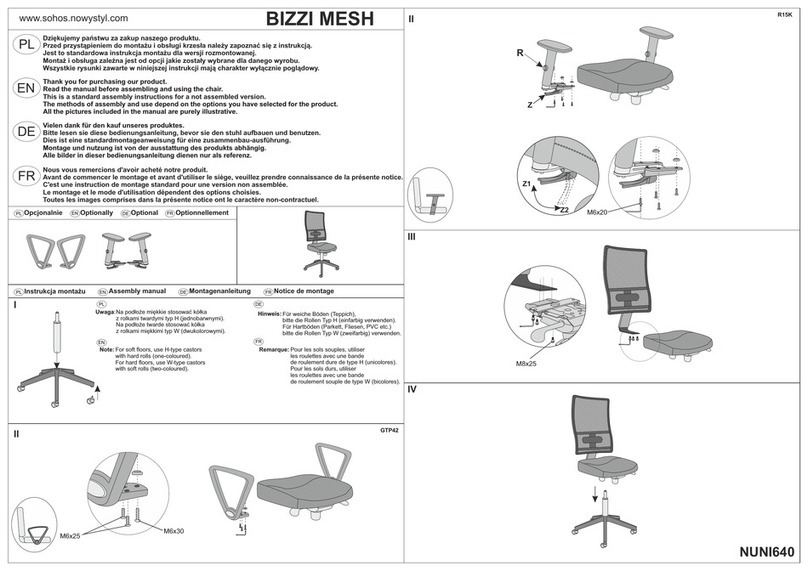
LP11/LP11T/LP11TNPLENDEFRA1 - Zmiana wysokości siedziskaB2 - Swobodne bujanie fotela B3 - Blokada siedziska w wybranym położeniuB4 - Regulacja pochylenia siedziska do przoduC5 - Siła wychylenia siedziskaD6 - Zmiana głębokości siedziskaA1 - Réglage de la hauteur d'assiseDéblocage du dossierB2 - Blocage du dossierB3 - B4 - Réglage de l’inclinaison de l’assise versl’avantC5 - Volant de réglage de la tension du dossierD6 - Réglage de la profondeur de l'assiseA1 - Gas height adjustmentB2 - Free floatingB3 - Mechanism in locked positionB4 - Angle regulation of the seat up frontC5 - Tension adjustment knobD6 - Seat depth adjustmentA1 - HöhenverstellungB2 - Freies Synchron - SchaukelnB3 - Blockierter Synchron - PositionB4 - Einstellung der Neigung des Sitzes nach vorneC5 - Handrad für die FederkrafteinstellungD6 - Sitzflächeverstellung- Le réglage de l’accoudoir se fait par déplacement de l’accoudoire vers l’avant ou vers l’arrière (R35K3-SB2,R35K3). - Ajustement de la hauteur des accotoirs – appuyez sur le bouton R.- Accoudoirs réglables : appuyer sur le levier Z: Z1 - Molette blocage Z2 - Déblocage pour régler les accotoirs en largeur (R35K2-SB2,R35K3-SB2).- Réglage de la hauteur du dossier: Le dossier redescend à la position la plus basse une fois que la position la plus haute est atteinte. Afin d’ajuster le dossier à la position souhaitée, il faut le faire coulisser de la position la plus basse à la plus haute, le faire redescendre puis graduellement remonter le dossier jusqu’à la position désirée.- Réglage en hauteur du renfort lombaire (LU2).-Têtière inclinable et réglable en hauteur (HRUA).- Réglage de l'anneu repose-pieds : vis W.En déserrant la vis W, l'anneau du piètement peut être déplacé vers le haut et vers le basPlacer l'anneau en position souhaitée et reserrer la vis W (RB).FRDE- R(R35K3-SB2, R35K3).egulierung der Armlehneauflage: - verschiebung nach vorne-hinten - Armlehnenhöheverstellung - R.- Armlehnenabstandverstellung - Z:Z1 - blockiertZ2 - entblockiert(R35K2-SB2, R35K3-SB2).- Höhenverstellung der Rückenlehne mittels Rastermechanik: Die Rückenlehne in die höchste Position ziehen und anschließend in die unterste Position gleiten lassen. Danach auf die gewünschte Höhe ziehen. Wird die Rückenlehne wieder in die höchste Position gezogen, gleitet sie wieder in die unterste Position zurück.- Regulierung der Höhe des Lendenkissens (LU2).- Höhenverstellung für Kopf- und Nackenstütze, Neigungseinstellung Kopf- und Nackenstütze (HRUA).- (RB).Ring Basehöhenverstellung über Schraube W PLEN
