NRS M85577 User manual

Intended Use
The NRS 3 Wheel Rollator comes complete
with Bag, Basket and tray and is designed to
provide support and assistance to those
unable to, or who lack the confidence to, walk
without some level of support. This rollator is
intended for indoor and outdoor use.
General Safety Warning
Please ensure these instructions are
fully read and understood before use.
Retain these instructions in a safe
place for future reference.
CONTENTS LIST
Item
Description
Qty.
1
Rollator Frame with braked
handles
1
2
3
4
5
6
Basket with lid/tray
Bag
Hand wheels with:
bolts/plastic washers
Basket Hook Locators
User Instructions
1
1
2
2
1
Unpacking
Check all parts carefully before assembling
the product.
Do not assemble if any parts are damaged.
Do not assemble if any parts from the list
below are missing.
MAXIMUM
USER
WEIGHT
Safety Precautions
Do not exceed the maximum user weight
limit of 127Kg (20st).
Ensure Rollator is locked open before use.
Check the brakes before use.
Only use the rollator as a walking support.
Do not use the rollator on stairs or an
escalator.
Exercise caution when there is a heavy
load in the bag (max. 5Kg) or basket /tray
(max. 5Kg)
Loads should only be transported using
the bag or basket/tray (where fitted). Do
not hang heavy items from the handles as
this may affect the stability of the Rollator.
Do not use the rollator to walk backwards.
Caution must be taken when negotiating
curbs and other obstacles, or when using
on sloping, uneven or slippery surfaces.
Failure to do so mayresult in a serious risk
of a fall or injury.
Do not perform any adjustments to the
rollator while it is in use.
Wheels must be in contact with floor at all
times.
When using the rollator in a stationary
position, the brakes must be locked.
Page 1
User Instructions
NRS 3-Wheel Rollator Range
M85577 –Blue with basket/tray
M79826 –Blue with basket/tray (2 pack)
M99126 –Blue with no basket/tray (2 pack)
M91139 –Red with basket/tray
M91127 –Red with basket/tray (2 pack)

Basket Hook
Locator (x2)
Handle Bar
Diagram:1
Assembly and Height Adjustment
NOTE: Before assembly consult a suitably qualified
healthcare professional regarding the correct height
adjustment for maximum support; and correct brake
activation.
1. Open the Rollator into operating position (see
overleaf)
2. Fit the Basket Hook Locators onto the
handlebar tubes as shown in Diagram. 1
3. Insert the Handlebars into the framing tubes
and set to the correct height as follows;
Stand upright behind the rollator with your
shoulders relaxed and your arms by your side,
looking straight ahead.
In this position, the handgrips of the rollator
should be adjusted to a height level with your
wrists.
This will position your arms at an approximate
20º to 30º bend when using the rollator.
Check that the holes in the handle bars and the
frame are aligned.
Place the supplied bolt through the aligned
holes in the handlebar and frame. The holes in
the frame are hexagonal in shape to
accommodate the head of the bolt.
Place the washer over the bolt and then apply
the hand nut. Hand-tighten firmly, but do not
over tighten
4. Check the brakes thoroughly before use.
NOTE: The brakes are factory set, and if
assembled correctly do not need adjusting. To
check; Apply and release the parking brake on
each side 10 times (see diagram 5b) The brake
should grip the wheel and prevent any
movement when applied, when released, the
gap between the brake and the wheel should be
between 1 to 3 mm. If either of the above
conditions is not correct adjust the brakes as
detailed in the maintenance section, and re-
check.
5. Fit the bag to the frame as shown in the
photograph on page 1 using the poppers to
fasten.
6. Fit the basket by fitting the hooks on the basket
into the hook locators as shown in diagrams
2&3.
Diagram:2
Diagram:3
Page 2

Locknut
Turn Adjuster
Anti-clockwise
to tighten brake
Diagram 6
Diagram 5a
Diagram 5b
Diagram 4a
Diagram 4b
Push down fully to lock
the rollator in the open
position
Pull up to fold the rollator.
Take care to keep fingers
away from frame when
folding
Caution: After making any adjustments to the
brakes, you must test them before the rollator is
used.
If adjustment does not tighten the brakes, do
not use the rollator. Contact your dealer or NRS
Customer services, details below.
Cleaning Instructions
Clean regularly, wipe down with a soft, non
abrasive cloth.
Ensure there is no build up of dirt or debris around
the axle, brakes and wheels.
Using the 3 Wheel Rollator
Opening: Fold out the Rollator and push down the
cross bar fully. (See Diagram 4a)
NOTE: It is very important that the crossbar is
pushed fully down to prevent the Rollator
folding during use.
Fit basket/tray in correct position (if provided)
Folding: Remove basket (if present) and Pull up the
cross bar. (See Diagram 4b) The Rollator will then
close inwards for storage. Take care to keep fingers
out of frame when folding. The bag should be empty
before folding.
Walking: This unit is to be used as a mobility aid,
creating a natural gait as the user walks securely
with their primary weight distribution between the
handlebars and with the unit in front of the user.
Braking: The locking brakes are intended to assist
the user to control the Rollator. To apply the brakes
when in motion, pull up both of the loop handles.
(See diagram 5a).
To apply the parking brakes, push down the handles
until they lock down. A distinct click indicates that
the brake is in the correct position. (See Diagram
5b) It is important that both the brakes are put in the
parking position when they are to be used. Lift up
the handle to release.
If you apply the parking brakes, or pull up the brakes
to stop whilst moving, and the rear wheels on the
rollator still move, stop use immediately. Do not use
again until the brakes have been checked and
correctly adjusted. Refer to the maintenance
section.
Maintenance
Regularly check for wear and tear and that all
screws and knobs are securely fastened.
Check brakes are working satisfactorily by both
walking and squeezing the brakes and by
braking to a stop.
Check the parking brakes by pushing the
handles into the locked position, and then trying
to push the rollator.
If the brakes do not completely lock the wheels
the brakes need to be adjusted, as detailed
below.
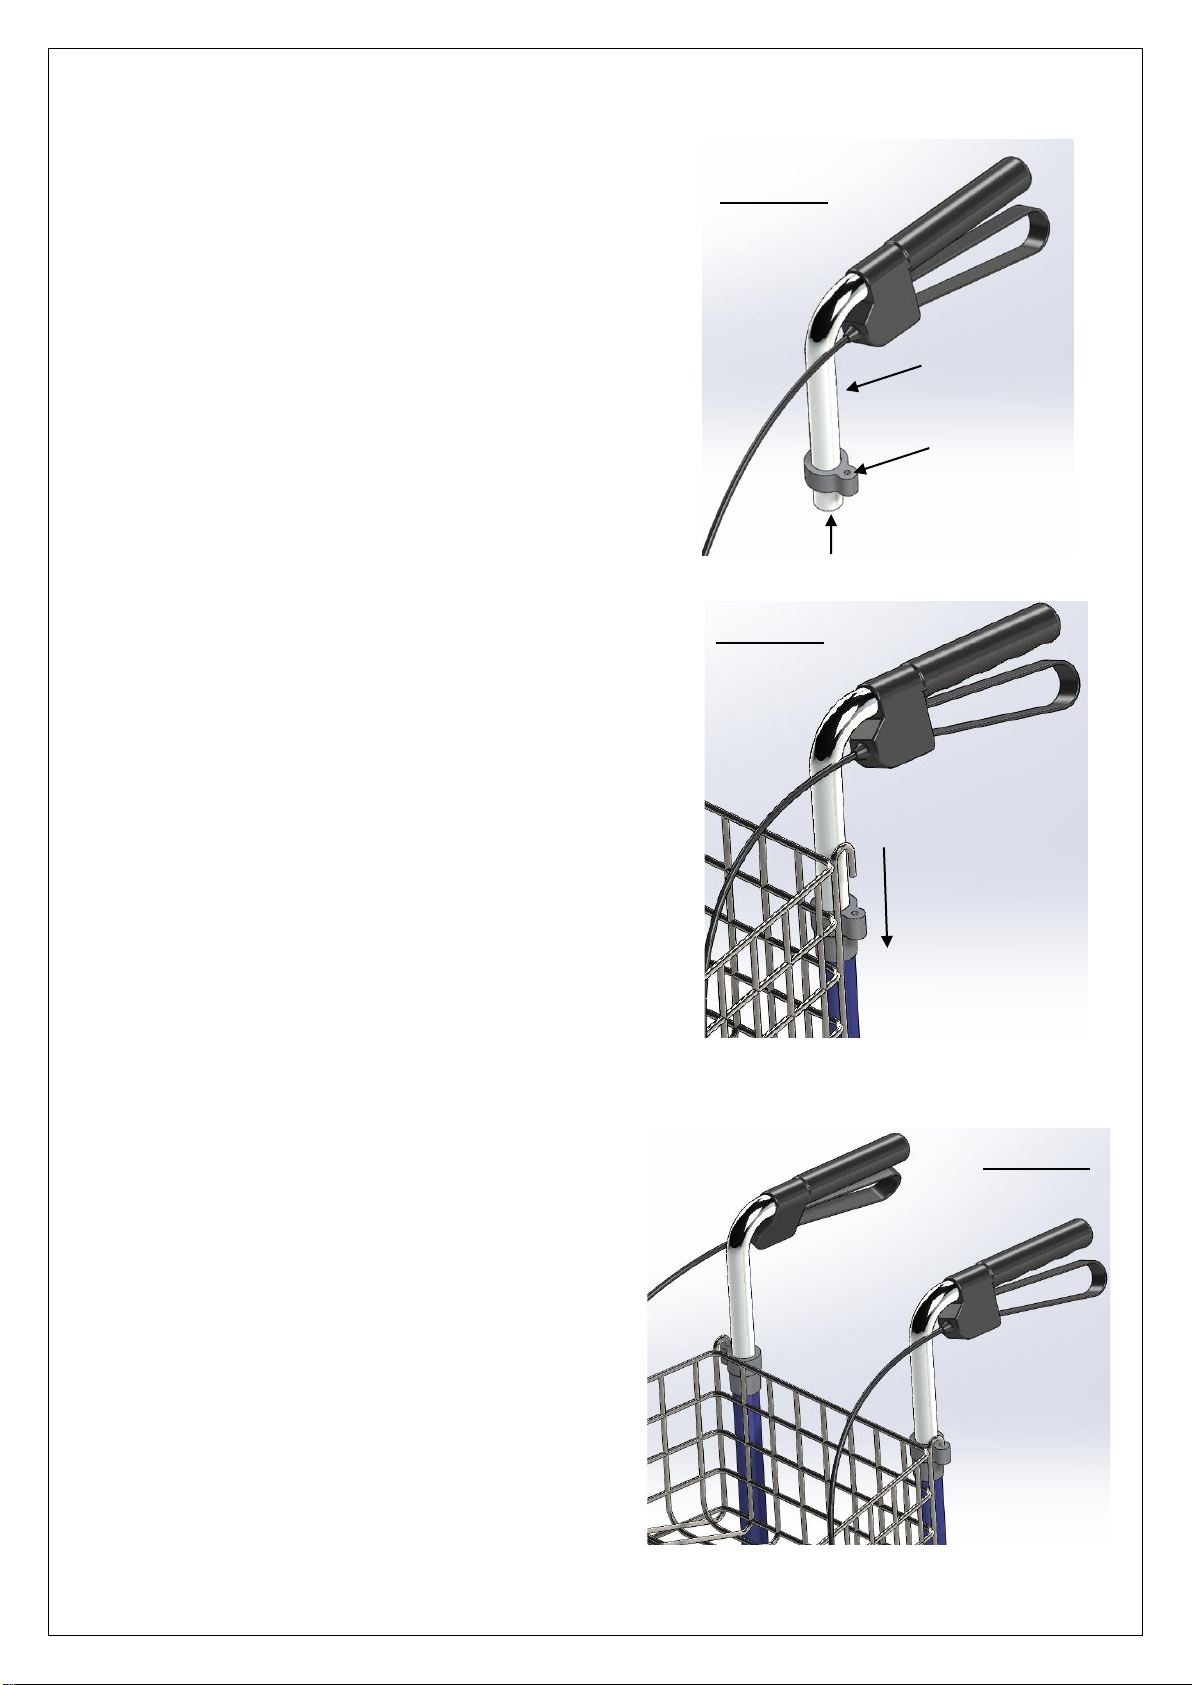
Brake Adjustment: The brake adjusters are
situated in front of the brake handles, as shown
in diagram 6. To adjust, loosen the lock nut, turn
the adjuster anticlockwise to tighten the brake
then retighten the lock nut.
For correct adjustment the brake mechanism
should not touch the wheel, but the gap should
be no greater than 3mm.
Page 3

Manufactured for
NRS Healthcare
Sherwood House, Cartwright Way,
Forest Business Park, Bardon Hill,
Coalville, Leicestershire. LE67 1UB UK
Tel. Main Office: 0330 100 0098
Tel. Customer Services: 0345 121 8111
Email: customerservice@nrshealthcareuk.co.uk
The NRS 3 - Wheel Rollator Range is part of a range of over 3000 daily
living aids available from NRS Healthcare.
To view the full range please visit our website www.nrshealthcare.co.uk
or request a catalogue from the number below
IMPORTANT
For information on how to obtain the User Instructions in other languages
and formats for use by people with visual, reading or cognitive
customer services department 0345 121 8111
Additional copies of this user instruction are available on our
website:www.nrshealthcare.co.uk.
UI/M85577,M79826,M99126,M91139,M91127/05/17/Iss5
Page 4
Product Guarantee
NRS Healthcare, guarantee this product for a period of 12 months from the date
of purchase against faulty materials and workmanship. This guarantee does not
cover, abuse, misuse, interference or tampering with any part of the product.
Any guarantee issued by NRS Healthcare does not affect your statutory rights.
NRS Healthcare is a Leading Supplier of Community Equipment and
Daily Living Aids, to view our full range, visit our website:
www.nrshealthcare.co.uk
This manual suits for next models
4
Other NRS Mobility Aid manuals
Popular Mobility Aid manuals by other brands

Invacare
Invacare O2 Holder Accessory Kit 1488 Installation and operating instructions

Drive Medical
Drive Medical RTL10266CF user manual

NRS Healthcare
NRS Healthcare L71134 User instructions

KOMFI-RIDER
KOMFI-RIDER ZOOM ULTRA user manual

Handicare
Handicare 3002920200 manual

AMF-BRUNS
AMF-BRUNS Alu Ramp Brief operating instructions

zopa
zopa B-4500 manual

Liberty Hardware
Liberty Hardware Decorative Series Installation, Operating and Care Instructions

FREERIDER
FREERIDER COMPANION User instruction manual

Sunrise Medical
Sunrise Medical Hoyer OXFORD Fitting instructions

Costway
Costway JH10010 Instruction booklet

Mobiak
Mobiak 0806054 user manual