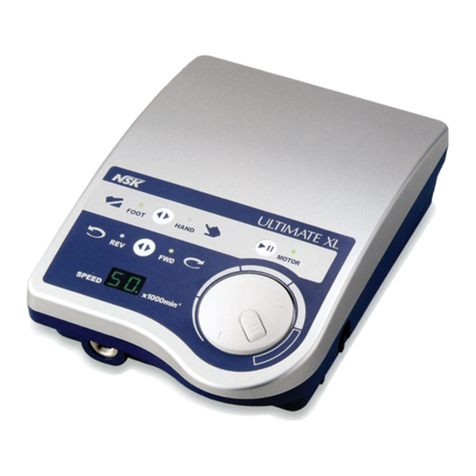
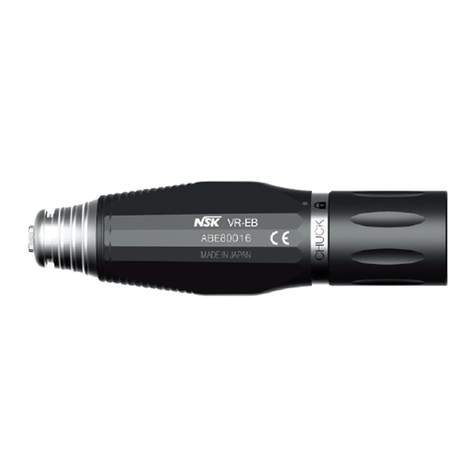
NSK ULTIMATE XL-K User manual

OPERATION MANUAL
Micromotor for Laboratory Work
English

1
Thank you very much for purchasing ULTIAMTE XL-K/D.
Please read this Operation Manual carefully regarding the instructions for use, handling method,
and maintenance and inspection prior to use and store it in a place where users can review it
anytime.
IMPORTANT INSTRUCTIONS AND WARNING
1. Component Names
2. Set up of Control Unit
3. Operation Procedure
4. Speed limit mechanism
5. Operation Procedure of Air Turbine (Option)
6. Protective Circuit
7. Memory Function
8. Error Code
9. Replacement of Fuse
10. Maintenance Mode
11. Vacuum-coupled Mode
12. Handling of Motor and Handpiece
13. Handpiece Stand
14. Specification
15. Troubleshooting
16. Disposing Product
1
5
6
7
8
8
8
9
9
10
10
11
12
14
14
15
18
·············································
························································································
·····················································································
·······················································································
···················································································
····················································
·····························································································
····························································································
······································································································
······················································································
························································································
··················································································
··································································
···························································································
···································································································
······························································································
·························································································
Contents
WARNING!
When using electric tools, basic safety precautions should always be followed to reduce
the risk of fire, electrical shock and personal injury, including the following. Read all these
instructions before operating this product and save these instructions.
IMPORTANT INSTRUCTIONS AND WARNING - Electric Devices
English

2 3
A. GROUNDING INSTRUCTIONS
1. In the event of a malfunction or breakdown, grounding provides a path of least resistance for
electric current to reduce the risk of electric shock. This tool is equipped with an electric cord
having an equipment-grounding conductor and a grounding plug. The plug must be plugged
into a matching outlet that is properly installed and grounded in accordance with all local
codes and ordinances.
2. Do not modify the plug provided - if it will not fit the outlet, have the proper outlet installed by
a qualified electrician.
3. Improper connection of the equipment-grounding conductor can result in a risk of electric
shock. The conductor with insulation having an outer surface that is green with or without
yellow stripes is the equipment-grounding conductor. If repair or replacement of the electric
cord or plug is necessary, do not connect the equipment grounding conductor to a live
terminal.
4. Check with a qualified electrician or service personnel if the grounding instructions are not
completely understood, or if in doubt as to whether the tool is properly grounded.
5. Use only 3-wire extension cords that have 3-prong grounding plugs and 3-pole receptacles
that accept the tool's plug.
6. Repair or replace damaged or worn cord immediately.
7. This tool is intended for use on a circuit that has an outlet that looks like the one illustrated in
Sketch A in Figure (below) (120V). The tool has a grounding plug that looks like the plug
illustrated in Sketch A in Figure (below). A temporary adapter, which looks like the adapter
illustrated in Sketches B and C, may be used to connect this plug to a 2-pole receptacle as
shown in Sketch B if a properly grounded outlet is not available. The temporary adapter
should be used only until a properly grounded outlet can be installed by a qualified
electrician. The green-colored rigid ear, lug, and the like, extending from the adapter must be
connected to a permanent ground such as a properly grounded outlet box.
8. USE PROPER EXTENSION CORD. Make sure your extension cord is in good condition.
When using an extension cord, be sure to use one heavy enough to carry the current your
product will draw. An undersized cord will cause a drop in line voltage resulting in loss of
power and overheating. Table (below) shows the correct size to use depending on cord
length and nameplate ampere rating. If in doubt, use the next heavier gauge. The smaller the
gauge number, the heavier the cord.
9. Install equipment so that the power supply cord can be pulled out without hindrance in event
of emergency.
1. For your own safety read instruction manual before operating tool.
2. Wear eye protection.
3. Replace cracked wheel immediately.
4. Always use guards and eye shields.
5. Do not over tighten wheel nut.
6. Use only flanges furnished with the grinder.
7. REMOVE ADJUSTING KEYS AND WRENCHES. From habit of checking to see that keys and
adjusting wrenches are removed from tool before turning it on.
8. KEEP WORK AREA CLEAN. Cluttered areas and benches invite accidents.
9. DON'T USE IN DANGEROUS ENVIRONMENT. Don't use power tools in damp or wet
locations, or expose them to rain. Keep work area well lighted.
10. Risk of injury due accidental starting. Do not use in an area where children may be present.
11. DON'T FORCE TOOL. It will do the job better and safer at the rate for which it was designed.
12. USE RIGHT TOOL. Don't force tool or attachment to do a job for which it was not designed.
13. WEAR PROPER APPAREL. Do not wear loose clothing, gloves, neckties, rings, bracelets, or
other jewelry that might get caught in moving parts. Nonslip footwear is recommended. Wear
protective hair covering to contain long hair.
14. ALWAYS USE SAFETY GLASSES. Everyday eyeglasses only have impact resistant lenses,
they are NOT safety glasses. Also use face or dust mask if cutting operation is dusty.
15. SECURE WORK. Use clamps or a vise to hold work when practical. It's safer than using your
hand and it frees both hands to operate tool.
16. MAINTAIN TOOLS WITH CARE. Keep tools sharp and clean for best performance and to
reduce the risk of injury to persons. Follow instructions for lubricating and changing
accessories.
B. OTHER WARNING INSTRUCTIONS
Minimum gauge for cord
Volts
120V
240V
Cord Number
Total Length of cord
7.5m (25ft.) 15m (50ft.) 30m (100ft.) 45m (150ft.)
15m (50ft.) 30m (100ft.) 60m (200ft.) 90m (300ft.)
Ampere Rating
More Than
0
6
10
12
Not More Than
6
10
12
16
#18
#18
#16
#14
#16
#16
#16
#12
#16
#14
#14
Not Recommended
#14
#12
#12
Grounding Method
GROUNDING
PIN
METAL SCREW
GROUNDING MEANS
GROUNDING PIN
ADAPTER
COVER OF GRIUNDING
OUTLET BOX
English

4 5
C.
Important Instructions and Warning on ULTIAMTE XL-K/D
17. DISCONNECT TOOLS before servicing; when changing accessories, such as blades, bits,
cutters, and like.
18. REDUCE THE RISK OF UNINTENTIONAL STARTING. Make sure switch is in off position
before plugging in.
19. USE RECOMMENDED ACCESSORIES. Consult the owner's manual for recommended
accessories. The use of improper accessories may cause risk of injury to persons.
20. NEVER LEAVE TOOL RUNNING UNATTENDED. TURN POWER OFF. Don't leave tool until it
comes to a complete stop.
21. For recommended operating speed for various applications, please follow the instructions of
bur manufacturers.
22. The system functions normally in the environment where the temperature is at 0-40°C,
humidity at 10-85% RH, atmospheric pressure at 500-1060hPa, and no moisture
condensation in the Unit. Use at outside of these limits may cause malfunction.
23. Store the system in the place where the temperature is at -10-60°C, humidity at 10-85% RH,
atmospheric pressure at 500-1060hPa, and the system is not subject to air with dust, sulfur,
or salinity.
24. Severe shock – Eg. Dropping Control Unit, or the Micromoto – may cause damage.
25. Do not turn the bur lock Chuck Control Ring while the handpiece is rotating.
26. Do not rotate the motor when the bur lock Chuck Control Ring is at OPEN position, or a bur
is not mounted in the chuck. It may cause the motor/handpiece disconnection or sudden
heat generation.
27. Activation of Circuit Breaker means too much load is applied to the motor beyond the
capacity the motor takes. This circuit breaker is designed to protect the motor, but it is
desired to perform the grinding work without activating the circuit breaker.
28. Care should be taken not to drop micromotor handpiece on floor or hard work surface in
order to avoid damage caused by impact shock.
No lubrication is required to either motor or handpiece because ball bearings impregnated with
grease in both motor and handpiece.
1
2
3
4
5
6
7
8
9
10
11
12
13
14
15
16
17
ULTIMATE XL-K
ULTIMATE XL-D
Control Unit
Motor Handpiece
Turbine Adapter (option)
Air Turbine (option)
Knee Controller (Ultimate XL-K)
Pedal
Speed Control Knob
Turbine / Motor Selector Switch
Forward / Reverse Selector Switch
Auto Cruise Switch
Indicator
Power Switch
Motor Connector
Turbine Adapter Connector
Fuse Box
Handpiece Stand
Foot Pedal Connector (Ultimate XL-D)
1. Component Names
1
7
8
9
10
11
7
8
9
10
11
2
3
5
12
12
4
4
3
6
2
1
13
14
15
16
16
13
14
15
17
English

4. Mounting of the Foot Pedal (ULTIMATE XL-D)
Insert the foot pedal plug into the Foot Pedal Connector at the back of the unit.
5. Mounting of the Air Turbine (Option)
Insert the plug of the Turbine Adapter into the
Turbine Adapter Connector at the back of the
unit. Insert two hoses from the Turbine Adapter
into the openings for foot pedal connection in the air
line kit. (Fig. 5)
1. Connect the power code to outlet.
2. Make sure that the Speed Control Knob is at the lowest position (position reached by fully
turning counterclockwise)
3. Turn the Power Switch. The preset rotation speed will appear on the Indicator.
4. Select the rotation direction with Forward/Reverse Selector Switch. Each time this switch
is pressed, the direction changes between FORWARD and REVERSE.
5. Preset the maximum rotation speed with the Speed Control Knob.
6. Depress the Knee Controller for ULTIMATE XL-K and the Pedal for ULTIMATE XL-D,
and the motor will run. The rotation speed can be variably controlled within the preset
maximum rotation speed range according to the degree of depression of the Knee
Controller or the Pedal.
Auto cruise mechanism
To fix the speed within the rotation speed range set by the volume with the Speed Control
Knob, press the Auto Cruise Switch while the motor is at rest. The display lamp, which is
next to the switch, will light up. If the desired speed is set with the Knee Controller or the
Pedal and a uniform speed can be maintained for one second, the motor will continue
running at the desired speed if the Knee Controller or the Pedal is released. To cancel
it, depress the Knee Controller or the Pedal again or press Auto Cruise Switch
again.
6 7
1. Mounting of the Unit
(1) ULTIMATE XL-K
Bore a hole while aligning the attached
template with the inside of the right side of
the technical desk. Then, mount a bracket
with the attached screw and nut, and mount
the unit by inserting the bracket lug into the
opening at the back of the unit. (Fig. 1)
(2) ULTIMATE XL-D (Option)
ULTIMATE XL-D is used by standing it on a
work bench, but it can be used by mounting
it by use of the optional bracket if there is a
wall at right side of the technical desk. If the
unit is to be mounted on the bracket, remove
the two cover-mounting screws. (Fig. 2)
2. Set up of Control Unit
Fig.1
Fig.2
2. Mounting of the Motor
Insert the motor cord plug locator into Motor
Connector aligning it with the groove of the
connector, and tighten the motor cord plug nut
to fix. (Fig. 3)
Fig.3
3. Connecting of the Power Cord
Securely insert the plug of Power Cord into
connector at the back of the unit aligning it with
the configuration. (Fig. 4)
Fig.4
7
5
6
5
5
7
5
5
6
6
6
6
7
9
3
3
10
10
12
17
13
Fig.6
OUTIN
OUT
OUT
OUT
IN
AIR IN
To XL-K/D
Foot Pedal Connector
3. Operation Procedure
Fig.5
Turbine Adaptre
Connector
Foot Pedal
Connector
English

1. Push the Turbine/Motor Selector Switch, and the green lamp will light up and the air
turbine will be selected.
2. • When the auto cruise mechanism is OFF :
Depress the Knee Controller or the Pedal, and the turbine will rotate.
• When the auto cruise mechanism is ON:
Push the Auto Cruise Switch and depress the Knee Controller or the Pedal, and
after a lapse of two seconds, the turbine will continue rotating even if the Knee
Controller or the Pedal is released.
3. To cancel the auto cruise mechanism, depress the Knee Controller or the Pedal again
or push the Auto Cruise Switch.
Even if Forward/Reverse Selector Switch is pushed while using the air turbine, it will be
neglected only with the beeps of electronic sounds.
4. Push the Turbine/Motor Select Switch again, and the lamp will go out and the motor will
be available.
8 9
56
8
5
6
6
5
9
8
6
6
5
5
7
12
11
10
10
For the use of a small-diameter round bur or
fisher bur at 40,000min-1(rpm) or more, pressing
the Speed Limit Release Button, which is
equipped with the Speed Control Knob, and
turning the speed control knob allows a setting
of up to 50,000min-1(rpm). (Fig.7)
4. Speed limit mechanism
5. Operation Procedure of Air Turbine (Option)
When the motor is operated with a load exceeding the limit or the handpiece is in an
unrotatable condition, the circuit to protect the motor and unit operates to stop the power
supply to the motor, whereby an error code appears on the Indicator.
How to reset the protective circuit
It can be reset by depressing the Knee Controller or Pedal again after eliminating the
cause of the error.
6.
Protective Circuit
When the Power Switch is turned on, the rotation direction made when the switch was last
turned off are restored. Special attention should be given to the rotation direction.
7.
Memory Function
When the motor is stopped due to some trouble such as a failure, overload, wire breakage or
misuse, Speed Display displays the error code for checking the status of the unit and
understanding the cause of the trouble easily.
8.
Error Code
Fig. 7
CAUTION
Use of 40,000min-1(rpm) or more is allowable only when the bur manufacturer or dealer
specifies that the bur's acceptable rotation speed is 40,000min-1 (rpm) or more. If the
use of more than the acceptable rotation speed is made, the bur may be broken.
Speed Limit Release Button
Speed Limit Release Button
Speed Limit Release Button
For countermeasures against error displays, see the section on 15.Troubleshooting.
Error cord
E0
E1
E2
E3
E4
E5
E6
E8
E9
EF
Description
Self-check error
Overcurrent detection error
(Hard)
Overvoltage detection error
Motor sensor error
Unit overheat error
PAM circuit error
Rotor lock error
Overvoltage detection error
(Soft)
ITRIP error
Foot pedal error
Cause
• Abnormal internal memory
• Broken internal memory
• Long-time use at a high load (overcorrect)
• Shorted cord (power line)
• Shorted motor winding
• Failure of a turbine adapter
• Shorted cord (power line), damaged circuit
• Broken internal circuit
• Failure of a turbine adapter
• Faulty sensor (Hall IC) in the motor
• Disconnected motor cord
• Severed cord (signal line)
• Open chuck
• Faulty handpiece
• If the cord of the turbine adapter is loosed.
• Temperature rise in the unit due to longtime
use at a high load
• Unit placed under high temperature
• Abnormal voltage generated in start / stop
circuit
• Faulty start / stop circuit from PAM (L Slide)
• Open chuck
• Faulty handpiece
• Motor Faulty
• Faulty sensor (Hall IC) in the motor
• Severed cord (signal, power line)
• Long-time use at a high load (overcorrect)
• Shorted cord (power line)
• Shortstop of the motor winding
• Failure of a turbine adapter
Faulty motor and circuit
• Faulty Foot Pedal or Shorted Foot Pedal cord
• Broken internal circuit
English

(4) "Pd": Knee Controller or Foot pedal check
Press Forward/Reverse Selector Switch, and Indicator will change. During normal time,
Indicator changes in hexadecimals ( 0~9, A~F ) according to the amount of depressing
Knee controller or Pedal. Also, depressing the pedal slightly lights LED, and depressing
it fully extinguishes the lamp. If Indicator does not change smoothly or LED does not light
properly, Knee controller or Pedal may be faulty. To cancel this check, press
Forward/Reverse Selector Switch again.
(5) "in": Initializing function
Press Forward/Reverse Selector Switch, and beeps will be made and rotation direction,
other settings will return to the factory set condition.
Rotation direction: FWD (forward)
Vacuum-coupled mode: OFF
Motor/Turbine: Motor
AUTO Cruse: OFF
(3) Motor signal check
(Hall IC check)
Press Forward/Reverse Selector Switch, and Indicator will indicate one or two
horizontal lines. Turn the motor slowly by hand, and this display will change to one line, two
lines, one line, two lines, smoothly from the top to bottom or from the bottom to top. If any
one of the three lines does not light, the sensor (Hall IC) in the motor is faulty or the cord is
severed, therefore repair is needed. To cancel this check, press Forward/Reverse Selector
Switch again.
Eg.
The unit is provided with a maintenance mode to check the functionality of the switches,
display, foot pedal, motor, etc. While pressing Turbine/Motor Selector Switch and Auto
Cruise Switch at the same time, turn on the Power Switch and keep pressing the button until
beeps are made (for about 2 seconds). At this time, turning the volume from the minimum
position in order displays "oP", "dP", "HL", "Pd" and "in", allowing the following checks. To
release Maintenance Mode, turn Power Switch off and switch on again.
(1) "oP": Switch check
(operation check)
Press the switches on the panel, and the right and/or left lamps will light to check to see if
the switches operate normally.
(2) "dP": Display check
Press Forward/Reverse Selector Switch, and the lamps will light one by one to check to
see if they operate normally. To cancel this check, press Forward/Reverse Selector Switch
again.
10 11
9
9
8
10
15
15
15
15
Fig.8
Fuse is located in Fuse Box. Release ratchet
clamp located on the top and bottom of the
Fuse Box and pull it out to change the fuse
(T3.15AL250V). (Fig. 8)
When the fuse come down, Insert new fuses
(T3.15AL250V)into the Fuse box and then
push the Fuse box into the original position
until hearing a sound click.
- Fuse: Order No. (120V) : 12001-31510
- Fuse: Order No. (230V) : 12001-16010
9. Replacement of Fuse
10. Maintenance Mode
On some dental tables with vacuum dust collector, the motor may be used while being coupled
with a dust collector. When such a dust collector * is used, power consumption of ULTIMATE
XL-K/D can be regulated so that the vacuum-coupled function can work. If you need coupling
with a vacuum dust collector, select the mode as follows:
How to select the mode
While pressing Forward/Reverse Selector Switch, turn on Power Switch, and the mode
can be selected. A long beep indicates vacuum-coupled mode and 2 short beeps indicate
non-coupled (energy-saving) mode.
* Each time the switch selection is made, the mode changes between vacuum-coupled mode
and non-coupled mode.
* A currently known dust collector is KAVO EWL-560.
11. Vacuum-coupled Mode
CAUTION
Fuse is burned out when a short circuit occurs or when over-voltage is flowed into the
primary current source. If the cause is uncertain, return the product to an authorized
NSK’s service shop for inspection.
9
9
6
6
9
5
5
9
9
9
11
11
12
11
2 3 4 A b C d C b A 4 3 2
English

12 13
Fig.10
(1) Insertion or Removal of Bur
The chuck is opened by turning the Chuck Control
Ring to an open position. The chuck is loosened
and the bur can be removed. By turning the Chuck
Control Ring in the LOCK direction, the chuck is
closed and the bur can be mounted. At this time,
turn the ring until it clicks. (Fig. 9)
(2)
Cleaning and Replacement of Chuck
(1) Removal of Chuck
To remove the chuck, open the Chuck
Control Ring and turn the chuck
counterclockwise with the provided spanner
wrench. (Fig. 10)
* If a bur having a large diameter of a cutting
part is used under a high torque, the chuck
may rotate in the close direction and the bur
may be stuck and cannot be removed. In
this case, align the nose's slit and spindle's
spanner position (flat part), and apply an L
spanner to fix the spindle. Open the Chuck
Control Ring and turn the chuck
counterclockwise with the provided spanner
wrench to remove it. (Fig. 11)
(2) Cleaning of Chuck
To keep accuracy for the Chuck remove and clean the chuck as frequently as possible in the
ultrasonic cleaner. Clean at least once a week.
12. Handling of Motor and Handpiece
Fig.9
CAUTION
• Do not turn the Ring during motor rotation.
• Do not turn a motor, when it has not attached bur or the Ring Open position. It may be
reasons for the failure or overheating of the handpiece.
CAUTION
Neglecting to clean the chuck for a long time is very dangerous because wax, gypsum,
etc., accumulate in the chuck and the bur is caught insecurely, causing runout.
OPEN
LOCK
Loosen
Loosen
Loosen
Fig.11
Loosen
Loosen
Loosen
(3) Insertion of Chuck
Thinly apply oil before insertion. Open the
Chuck Control Ring, insert the dummy bur or
the bur in use into the chuck, and turn the
chuck clockwise by hand until it stops. Then,
lock the Chuck Control Ring, and the chuck
could hold the bur securely. (Fig. 12)
Fig.12
CAUTION
Before using the handpiece, make sure to pull the rotating instrument (bur, etc.) to check
that it is securely mounted.
Turn until finger-tight
Turn until finger-tight
Turn until finger-tight
Fig.13
Fig.14
3. Disconnecting and Connecting of Motor Cord to Motor
Remove the cord nut at the rear end of the motor, and the motor cord connector can be
pulled out. For connection, align the connector pin and the hole in the motor cord connector,
and insert the connector straight until it stops. Then, tighten the cord nut. (Fig.13)
* When inserting the connector, do not turn or twist it.
4.
Disconnecting Handpiece from Motor
The handpiece and motor are screwed at the
midpoint. Firmly grasp the motor outer case
and the handpiece outer case and turn it
counterclockwise to disconnect. (Fig. 14).
Fig.15
Torque Type / Compact Type
CAUTION for Handpiece connection
When connecting the handpiece to the motor, turn
the handpiece clockwise and tighten firmly. If the
clutch is not engaged properly, the handpiece
cannot be tightened completely. In such case, Do
Not Force. Loosen the handpiece and turn the bur
briefly to re-position the drive dog. Reconnect the
handpiece and tighten securely. (Fig. 15)
English

14 15
At the bottom of the handpiece stand, tools
necessary for handpiece maintenance and a
spare chuck (optional) can be mounted.
(Fig. 16)
13. Handpiece Stand
14. Specification
Fig.16
Food Pedal
Model
Weight
FC-64
460g
Handpiece Stand
Model
Weight
Handpiece Stand
120g
Control Unit
Model
Power supply
Weight
Model
Ultimate XL-K
Ultimate XL-D
AC120V 50/60 Hz 46VA
AC230V 50/60 Hz 46VA
Ultimate XL-K
Ultimate XL-D
Ultimate XL-K
Ultimate XL-D
NE231
NE232
3.2kg
3.3kg
W90 × D270× H230 mm
W81 × D270× H230 mm
Motor Handpiece
1 ) Torque Type
Model
Speed
Max. Torque
Weight
Dimensions
Code Length
UMXL-T(P) 2M
1,000~50,000 min-1
8.7N·cm
215g (exclude the code)
L151× ø 29mm
2.0m
2 ) Compact Type
Model
Speed
Max. Torque
Weight
Dimensions
Code Length
UMXL-C 2M
1,000~50,000 min-1
6 N·cm
181g (exclude the code)
L144 x ø 27mm
2.0m
Trouble Cause / Check Remedy
Please check the following points before sending back instruments for repair.
<Unit / Motor>
15. Troubleshooting
English
No error code
indication
Error code E0
appears.
Error code E1
appears.
Error code E2
appears.
The power plug is disconnected.
The fuse is blown.
Power Switch is faulty.
Power on the Control Unitࠉ
within pressing the Foot Pedal.
The connection of the foot control
cord plug is loose.
Maintenance mode (4) “Pd”:
Check to see if the foot control
operates normally.
Turn on the power again.
Turn on the power again.
If you have two or more units,
replace the motor and the motor
cord and check the operation.
The motor cord is disconnected.
If you have two or more units,
replace the motor and the motor
cord and check the operation.
Insert the power plug correctly.
Replace it with a specified fuse. If the
reason the fuse has blown is unknown,
ask for an inspection.
Ask for repair.
Power on the Control Unit without
pressing the Foot Pedal. When it does
not work definitely, take off the Foot
Pedal cord plug from the Control Unit
and Power it on. If it does not operate
correctly, ask for your dealer.
Even after you tried above and the
Control Unit could not operate
normally, contact your dealer for repair.
Connect the foot control cord plug
correctly.
If the foot control dose not operates
normally, ask for repair of the foot
control or replace it with a new one.
If the same error code appears, ask for
repair of the unit.
If it operates normally, the error display
is temporarily due to overload, which is
not a problem.
If it operates normally after replacing
the motor and the motor cord, the
motor and/or the motor cord may be
shorted. Ask for repair of the motor
and/or the motor cord. If the same
error code still appears after replacing,
ask for repair of the unit.
Connect the motor cord correctly.
If it operates normally after replacing
the motor and the motor cord, the
motor and/or the motor cord may be
severed. Ask for repair of the motor
and/or the motor cord. If the same
error code still appears after replacing,
ask for repair of the unit.
The motor and handpiece do not run, or Reset Lamp lights.
Pilot Lamp does not
light
Control Unit display
“—“and “Setting
Rotation Speed”
alternately.

16 17
<Handpiece>
Trouble Cause / Check Remedy
The handpiece does
not run with the
chuck tightened.
Heat is generated
during rotation.
Vibration or noise
occurs during rotation.
Runout of the bur is
heavy.
The bur comes out
Entry of foreign matter in the ball
bearings or seizure.
Entry of foreign matter in the ball
bearings, causing wear of the bearings.
Same as the above.
A bent bur is used.
Dust may be stuck in the chuck or
spindle.
The chuck is worn.
The ball bearings are worn.
The chuck is loose.
Send it to your dealer. Ask for
repair.
Same as the above.
Same as the above.
Replace the bur.
Clean the inside of the chuck and
spindle.
Replace the chuck.
Send it to your dealer.
Tighten the chuck securely. (See
12. Handling of Motor and
Handpiece.)
Trouble Cause / Check Remedy
The motor and handpiece do not run, or Reset Lamp lights.
Trouble Cause / Check Remedy
The rotation speed
does not rise.
The air turbine does
not rotate.
English
Error code E9
appears.
Error code EF
appears.
If you have two or more units,
replace the motor cord and
check the operation.
Maintenance Mode (3) “Pd”:
Check whether Foot Pedal
operates normally by Foot Pedal
Chuck.
The maximum rotation speed for
operation by Foot Pedal should
be set with the Speed Control
Knob.
The connector of the turbine
adapter is disconnected.
The tube connected to the air line
kit is bent or pinched.
The turbine adapter is faulty
and/or the Ultimate XL-K/D is
faulty.
If it operates normally after replacing
the motor cord, the motor and/or the
motor cord may be shorted. Ask for
repair of the motor and/or the motor
cord. If the same error code still
appears after replacing the motor
cord, ask for repair of the unit.
If it does not operate normally, change
the Foot Pedal for new or ask for
repair.
Check the connector of the turbine
adapter, and re-insert it correctly.
Check the tube to the air line, and flow
the air.
Ask for repair of the turbine adapter
and/or the Ultimate XL-K/D unit.
Ask for repair of the turbine adapter
and/or the Ultimate XL-K/D unit.
The motor and handpiece do not run,
or Reset Lamp lights.
Error code E3
appears.
Error code E4
appears.
Error code E5
appears.
Error code E6
appears.
Error code E8
appears.
The motor cord is disconnected.
Maintenance mode (3) “HL”:
Confirm whether you work by a
motor signal check normally.
The chuck is open.
Check turning a tip with a finger
lightly and turning around it
lightly.
After stopping to cool it down
place for about 10 minutes,
check the operation again.
Vacuum-coupled Mode is on,
while the dust collector is not
used.
Turn on the power again, and
repeat starting and stopping
several times.
The chuck is open.
Check turning a tip with a finger
lightly and turning around it
lightly.
Maintenance mode (3) “HL”:
Confirm whether you work by a
motor signal check normally.
Turn on the power again.
If you have two or more units,
replace the motor cord and
check the operation.
Connect the motor cord correctly.
If any problem is found during a check,
the motor cord may be severed or the
sensor in the motor may be faulty. Ask
for repair.
Lock the chuck.
If the rotation is abnormal, ask for
repair of the motor and handpiece.
If it operates normally, there is no
problem. Check the operating
environment, storage location, etc., for
high temperature. If the same error
code appears frequently, ask for repair
of the unit.
Make the Vacuum-coupled Mode to
be off. See Vacuum-coupled Mode
section in the manual.
If it operates normally, there is no
problem. If the same error code
appears, ask for repair of the unit.
Lock the chuck.
If the rotation is abnormal, ask for
repair of the motor and handpiece.
If any problem is found during a check,
the motor cord may be severed or the
sensor in the motor may be faulty. Ask
for repair.
Error indication is a temporary thing by
the overload if I work normally. There is
not it abnormally.
If it operates normally after replacing
the motor cord, the motor and/or the
motor cord may be shorted. Ask for
repair of the motor and/or the motor
cord. If the same error code still
appears after replacing the motor
cord, ask for repair of the unit.

18
Please consult with dealer from whom you purchased it about waste disposal.
16. Disposing Product
Other manuals for ULTIMATE XL-K
1
This manual suits for next models
3
Table of contents
Other NSK Laboratory Equipment manuals
Popular Laboratory Equipment manuals by other brands

Holbach
Holbach MBASS30V3 operating manual
BRUEL & KJAER
BRUEL & KJAER 4128-C user manual

horiba
horiba 7544 instruction manual

Thermo Scientific
Thermo Scientific Heraeus Multifuge X3F instruction manual

Sartorius
Sartorius WZA N Series installation instructions

Steris
Steris Reliance 5000 Series Operator's manual
