manuals.online logo
Brands
  1. Home
  2. •
  3. Brands
  4. •
  5. Num'axes
  6. •
  7. Pet Care Product
  8. •
  9. Num'axes Canifugue Small User manual

Num'axes Canifugue Small User manual

User’s guide CANIFUGUE SMALL – indice A
1/12
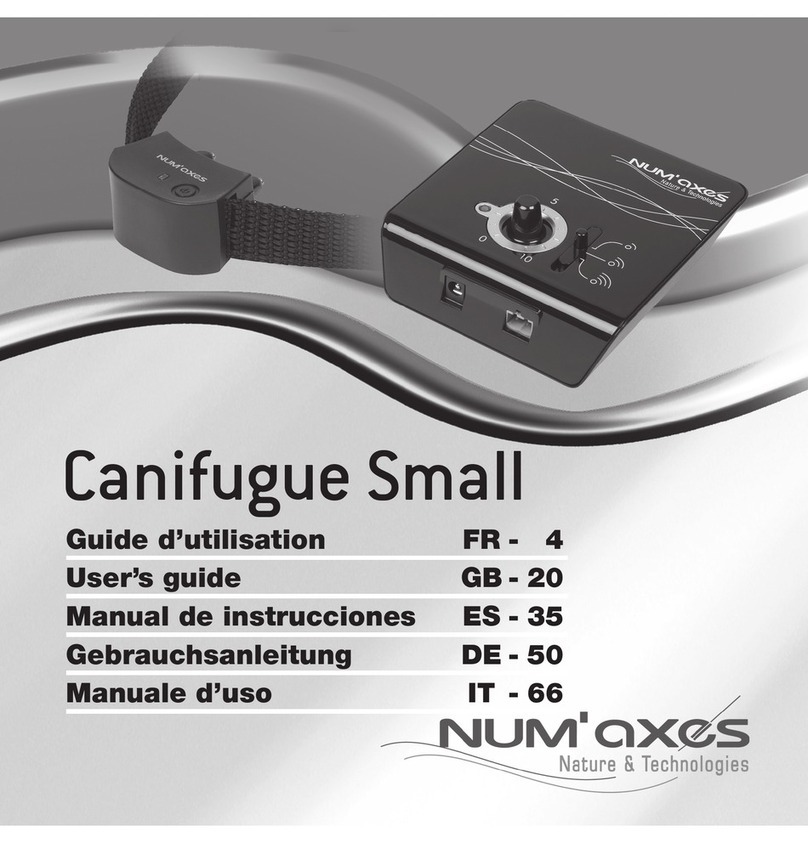
Canifugue Small
USER’S GUIDE
DECLARATION « CE » DE CONFORMITE / « EC » DECLARATION OF CONFORMITY
Directive R&TTE 1999/5/CE
NUM’A ES
déclare que / declares t at
l’ensemble anti-fugue / t e pet fencing system
Canifugue Small
satisfait à toutes les dispositions de la Directive R&TTE N° 1999/5/CE du 07/04/99 du Conseil Européen
complies to all dispositions of t e European Council R&TTE Directive below N° 1999/5/EC
Canifugue Small
Boîtier émetteur et collier récepteur
ETSI EN 61000-4-3 : EN 301 489-3 / EN 61000-6-1 / EN 61000-6-3
ETSI EN 301 489-3 : 2013 V1.6.1
ETSI EN 300 330-2 V1.5.1
ETSI EN 62479 : 2010 (R&TTE 1999/5/CE DBT 2006/95/CE)
ETSI EN 60335-1 : 2012
FCC 47 CFR PART 15 : 2014
ICES-003 / NMB-003 ed5 : 2012
0536
Pour utilisation dans les pays suivants / For use in t e marked countries:
FR, DE, IT, BE, NL, LU, GB, PT, SE, FI, DK, GR, ES, IE, NO, AT
NUM’A ES
Z.A.C. des Aulnaies – 745 rue de la Bergeresse – CS 30157
45161 OLIVET CEDEX – FRANCE
Tél. + 33 (0)2 38 63 64 40 / Fax + 33 (0)2 38 63 31 00
30/04/2015 – M. Pascal GOUACHE – Président du Directoire
T ank you for c oosing a NUM’AXES product.
Before using your pet fencing system, please read t e instructions in t is guide carefully and keep it for future
reference.
User’s guide CANIFUGUE SMALL – indice A
2/12
Important safety and product information
−T is device can be used by c ildren aged 8+ and also disabled people,
sensory and mentally andicapped people or people wit out knowledge
or experience provided t ey stay under strict supervision or t ey ave
received sufficient instructions on ow to use t e device safely, and
potential risks ave been evaluated. C ildren s all not play wit t e
device. Cleaning and maintenance by user s all not be done by c ildren
wit out surveillance.
−Before using t e collar, we strongly advise you to ave your pet
c ecked by your vet to ensure e is fit to wear a collar.
−Do not use t e collar wit pets t at are not in good p ysical s ape (i.e.
cardiac problems, epilepsy…) or ave be avioral problems
(aggressiveness…).
−C eck your pet’s neck regularly as repeated rubbing of t e contact
points against t e animal’s skin may cause irritation. If t is appens,
remove t e collar until all signs of skin irritation ave disappeared. Do
not leave t e collar more t an 8 ours per day on your pet.
−You can start using t e collar wit 6-mont -old puppies t at ave
already received some basic training.
−T e collar is equipped wit 8 levels of stimulation. Always start wit t e
lowest level of stimulation t en define t e level from w ic your pet
reacts by increasing gradually.
−Do not esitate to contact a professional trainer for any furt er advice.
User’s guide CANIFUGUE SMALL – indice A
3/12
●Foreword
T e understanding between a pet and is owner as existed since a long time.
Nonet eless, a pet is often guided by is natural instincts and breaks t e rules is master as taug t im, causing
complaints about straying and damages suc as: damages to flowerbeds, jumps into swimming pools, etc.
More seriously, e may be t e victim or t e cause of road accident.
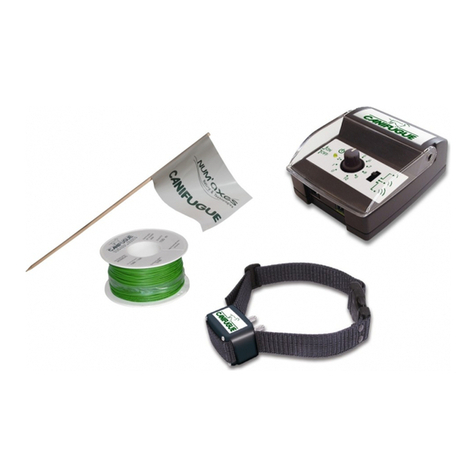
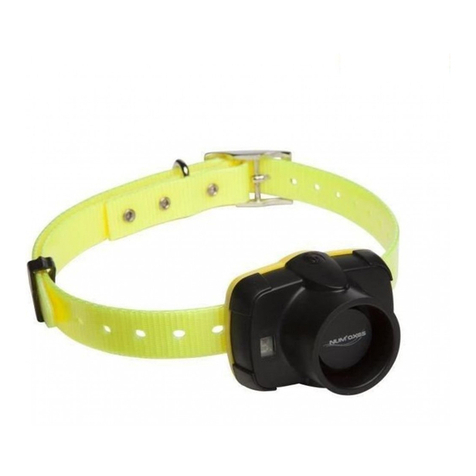
T e CANIFUGUE SMALL pet fencing system is a modern and ig ly effective system enabling you to keep one or more
cats and dogs in complete freedom wit in a perimeter, fenced or unfenced, you ave defined.
●Contents of the product
-1 collar fitted wit s ort contact points -1 transmitter connector
-1 c arger station and its power unit -1 set of 10 flags
-1 breakaway nylon strap -1 magnetic key (magnet)
-1 transmitter -1 neon test lamp
-1 power unit for t e transmitter -1 pair of long contact points
-1 spool of antenna wire (100 m) -1 CD-ROM
-3 antenna wire connectors -t is user’s guide
●Presentation of the product
Antenna socket
Power jack
Stimulation area
adjustment button
Indicator lig t:
On/Off indicator
Warning area
adjustment button
Diagram 1 Diagram 2
Diagram 3
Nylon strap
Contact points
(s ort or long)
Indicator lig t:
On/Off indicator
+
battery level indicator
symbol:
area w ere t e switc magnet is located
T is magnet allows you
to switc On/Off t e collar
and to select t e level of stimulation
Magnetic key
(magnet)
User’s guide CANIFUGUE SMALL – indice A
4/12
●How the pet fencing system works
You can define your pet’s play area by installing a wire, called antenna wire, around t e aut orized perimeter. T is
wire placed on t e ground, buried or raised on an existing fence carries a radio signal from t e transmitter.
W en your pet, wearing a receiver collar, approac es t is wire, e is warned by beep sounds t at e is too close to an
area w ere e is not allowed; t en if e carries on, static stimulations will be emitted by t e collar. Your pet will ave
to leave t e unaut orized area to stop t e stimulations and beep sounds.
An unlimited number of receiver collars can be used with one transmitter: you can keep as many cats and
dogs as you wish safely in the same area.
T e CANIFUGUE SMALL pet fencing system as been designed to give you complete satisfaction wit an antenna wire
wit a maximum lengt of 400 meters (equivalent to one square ectare). If a longer antenna wire is used, t e pet
fencing system will still work, but t e warning and stimulation zones will be markedly reduced.
●Installing the pet fencing system
Transmitter
T e transmitter must be installed indoors in a dry location: t e transmitter can wit stand c anges in temperature but
will be damaged by water. Make sure t e transmitter is correctly and surely fixed (for example, screw it to a wall).
Install t e transmitter in a garage or garden s ed near an electrical outlet (220 V AC).
Antenna wire
For t e system to operate, t e wire must be connected to t e transmitter and form a continuous loop from t e
transmitter and back again. T e outward and inward wires must be spaced 2 meters apart to avoid cancelling t e
signal.
0.52 mm² or 1.5 mm² wire can be used (you can combine several wire sections).
T e wire sections recommended depending on t e lengt of t e system are as follows:
−for less t an 400 m of antenna wire: 0.52 mm²
−from 400 to 800 m of antenna wire: 1.5 mm²
From t e transmitter, unroll t e wire around t e perimeter you wis to protect. To run t e wire from your garage or
garden s ed, pass it t roug a window, door or similar.
T e wire can be placed on t e ground, buried (maximum: 10 cm deep) or fixed to a non-metallic existing fence or
wall (best eig t: your pet’s neck eig t). If you plan on burying t e wire, make sure your installation is functioning
properly before doing so. You can protect t e wire by running it t roug PVC pipe or a lengt of garden ose.
T e wire must not be taut as variations in temperature may cause it to expand or contract. In t e corners, do not
make rig t angles but prefer rounded corners wit a large radius.
Separate t e wire by at least 2 meters from a metallic gate or one meter from a metallic fence.
Do not install t e antenna wire near an electrical cable, telep one cable, television cable or satellite dis es.
In order to prevent any interference, do not run t e wire wit in 3 meters or parallel to electrical cables. If you must
cross electrical wires, telep one wires or television cables, do so at 90 degree angles.
If you need more t an 100 m of antenna wire, you must connect t e different lengt s of wire using t e supplied
connectors (t e wire does not need to be stripped). You can purc ase additional wire and connectors from your
supplier at any time.
To ensure your pet does not receive any warning or stimulation in certain free areas (e.g. between t e transmitter in
t e garage and t e edge of your property) you ave to twist t e outward wire around t e inward wire. T e twists
prevent radio waves from being emitted (ref. Diagram 4).
Once t e loop is completed and you are back to t e transmitter, strip t e two ends of t e wire to connect t em to t e
supplied transmitter connector (connect eac wire wit eac connector screw). T en, insert t is connector into t e
antenna socket located on t e transmitter (ref. Diagram 2 – t e connector is slanted. If you can’t insert it, turn it 1/2
turn).
Flags
User’s guide CANIFUGUE SMALL – indice A
5/12
T e flags are a temporary visual aid for your pet during t e training process. T ey enable your pet to visualize t e
area w ere e can move freely and t e boundaries e must not cross.
We recommend installing t e flags at t e inner edge of t e warning zone at s ort intervals. Do not place t e flags at
t e antenna wire.
Once your pet is familiar wit t e boundaries, t e flags can be gradually removed.
Layout of your installation
Before starting t e installation of your pet fencing system, it may be useful to draw a layout of t e installation.
Once t e installation is completed, note t e location of t e wire connectors on t e layout you drew for future
reference. In case of connection default, you will find t em more easily.
AUTOMATIC SYSTEM
As soon as t e animal wearing a collar enters t e protected area, e is warned by beep sounds.
If e continues to move forward, towards t e antenna wire, t e collar emits stimulations.
T e antenna wire is placed on t e ground, buried or raised on an existing fence.
For t e system to function, t e wire must form a continuous loop.
Bot wires (inward and outward) must be spaced 2 meters apart.
●Activate/deactivate the transmitter
▪Activate: connect t e transmitter to t e power supply by plugging t e AC adapter into t e power jack on t e
transmitter and into a wall outlet. T e green indicator lig t on t e transmitter comes on, the transmitter is
On.
▪Deactivate: disconnect t e AC adapter from t e wall outlet. T e green indicator lig t on t e transmitter goes
out, the transmitter is Off.
NOTE: do not connect t e transmitter to t e power supply before connecting t e antenna wire to t e antenna socket.
T e wire break alarm would alert you to a connexion default (ref. § Safety features – wire break alarm).
Transmitter
Stimulation
area
Warning
area
By twisting t e outward strand wit
t e inward strand, wave emission is
blocked and t e animal can move
freely wit in t is zone.
2 m
between
bot wires
Antenna wire
Diagram 4 – Sample installation
Twisted
wire

Other Num'axes Pet Care Product manuals

Num'axes EYENIMAL NGDISCRO006 User manual

Num'axes

Num'axes EYENIMAL NGDISCRO006 User manual

Num'axes EYENIMAL NGDIVEYE002 User manual

Num'axes

Num'axes EYENIMAL NGDIVEYE002 User manual

Num'axes IKI PULSE User manual

Num'axes

Num'axes IKI PULSE User manual

Num'axes EYENIMAL User manual

Num'axes

Num'axes EYENIMAL User manual

Num'axes CAT VIDEOCAM User manual

Num'axes

Num'axes CAT VIDEOCAM User manual

Num'axes CANICOM 1500 PRO User manual

Num'axes

Num'axes CANICOM 1500 PRO User manual

Num'axes Canicalm spray User manual

Num'axes

Num'axes Canicalm spray User manual

Num'axes Expert 600 User manual

Num'axes

Num'axes Expert 600 User manual

Num'axes Canicom 5.201 User manual

Num'axes

Num'axes Canicom 5.201 User manual

Num'axes Canicom 500 User manual

Num'axes

Num'axes Canicom 500 User manual

Num'axes Canicom Spray User manual

Num'axes

Num'axes Canicom Spray User manual

Num'axes Canicom 200 User manual

Num'axes

Num'axes Canicom 200 User manual

Num'axes EYENIMAL User manual

Num'axes

Num'axes EYENIMAL User manual

Num'axes Canicom 200 First User manual

Num'axes

Num'axes Canicom 200 First User manual

Num'axes Canifugue Mix FUG1031 User manual

Num'axes

Num'axes Canifugue Mix FUG1031 User manual

Num'axes Canifugue User manual

Num'axes

Num'axes Canifugue User manual

Num'axes Canicalm Premium User manual

Num'axes

Num'axes Canicalm Premium User manual

Num'axes Indoor Pet Control User manual

Num'axes

Num'axes Indoor Pet Control User manual

Num'axes Intelligent Pet Bowl XL User manual

Num'axes

Num'axes Intelligent Pet Bowl XL User manual

Num'axes Canicom 1000 User manual

Num'axes

Num'axes Canicom 1000 User manual

Num'axes Canicalm Excel Installation instructions

Num'axes

Num'axes Canicalm Excel Installation instructions

Num'axes PET at SCHOOL Soft User manual

Num'axes

Num'axes PET at SCHOOL Soft User manual

Num'axes Canicalm Small User manual

Num'axes

Num'axes Canicalm Small User manual

Num'axes EYENIMAL Outdoor Bark Control User manual

Num'axes

Num'axes EYENIMAL Outdoor Bark Control User manual

Popular Pet Care Product manuals by other brands

PitPat PP02 user manual

PitPat

PitPat PP02 user manual

Schwinn Rascal owner's manual

Schwinn

Schwinn Rascal owner's manual

K&H Small Animal quick start guide

K&H

K&H Small Animal quick start guide

SHOR-LINE 006.3230.00 Product guide

SHOR-LINE

SHOR-LINE 006.3230.00 Product guide

Petsafe Stubborn Dog Receiver Collar operating guide

Petsafe

Petsafe Stubborn Dog Receiver Collar operating guide

juwel Rio 240 instruction manual

juwel

juwel Rio 240 instruction manual

Datamars OMNI MAX user manual

Datamars

Datamars OMNI MAX user manual

Trixie 24444 instructions

Trixie

Trixie 24444 instructions

Roverpet 30DDPP Assembly instructions

Roverpet

Roverpet 30DDPP Assembly instructions

SportDOG SD-105S-C manual

SportDOG

SportDOG SD-105S-C manual

Staywell 400 Series Magnetic user guide

Staywell

Staywell 400 Series Magnetic user guide

Dogtek Sonic Birdhouse user guide

Dogtek

Dogtek Sonic Birdhouse user guide

Togfit Deluxe Trigger Lock Door Gate Instructions for use

Togfit

Togfit Deluxe Trigger Lock Door Gate Instructions for use

Girafus 227PA user manual

Girafus

Girafus 227PA user manual

ubbink KoiFeeder Solar operating instructions

ubbink

ubbink KoiFeeder Solar operating instructions

Petsafe ST-100 operating guide

Petsafe

Petsafe ST-100 operating guide

CADOCA Deuba 106911 instructions

CADOCA

CADOCA Deuba 106911 instructions

Dogtra RR Deluxe owner's manual

Dogtra

Dogtra RR Deluxe owner's manual

manuals.online logo
manuals.online logoBrands
  • About & Mission
  • Contact us
  • Privacy Policy
  • Terms and Conditions

Copyright 2025 Manuals.Online. All Rights Reserved.