DESCRIPTION
The PolyMatrix nVent RAYCHEM PMKG-J2LP is a NEMA 4X rated
connection kit for use with nVent RAYCHEM BTV-CR, BTV-CT, QTVR-CT,
XTV-CT, KTV-CT and LBTV2-CT self-regulating heating cables.
Materials for one powered splice are included in this kit.
For technical support call nVent at (800)545-6258.
TOOLS REQUIRED
• Screwdriver • Needle-nose pliers
• Wire cutters • Utility knife
• Adjustable pliers
• Heat gun or mini-torch (for LBTV2 only)
ADDITIONAL MATERIALS REQUIRED
• Pipe straps
• Tape
– GT-66 Installation temperature above 40°F (5°C)
– GS-54 Installation temperature above –40°F (–40°C)
• HCS-100-A (Required for LBTV2)
• Grommets (Required for KTV and LBTV2)
This component is an electrical device which must
be installed correctly to ensure proper operation
and to prevent shock or fire. Read these important
warnings and carefully follow all of the installation
instructions.
• To minimize the danger of fire from sustained
electrical arcing if the heating cable is damaged
or improperly installed, and to comply with the
requirements of nVent and the 1996 National Electrical
Code, ground-fault equipment protection must be used
on each heating cable branch circuit. Arcing may not
be stopped by conventional circuit protection.
• Component approvals and performance are based
on the use of specified parts only. Do not use
substitute parts or vinyl electrical tape.
• The black heating cable core and fibers are
conductive and can short. They must be properly
insulated and kept dry.
• Damaged bus wires can overheat or short.
Do not break bus wire strands when scoring the
jacket or core.
• Keep components and heating cable ends dry
before and during installation.
HEALTH HAZARD. Prolonged or repeated contact with
the sealant in the core sealer may cause skin irritation.
Wash hands thoroughly. Overheating or burning the
sealant will produce fumes that may cause polymer fume
fever. Avoid contamination of cigarettes or tobacco.
Consult MSDS RAY/5510 for further information.
CHEMTREC 24-hour emergency telephone:
(800) 424-9300
Non-emergency health and safety information:
(800) 545-6258.
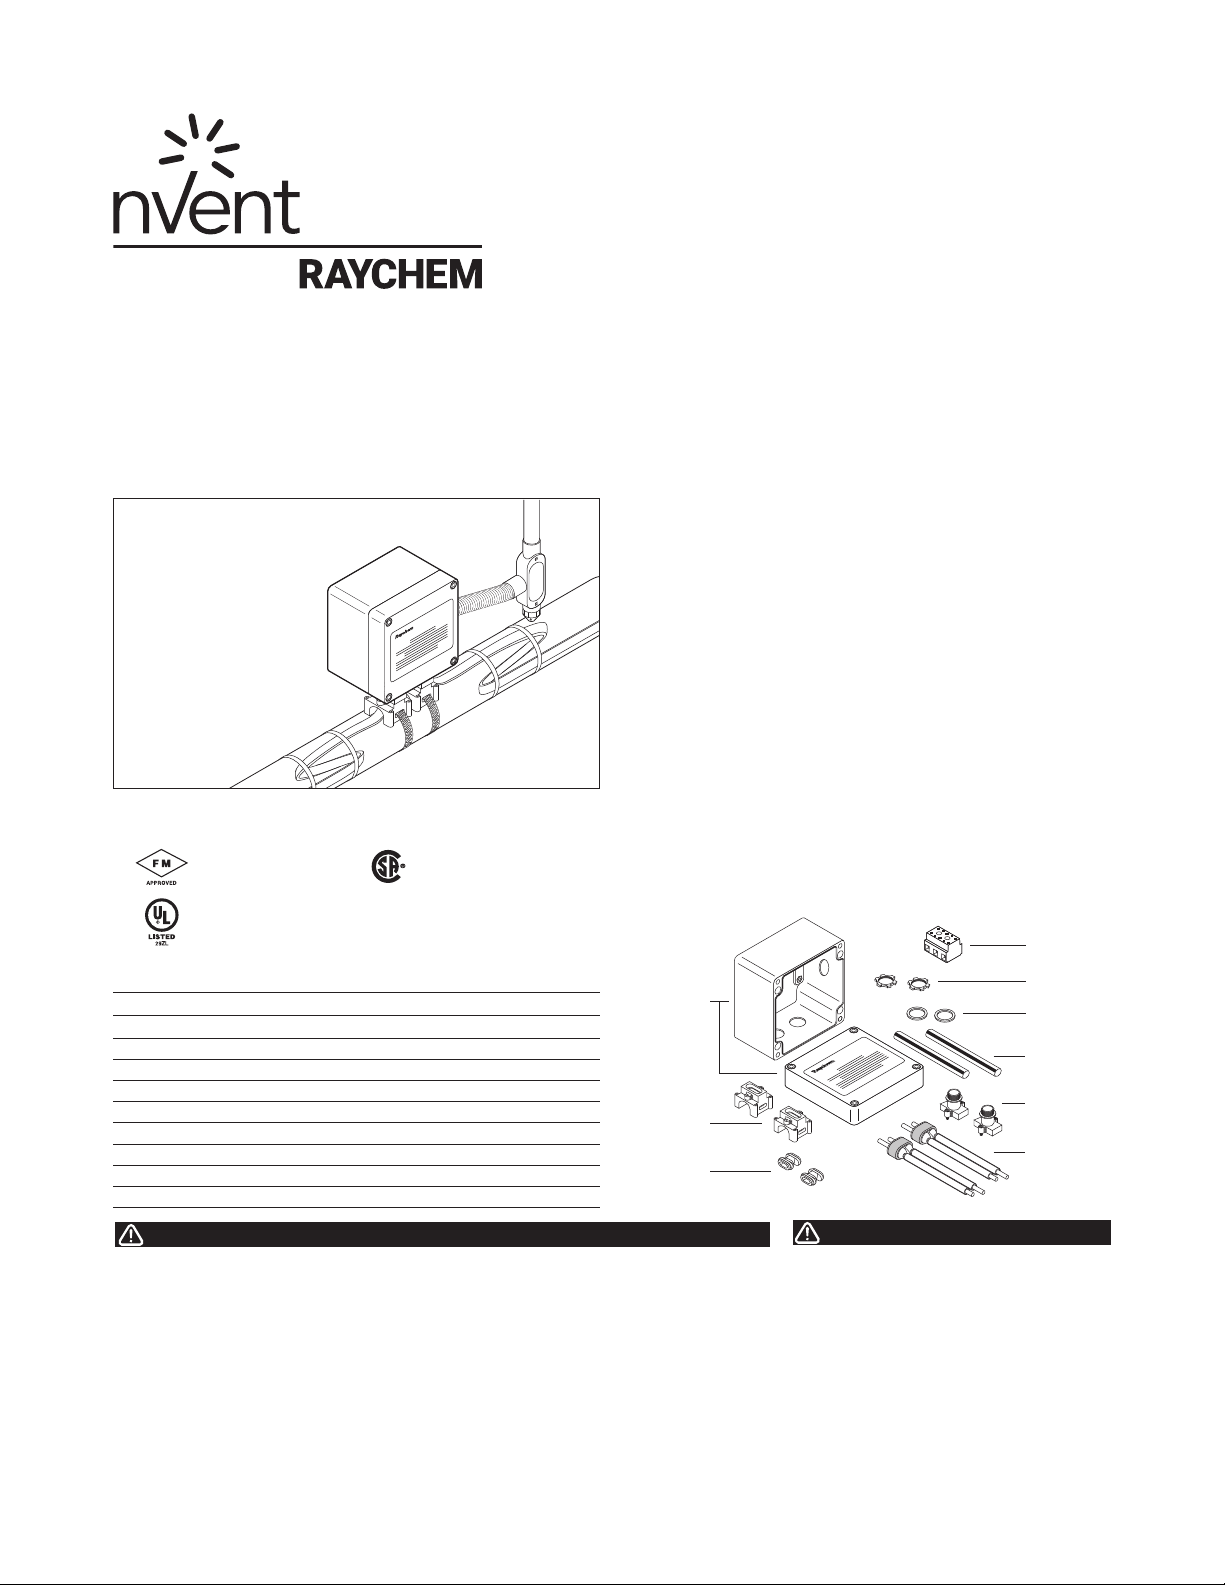
KIT CONTENTS
Item Qty Description
A 1 Junction box with lid
B 2 Bases
C 2 Red grommets
D 2 Core sealers
E 2 Tops (3/4 inch NPS thread)
F 2 Green/yellow heat-shrinkable tubes
G 2 Ring gaskets
H 2 Locknuts
I 1 Terminal block
A
B
C
F
E
D
G
H
I
APPROVALS
Hazardous Locations
Class I, Div. 2, Groups B, C, D
Class II, Div. 2, Groups F, G
Class III
Class I, Div. 2, Groups A, B, C, D
Class II, Div. 2, Groups F, G
Class III
Class I, Div. 2, Groups A, B, C, D
Class II, Div. 2, Groups F, G
For BTV and LBTV Heating Cable Systems Only
PMKG-J2LP
Polymatrix Powered Splice Kit Installation Instructions


