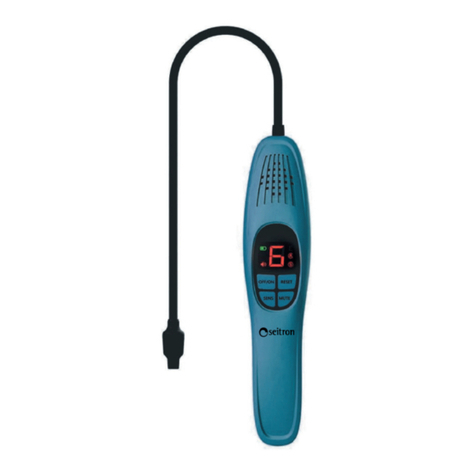
Oceanus OC-905 User manual

OC-905
Portable gas detector
Operating Manual
Henan Oceanus

- 2 -
Attention:
1. All operators who operate and test our company’s factory instrument must
read this manual carefully before operation. Only the instrument of this company
is operated according to the operation manual of this company, can the instrument
work normally.
2. The usage of the instrument of this company must conform to the
regulations confirmed by the operation manual. The maintenance of the
instrument and changing of the parts must adopt accessories offered by this
company, and the maintenance operators must be the works who have been
trained.
3. If the user repairs this product or change accessories arbitrarily and does
not conform to the above-mentioned manual, the operator shall be responsible for
the reliability of the instrument. And this company is not responsible for the
warranty.
4、The instrument should be calibrated every half year; the flame-proof piece
of the instrument sensor or the waterproof and breathable memebrane should be
cleared or changed periodically, or the detection sensitivity would be affect
because the dust and impurities would block the protective hole.
5. The usage of this instrument also should conform to the laws and
regulations of the domestic relevant departments and instrument management of
the factory.
6. Determined by the characters of the sensor, the instrument should be
calibrated every three months (the company can offer the standard gas).

- 3 -
7. The sensor is the sensitive part, so if the measuring environment is full of
lamp black, moisture, and dust, the filtering pretreatment is necessary, or the
sensor is easy to be damaged.
8. The instrument adopted the electrochemical sensor must not be exposed in
the high concentration gas (except the oxygen), or poisoning and decreasing
service life of the sensor is easy to happen.
9、When pipeline instrument makes the operation of calibration and gas
detection, the flow shall be controlled within 160-200ml/min, or the value would
be unsteady or inaccurate.
I. Application and fundamental principles:
Firstly, thanks you for choosing OC-905 series portable gas detector .
OC-905 portable gas detector is a high-end detector, which adopts the full
metal shell. OC-905 adopts the brand new imported sensor and 32-bit low power
processor; the circuit adopts four wiring, which has a good effect on
anti-interference and week signals; the independent high precision imported AD
chip, and with the signal processing algorithm owned by our company make the
accuracy of the measuring result higher and steadier; 2.5 inch lattice display
interface makes the numerical reading more intuitional; the top-ranking process
design makes the quality of OC-905 monolithic. The performance of this
instrument is steady and reliable, which is the advanced level in this industry.
The product is widely used in: the place where need to detect flammable and
combustible, poisonous and harmful gas continuously, such as, petroleum and
petrochemical industry, metallurgy, chemical industry, scorching, municipal
administration, biopharmaceutical, environmental protection, laboratory of school,

- 4 -
automobile exhaust, electric power, shipping, and sewage treatment and so on.
1.1 Safe instruction
The too high or too low of the content of the oxygen can affect the
reading of the flammable gas sensor.
The sudden change of atmospheric pressure may affect the reading of
the oxygen sensor.
The steam of the silicone compound would catalyze the burn type
sensor and cause damage, please make sure that there are no this kind of materials
in the application environment.
In the process of using, please keep cleaning the sensor air inlet. The
bulkhead of the air inlet would make the reading of detector low.
Please do not to disassemble this instrument voluntarily in order to
guarantee that the using of the detector is safe and reliable.
Please do not put this detector in the high temperature, moist or strong
static environment.
Please do not clean this machine using any corrosive liquid.
The user cannot change the parts of this product voluntarily, and should
deal with the breakdown in the process of operation with the maker, which can
completely eradicate damage phenomena.
The installment, use and maintenance should conform to operation
manual, GB3836.13-1997 “explosive air environmental electrical equipments the
thirteen part: the maintenance of the explosive air environmental electrical
equipments”, GB3836.15-2000 “explosive air environmental electrical
equipments the fifteen part: the electrical installment in the dangerous place

- 5 -
(except coal mine)”, GB3836.16-2006 “explosive air environmental electrical
equipments the sixteen part: the check and maintenance of the electric installation
(except coal mine)” and GB50257:1996 “the relevant regulations of “the
explosion of the installation works of electrical equipments and the construction
of electrical installation in the fire dangerous environment”.
II. The appearance of the instrument
The definition of the keypad parts
Key
Definition
▲
[Upper key]the upper direction key
▼
[Lower key] the lower direction key

- 6 -
[Left key] startup or shutdown and shift key
[Right key] return key
[M/OK key] menu/confirmation setting
III. The instrument operation instructions
The operating process of machine: in the holding state, press the startup key,
and the machine enters into the preheating state interface, at the same time, the
backlight is light, the machine enters into the measuring state after completing
preheating, in the measuring state, the machine can measure the environment gas,
after measuring, press shutdown key. In the measuring process, if some
parameters of the machine need to be set, enter into the menu interface to set. The
specific operation process is as follow:
3.1 Startup:
In shutdown mode, long press【 】startup and shutdown key 3 seconds.
3.2. Shutdown:
In the measuring mode, long press 【 】key 3 seconds.
3.3 Preheating state:
After startup, the machine would enter into the preheating interface, and the
preheating time is 60s. In the preheating state, press conformation key, and then
the preheating interface can be skipped. However, this operation is not suggested.
There may be some prompt messages after preheating, and then the machine
would enter into the measuring state.

- 7 -
Note: all sensors have the preheating process, if the preheating time is
skipped, the numerical value may be unsteady or incorrect, so this operation is not
suggested by the maker.
3.4. Measuring state
After completing preheating, the machine enters into the measuring state, and
the measuring interface is generally as follows.
a. The first line displays time and battery capacity.
b. In the second line, co2is the gas type, and the machine display the
different name for the different gas types.
c. In the third line, the big character 850.6 is the air concentration
value---the measuring value. The different measuring results display the
different values.
d. The fourth line displays the unit. At present, the selectable units of the
machine have PPM, %VOL, %LEL, mg/m3. The other units can be
customized specially according to the demand of customers.
3.5 Menu setting interface
The menu interface adopts the classical 9-level menu catalogue, in the

- 8 -
measuring mode, press [menu/confirmation], and then enter into the menu setting
mode, the interface will display:
a. 1 ALARM SET the setting of the alarm value;
b. 2 DATE SET used for setting time;
c. 3 CALI SET calibration setting, can enter into the calibration interface;
d. 4 RECORD SET setting the data record (only valid for part machine);
e. 5 PUMP ON/OFF setting the pump switching, the pump is given tacit
consent to on.
f. 6 EARSE FLASH delete all data of the storage area, aiming at the machine
which has the storage data function;
g. 7 RESTORE SET restore factory setting, the parameter setting of factory
can be restored;
h. 8 ABOUT OC-905 some information which is related to this machine,
such as version No.
i. 9 RETURN, after pressing confirmation, the machine can return to the
measuring interface.
This instrument has 9 setting menus. On the menu interface, press up key, down
key or left key to choose the corresponding settings, and then press CONFIRM
enter into the corresponding setting interface; if you want to return, press the
return key. If the machine has not the pressing operation for a long time, the
machine would return to the measuring interface automatically.
3.5.1. Alarm value setting

- 9 -
On the interface of the alarm value setting, the alarm value of the machine
can be set, of which ALARM LO is the one-level alarm value setting, ALARM HI
is the second-level alarm value. Press left key , you can set the number, and the
corresponding place would reverse video, press the upper and lower key which
can change the corresponding number, after changing the number, press
confirmation key. If the number does not need to be changed, you can press return
key, and return to the last interface.
Note: the one-level alarm value cannot be bigger than the second-level value,
and the alarm value cannot be bigger than the scale span value.
3.5.2 Time and date setting
On the menu interface, pick on the TIME SET, press confirmation, and then
enter into the time setting interface. The current date and time of the system can
be set. Of which the SET DATE is the date setting, from the left to right, it is
year/month/date, SET TIME is the time setting, from left to right, it is
minute-second. If the time and date does not need to be set, press return key, and
the interface can return to the last interface directly.
The setting method is as follows. Press left key, the corresponding setting

- 10 -
place can be changed, the up and down key can change value. After changing,
press CONFIRM to keep the time and date which have been changed. If the time
and date which have been changed do not need to be kept, press return key, logout
the time and date setting interface.
3.5.3 The process of calibration setting
After picking on the calibration setting menu, the system would enter into the
password interface firstly, and put into password 88, and then enter into the
calibration interface. On the calibration interface, the zero and span can be set,
and the calibration result can be checked.
The menu of the calibration interface
On the calibration interface menu, choose 1 ZERO CAL, and then enter into
the zero calibration, when the display number is steady, press confirmation, and
the zero calibration is completed.
Zero calibration
Other Oceanus Gas Detector manuals
Popular Gas Detector manuals by other brands
Macurco
Macurco GD-6 Operation manual
Evikon
Evikon E2632 user manual
Critical Environment Technologies
Critical Environment Technologies CGAS-A Series Installation & operation manual
MSA
MSA altair 5 operating manual

DOD Technologies
DOD Technologies ChemLogic CL96 operating manual
DEGA
DEGA NS III LCD Series instruction manual
