Select button –select a menu option, or select an item in a game or app.
Note: The select button has the same function as the A button on the Xbox controller.
Back button –cancel an option, or move back a screen.
Note: The back button has the same function as the B button on the Xbox controller.
Volume down and Volume up –control the volume in the On-ear Headphones.
Oculus button –press to access the Universal Menu from almost anywhere in Rift S .
(See The Universal Menu.)
Note: If you ever need to replace, or disconnect and reconnect, the Oculus remote, you can
manage your devices in the Devices section of the Oculus app settings. (See Managing your
Oculus Account, Privacy and Devices in the Oculus App)
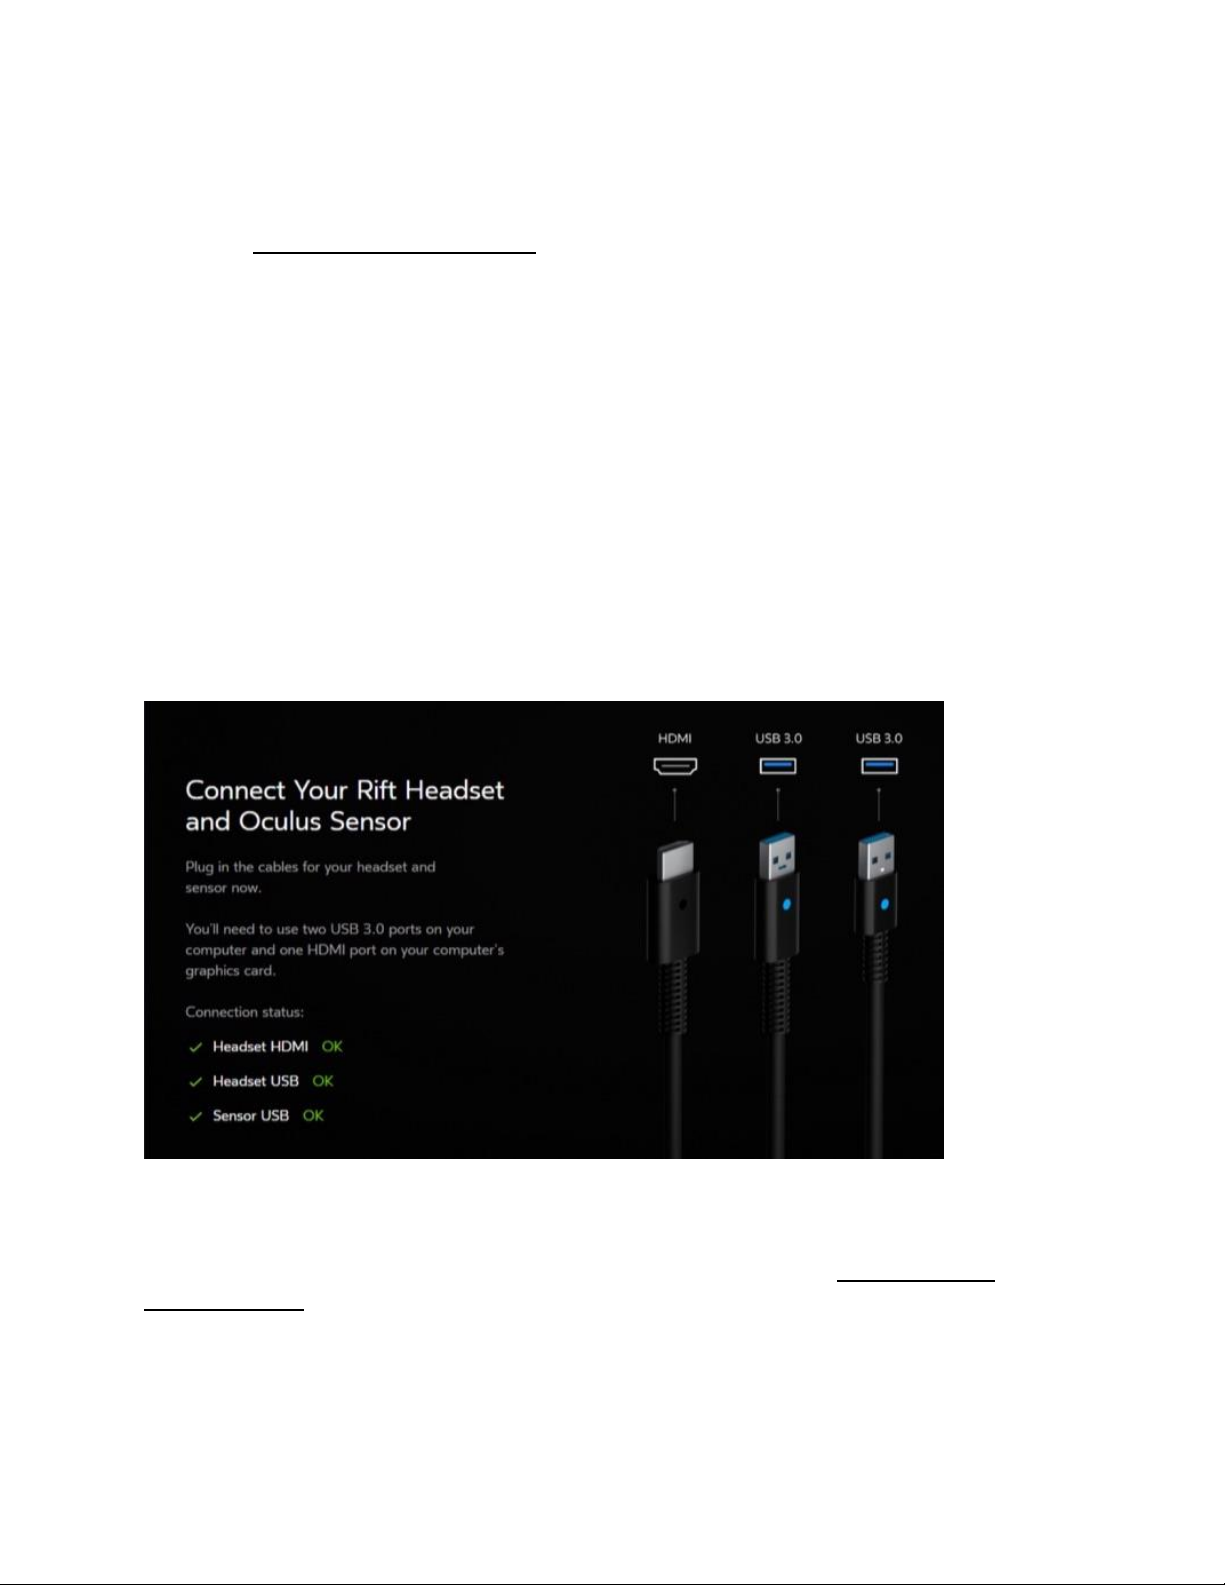
Set Up your Oculus Sensor
The Oculus sensor makes sure that what you're seeing in Rift S tracks your position
and movement.
1. Enter your correct height when asked. This helps ensure that your VR environment looks right
to you.
2. Remove the protective film from the sensor lens (the shiny side of the sensor body).
3. Find a good place for your Oculus sensor. The ideal position is:
Between 1 metre and 2 metres away from your head.
Where nothing will get in the way. Try crouching and stepping sideways to make sure that the
edges of the desk or shelf you're using won't block your view of the sensor. Don't use an area
where people will be walking between you and the sensor.
Where you'll normally be facing. Keep the sensor inside your starting field of view.
On a stable surface. Don't put the sensor on top of your monitor or computer, or anywhere else
where it will vibrate or wobble.
Slightly above your headset. If this isn't possible, it's fine to have it below your head instead.
4. Take the Rift S headset to the spot where you plan to use it.
5. Make sure that the sensor lens (the shiny side) is pointing at your head.
6. Gently adjust the angle of the sensor body on the sensor stand if necessary.
7. Hold the headset just in front of you and move it slowly side to side.