10
The Track Pad is located on top of
the right temple of the smartglasses,
and there is another located on the
Recle Speed Mouse (See Diagram,
Page 14). The Track Pad is an input
device that allows the user to control
the soware interface by swiping
with a ngerp. It is a device that
funcons equally with gloved or
gloveless ngers.
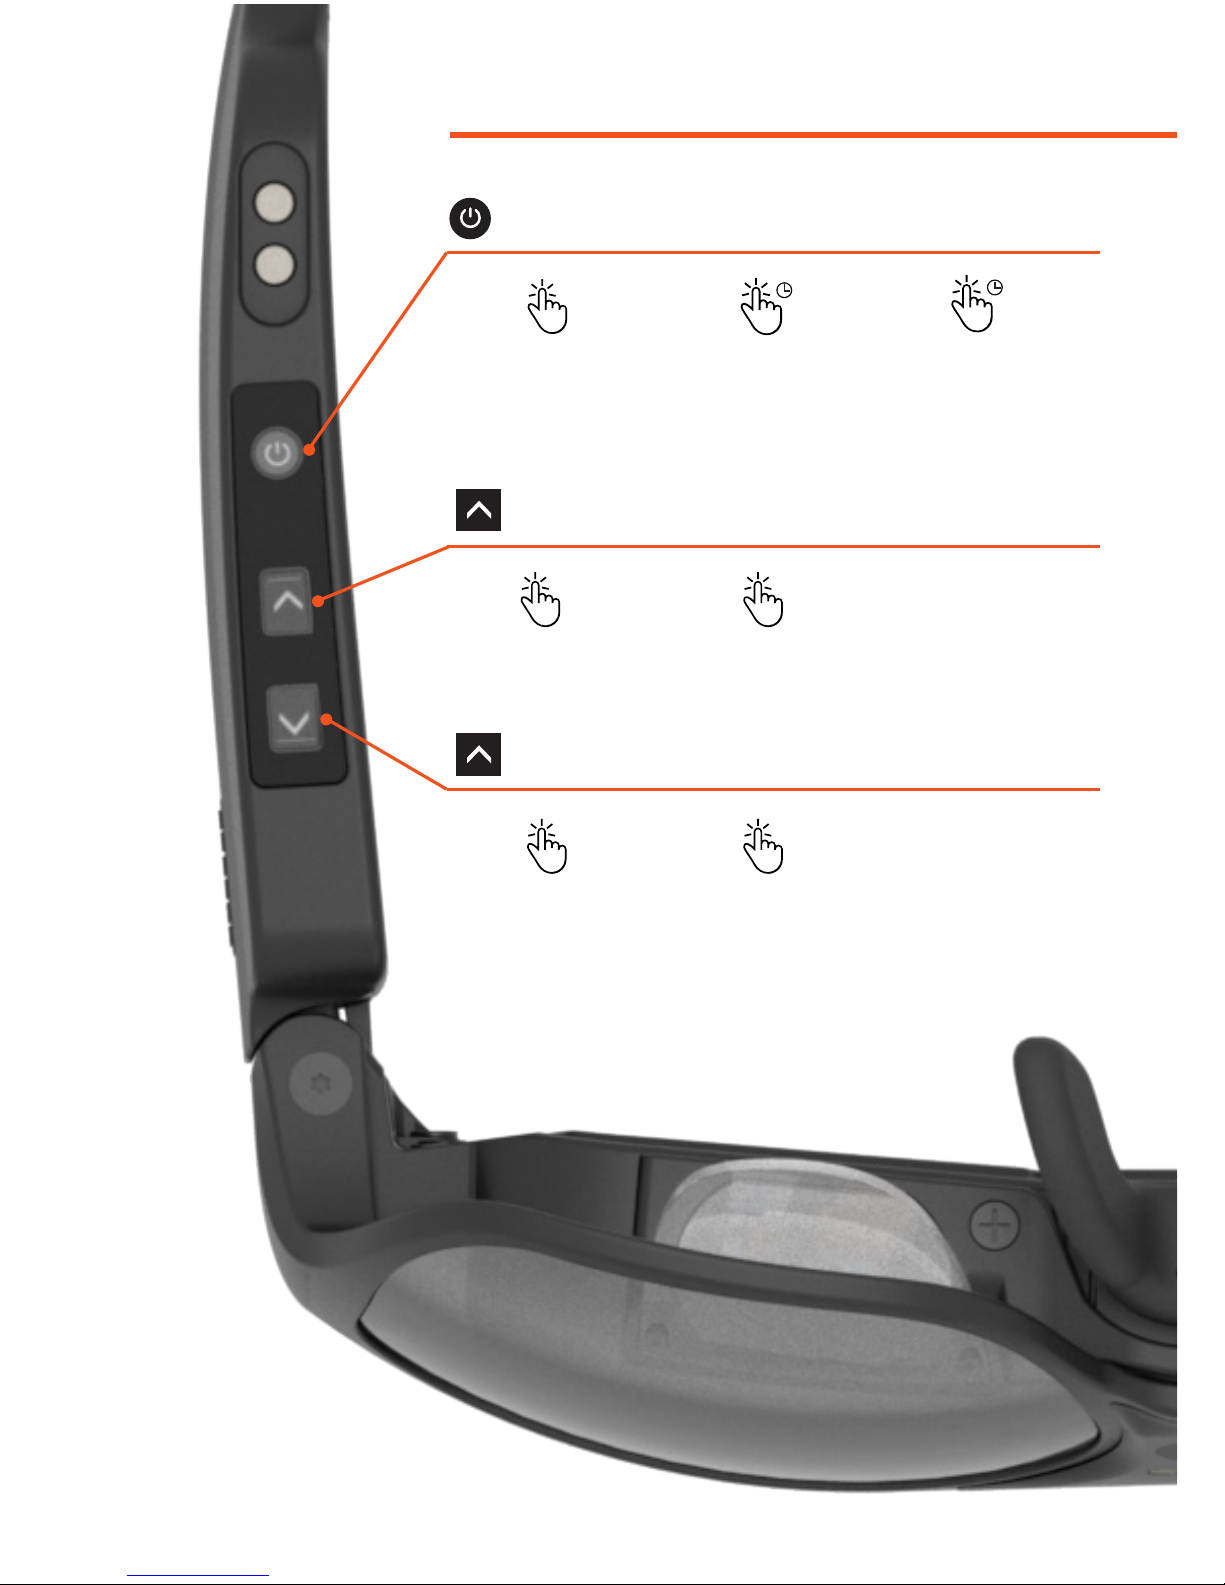
Pressing down on a Track Pad
represents a click or selects an item.
Pressing down for 3 seconds displays
contextual menu on Launcher items
(See Launcher,
Page 12).
There are two modes of the Track Pad input. To switch modes, either press
the mul-funcon buon to toggle modes (See Main Controls, Page 8-9). If the
mul-funcon buon has been re-assigned press Menu once to display the
System Menu, then select Input Mode.
Swiping the Track Pad allows free
movement of the cursor in any
direcon in the same manner as a
computer mouse.
Swiping the Track Pad up, down,
le, or right funcons in the same
manner as standard 4-way arrow
keys on a keyboard, allowing the
user to select items, navigate
through the interface, or scroll.
CURSOR MODE
SELECTOR MODE
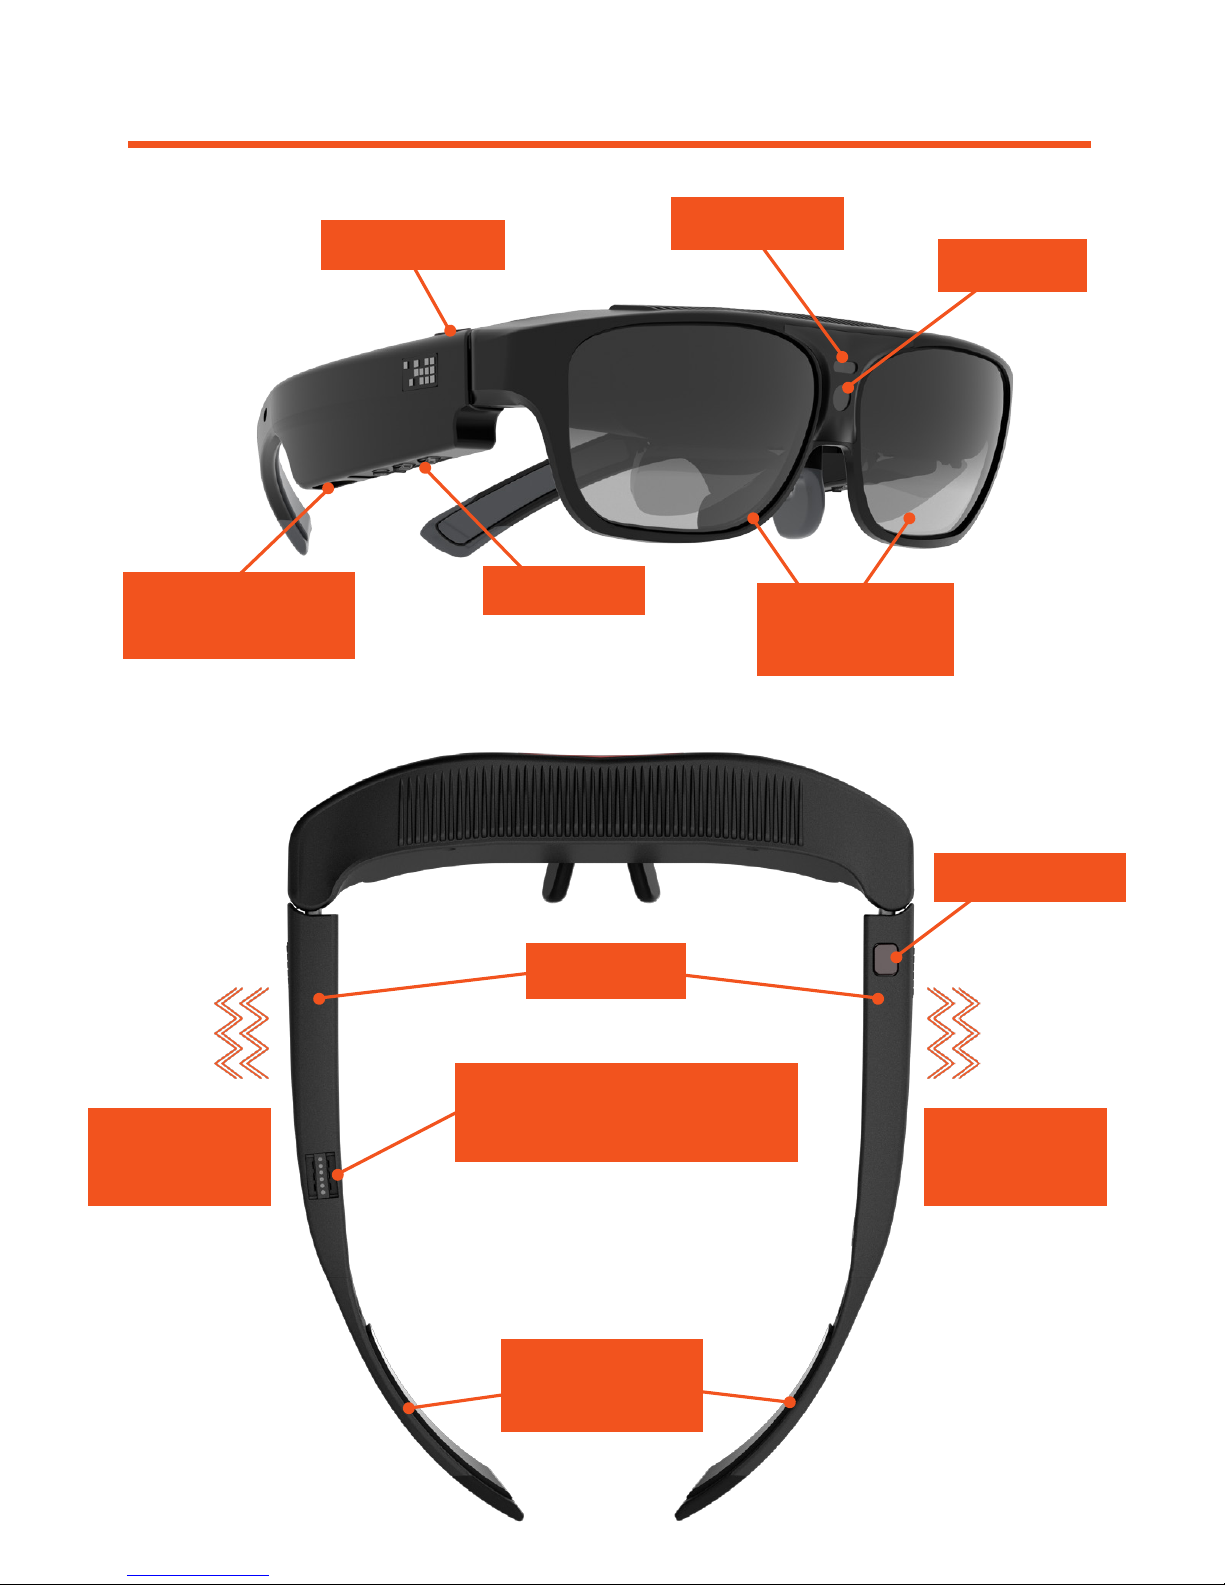
TRACK PAD
INPUT MODES
RIGHT TEMPLE, TOP
Track Pad