2
Operating Instructions and Parts Manual 24571, 24572, 24573, 24574, 24575, 24576, 24631, 24632 and 24633
4/17
2017 OEMTOOLS™
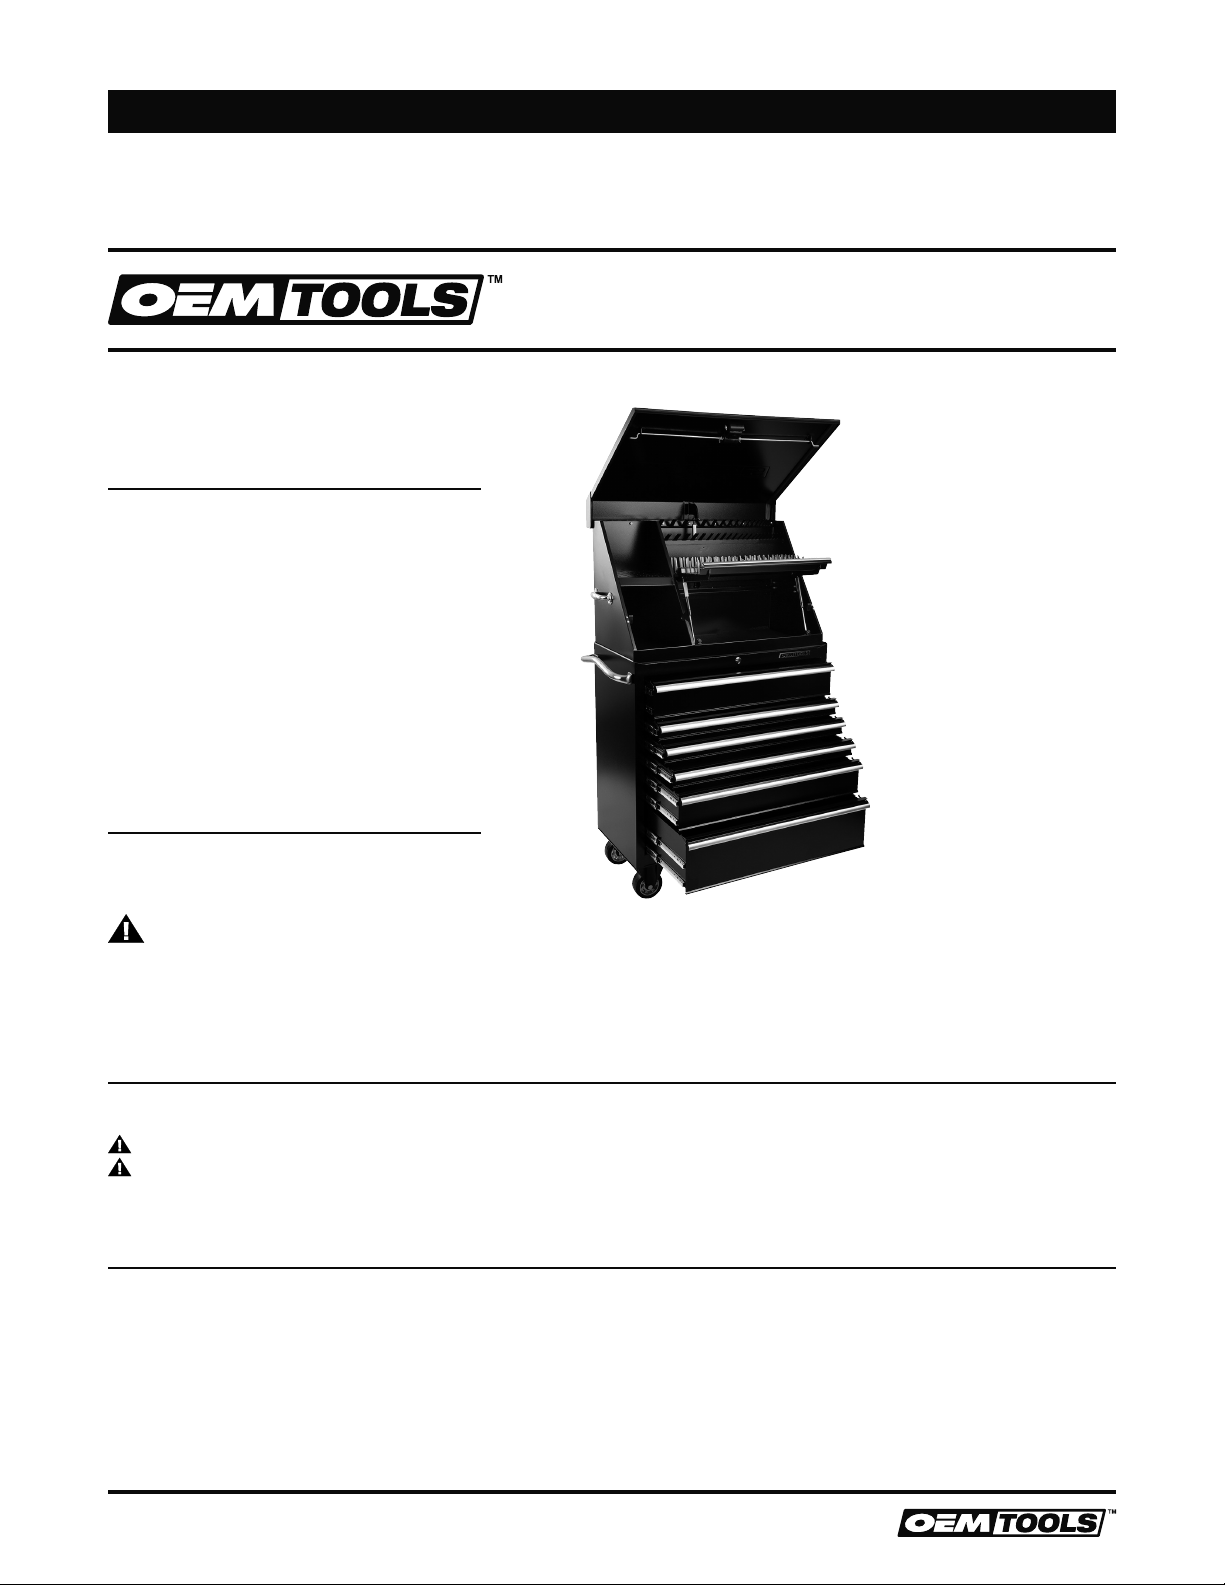
36"x17" Portable Tool Chest and
6-Drawer Tool Cabinet
IMPORTANT INSTRUCTIONS
AND SAFETY RULES
1. The maximum product weight, including contents, for this unit should
be no more than 1100 Lbs. (499 kg).
2. The maximum weight for each drawer should be no more than 100
Lbs. (45 kg).
3. Do not attempt to lift the chest using chains, ropes or lifting devices, if
two people cannot lift the chest by the side handles. Use a forklift placed
under the bottom of the chest if this situation occurs. The side handle
may fail, which may cause personal injury or damage to the product.
4. Close the lid and lock the drawers before moving this product. The
drawers could come open and make the product unstable and tip,
which may cause personal injury or product damage.
5. Be careful when closing the lid. Remove hands before the lid closes
completely to prevent personal injury.
6. DO NOT stand on this product. You may fall, which may cause
personal injury.
7. Wear safety glasses when removing or repositioning the slides.
8. When moving this product, do not pull it. Push the product to prevent
personal injury.
9. Use the brakes when not moving this product. This will prevent the product
from rolling, which may cause personal injury or product damage.
10. Be careful when opening more than one drawer at a time. The
product could become unstable and tip, which may cause personal
injury or product damage.
11. Secure this product properly before moving it with a forklift.
12. DO NOT tow with power equipment. The product could tip, which may
cause personal injury or product damage.
13. DO NOT alter this product in any manner. For example, do not weld
external lockbars or attach electrical equipment. This may cause
product damage or personal injury.
14. Keep the product on level surfaces. The product could become
unstable and tip if stored or moved on an uneven surface, which may
cause personal injury or product damage.
15. To prevent the chest from easily tipping over, fasten the screws to
connect the chest and cabinet at the back.
PRODUCT DESCRIPTION
The OEMTOOLS™ top chest, cabinet and combo toolbox combines the
flexibility of a drawer toolbox with the efficiency and organization of their
patented peg tool storage system to keep your tools organized and in one
place in your shop or garage.
TOP CHEST SPECIFICATIONS
Part #s 24571 (Black), 24574 (Green), 24631 (Red)
Dimensions 36" (W) x 17-3/8" (D) x 21-1/2" (H)
Size 13,120 Cubic Inches
CABINET SPECIFICATIONS
Part #s 24572 (Black), 24575 (Green), 24632 (Red)
Dimensions 36" (W) x 18-3/8" (D) x 40-3/4" (H) (with casters)
Size 12,388 Cubic Inches
Drawers 2.5" (3), 5.5" (2), 8.5" (1)
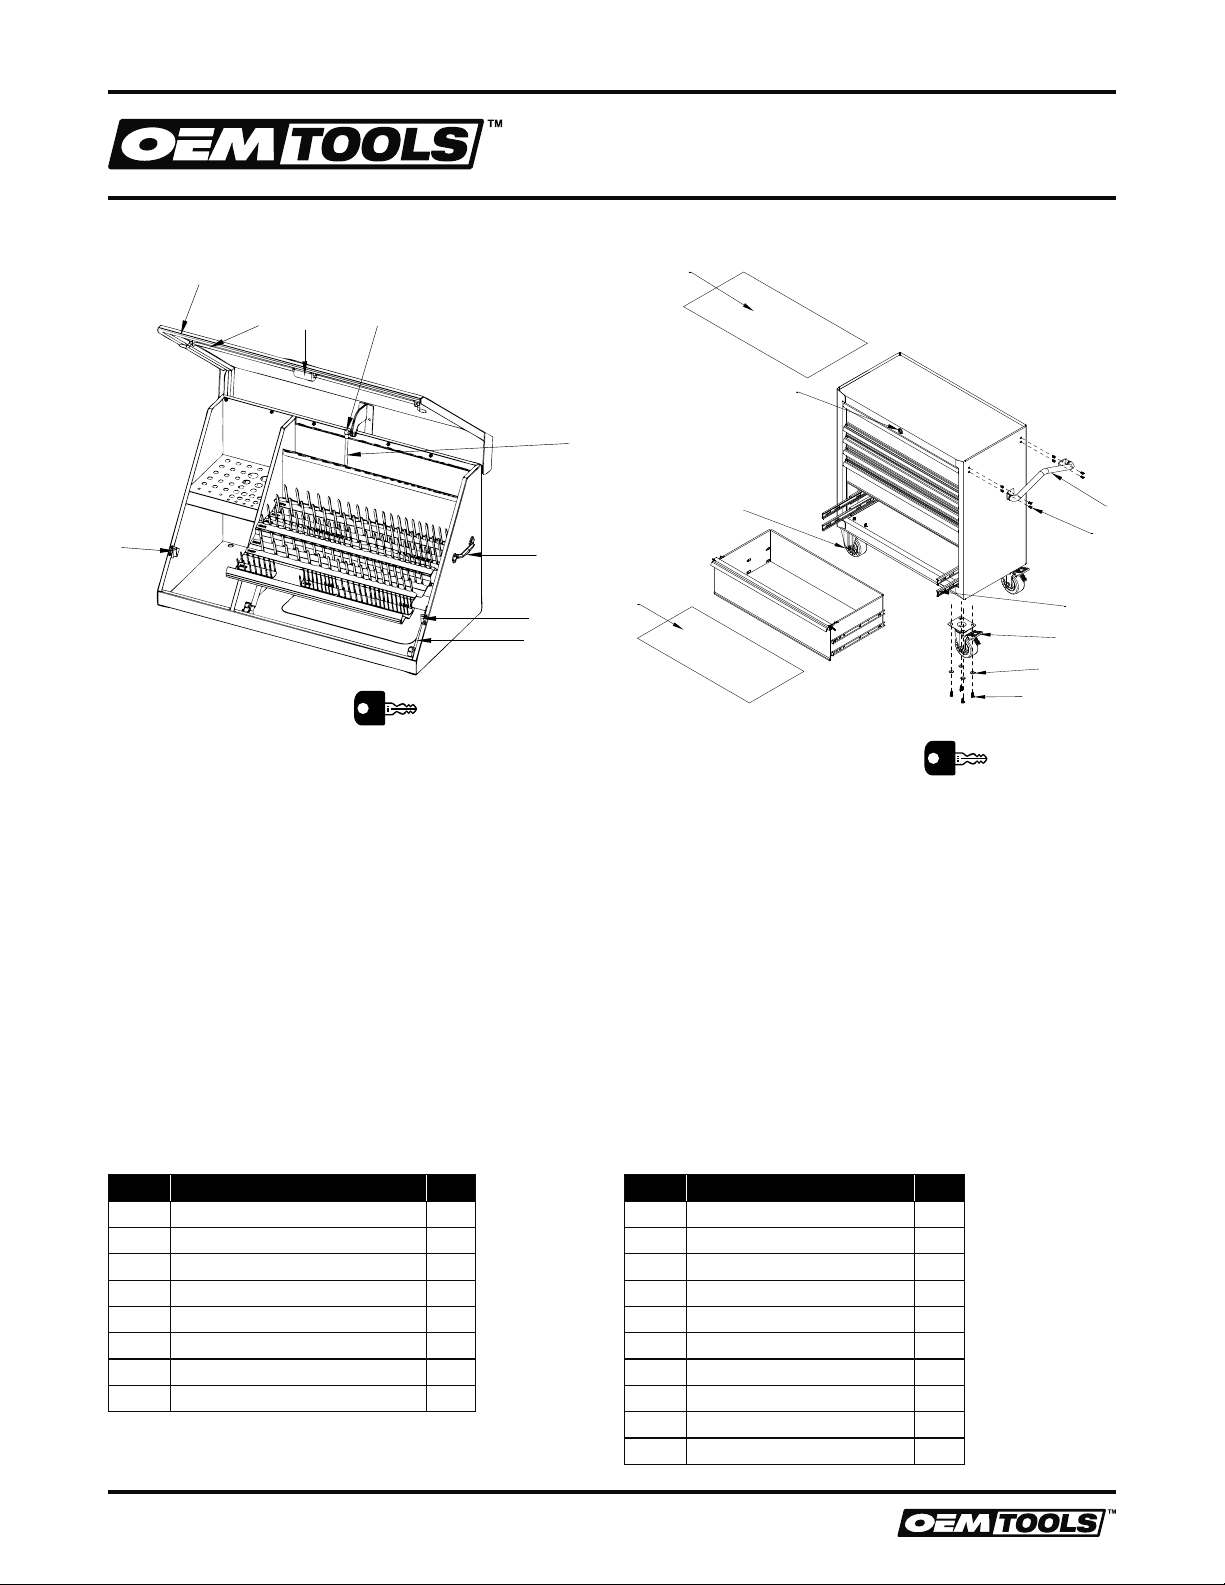
ASSEMBLY
STEP 1 HANDLE INSTALLATION
NOTE: Assemble the handle first to make it easier to move the cabinet.
Position the handle over the holes in the cabinet and attach with the M6 x
12 mm hex bolts provided. Tighten securely using a 10 mm socket.
STEP 2 CASTER INSTALLATION
CAUTION:Two or more people are required to lay down or stand
up the cabinet. Use the side handles for assistance. DO NOT stand in
front of or behind the product during this process. Lock drawers before
proceeding.
Carefully lay the cabinet on its back, with a soft mat underneath for
protection.
Position the two swivel casters on the cabinet bottom, on the same side
as the handle. Insert four M8 x 20 mm hex bolts through washers, then
through each caster and into the bottom of the cabinet. Tighten securely.
Repeat for the two rigid casters on the other side of the cabinet.
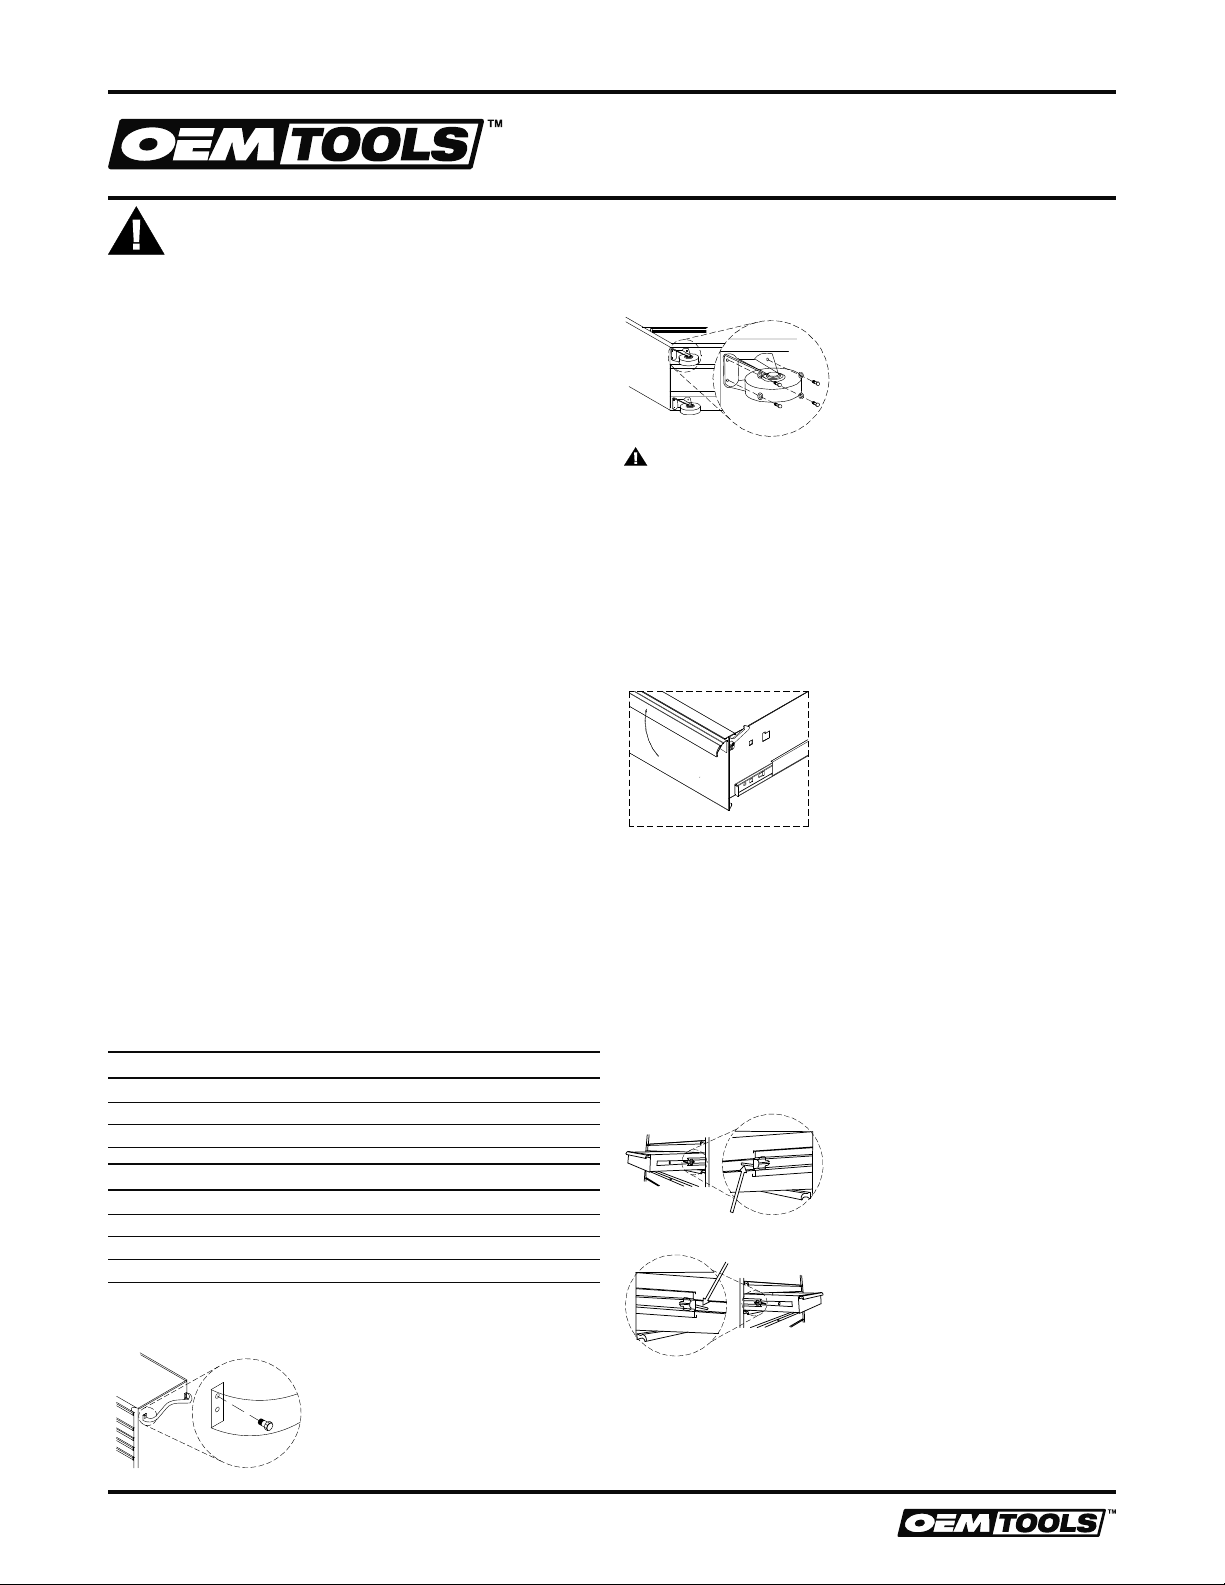
RAISE AND RELEASE DRAWER FRONTS
Lift
These units are equipped with raise and release drawer fronts. To open,
lift up on the drawer front while pulling towards you. To close, shut the
drawer firmly until the latch engages.
If the drawer does not stay closed, the hook may be bent, or it may be
rubbing against the drawer slides. To fix this problem, lightly bend the
hook until the drawer will engage in the slide.
DRAWER REMOVAL
Pull the drawer out so that it’s almost fully extended. Push up on the
black release lever on one side, while pulling down on the black release
lever on the other side.
While holding the levers in the positions as instructed above, pull the
drawer outward until it is released from the drawer slide.
ONE SIDE – PUSH UP
OTHER SIDE – PUSH DOWN
DRAWER REPLACEMENT
Extend the drawer slides from the tool chest or cabinet. Insert the
brackets on each side of the drawer into the slots in the slides, being
careful that they are properly positioned. Once properly inserted,
completely close the drawer to set the slides in their proper positions.