2
Operating Instructions and Parts Manual 24966, 24967, 24968, 24969 and 24630
5/17
2017 OEMTOOLS™
37" 6-Drawer Service Cart
IMPORTANT INSTRUCTIONS
AND SAFETY RULES
READ ALL SAFETY INSTRUCTIONS BEFORE ASSEMBLING AND USING THIS
PRODUCT.
1. WEAR SAFETY GLASSES AND GLOVES when assembling this product.
2. DO NOT stand on this product. You may fall, which may cause
personal injury.
3. DO NOT alter this product in any manner. For example, do not weld
external lock bars or attach electrical equipment to it. This may cause
product damage or personal injury.
4. BE CAREFUL of sharp edges.
5. Keep the product on a level surface. The product may become
unstable and tip if stored or moved on a tilted surface, and may cause
personal injury or product damage.
6. The maximum weight for each loaded drawer of the service cart
should be no more than 100 Lbs. (45 kg).
7. ALWAYS WEAR ANSI-approved safety goggles when working with
tools and equipment.
PRODUCT DESCRIPTION
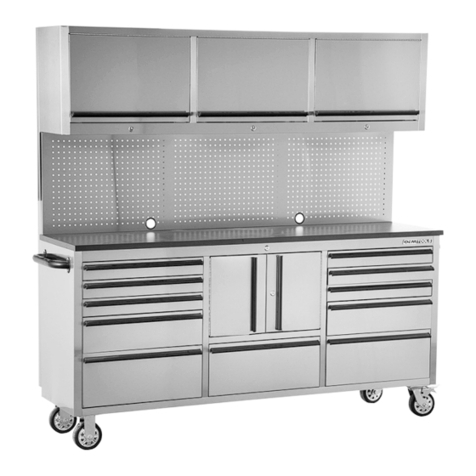
The OEMTOOLS™ Professional Service Carts fill a variety of storage
needs for most garages and shops. The injection molded corner bumpers
protect vehicles and other objects in your shop from damage and the
(4) 5" x 2" swivel casters (2 locking) provide easy mobility. Its drawers
feature EVA liners to keep tools in place and organized. The raise-and-
release drawer latches prevent opening while cart is in motion for safety.
Its 6 drawer design provides a storage capacity of 9,660 cubic inches.
SERVICE CART SPECIFICATIONS
Part #s: 24966 (Black), 24967 (Blue), 24968 (Red),
24969 (Green) and 24630 (Orange)
Dimensions: 37.4" (W) x 20" (D) x 40.5" (H)
Storage Capacity: 9,660 Cubic Inches
ASSEMBLY
STEP 1: CASTER INSTALLATION
CAUTION:Two or more people are required to lay down or stand
up the service cart. Use the side handles for assistance. DO NOT
stand in front of or behind the product during this process. Lock
drawers before proceeding.
Carefully lay service cart on its back, with a soft mat underneath for
protection. Position the two casters with brakes on the right side of the
bottom of the cart. Insert M8 x 20 mm hex bolts through washers, then
through casters and into the bottom of the cart. Tighten securely. Repeat
for the two swivel casters on the other side of the cart.
STEP 2: SIDE HANDLE INSTALLATION
Remove the two corner bumpers to install the side handle. Position the side
handle over the holes and attach with the provided M8 x 16 mm round head
square neck bolts and M8 hex nylon locknuts. Tighten securely.
Re-install the corner bumpers.
OPERATION
COVER RELEASE
M8 Hex
Nylon
Locknut
Remove the two M8 hex nylon locknuts which are fastened to the top of
the gas struts. Be sure to hang on to the cover when removing the second
locknut as the cover will now be disconnected from the struts, allowing it
to hinge backwards and lie flat against the back of the cart.
DRAWER LATCH OPERATION
Drawer security is controlled by a flip lever. To lock the drawers, move the
lever to the right. To unlock drawers, move the lever to the left.
To lock the entire cart, remember to lock the drawers BEFORE you lock
the lid, using the tubular lock.


