OHAUS 1119D User manual

Ohaus Corporation
19A Chapin Road
P.O. Box 2033
Pine Brook, NJ
07058-2033
HEAVY DUTY
SOLUTION BALANCE
Instruction Manual
INTRODUCTION
This manual contains installation, operation and maintenance instructions for the Ohaus
Heavy Duty Solution Balance, Model 1119D. To ensure proper operation of the Balance,
please read this manual completely.
DESCRIPTION
The Model 1119D Heavy Duty Solution Balance is a dual beam mechanical balance ith a
maximum capacity of 20 kilograms and a readability of 1 gram. A dual-faced Indicator Plate
allo s front and rear eighing. The base and beam are constructed of cast aluminum and
finished ith a durable epoxy po der coating hich is resistant to commonly used acids.
Many other components including the large platform are made of stainless steel for corro-
sion resistance. A large lockable tare allo s for balancing of containers up to 2270 grams
(5 Lbs). Fine balancing may be accomplished using the small spring loaded tare poise.
Magnetic damping speeds up the eighing process. Readings up to 1100 grams may be
taken directly off the t o beams and the slotted mass set provided extends the eighing
capacity to 20 kilograms.
UNPACKING AND SET UP
1. Place the opened carton ith the Beam Pointer facing to ard the right.
2. Remove the corrugated liners from the front and rear of the carton. Remove the
Scale Plate from the rear liner and set it aside. Remove the corrugated box, that
contains the Slotted Masses, from the left end of the carton and set it aside.
3. Grasp the Balance at both ends and lift it from the carton.
4. Remove the corrugated liner (that protects the Base) and the ooden edge from
under the Scale Plate support.
5. Place the Balance on a bench or other level surface.
6. Remove the ire from the Mass Hanger Assembly, the Poises, and the left end of
the Beam. Remove the ooden beam end block.
Ohaus Corporation
19A Chapin Road
P.O. Box 2033
Pine Brook, NJ 07058-2033, USA
Tel: (973) 377-9000,
Fax: (973) 593-0359
.ohaus.com
With offices orld ide.
Printed in Mexico
P/N 2339-02 R0703 © Ohaus Corporation 1995, 2003 all rights reserved.
UNPACKING AND SET UP (Cont.)
7. Place the Scale Plate on the four vertical Support Posts, ith the solid eld stud
resting on the left front Post ( ith the t o Lock Nuts). Hook the Mass Hanger Assembly
on the Ring that is located at the right end of the Beam.
8. Unpack the Slotted Masses from the corrugated box and place them on the Mass Rack.
USING THE BALANCE (ZEROING)
1. Move all four Poises to their ZERO positions at the ex-
treme left end of travel. The Rear Poise is equipped
ith a pin that ill position it accurately in the notches.
2. If the Balance does not come to rest exactly at zero, it
can be rebalanced by using the t o knurled, brass Ad-
justment Nuts of the Balance Compensator Assembly.
When correct balance has been restored, be sure to
lock the Balance Nuts against each other to prevent
movement.
WEIGHING
Net Weight can be determined rapidly by follo ing these steps:
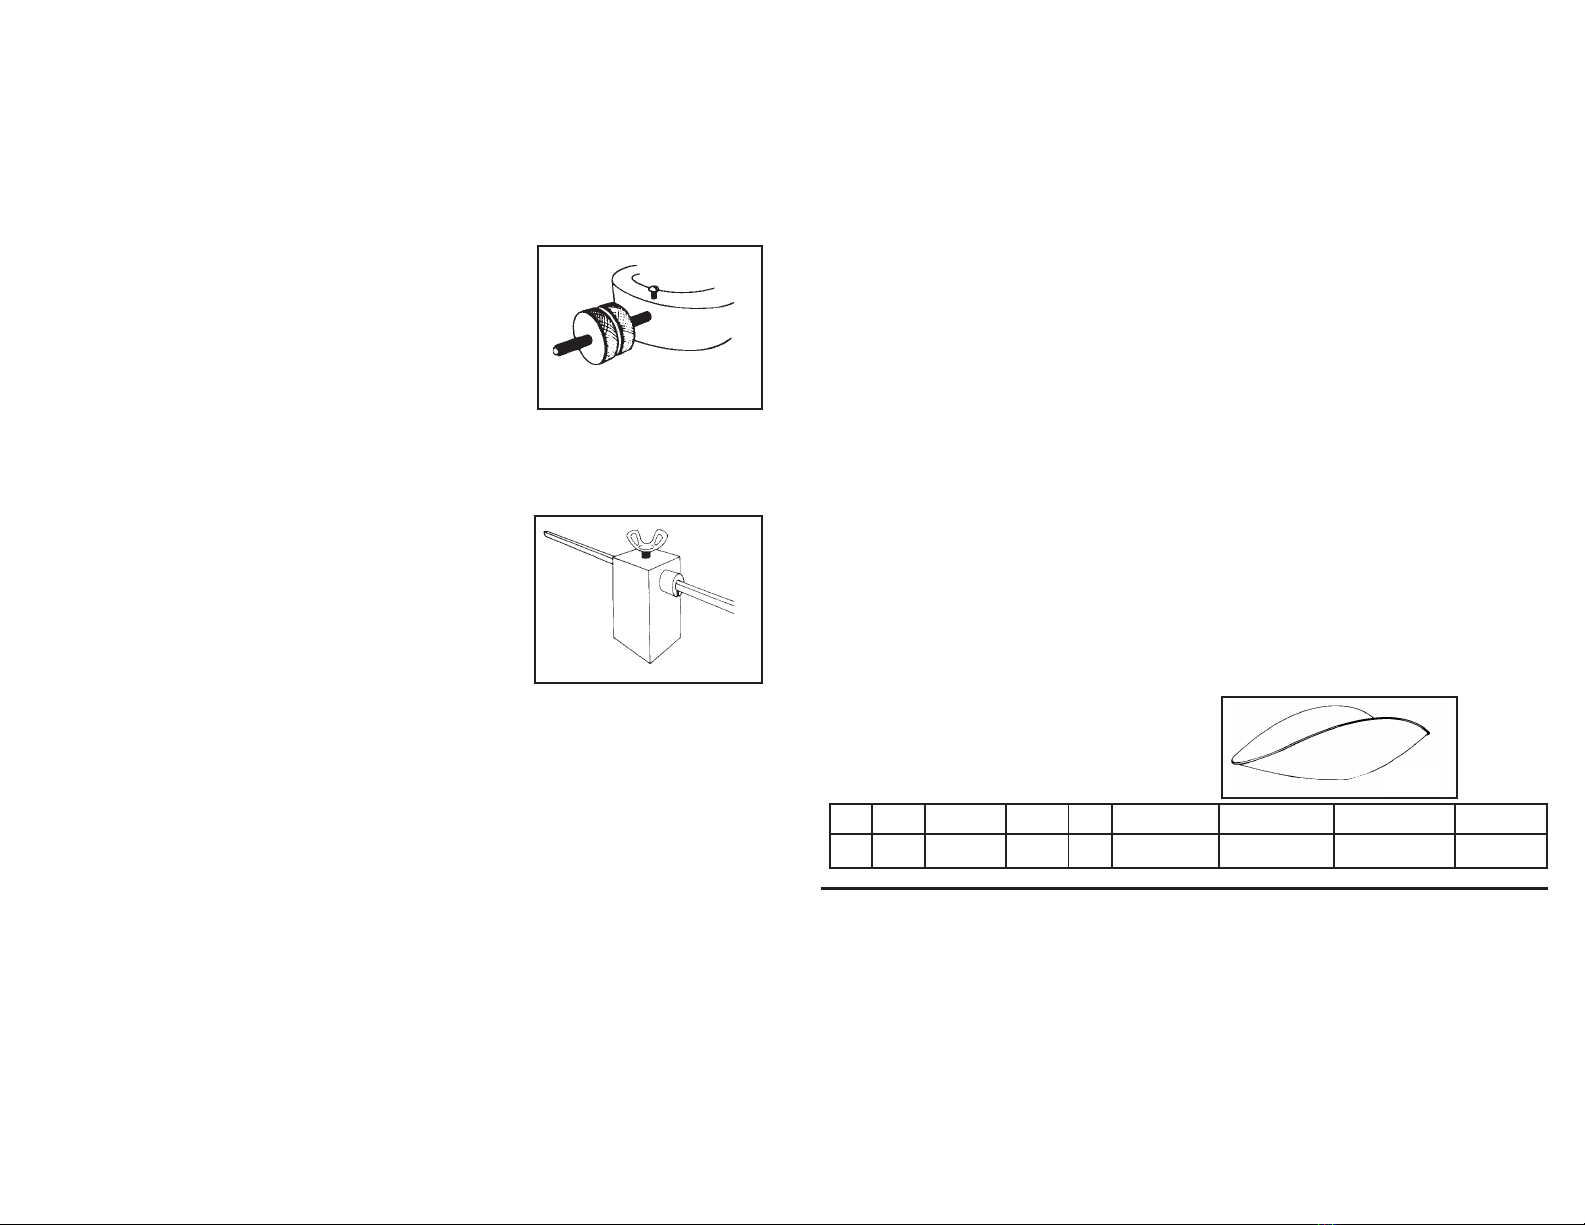
1. Counterbalance the EMPTY container ith the t o
Tare Poises. Loosen the Thumb Scre of the larger
Tare Poise and move both Poises to the right. The
larger Tare Poise is used for COARSE balancing and
then is locked ith the thumb scre . The smaller Tare
Poise is used for FINE balancing. It is spring-loaded
to protect against accidental movement.
2. Place the specimen as near the center of the Scale
Plate as possible.
3. Move the Rear Poise to the right until it is in the first notch that ill cause the Beam to
DROP belo the Balance Indicator at the pointer end of the beam. Move it to the left
one notch and the Beam ill RISE.
4. Move the Front Poise to the right until balance is obtained.
5. Read the eight of the specimen directly by adding the values indicated by the Poises.
6. If the Rear Poise can be moved to the extreme right notch but it does not cause the
Beam to DROP, return both the Front and Rear Poises to ZERO and add Slotted
Attachment Masses to the Mass Hanger Assembly. Add sufficient masses to cause
the Beam to DROP belo the Balance Indicator at the pointer end of the Beam.
Remove the smallest (lightest) mass and follo Steps 3, 4 and 5. Add the total value
of the Attachment Masses on the Mass Hanger Assembly to the values indicated by
the positions of the t o poises to obtain eight of the specimen.
CARE AND MAINTENANCE
The follo ing practices ill ensure that your Heavy Duty Solution Balance ill give years of
satisfactory and trouble-free service.
1. When not in use, remove any load from the Scale Plate and place the Slotted Masses
on the Mass Rack. Slide one of the Poises a ay from ZERO, so that the Balance is
not in equilibrium. This ill stop the Balance from oscillating and prevent unnec-
essary ear.
2. Use and store the Balance in places that are free from vibration, hich can cause
unnecessary ear.
3. Keep the Balance clean at all times, being particularly careful to not let dirt accumu-
late in the vicinity of the bearings. Never use oil, or any lubricant, on the knives or
bearings. Lubrication ill reduce the readability and accuracy of the Balance.
4. Occasionally, it ill be necessary to clean accumulated debris from the Magnet Faces
in the base of the Trig Loop Post Assembly. Insert a piece of adhesive-backed tape
into the Magnet slot that the aluminum Damper Vane enters. Press the tape against
the Magnet Face ith a ruler or a similar thin strip. Dirt or magnetic particles ill
adhere to the tape hen it is removed and the Damper Vane ill be able to oscillate
freely.
ACCESSORIES
Description
Slotted attachment Mass Set Ohaus Part No. 127-MO
1-10kg, 1-5kg, 2-2kg, 1-1kg
Stainless Steel Scoop Ohaus Part No.80250954
17.2 x 11 x 3.4/
44 x 28 x 8.5
Balance Compensator
LIMITED WARRANTY
Ohaus products are arranted against defects in materials and orkmanship from the date of delivery
through the duration of the arranty period. During the arranty period Ohaus ill repair, or, at its option,
replace any component(s) that proves to be defective at no charge, provided that the product is returned,
freight prepaid, to Ohaus.
This arranty does not apply if the product has been damaged by accident or misuse, exposed to
radioactive or corrosive materials, has foreign material penetrating to the inside of the product, or as a
result of service or modification by other than Ohaus. The arranty period shall begin at the date of
installation, or three months from shipment to the buyer, hichever occurs first. A properly completed
Warranty Registration Card must be received by Ohaus ithin 30 days from date of purchase to initiate
coverage under the arranty. No other express or implied arranty is given by Ohaus Corporation.
Ohaus Corporation shall not be liable for any consequential damages.
As arranty legislation differs from state to state and country to country, please contact Ohaus or your
local Ohaus dealer for further details.
SPECIFICATIONS
Model Weighing Beam weighing Readability Tare Platform type Dimensions Carton size Shipping
capacity range and size (in/cm) W x H x D (in/cm) W x H x D (in/cm) weight(lb/kg)
1119D 20kg 1100g 1g 2270g Stainless steel 11/27.9 34 x 11 x 11/ 36 x 12 x 10/ 44/19.9
86.36 x 27.94 x 27.94 91.44 x 30.48 x 25.4
Tare Poise
Other OHAUS Scale manuals

OHAUS
OHAUS Explorer Balances User manual

OHAUS
OHAUS AV412 User manual

OHAUS
OHAUS D31P75SD User manual

OHAUS
OHAUS 1119-D0 User manual

OHAUS
OHAUS Traveler Series User manual

OHAUS
OHAUS Ranger Count 3000 Series User manual

OHAUS
OHAUS CS 2000 User manual

OHAUS
OHAUS Adventurer Pro AV53 User manual

OHAUS
OHAUS Ranger 3000 Series User manual

OHAUS
OHAUS Ranger User manual

OHAUS
OHAUS PS Series User manual

OHAUS
OHAUS Valor 1000 User manual

OHAUS
OHAUS Scout pro Installation guide

OHAUS
OHAUS DV114C User manual

OHAUS
OHAUS adventurer+ User manual

OHAUS
OHAUS Explorer EX125D User manual

OHAUS
OHAUS Scout Pro Balance User manual

OHAUS
OHAUS Scout pro User manual

OHAUS
OHAUS SCOUT II User manual

OHAUS
OHAUS PX Series User manual


